ProcrastinatorFraser
Active Member
- Posts
- 771
- Location
- France
I saw a post about someone wanting to replace the rear X member of their 90. So, i decided to make a post about it. How do you do it? A lot of people will keep the tub on to do the replacement, if you are like me, you will not want to do this. So, to get the alignments right, here's how you do it. First of all, i recommend getting the one with short extensions. Makes the job A LOT easier for alignment. DO NOT FOLLOW THESE STEPS IN ORDER. READ THE WHOLE POST BEFORE GETTING STARTED.
As you can see, mine was completely rotten.

So, before cutting the rear X member off, remember to watch out for the bundle of wires that run internally, if you cut them, you will need to connect the wires back up with connecting blocks or the like, in which case you risk getting wires coming loose and short circuiting, which would be a big job to fix.
For the measurements, i cut mine a bit short. So, instead of cutting another section off, i ground down the top, sides a bottom of the box section to allow the cross member to move forward a bit more.
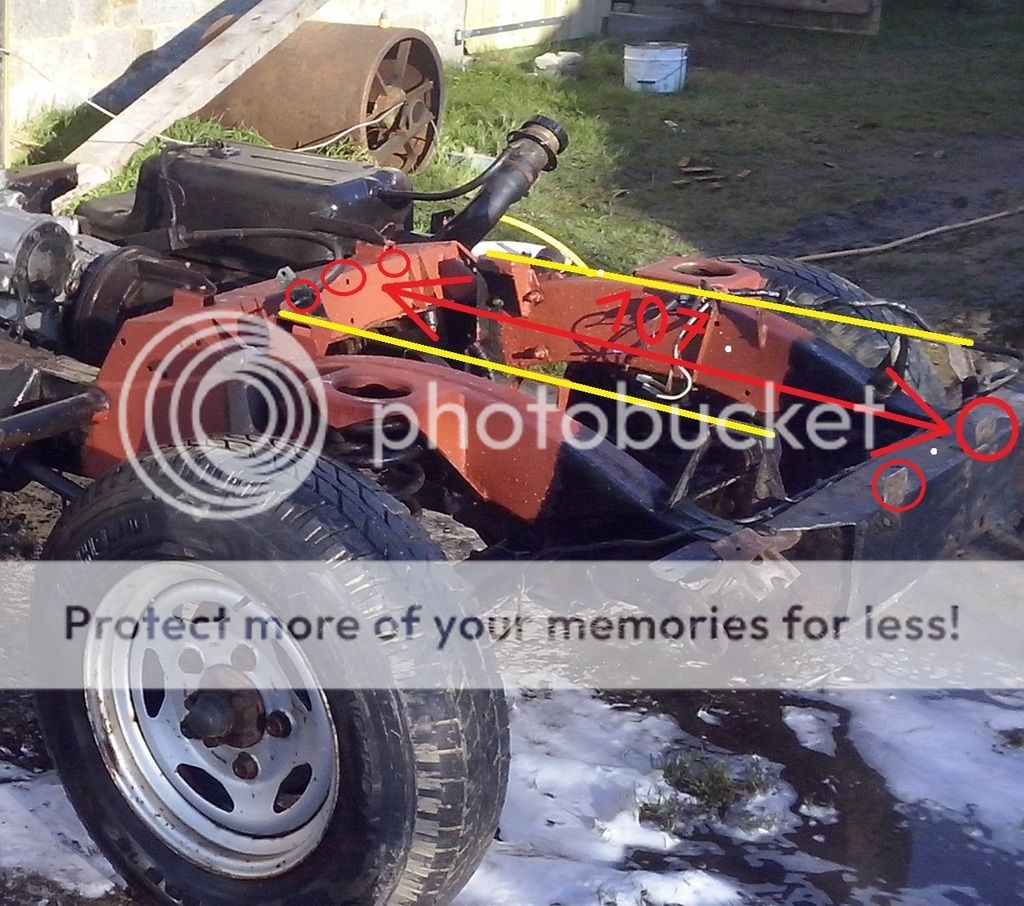
Now, the important part. Measurements. How do you get them perfect? well, this is a system i have found to work quite well. For me, anyway.
For vertical movement, you need to keep the 6 tub supports in line, as illustrated below in yellow. For Distance, you need to make sure before welding that between the rear middle , 2nd to last left, and 2nd to last right tub mounting brackets, keeping the tape measure as straight as possible, you read 107cm to the beginning of the swan neck illustrated in red below. Whatever the measurement is in your case, it should not differ unless you have a pre-defender model, or TD5 model. I have a 1986 90. Allways check this measurement before hand though.
Before welding, to avoid the risk of melting wires internally, what i did was attach the wires to a series of copper wires, such as these:

Verify once, twice, three times making sure all measurements are correct, then weld. Simply pull the wire back through after everything has cooled down, and there you go!
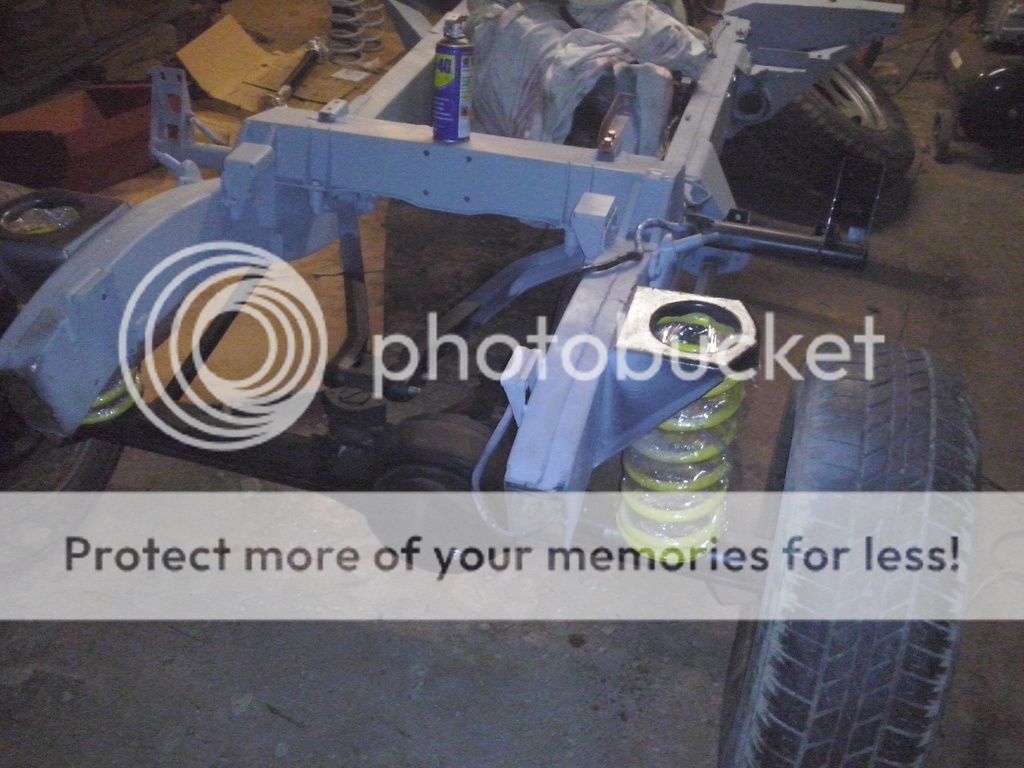
To prove that this worked for me:

As you can see, everything aligned perfectly.
I hope this helped")
As you can see, mine was completely rotten.
So, before cutting the rear X member off, remember to watch out for the bundle of wires that run internally, if you cut them, you will need to connect the wires back up with connecting blocks or the like, in which case you risk getting wires coming loose and short circuiting, which would be a big job to fix.
For the measurements, i cut mine a bit short. So, instead of cutting another section off, i ground down the top, sides a bottom of the box section to allow the cross member to move forward a bit more.
Now, the important part. Measurements. How do you get them perfect? well, this is a system i have found to work quite well. For me, anyway.
For vertical movement, you need to keep the 6 tub supports in line, as illustrated below in yellow. For Distance, you need to make sure before welding that between the rear middle , 2nd to last left, and 2nd to last right tub mounting brackets, keeping the tape measure as straight as possible, you read 107cm to the beginning of the swan neck illustrated in red below. Whatever the measurement is in your case, it should not differ unless you have a pre-defender model, or TD5 model. I have a 1986 90. Allways check this measurement before hand though.
Before welding, to avoid the risk of melting wires internally, what i did was attach the wires to a series of copper wires, such as these:
Verify once, twice, three times making sure all measurements are correct, then weld. Simply pull the wire back through after everything has cooled down, and there you go!
To prove that this worked for me:
As you can see, everything aligned perfectly.
I hope this helped