It's A Gas...

This site contains affiliate links for which LandyZone may be compensated if you make a purchase.
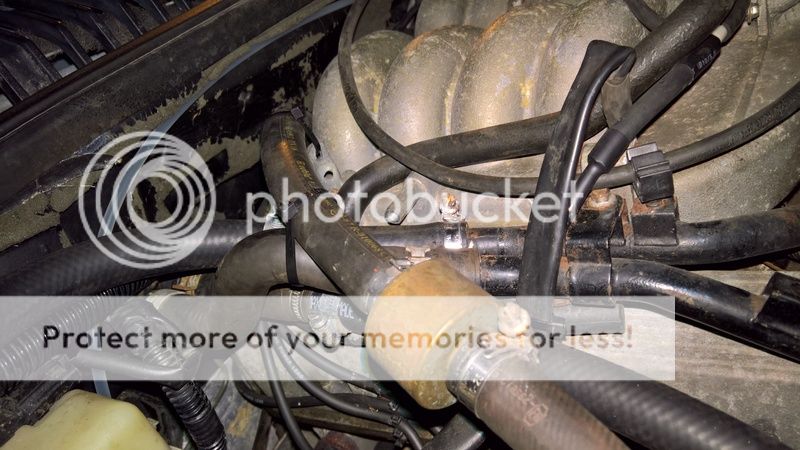
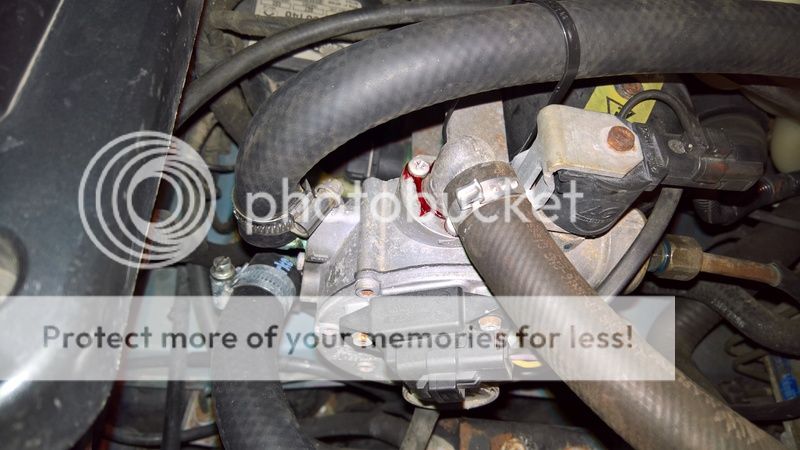
I'm a bit puzzled by the path you're taking above Doo. Unless there's someone else in internet world on the P38 Yoof sites with exactly the same problems as you, then it's already been established over there that you have an SGI Type 1 vapouriser. These have the solenoid incorporated into the unit, as well as wet stage and vapour stage filters. There's even a schematic of it over there. All you need to do is replace the filter elements in your old one.
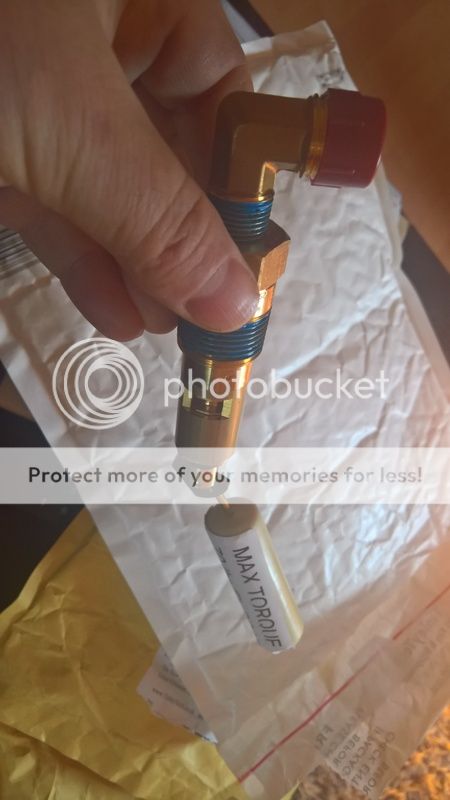
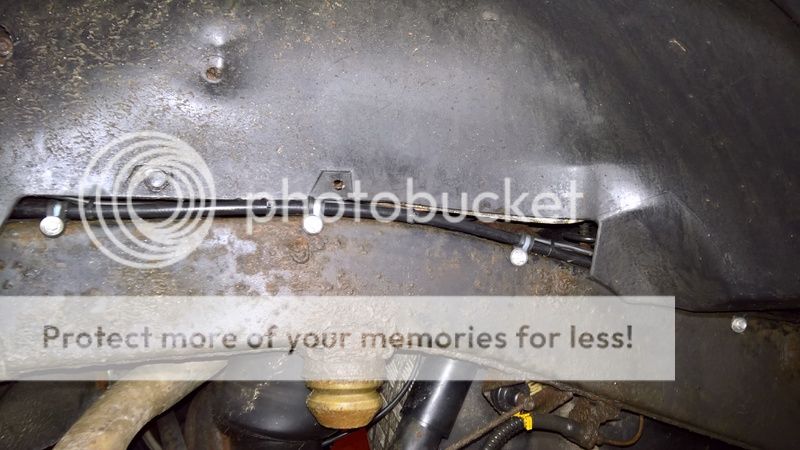
Plumbing it in with Faro pipe is a good solution, but you can't get push fit (quick release) connectors. You can get connectors that will screw straight into the tank solenoid and vapouriser solenoid, but you need to know the thread sizes. Take photos of current connectors and email to Tinley so that they can supply the correctly angled fittings.
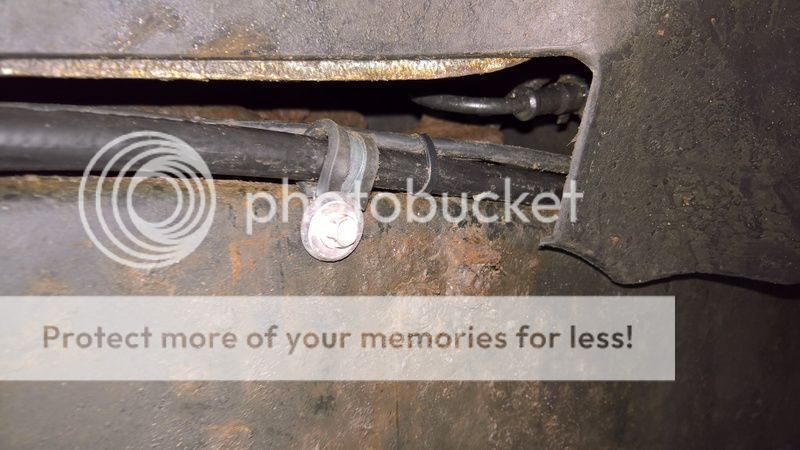
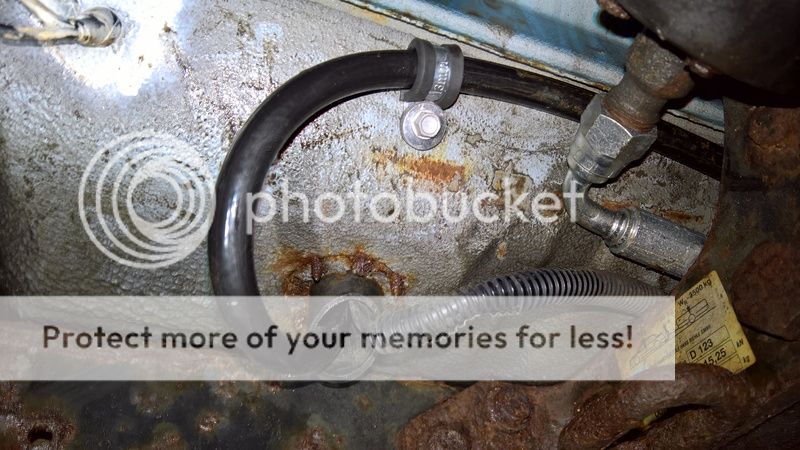
Faro pipe end connectors (the bit that the flexible pipe goes onto) have an olive type compression fitting, where the pipe itself pushes onto barbs on the connector.
Total for the plumbing side should be around £45 delivered.
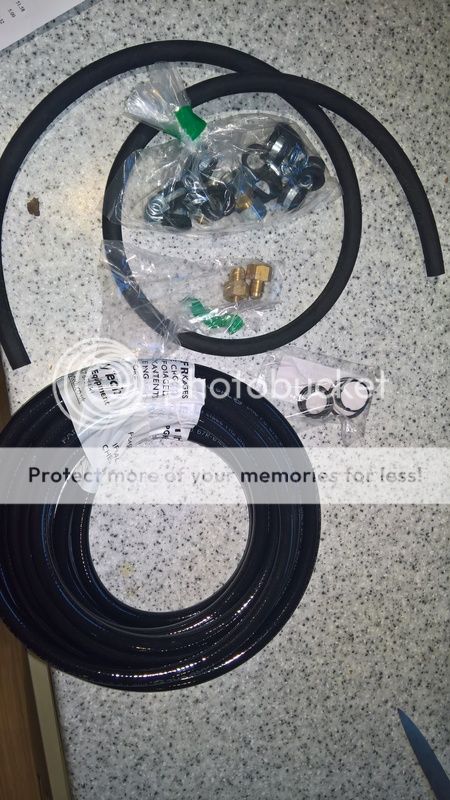
 
Hi Orangebean, thanks for that. I realised there is a filter in the vapouriser and assumed that the solenoid valve filter under the car was put there as an extra for shutting down the twin tanks.

I called TT and spoke at length with Mick (Top bloke :)) Who suggested i can simply run tank to vaporiser without the nonsense. So I ordered a filter service kit for my one + pipe & fittings So should have a nice clean safe set up with half the weight gone when I remove the pipes (old and old old :rolleyes: ).

I'll take pictures and post them when I'm done :)
 
Very true Saint.V8
CoP 11 isn't too scary when it comes to pipelines though. Extract of the relevant bit:


4.4 Pipeline Location


4.4.1 Every pipeline feeding from or into the fuel tank should follow the safest route and beprotected from impact. It should not be routed through any passenger compartment. Itshould be below the body shell where it may be shielded by structural members of thevehicle wherever possible.


4.4.2 Pipelines should be no closer than 100 mm remote from the vehicle exhaust system.Where this is not practicable, the pipeline must be shielded from the vehicle exhaust
system by a suitable heat shield so as to ensure that the pipeline is not subjected to atemperature above 120°C.


4.4.3 Pipelines should be effectively secured to the chassis frame or body shell using purposedesigned pipe clips at intervals of not exceeding 600 mm
[OB edit- for flexible pipe I'd go for 300mm max!] and in such a manner to beprotected against excessive strain and vibration.


16 LPGA Code of Practice No. 11 : 2001


Section 4: Pipework

> Plastic strapping, tie wrap etc is not suitable

4.4.4 Pipelines should not be installed where any part is permanently hidden from view andcannot be inspected regularly.

4.4.5 The positioning of pipelines should be such that they are not affected by chassis, panel,suspension or propshaft movement. Pipelines should not be located at jacking points.

4.5 Flexibility

To avoid chaffing and damage pipelines should be installed so as to take up safely the relative movement between the chassis/body and the fuel system components and secured in such a manner so as to prevent wear taking place. Particular care should be taken when using non-metallic pipelines.
 
Silly question, but the clips to fasten the pipework... Do they have to be rubber coated metal or will plastic clips do?

Can't recall if Tinley Tech are adding then to my order or not, but I can get them locally. I just wondered what the plastic strapping bit meant? Is it pertaining to cable ties or does it mean actual purpose made clips "must" be made of metal?

o_O
 
I was speaking to one of my friends who told me one of the local electrical factors sell them for fastening fire alarm cables to the wall. They will be fine. We plan to use self drilling screws on the chassis leg as close to the top as possible. These screws are 10mm long and have a large flat head so are ideal.

Just have to wait until the stuff arrives now :)

Excited :cool:
 
LPG%20Kit.jpg

WP_20171202_12_42_28_Pro.jpg


All new parts, very happy. Was meant to be getting done tomorrow, but mates wee girl has the norovirus so all off till Monday. Can't wait. And the LPG station is on the way home so can test the kit for leaks (not that there'll be any o_O as job getting done right the 1st time).

I also have to get some red rubber lube for my rebuild of my EAS block as it's entirely possible that the Vaseline may be petrolium based and has caused damage to my "o" rings :eek:

I'll know when I strip it down as I plan to fit new NRV's so if I need to do the whole thing again I'll have loads of experience and may be able to offer it as a service for which I can charge a small fortune :p
 
Vaseline always used to be labeled "Vaseline- Petroleum Jelly" which might be some indication :)

Indeed, but it never occurred to me it may damage the rubber in the "o" rings o_O I mean, rubber is used for filler pipes, injector seals and all manner of "oil" seals!
 
Is there a problem if you alter the pipes etc from the certificate that came with the car for insurance purposes or a need to get the tank tested every ten years?
 
Is there a problem if you alter the pipes etc from the certificate that came with the car for insurance purposes or a need to get the tank tested every ten years?

Certificate my arse lol. My current insurer wont cover LPG cars iv found lots that will none require a certificate, there is no LPG approved body any more. Once my policy is up I'm fitting my LPG and swooping insurance companies.
 
Got everything fitted yesterday so planning to go to mate Ronnie's to fix something that I think is causing woe and grief...

I knew I'd put in about ten quids worth of LPG, but nothing showing on the LED guage and I think I found why yesterday.

But before that, we had to let the gas escape for well over an hour and it was flying out!

The filler valve assembly had been installed all wrong, over tight and squint, so that it would only ever accept a small amount of LPG and catching on the float for the guage on the tank. Fixed all of that and replaced the pipe up to the middle.... Reason being, the connectors I got simply wouldn't fit onto the end of the vapouriser so when I found the copper pipe to the defunct solenoid valve & filter was a straight fit, I fitted the joining piece to that and away we went.

The last pipe ran on the side of the chassis, which looked at if it could get all the grot thrown up from the wheel, so I put the "P" clips around the poly pipe and onto the top of the chassis with the screws on the edge, pipes well out of the way along with wiring....

Which brings me to the possible reason I was having problems. The wires to the old tanks were cut, by me as I didn't think I needed them! I rather think the wire I cut tells the on/off switch, which incorporates the guage to tell how much LPG is in the tank. Now, if the switch/guage can't measure any amount of gas, ot standts to reason it will inform the LPG ECU that the tank is empty and switch back to petrol. Does that sound feasible? It would run all day on idle and a little over, but foot down and PEEEEEP flash, etc, telling me the tank is empty! The pressure to the vapouriser was ample to let the car run until I caused a huge vacuum and it switched.

That's my theory anyway so I'm off to see what happens.

I'll report back later ;)
 
lets have a few photos doo of your lpg pipe routing im trying to decide where to run mine iv decided to get on with my install once its warmed up at least get the front end all plumbed in ready for my insurance swop over
 
Ok, starting under the bonnet, here's me one way vacuum valve thingy between the vapouriser & the inlet manifold

WP_20171212_17_12_54_Pro.jpg


Here's the twin ECU's (one for each bank as this system was fitted 2003)...

WP_20171212_17_55_58_Pro.jpg


The vapouriser. No, it's not bleeding, I added some of my new Red Rubber Grease for the seal.

WP_20171212_17_12_46_Pro.jpg


This is a close up of the "P" clip just above where the old one used to be (rusted lump) where the pipe disappears past the front of the rear wheel arch liner and carries on down the chassis to where I had to clamp it to a male/male onto the copper pipe up to the vapouriser. Reason being nothing fitted the connector on the vapouriser as it was an olive connection where the rest are flared. But it's fine and at least we bypassed the dicky solenoid valve/filter which I think was causing some issues too...

WP_20171211_16_59_45_Pro.jpg


This is "much" tidier than the old mess of pipes & wires dangling like a street in Bangladesh...

WP_20171211_16_59_37_Pro.jpg


This is where the new poly pipe & wiring goes up into the spare wheel well. Overall Ian made a splendid job and I am very happy with just how tidy it all is.

WP_20171211_16_49_34_Pro.jpg


I got the wires connected, but never made it to the LPG station to put a drop in and do the leak tests (I'm really looking forward to that...NOT :confused:o_O)

Anyway Mr BT Dave, hope that is of some help.

Right, off to look into stripping my spare EAS valve block & pump... That Red Rubber Grease will come in handy. Then I'll swap it over for mine, which I will also strip down and see if the "O" rings swelled with the Vaseline :oops:
 
Last edited:
Ok, starting under the bonnet, here's me one way vacuum valve thingy between the vapouriser & the inlet manifold

WP_20171212_17_12_54_Pro.jpg


Here's the twin ECU's (one for each bank as this system was fitted 2003)...

WP_20171212_17_55_58_Pro.jpg


The vapouriser. No, it's not bleeding, I added some of my new Red Rubber Grease for the seal.

WP_20171212_17_12_46_Pro.jpg


This is a close up of the "P" clip just above where the old one used to be (rusted lump) where the pipe disappears past the front of the rear wheel arch liner and carries on down the chassis to where I had to clamp it to a male/male onto the copper pipe up to the vapouriser. Reason being nothing fitted the connector on the vapouriser as it was an olive connection where the rest are flared. But it's fine and at least we bypassed the dicky solenoid valve/filter which I think was causing some issues too...

WP_20171211_16_59_45_Pro.jpg


This is "much" tidier than the old mess of pipes & wires dangling like a street in Bangladesh...

WP_20171211_16_59_37_Pro.jpg


This is where the new poly pipe & wiring goes up into the spare wheel well. Overall Ian made a splendid job and I am very happy with just how tidy it all is.

WP_20171211_16_49_34_Pro.jpg


I got the wires connected, but never made it to the LPG station to put a drop in and do the leak tests (I'm really looking forward to that...NOT :confused:o_O)

Anyway Mr BT Dave, hope that is of some help.

Right, off to look into stripping my spare EAS valve block & pump... That Red Rubber Grease will come in handy. Then I'll swap it over for mine, which I will also strip down and see if the "O" rings swelled with the Vaseline :oops:

hi

nice to see some neat work being done

PS, hope ur on the mend and feeling abit better
 
Back
Top