Hi all...
Having just completed my most recent project, I’m posting the complete process of how I went about refurbishing a full set of Injectors for my Freelander, 2006, 3-Door, Diesel Td4.
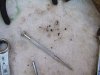
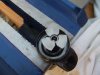
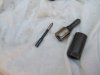
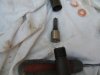
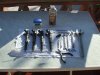
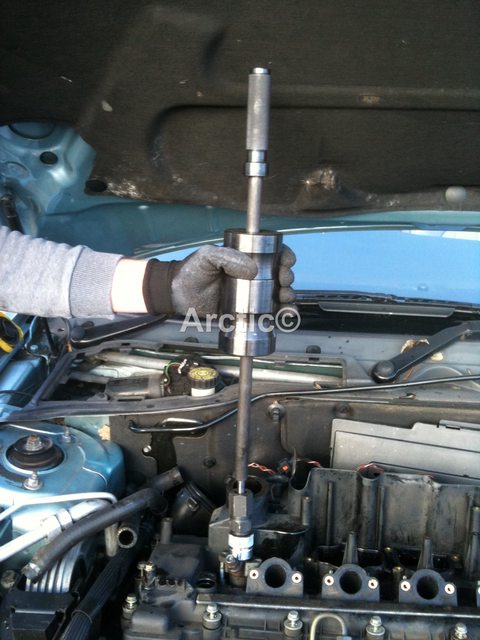
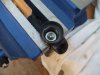
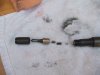
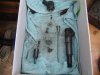
The first picture in the series shows the tools I used, the most important being the 10mm hexagonal adaptor for removing the internal retaining-nut that sits over the lengthy internal pin. I tried to adapt an Allen Key to do the job, but that was a lengthy & fruitless effort; so buy the proper tool instead – should you wish to do-it-yourself (DIY). They are on Ebay.
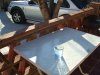
I must apologise for not using the correct names for certain objects as I have not researched this subject so can only go by what I see and can relate to. For example, a horseshoe-clip.
To begin with, I previously carried out a flow test of my Td4’s Injectors measuring the diesel return, which in-turn indicated how efficient and serviceable they are - in relation and compared to each other’s output.
My 1 and 4 were running on an equal measure, while the No2 showed the highest return followed by the No3. That’s when I decided to do something about it. I want my engine to run at near perfection, if not so! I don’t like 2nd-best or make-do.
I bought a complete set of Injectors for my Td4 on Ebay; where seller’s description stated, “Tested and ready for use”. The price alone was tempting, plus new rubber-seals and copper-washers.
Inc P&P… £146.10 LAND ROVER FREELANDER 2.0 TD4 INJECTOR ALL 4 INJECTORS 0445 110 049
BMW Diesel Injector O Rings for Bosch Injectors on Common Rail Pack of 4
Land Rover Freelander TD4 Diesel Injector Copper Washers - Pack of 4
Sorry about the large fonts, but I copied from Ebay.


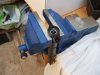
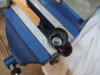
Having received the injectors, checking their electrical continuity (in comparison with my car’s existing units) I fitted them. They simply didn’t work! All four replacement units had been fitted, and would only start the engine for about one second before shutting down – and that followed several turns of the engine – over-and-over again. It’s not a simple job to remove and fit injectors, where dismantling all the covers, etc, can cause problems with threads and mounts galore. It’s a straight forward job, but can prove disrupting.
However, I did try them… and they FAILED! So much for the seller’s statement!!
They were sold for a good price though. Ooooerr! So, please take this experience on-board.
I could have sent them back; but the fact they failed and that I am an experienced multi-skilled engineer who once restored old British Motorcycles (including their failed Lead-Acid batteries – which is another [chemical] thread in the making, if anyone is interested). Okay, I’ll let you into a secret. It’s called, Tetrasodium EDTA, and can be used to recover failed lead-acid batteries. Once again, my previous chemistry studies proved to be quite invaluable. However, there are always those who are… difficult to persuade or convince, without accusations of incompetence. But that’s another story.
I do apologise for making this thread quite lengthy, but if I include all that I have learned then I hope not to leave any unanswered questions for any who might wish to do the same.
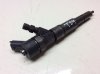
If any would care to view that added pictures it might help some to complete a refurbishment of an injector or the plural. I’m always able to give advice, as are many others on Landyzone who also know about the procedure & pitfalls of doing such a thing. As for myself, I have learned a lot, resulting with what I now consider a complete set of refurbished injectors for the use-of in my possession. And at a fraction of the cost of buying something stated as Refurbished that fails. There are many stories of woe belonging to this subject, I’ve learned.
The pictures follow…
Then, after clearing all my tools away, washing my hands and changing into different clothing, I settled down with a G&T with lemon. I earned it!
If anyone has any questions I will do my utmost to respond in detail, to help as best I can.
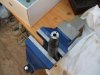
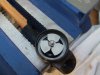
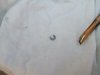
Finally, as an Edit to what I've written, carbon-build up was the biggest problem. Clean that away and you too can have a servicable set of Injectors. I encountered stuck needles, blocked tubes and debris in amongst the workings. Easily cleaned and ready to work again, at the fraction of the cost for so-called professionally fixed units. DIY is best, I reckon.
Having just completed my most recent project, I’m posting the complete process of how I went about refurbishing a full set of Injectors for my Freelander, 2006, 3-Door, Diesel Td4.
The first picture in the series shows the tools I used, the most important being the 10mm hexagonal adaptor for removing the internal retaining-nut that sits over the lengthy internal pin. I tried to adapt an Allen Key to do the job, but that was a lengthy & fruitless effort; so buy the proper tool instead – should you wish to do-it-yourself (DIY). They are on Ebay.
I must apologise for not using the correct names for certain objects as I have not researched this subject so can only go by what I see and can relate to. For example, a horseshoe-clip.
To begin with, I previously carried out a flow test of my Td4’s Injectors measuring the diesel return, which in-turn indicated how efficient and serviceable they are - in relation and compared to each other’s output.
My 1 and 4 were running on an equal measure, while the No2 showed the highest return followed by the No3. That’s when I decided to do something about it. I want my engine to run at near perfection, if not so! I don’t like 2nd-best or make-do.
I bought a complete set of Injectors for my Td4 on Ebay; where seller’s description stated, “Tested and ready for use”. The price alone was tempting, plus new rubber-seals and copper-washers.
Inc P&P… £146.10 LAND ROVER FREELANDER 2.0 TD4 INJECTOR ALL 4 INJECTORS 0445 110 049
BMW Diesel Injector O Rings for Bosch Injectors on Common Rail Pack of 4
Land Rover Freelander TD4 Diesel Injector Copper Washers - Pack of 4
Sorry about the large fonts, but I copied from Ebay.
Having received the injectors, checking their electrical continuity (in comparison with my car’s existing units) I fitted them. They simply didn’t work! All four replacement units had been fitted, and would only start the engine for about one second before shutting down – and that followed several turns of the engine – over-and-over again. It’s not a simple job to remove and fit injectors, where dismantling all the covers, etc, can cause problems with threads and mounts galore. It’s a straight forward job, but can prove disrupting.
However, I did try them… and they FAILED! So much for the seller’s statement!!
They were sold for a good price though. Ooooerr! So, please take this experience on-board.
I could have sent them back; but the fact they failed and that I am an experienced multi-skilled engineer who once restored old British Motorcycles (including their failed Lead-Acid batteries – which is another [chemical] thread in the making, if anyone is interested). Okay, I’ll let you into a secret. It’s called, Tetrasodium EDTA, and can be used to recover failed lead-acid batteries. Once again, my previous chemistry studies proved to be quite invaluable. However, there are always those who are… difficult to persuade or convince, without accusations of incompetence. But that’s another story.
I do apologise for making this thread quite lengthy, but if I include all that I have learned then I hope not to leave any unanswered questions for any who might wish to do the same.
If any would care to view that added pictures it might help some to complete a refurbishment of an injector or the plural. I’m always able to give advice, as are many others on Landyzone who also know about the procedure & pitfalls of doing such a thing. As for myself, I have learned a lot, resulting with what I now consider a complete set of refurbished injectors for the use-of in my possession. And at a fraction of the cost of buying something stated as Refurbished that fails. There are many stories of woe belonging to this subject, I’ve learned.
The pictures follow…
Then, after clearing all my tools away, washing my hands and changing into different clothing, I settled down with a G&T with lemon. I earned it!
If anyone has any questions I will do my utmost to respond in detail, to help as best I can.
Finally, as an Edit to what I've written, carbon-build up was the biggest problem. Clean that away and you too can have a servicable set of Injectors. I encountered stuck needles, blocked tubes and debris in amongst the workings. Easily cleaned and ready to work again, at the fraction of the cost for so-called professionally fixed units. DIY is best, I reckon.
Attachments
-
 DSCF0397.JPG319.2 KB · Views: 867
 -
 DSCF0398.JPG179.3 KB · Views: 832
 -
 DSCF0399.JPG221.8 KB · Views: 826
 -
 DSCF0400.JPG147.2 KB · Views: 894
 -
 DSCF0401.JPG316.4 KB · Views: 859
 -
 DSCF0402.JPG179.8 KB · Views: 827
 -
 DSCF0403.JPG268 KB · Views: 821
 -
 DSCF0404.JPG219.4 KB · Views: 818
 -
 DSCF0405.JPG223 KB · Views: 863
 -
 DSCF0406.JPG263.7 KB · Views: 817
 -
 DSCF0407.JPG240.5 KB · Views: 827
 -
 DSCF0408.JPG234.9 KB · Views: 857
 -
 DSCF0409.JPG279.4 KB · Views: 830
Last edited:


")