Freelander Project IV (Bertie)

This site contains affiliate links for which LandyZone may be compensated if you make a purchase.
So the new silicone hoses arrived this morning and were fitted.
20160823_123146_zpsnpwvn94c.jpg

I've also ordered some green vac hose so will see how that looks. I'm thinking with the bonnet closed they will look fine. :p
I spent a bit more time on the boot door tonight putting fillers in a couple of holes. I have also been spraying filler primer on the areas where there were patches of rust every time I go past so tomorrow will probably start rubbing that down.
Also got the support bearings off the VCU so plan to start the refurb of VCU number 4 tomorrow. To be honest I have been putting it off for days because it is such a pain of a job.
 
So the new silicone hoses arrived this morning and were fitted.

Also got the support bearings off the VCU so plan to start the refurb of VCU number 4 tomorrow. .

Very nice.

Waiting for torx to arrive then VCU here I come.
 
Very nice.

Waiting for torx to arrive then VCU here I come.
I've never used a torx for the propshaft. A 1/4" hex socket works a treat. Can't remember what size but I think 8 or 10mm at the front and 10 or 12mm at the rear.
Or maybe the other way round, I can't remember. :confused: But either way you don't need torx.
Actually I have 1/2" torx sockets but they are too fat to fit onto the bolts.


Thank you. I can get round to it tomoz.
Round to it.jpg

I wish I had known that cos I have twiddled my thumbs waiting for days for the socket to come which will be in 3/8".
 
I have used hex myself, but have found that hex socket can damage the torx bolt head. This is why I now only use torx sockets. If the bolts are particularly tight or rusty, a hex will mangle the bolt head, torx socket won't.
 
For anything else it would probably be important but when loosening and tightening the propshaft bolts the spanner on the nut does most of the work. I've removed 4 propshafts now and fitted 3 and no problems.
Having said all the above I'm now going to order some 3/8 torx. :p
 
For anything else it would probably be important but when loosening and tightening the propshaft bolts the spanner on the nut does most of the work. I've removed 4 propshafts now and fitted 3 and no problems.
Having said all the above I'm now going to order some 3/8 torx. :p

I have done it by holding the bolt head with a hex socket and tuning the nut. It does work, but is to slow for me. I now use a torx socket and my 3/8" small buzz gun.
 
Having said all the above I'm now going to order some 3/8 torx. :p
Also order a wobble extension set. I have a three piece, had it for years, and it not only gets used a lot but saved the day today on the top two little buggers on the front prop. Something like these.
http://www.ebay.co.uk/itm/6pc-Quali...318262?hash=item1a164d5bf6:g:K6wAAOSwBP9UVfEU

Also I kept the torx still (on a ratchet handle naturally!:D) and span the nuts off - use a 13mm on the front and 17mm on the rear.
It was a 5 hour job and a damn nightmare but I have had worse.
Once I have the tightness broken I normally use my battery drill with all my 1/4" extensions to get those ones out. Speeds things up big time so now I can take it off in a couple of hours. Including jacking up onto axle stands.
Still an awkward heavy beggar when the whole thing lands on your chest.
 
Once I have the tightness broken I normally use my battery drill with all my 1/4" extensions to get those ones out. Speeds things up big time so now I can take it off in a couple of hours. Including jacking up onto axle stands.
Still an awkward heavy beggar when the whole thing lands on your chest.

Gosh that is quick. I took about 5 hours today. I lowered the VCU with front prop attached with a small trolley jack. If I did this often I'd make a tailor made viscous coupling unit cradle to fit into the jack. Also once out next time has to be quicker but I doubt I'd need to do this again.
 
I started fitting my 50mm lift kit this morning and ran into a couple of problems. Because of the shape the car was in the garage I started at the back, I had read somewhere the rears were more difficult to fit and OMG what a pain. It isn't difficult as you only need to remove the two clamp bolts on at the bottom of the strut and the three nuts at the top but the issue is the metal brake pipe which is clamped through the bracket at the back of the strut. To get the strut out (unless someone knows different) you need to release one end of this pipe and doing so without breaking it is a trick I haven't learnt. So once I realised it wasn't coming out in one piece I just kept going but it wasn't pretty.
Gosh that is quick. I took about 5 hours today. I lowered the VCU with front prop attached with a small trolley jack. If I did this often I'd make a tailor made viscous coupling unit cradle to fit into the jack. Also once out next time has to be quicker but I doubt I'd need to do this again.
LMFAO. Yeah right! Sorry what was it you bought? Oh yes, a Freelander. I'll give it 18 months. :p:D
 
I started fitting my 50mm lift kit this morning and ran into a couple of problems. Because of the shape the car was in the garage I started at the back, I had read somewhere the rears were more difficult to fit and OMG what a pain. It isn't difficult as you only need to remove the two clamp bolts on at the bottom of the strut and the three nuts at the top but the issue is the metal brake pipe which is clamped through the bracket at the back of the strut. To get the strut out (unless someone knows different) you need to release one end of this pipe and doing so without breaking it is a trick I haven't learnt. So once I realised it wasn't coming out in one piece I just kept going but it wasn't pretty, the pipe was screwed.
Once the brake pipe was out of the way and a suitable container placed to catch the drips, my recently purchased 30" breaker bar cracked the bolts easily and with the bolts out the strut came out easily. It only took a few minutes to fit the 50mm lift and refit the strut.
BTW, top tip, trying to locate the bolt holes in the strut tower is almost impossible from below so get the strut in approx the right position and go inside the car. It is easy to pull them into position from inside. Once that was done I made a new brake pipe and screwed it in. Thankfully I have a couple of brake pipe tools so it was an easy job.
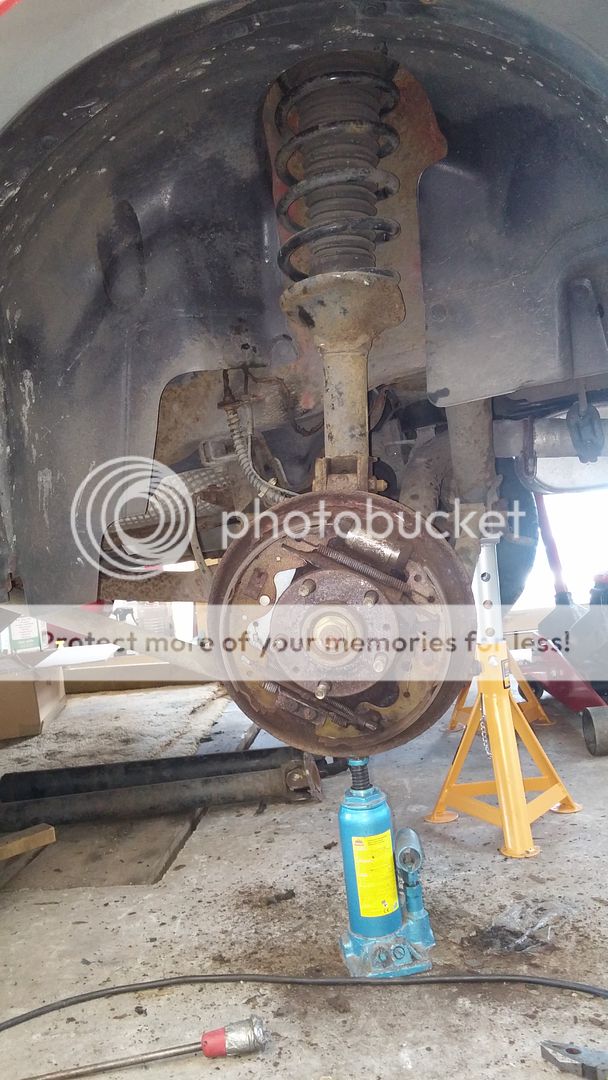
This is it fitted
20160824_120118_zpst0wrr6ts.jpg

Yeah I can't see much either but honest it is in there out of site at the top. BTW the hub was loose so I took it off to clean it up and will paint it black.
So that was the easy side done. :eek:
I did the OS this evening and unfortunately found I have a leaky brake pipe so it looks like I need to fit a new brake pipe to the front of the car. :mad:
I haven't traced it yet but will do that tomorrow, at least I have the other rear lift fitted and a new 10" brake pipe ready to go for the connection to the wheel hub.
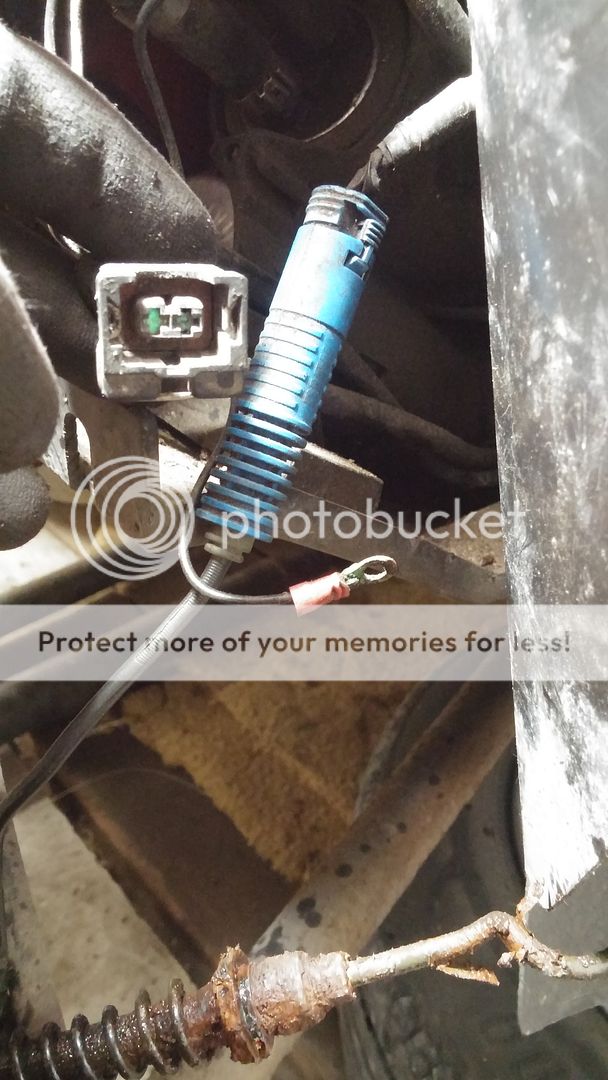
While in the OS wheel arch I found this connector and what looks like an earth connection.
20160824_215103_zps13qwtwmi.jpg

Anybody know what they are for and is it possible the earth not being connected might be the cause of the HDC and TC warning lights coming on intermittently?
 
Back
Top