DIY 2" Lift Kit

This site contains affiliate links for which LandyZone may be compensated if you make a purchase.

hugle

Member
Posts
68
Location
Skopje, Macedonia
Hi There,

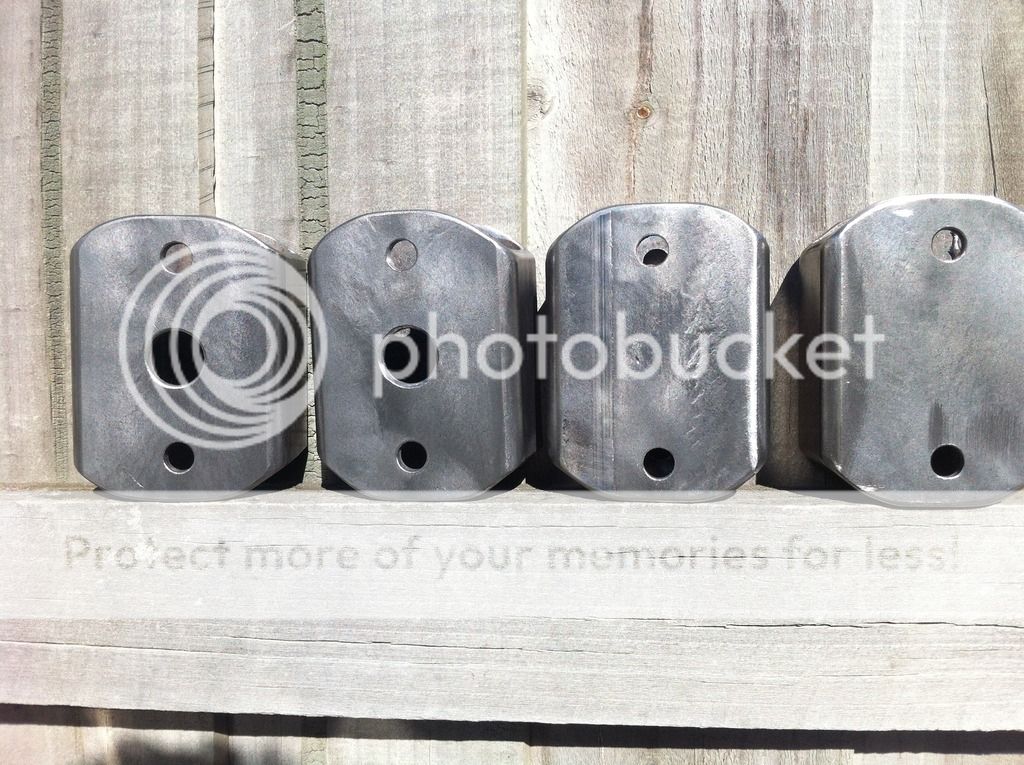
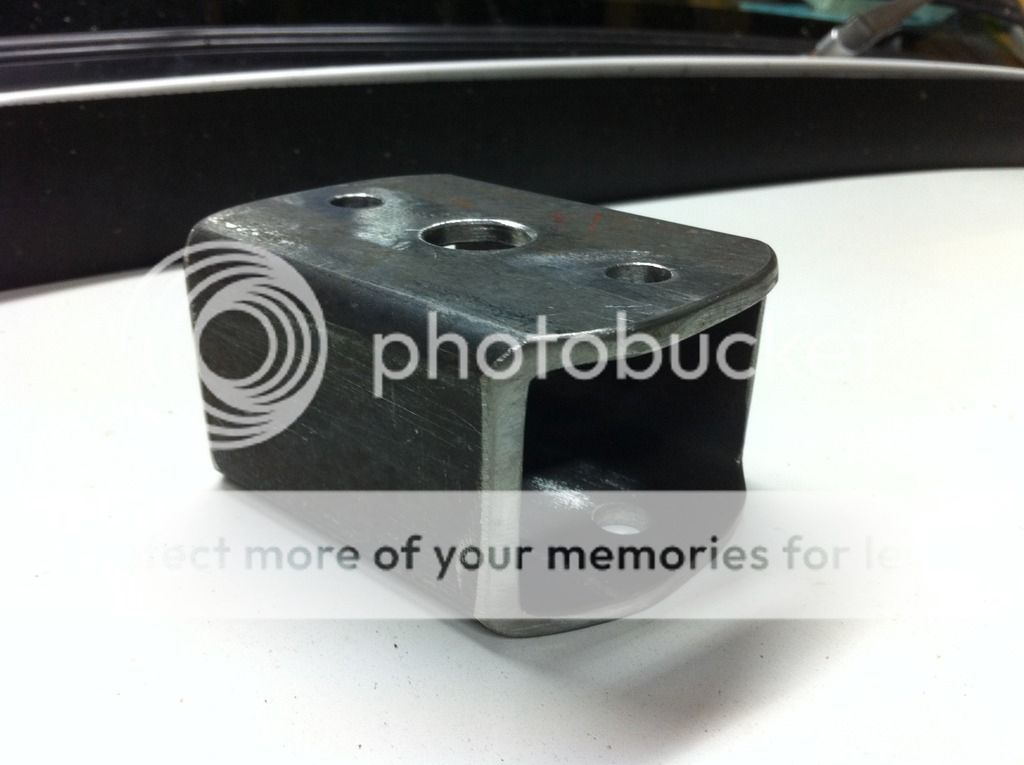
Did somebody installed a home made 2" Lift Kit on a Disco 2?
How should that look like, was it installed on the springs?

If somebody had made this kit's I will appreciate if you share the dimensions from them.
I like to lift mine, but currently my budget is running low :)

When you install the Kit, do you need to make some more adjustments and if so...what should be changed?

Thanks to all

Zoran
 
The first question is, why do you want to lift it and to achieve what?

I'm not against lifting a 4x4, but there is more to a good suspension setup than just a lift.

And to that end, there is more than one way to lift a vehicle.

Also, being a D2, do you have air or coil springs on the rear?


Assuming coil all round. There are two simple options.

-Longer or stiffer springs. These will make the vehicle sit higher.

-Spring packers. Essentially a metal plate/pack that replaces the lower spring seat and lifts it 'x' inch.


Either solution will really require longer shocks to make it perform better off road and possible longer brake lines. However both are possible with standard shocks.

The spring lift could be done by fitting HD factory or aftermarket spring. The downside of this is ride quality will likely suffer. And if over stiff you may find it doesn't flex as well off road any longer. Also higher chance of a spring dislocating if does still flex.

Longer springs might able to be softer, but then may affect the handling and make it too soft.

Spring packers will keep the ride and handling pretty much as stock (just slightly high er CoG). But it will likely cross axle easier off road unless you fit longer shocks or drop the top shock mounts.

Not sure who sells spring packers. Llama4x4 used to sell them for other LR models, but can't see anything listed now.

Seems to be some info here:

www.discovery2.co.uk / 2" Suspension lift
 
Have you got coil spring all round or air suspension in the back? If you have air suspension, I'm sure there is a way of lifting it using homemade spacers, but I'm not sure how. If I were you, I'd have a look at RTE's website, as they have +2" spacers for D2 air springs. If you have coils all round, then I might be able to help :D

I'm pretty sure the springs are the same in a D2 as a D1 (but please correct me if I'm wrong). If they are, then you can make up some simple spring spacers for about $30 (or 15 pounds). It will leave you with a tiny bit less flex in the rear, so if you want full articulation you'll have to buy some +2" shocks for the back but the fronts mount onto the new spacer. Have a look at my thread of my Disco 1. It has some info there: http://www.landyzone.co.uk/lz/f8/trillos-v8-disco-1-build-276715.html I think its at post #7
 
Hey M8,

Thanks for the respond,

Yes, I Have coils all over.
I will appreciate if somebody can share the exact dimensions of the homemade lifters (front and back).

I can see that there are a lot of different types of spacers, and that way I addressed to this forum :D, because I now for sure that I could get the right information.

Stay I touch
Cheers

Have you got coil spring all round or air suspension in the back? If you have air suspension, I'm sure there is a way of lifting it using homemade spacers, but I'm not sure how. If I were you, I'd have a look at RTE's website, as they have +2" spacers for D2 air springs. If you have coils all round, then I might be able to help :D

I'm pretty sure the springs are the same in a D2 as a D1 (but please correct me if I'm wrong). If they are, then you can make up some simple spring spacers for about $30 (or 15 pounds). It will leave you with a tiny bit less flex in the rear, so if you want full articulation you'll have to buy some +2" shocks for the back but the fronts mount onto the new spacer. Have a look at my thread of my Disco 1. It has some info there: http://www.landyzone.co.uk/lz/f8/trillos-v8-disco-1-build-276715.html I think its at post #7
 
Dimensions are coming. But I've just done some research and the shock mount are different on a D2 rather than a D1 (what I did it on)
I'll show you what I did, but the shock absorber mount my need changing. That shouldn't be too hard
 
Hey friend,

I'm Very thankful for all your time spent helping me sort this out.

If I can be of any help to you, please let me know

Stay in touch

Zoki

Dimensions are coming. But I've just done some research and the shock mount are different on a D2 rather than a D1 (what I did it on)
I'll show you what I did, but the shock absorber mount my need changing. That shouldn't be too hard
 
Alright, sorry to be late but here is the info on what I did for a D1. I'd check all the measurements (draw up a fullsize plan on some cardboard and sit it in a spring mount) as this was not made for a D2.

Here's a plan I drew up (quite badly :eek:)

Scanned%20Document%201_zpsqmhzberj.jpg


Here's the steps in real life.

Start off with some RHS box section that's 2"x3" and 100mm long.

IMG_0827_zpsrxsav1vr.jpg


Cut off the end sections as shown in the drawing

IMG_0835_zpsty1z89ej.jpg


Get your angle grinder and grind the ends down round using the grinding wheel.

IMG_0845_zpsmfiqor9a.jpg


How it should look

IMG_0850_zps7nfbrvt7.jpg


Clean them up more with a sanding wheel on and angle grinder. Then measure out the holes that need to be drilled evenly from the each end for the bolts to go through from the spring mount to the axle. Then drill :D

IMG_0860_zpskb2saoxx.jpg


How it goes together (except with bolts!)

IMG_0863_zpsn512vt2z.jpg


Then clean any markings off as well as any surface rust with a wire wheel on an angle grinder.

IMG_0882_zpsdfzra4x3.jpg


Then clean it up and paint. Sorry, but you'll have to wait for the fitment instructions until another day, because I need to go and eat my French Toast!!!! (as well as upload photos and update my trucks build thread!)
 
Wow, you realy did it like a pro.

i can't thank you enough for the effort you did to explain it in this way :)
The drawing is super fine, but I couldn't fine the info for the central hole in the front ones!?

About the toast...hhhhmmm, you just made me hungry :) pass on some...I don't have a toaster near by hahaha


Chears friend

Thanks
Zoki


Oops, just realise first photos upside down, but I'm sure everyone will survive :D
And incase your wondering, the French toast is good!!!! :D lol
 
Sorry about missing the hole!
Um, well, I don't know how it it set up at the front for a D2. However, I can show you what I did for my Disco 1!

You'll need to find the centre of the spacers, and drill a hole 3/4" for the front shockies. I assume you'll be making the spacers out of seamed box section, so make sure the hole that you drill is not on the side with the seam, as it is weaker.

Here is a front spacer

IMG_0856_zpsor0losza.jpg


You can see what I mean about the seam at the bottom in this one

IMG_0855_zpsv5rdwz4d.jpg


One more thing you must be aware of. When you take the shock absorber off from the front, if it's anything like my shock it will have a bush, followed by an angled washed, another angled washer around the other way and then another bush. It's these washers that you have to be really careful of. They will mount into your spacer, and the angle that they are on is the angle that you must recreate. Here (someone else's) photo of these washers

ome002%20005.JPG


Using a file you need to shamfer the shockie mounting hole, inside AND outside, making these washers fit snuggly into the hole. You do not want these washers just sitting on one point of the hole you drilled, as you will wear through them very quickly, leading to you going through bushes incredibly quickly. I hope you understand this. If you don't tell me and I'll do something to help you as this is one of the most important things.
 
Back
Top