Discovery 1 300tdi

This site contains affiliate links for which LandyZone may be compensated if you make a purchase.
still in love with your build.
i was just wondering; after all these modifications what do you think you have used the most/been the most beneficial.

cheers

Hi,

It's hard to answer really as it had been modified a fair bit before I bought it. It was already capable offroad too, and I've only been out in it properly once.

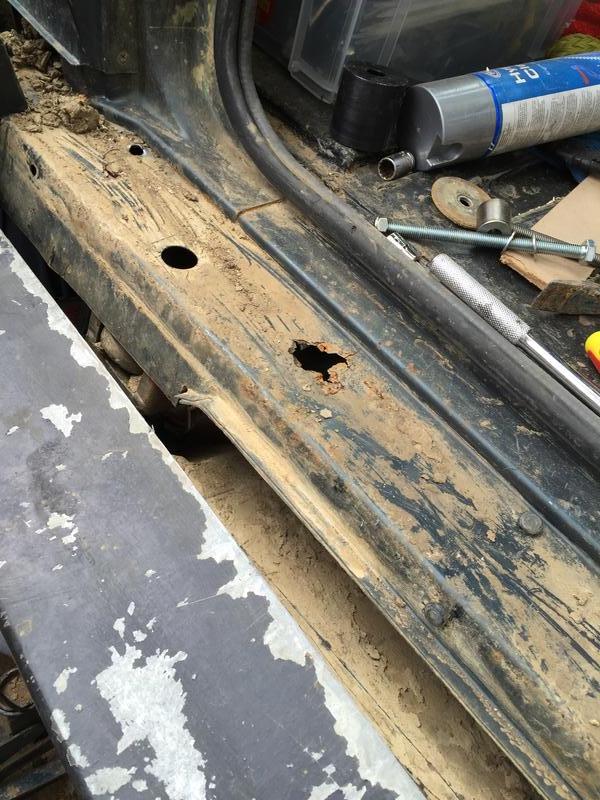
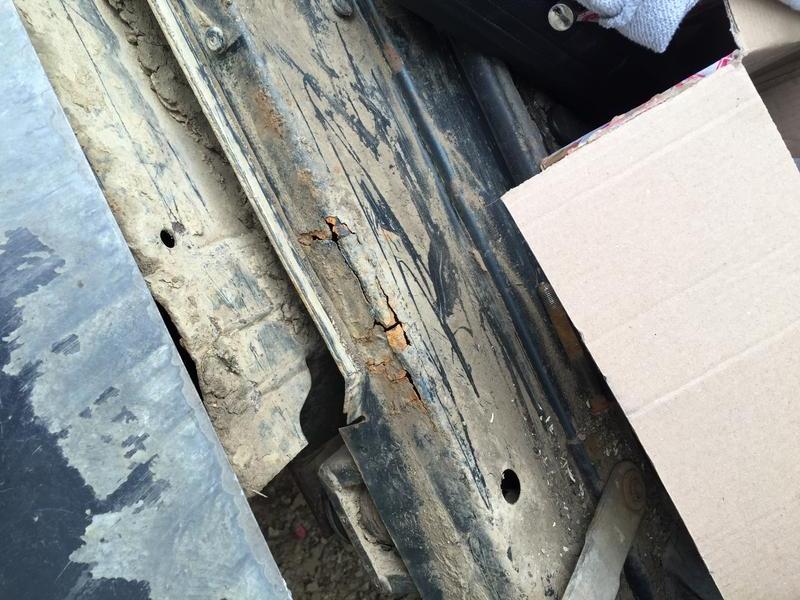
I've only really added small bits myself, most of the time has been spent fixing/cleaning stuff! As I work on it, drive it and use it I find more things that I feel I "need" - not everyone will agree but everyones needs are different!

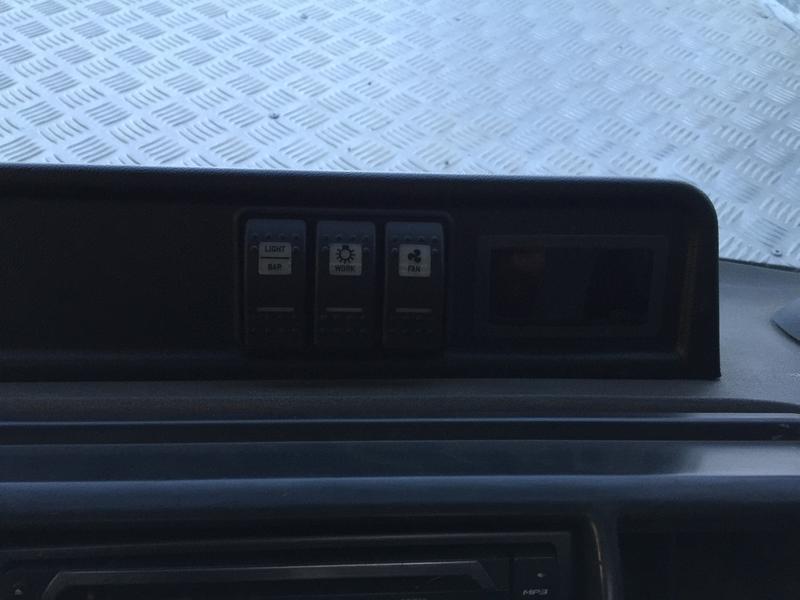
The under bonnet lights have been very useful, I hate it when I've almost finished a job and then it gets too dark to see.
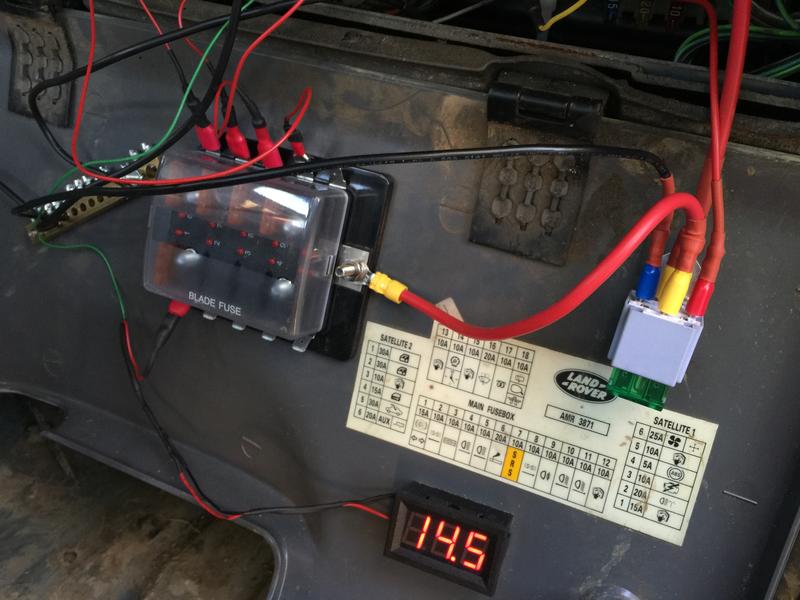
The EGT sensor and gauge have been useful, as I don't want to cause any damage and it does get rather warm going uphill.
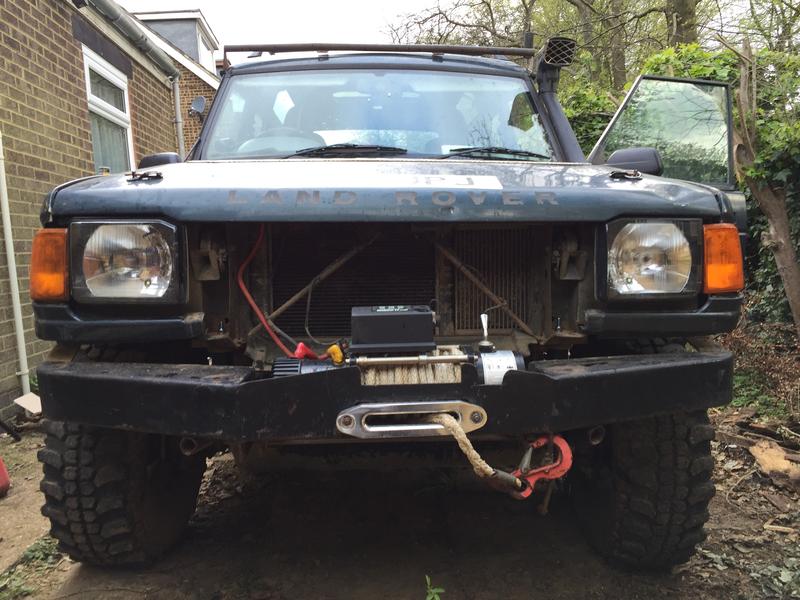
I haven't had to use it yet, but I feel the isolation switch on the winch is important.

The other bits are just gadgets really, as I like gadgets haha.

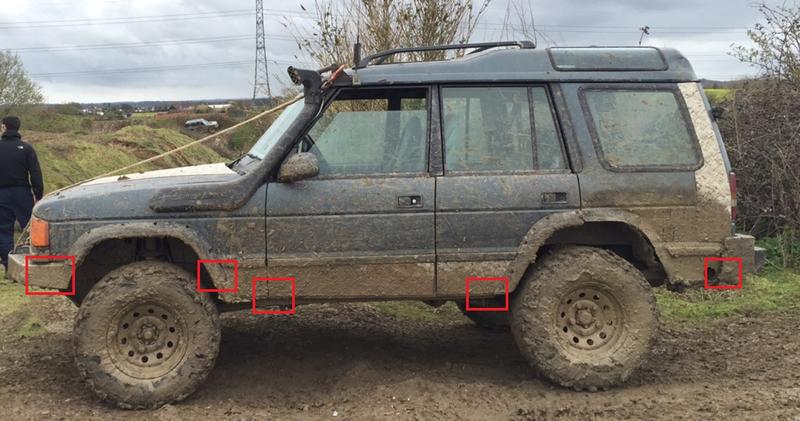
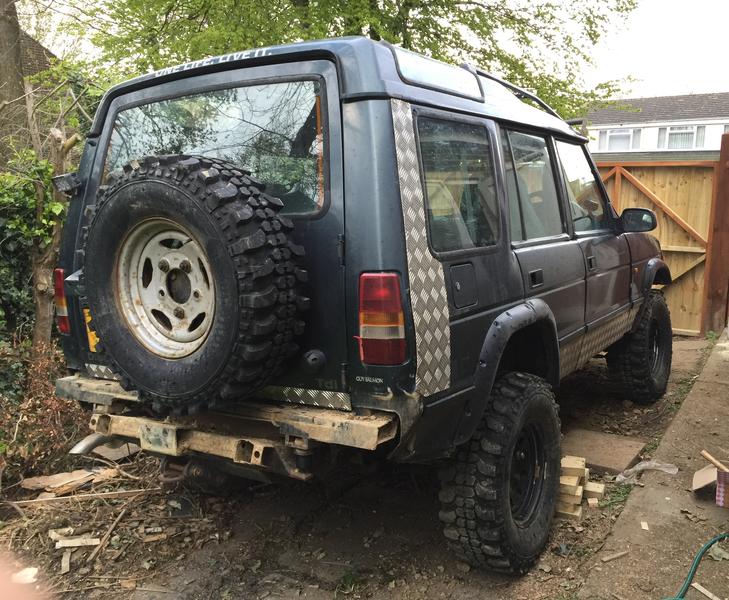
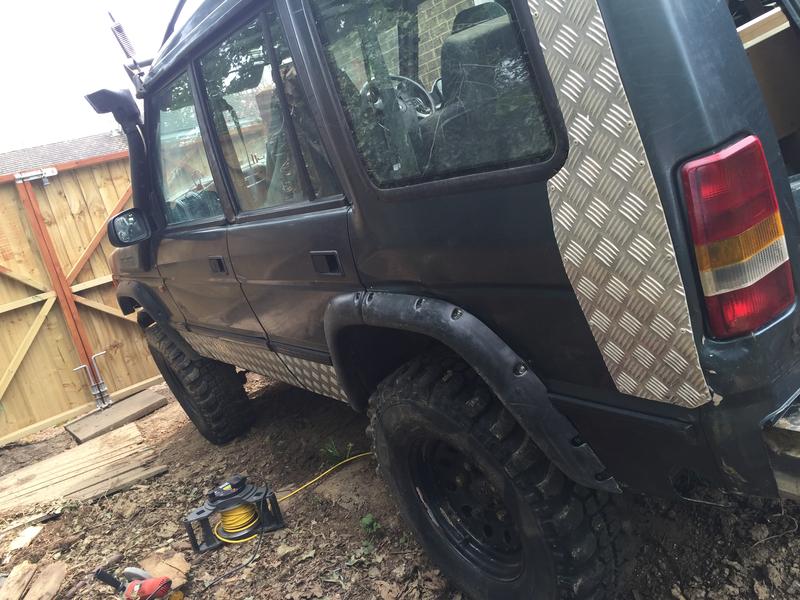
Regarding the bits that had already been added - tyres, tyres make so much difference. In my old Discovery which had All Terrains I remember having trouble turning in mud, as well as getting traction in deep mud. With mud terrains it is night and day.

A suspension lift isn't really required unless you fit taller tyres, which you'd fit to give you better ground clearance. Probably better off fitting a body lift, as it doesn't alter the steering geometry and will allow you to fit taller tyres.

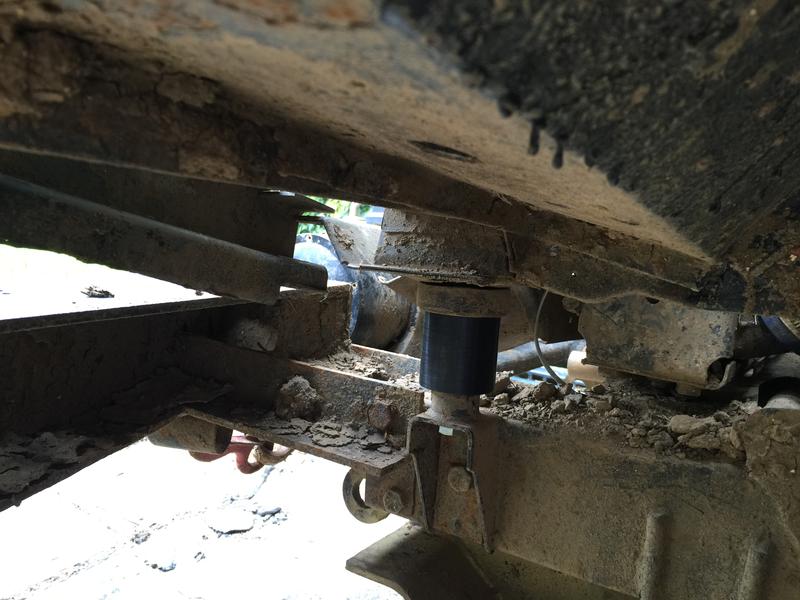
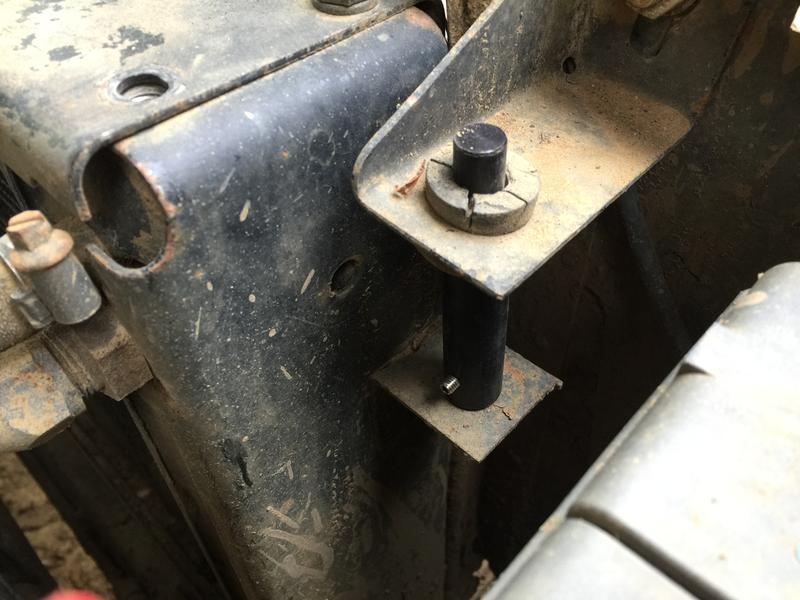
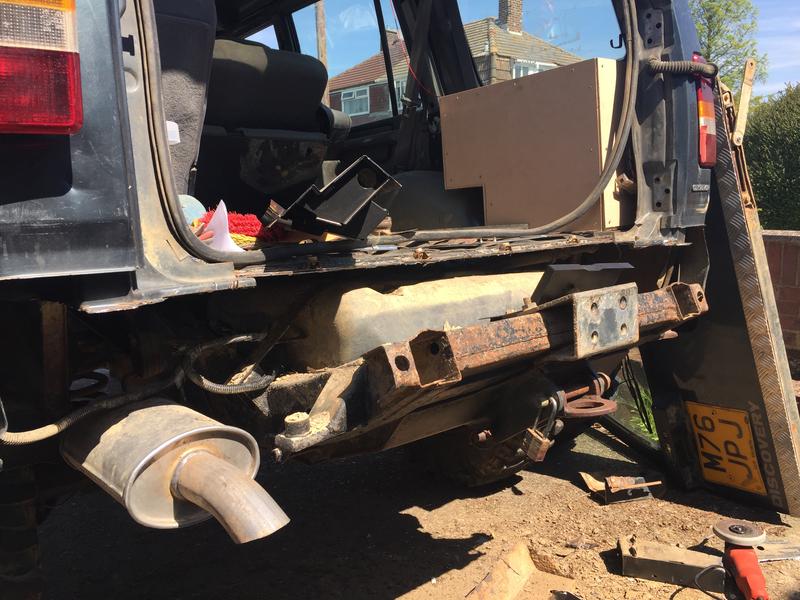
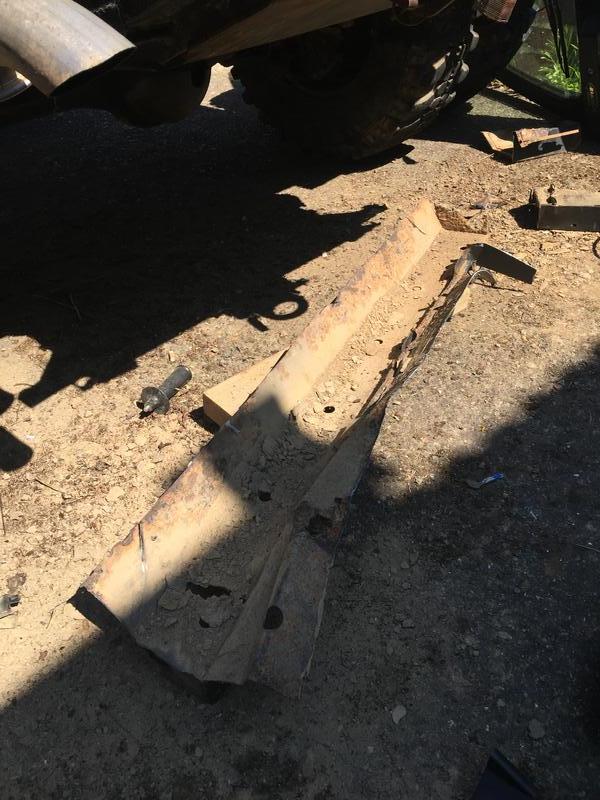
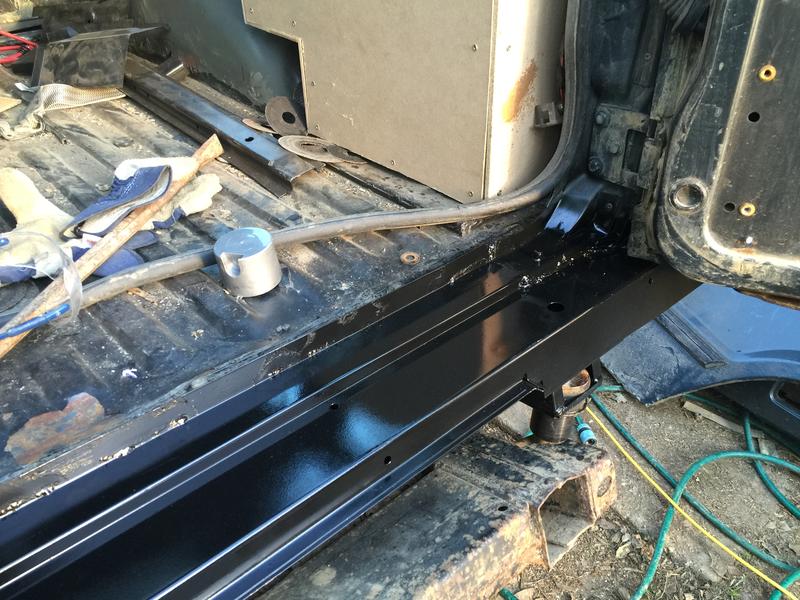
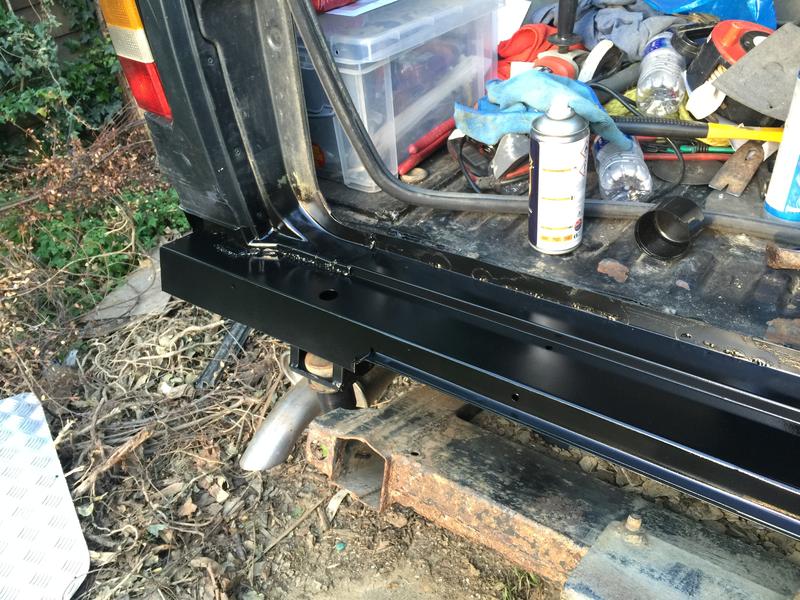
I also feel underbody protection is important - mine has a steering guard, track rod guard, diff guards and a tank guard.

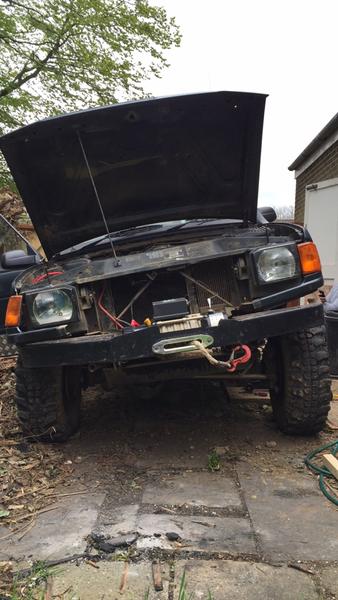
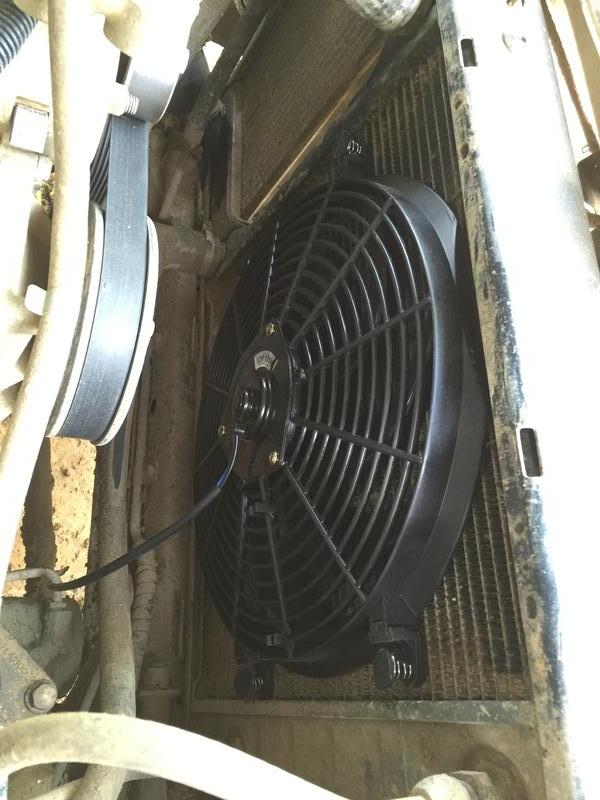
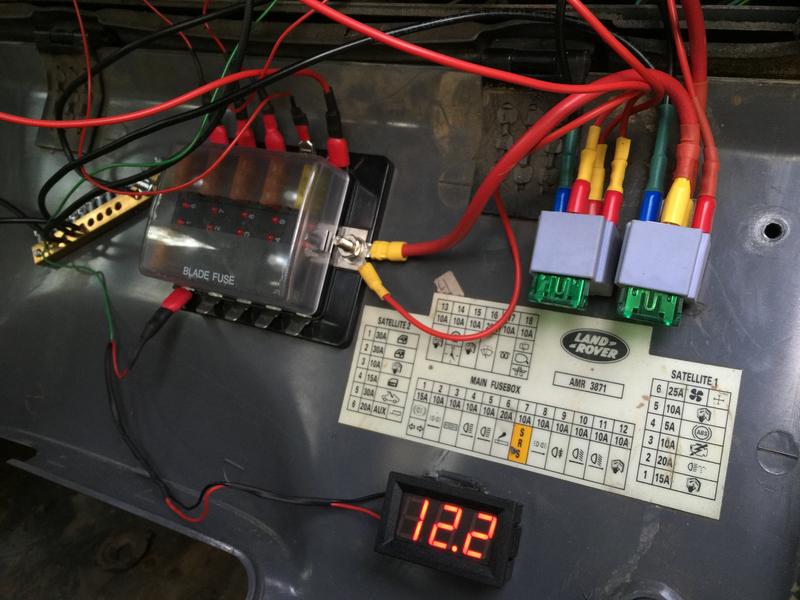
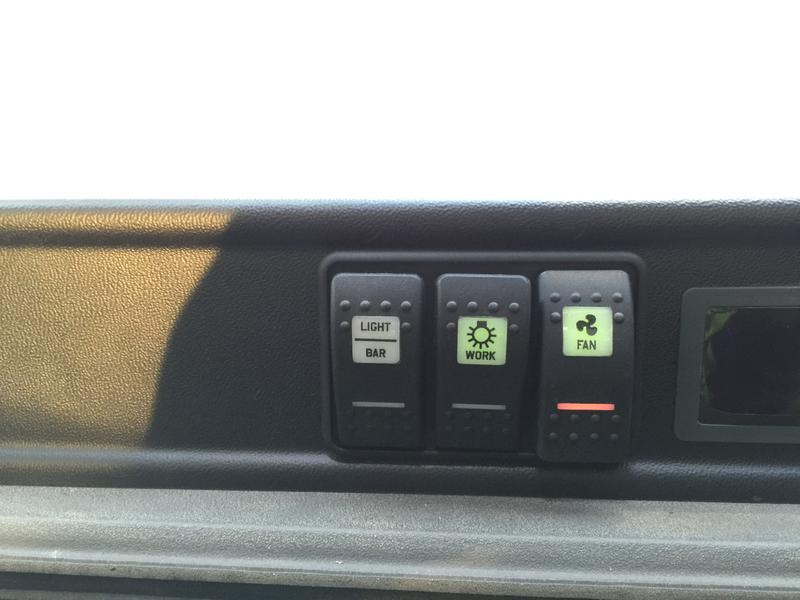
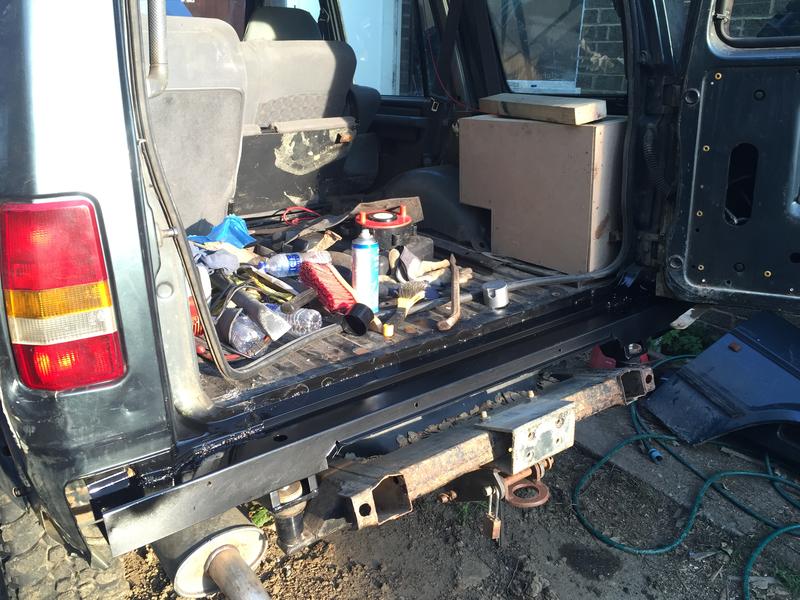
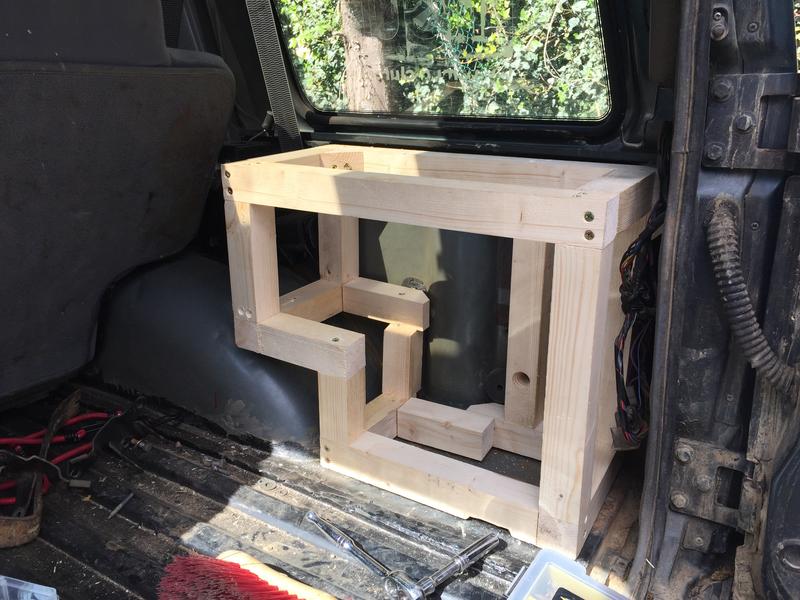
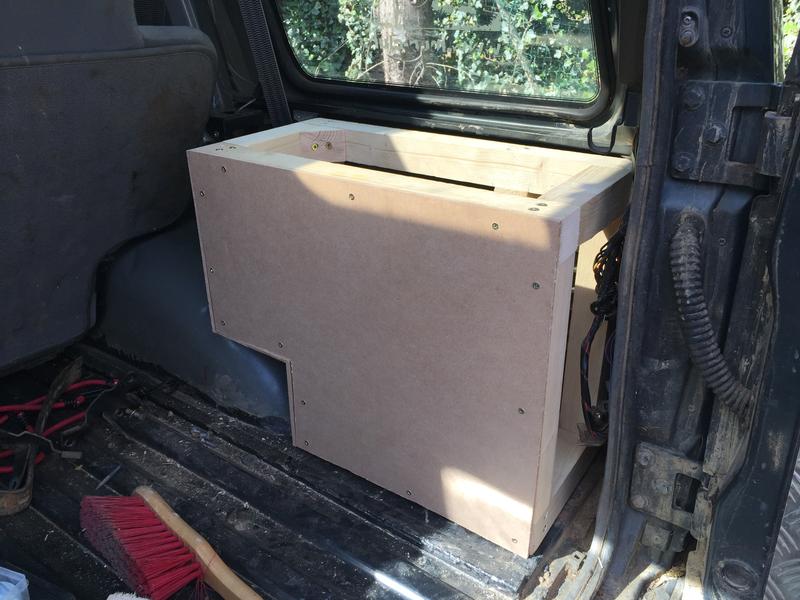
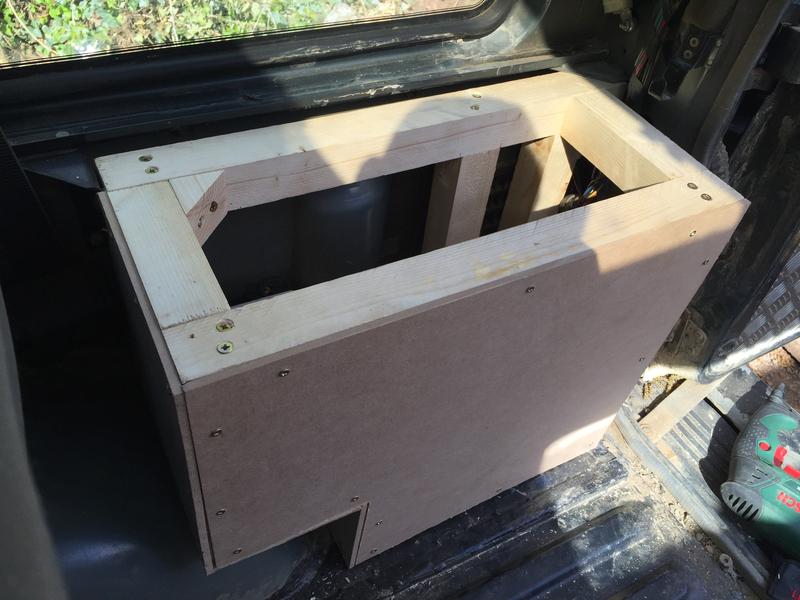
Going forward I'm going to fit an electric fan, as I removed my viscous fan and it does get a bit warm offroad - probably need a new radiator too to be honest. I want to build some kind of storage to go in the back, where the dickie seats used to go - and add some usb power to these etc. I want to replace the rear work light with a switched one, as my current one comes on with the reverse light and dazzles people behind me. I'd like a tubular winch bumper but that's just because I prefer how they look. I also want a couple of LEDs light bars because they're cool haha.

Foz.
 
So, last weekend I was ill - I was stuck in bed all day so just kept buying things! Oops!

Rear window seals
Window tint film to tint the rear windows whilst I have them out
Wind deflectors
A 3D printed carling switch mount - found from another thread on here, i liked the idea so much I got one myself
14" electric fan
2" body lift kit
2" body lift bumper lifting brackets.

I also popped to B&Q today to pick up the wood to build some rear storage - haven't done this before so that could be interesting.

I'm gonna have my work cut out over the next couple of weekends...

Body lift kit -

06muJZR.jpg


3D printed switch mount. Needs some sanding/tidying up -

Dcs4KNV.jpg


Foz
 
3D printed switch mount. Needs some sanding/tidying up -

Dcs4KNV.jpg


Foz

Glad to see someone else getting some use from that model. If the printer would have rotated it so the face points up it wouldnt require any sanding. The gauges should cover it up once complete
 
Didn't get as much done as I had hoped - I didn't realise how long making things out of wood takes! I also got distracted by fitting some CCTV that I had been meaning to do for ages.

So this is where I want to build some storage, in place of the dickie seats.

zTSXpgS.jpg


I haven't made anything from wood before, so don't judge haha. Basically this slots in place by some wood tucking in near the rear light, and I made use of the old dickie seat mount. Even just slotted in it's very sturdy, but I added 1 bolt to hold it in place (making use of the old dickie seat bolt holes) - when that's in it isn't going anywhere.

Not finished yet...

iSCtQe7.jpg


Oshfnjf.jpg


This picture will give you a better idea of how it "slots" in.

S22BLNE.jpg


I cleaned up the surface rust best I could and gave it a coat of hammerite.

6jCyk5e.jpg


Had some switch stickers arrive - none of these do anything yet, but stickered up with their future function :)

FrraGSb.jpg


I also finally added a relay to power all of the extra bits i've added - turns on with ignition. Getting a bit messy now.

Nz87PeP.jpg


Foz
 
Wired some electrics for my switches today, and another coat of hammerite in the back.

Looking to do the body lift tomorrow.

afubnEu.jpg
 
Cool, have you said it has a suspension lift or not?
What brand? Just intrested what different people use.....

Yeah it does have a suspension lift, no idea on the brand of those. I think they're due a replacement one side sags a little.

The body lift is from a guy called Wizard, he has been making lift kits for a while i believe and it comes with everything you need - minus the bumper relocation brackets.

This is the kid i bought - LINK

So the body lift is done, and what a pain it was. The actual lift itself isn't difficult, and relatively straight forward. My main pain came from the rear bumper, that had to be removed to give me proper access to the rear body mounts. It took about 2 hours to get a seized bolt undone.

I also discovered my rear crossmember needs replacing, brilliant.

For anyone that is wondering, the locations of the body mounts:

oJiQDGY.jpg


Anyway, pictures.

Spacer in at the front -

cKH3owq.jpg


Side jacked up and half way through -

Y6kowCg.jpg


Rad spacers -

J8NeEmo.jpg


Extended body ties -

TCUwWuc.jpg


Rusty crossmember :(

wZV7Pri.jpg


lMMx0lH.jpg


Bumper gap - I have the brackets to raise it, though.

YwZbeHZ.jpg


Rear/side after lift completed -

rl8Y18h.jpg


I have also extended the length of the transfer box gear knob.

The normal gear stick needs a bit of adjustment i think as it does knock the side of the centre console now.

Also whilst I was under the car, I had a look at my UJs and the front ones have ALOT of play, so now I need to order one of those.

Not including the 2 hour hold up caused by the bumper it took me about 6 hours.

Foz.
 
Last edited:
Finally fitted and wired up the electric fan.

It's just a very basic 14" fan on a switch.

lLxEaGC.jpg


Additional relay for fan, wires getting even messier.

t5PkUaJ.jpg


and now finally one of my switches has a function :)

Bg7R1fZ.jpg


Foz
 
I don't want to worry you, but there's a well-established code of practice for installing extra wiring in Land Rovers - and you're not following it.

Bus bars, heat shrink tube, insulated covers and fuses are all on the banned list. I can't see any chocolate block connectors of the wrong size anywhere. What's worse is the total lack of Scotch-Loks. You could at least have made an effort with odd lengths of insulting tape, but no, it's obviously too good for you.

This looks like the kind of thing I'd expect to see in a BMW or a Porsche perhaps - are you maybe of German ancestry?

Hiding the 240v lighting cable is all well and good but we still know it's there somewhere....
 
I don't want to worry you, but there's a well-established code of practice for installing extra wiring in Land Rovers - and you're not following it.

Bus bars, heat shrink tube, insulated covers and fuses are all on the banned list. I can't see any chocolate block connectors of the wrong size anywhere. What's worse is the total lack of Scotch-Loks. You could at least have made an effort with odd lengths of insulting tape, but no, it's obviously too good for you.

This looks like the kind of thing I'd expect to see in a BMW or a Porsche perhaps - are you maybe of German ancestry?

Haha! I'm saving the scotch loks for the really important stuff!

I do own a BMW, maybe that's what it is...
 
Done a couple of bits this weekend.

As I said in the previous post, I had a bad UJ - so i chose to replace the whole propshaft for ease.

It's safe to say the UJ was knackered...

0ZXvP4a.jpg


Old vs New

Uy7RSde.jpg


I FINALLY got round to fitting the extended arch that had been missing since the day i bought it - rear 1/4.

Z00MvBQ.jpg


Today we replaced the rear cross member (Mainly my dad if i'm honest).

New cross member

TVMKFXT.jpg


This was the state of the old one, the body mounts were barely hanging on.

OCBB5Xi.jpg


Old one cut out.

swOHMpe.jpg


XAqllOX.jpg


yz6Z8wp.jpg


New one welded in and painted.

laj5WQk.jpg


4zV0iDQ.jpg


KJuTL6M.jpg


Few little bits to finish off with the cross member but it's safe now.

I also made a start on removing the paint from my rear bumper, what a nightmare job that is.

7WhTcYZ.jpg


Foz.
 
Back
Top