You are using an out of date browser. It may not display this or other websites correctly.
You should upgrade or use an alternative browser.
You should upgrade or use an alternative browser.
Defender nut and bolt rebuild
- Thread starter UpandOver
- Start date
This site contains affiliate links for which LandyZone may be compensated if you make a purchase.
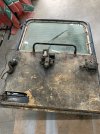
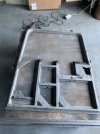
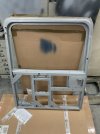
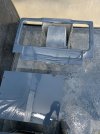
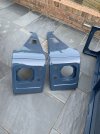
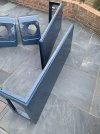
Rear door bottom rail replaced, centre rail removed straightened and welded back in. Will spend a bit of time tomorrow evening cleaning up the welds and give it a good coat of 2k zinc primer before re skinnining with new ali.
Attachments
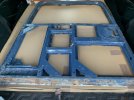
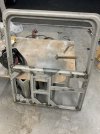
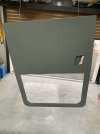
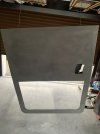
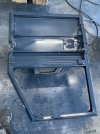
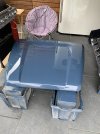
Rear door skin bonded and edges folded, took a good few hours to do carefully not to dent or crease the ali skin but well worth the extra time and patience. Went over it with 230 grit orbital before two coats of 2k etch primer. Applied extra seam sealer around all the frame on the inside to fill any voids hopefully stopping the skin from buckling when the spare wheel carrier to re bolted.
Top tip, dont drill any of the hinge holes or fix the pop rivets around the lock until the panel adhesive is fully cured otherwise they can pull the ali inwards and dent the surface. Apologies the photos aren’t upside down its just that it was easier to spray around all the edges when hung up.
Top tip, dont drill any of the hinge holes or fix the pop rivets around the lock until the panel adhesive is fully cured otherwise they can pull the ali inwards and dent the surface. Apologies the photos aren’t upside down its just that it was easier to spray around all the edges when hung up.
Attachments
- Posts
- 24,705
- Location
- In the next Glen
Doing a fine job on this pal nice one. 
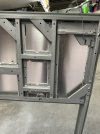
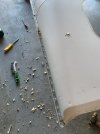
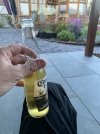
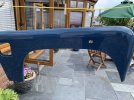
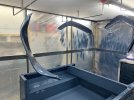
Three and a half house later …. The cracked sticks like **** seam sealer is all out of the roof gutter.
I recon this deserves a beer !
Todays tip, use a narrow screwdriver, heat gun and wire brush, oh and a glove on the right hand ! Cos that bloody heat gun doesn’t half get hot , suppose the clue is in its name really
I recon this deserves a beer !
Todays tip, use a narrow screwdriver, heat gun and wire brush, oh and a glove on the right hand ! Cos that bloody heat gun doesn’t half get hot , suppose the clue is in its name really
Attachments
- Posts
- 5,076
There's a big hole in it ..... it's just begging for a fancy bit of TIGing .... it'll end in tears or drips or both.
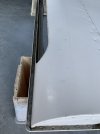
Exactly 2 tubes of tiger seal, some masking tape, latex gloves and my thumb thats all it took to fill all the joints and gutter rails. Oh and a gallon of white spirits and half a roll of blue paper to clean up!
Attachments
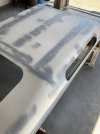

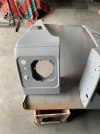
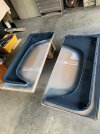
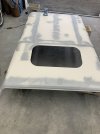
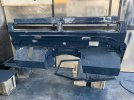
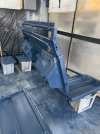
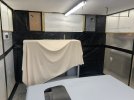
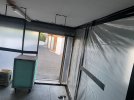
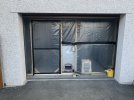
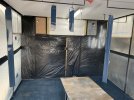
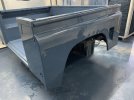
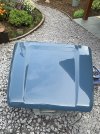
DIY heated paint booth built its now time to starting to get some colour down, roof in Charlton white completed with a few runs that I can flatten and polish out, rear tub done and then done again as I found a 3” straight dent in one side. Floor plates, front grill and bulkhead done. Inside door jams done.
This evening plan is to do outside of doors and windscreen surround.
This evening plan is to do outside of doors and windscreen surround.
Attachments
- Posts
- 5,076
Dedication and attention to detail ... love it
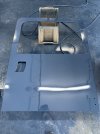
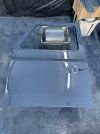
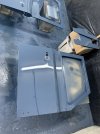
Kicked arse out if the painting today ! Outside temp 22deg booth a cool 23!
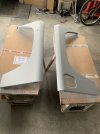
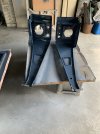
Wings done, van panels done, bonnet done, sills done, rear corner cover panels done, I’m also done ! Ya dont half seat in a white cat suit !
Wings done, van panels done, bonnet done, sills done, rear corner cover panels done, I’m also done ! Ya dont half seat in a white cat suit !
Attachments
Dr Strangeglove
Well-Known Member
- Posts
- 705
- Location
- Lancashire
Wow, I am envious of your work! Some fantastic effort going in there and great attention to detail.
I take it a galvanised chassis will be going on?
A well deserved pat on the back
I take it a galvanised chassis will be going on?
A well deserved pat on the back
- Posts
- 5,076
T-Wash Mordant Solution first ?
Then a primer and i'd probably go with a brushed on tractor enamel top coat as it's a bit more flexible than 2K.
Whatever to choose it will look amazing i'm sure.
Then a primer and i'd probably go with a brushed on tractor enamel top coat as it's a bit more flexible than 2K.
Whatever to choose it will look amazing i'm sure.
Yup I’ll use crown T wash, let it dry then apply intershield epoxy primer, then intershield epoxy top coat which is the paint used on offahore structures and commercial boat decks, which is very hard wearing and abrasive resistant, used it on my series 3 chassis two years on and its exactly as it was the day it was applied.
Similar threads
- Replies
- 7
- Views
- 1K
- Replies
- 19
- Views
- 4K