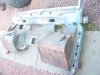
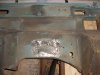
I have repaired the top part of the bulkhead and will take photos once the welds are dressed up.
I'll be interested to see them. I need to do them on my wife's 90, but I'm not really fancying it much
I have repaired the top part of the bulkhead and will take photos once the welds are dressed up.
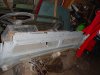
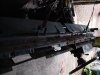
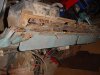
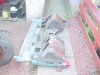
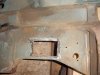
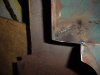
Thanks for the encouragements, the part of the bulkhead I am repairing is the part that is hidden by the window frame. It looked solid until I took the window off and the ledge was rotten most of the way along. I have fabricated repair patches and welded them on, after cutting out the rot. Not an easy task but I will post photos when done.
")
same thing i had to contend with ( its a bugger of a job innit )
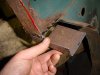
Thanks, I ground down the welds then gave it a skim of cataloy. I dont like catty but it was just to dress it up a bit, even though it will be hidden.looks a nice repair!
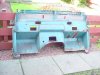
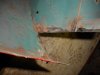
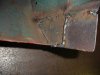
Decided to completely strip down the bulkhead to get better access for some small weld repairs and a complete respray. Here she is in her naked glory.
Welcome To LandyZone, the Land Rover Forums!
Here at LandyZone we have plenty of very knowledgable members so if you have any questions about your Land Rover or just want to connect with other Landy owners, you're in the right place.
Registering is free and easy just click here, we hope to see you on the forums soon!