Bobsticle
De Villes Advocaat
- Posts
- 27,632
- Location
- Manchester
Ah, right. He's the one that's driving the price up. 

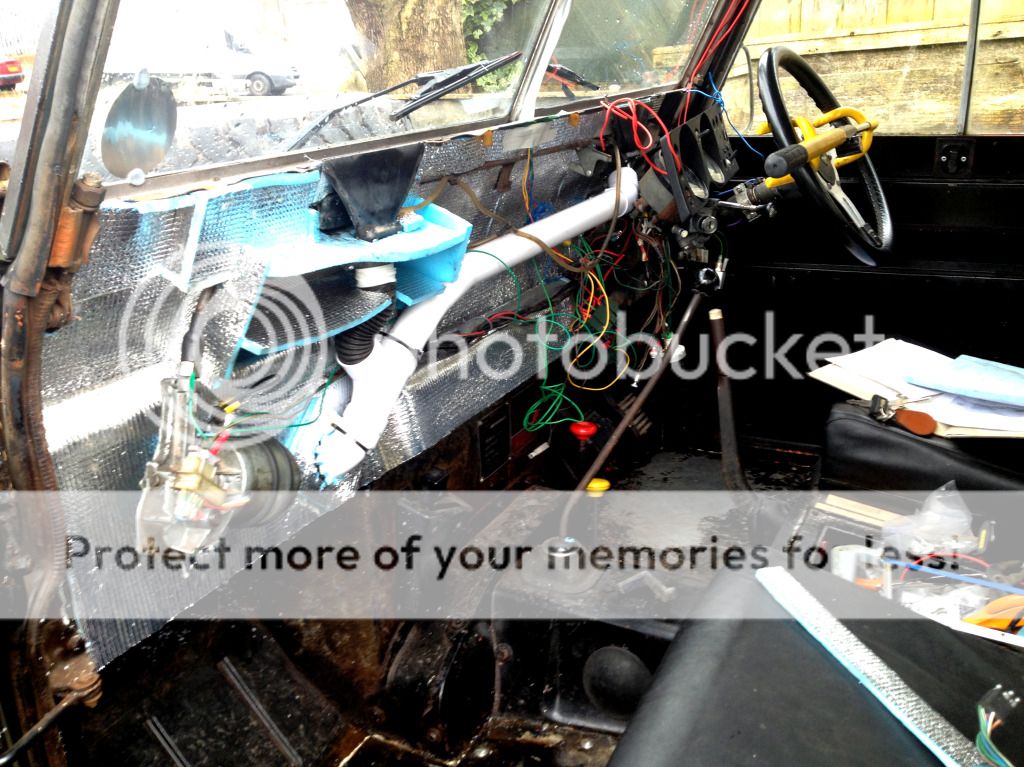

dig the fancy pipework for the demister, is that just day to day plastic pipe you can get in b&q?
Does the matting make much difference to the road noise?
Can't you buy similar stuff for the job with adhesive already applied? Never priced it tho.
Welcome To LandyZone, the Land Rover Forums!
Here at LandyZone we have plenty of very knowledgable members so if you have any questions about your Land Rover or just want to connect with other Landy owners, you're in the right place.
Registering is free and easy just click here, we hope to see you on the forums soon!