Hicap phill
Well-Known Member
- Posts
- 17,294
- Location
- Wiltshire
That holes for a choke cable
And fog light switch attaches to the light cluster switch bracket. Yes they are in line on the plastic shroud
That holes for a choke cable
<snip>
In that case I must have has one previously as well as this shroud is a lot newer than my old one. Is there a specific cover panel for it or is just a case or putting a grommet in the hole to close it up?
") just do not provide good contact area or waterproofing.
just do not provide good contact area or waterproofing.Cut the wire and fit a Lucas connector or one of the newer 1 into 2 connectors ...
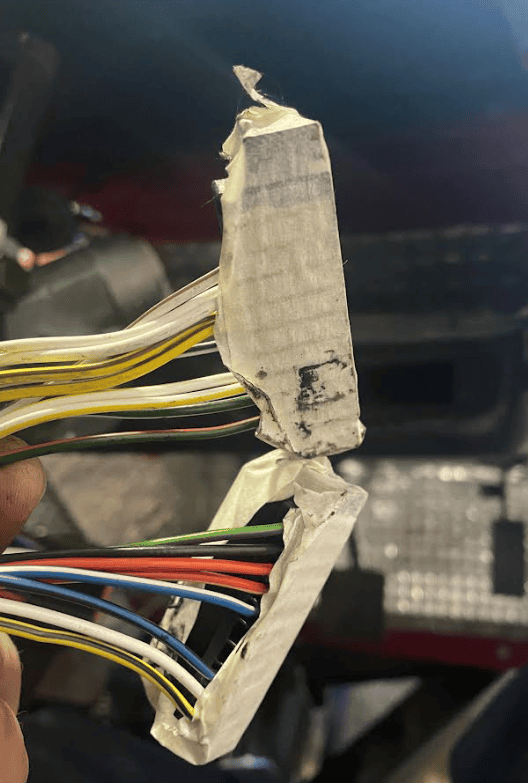
The extra wire is bound to the main with several turns and covered with that self melding tape that blends into its self.
Perhaps I am just being a little precious as I is new and very expensive but I am reluctant to cut the wire but other than the previous mentioned it is brand new and very expensive I cant really put a finger on the reason why.
There is only a few centimeters of wire before it disappears into the loom wrap which I do not want to undo. the factory solution is a scotch lock here at the warning light plug:Surely there is a connector at the ends or in the line that you could chop and then add 2 wires too a new connector.
May involve more wire to get to where you want your "relay" I guess but neat.
J
There is only a few centimeters of wire before it disappears into the loom wrap which I do not want to undo. the factory solution is a scotch lock here at the warning light plug:
"depin" and solder crimp a new pin with 2 wires? Neat as F.
J
mad I am not with the vehicle you can probabaly guess my next question. Do you know what pin they are so I can get some more To do that.
.Perhaps I am just being a little precious as I is new and very expensive but I am reluctant to cut the wire but other than the previous mentioned it is brand new and very expensive I cant really put a finger on the reason why.
What tape are you referring to there? the only self amalgamating tape I have used it very bulky and form a huge mass over the joint?
Welcome To LandyZone, the Land Rover Forums!
Here at LandyZone we have plenty of very knowledgable members so if you have any questions about your Land Rover or just want to connect with other Landy owners, you're in the right place.
Registering is free and easy just click here, we hope to see you on the forums soon!