attempted alternator change.. AAARRRGGGHHH

This site contains affiliate links for which LandyZone may be compensated if you make a purchase.

europaS2

New Member
Posts
37
Well I didn't get very far, just very angry!
I read lots of threads on the subject of changing the alternator on my TD4, and liked the one saying it can be done from underneath without taking much stuff away, belt and undertray I think that was it.
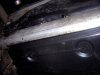
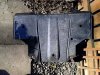
I got as far as removing wheel, and partly removing undertray!
This was held on with 2 pop rivets on left and right sides, one bolt at the rear, (one was missing) and the icing on the cake, 2 rivets at the front edge fixing it to the cross member, from INSIDE the engine bay.. WTF!!
Surely this ain't right?
So the only way to remove said undertray would be to rip the fekker out!
Needless to say I put it back together and intend to leave it at the village garage!

Steve
 
Hi mate,
The undertray is held on by 2 bolts and 2 screws at the front edge of the tray. Then by 4 larger bolts onto the subframe, then 2 more smaller bolts up into the subframe. Don't worry bout the rivets, the plastic part & the aluminium part come out together. There's a plastic flap on each side thats connected to the bumper, u may have to pry them out as the screws tend to rust solid. But u can just tuck em back in later.
I took one off a couple o weeks ago, & thought I'd be drilling out fixings but a bit heat from a plumbers blow torch worked wonders.
Have a cuppa then go out there and show it who's boss:D.
 
The undertray is held on by 2 bolts and 2 screws at the front edge of the tray. Then by 4 larger bolts onto the subframe, then 2 more smaller bolts up into the subframe.

not on mine it aint! been bodged like a goodun
 
Last edited:
guess wot, I'm stoopid.

Just seen pics of the 'undertray' and I was thinkin its just the plastic part.
So the ally bit is also part of it then.

double AAAARRRRGGGGHHHHHH!!!!!!!!!!!!!
 
Lol, have another cuppa m8, these freelanders can wind ye up, but they're worth it ...
Meant to say, while it's off, u can cut out a bit to let u undo the sump plug for oil changes in the future,
Cheers,
 
so close.. just went out, found all attachments, freed them off and now left with one rounded-head-seized solid bolt!
 
After having to remove the full frame , I thought sod this and drilled out the pop rivets , the front of the plastic tray now just rests in the frame and I use 2 long tie wraps through the remaining rivet holes/brackets on the frame to hold it , and the 2 bolts at the rear , it can be removed in a jiff, you may need the full frame off to get at the alternator !
 

Attachments

  • DSCN2490.jpg
    DSCN2490.jpg
    249.4 KB · Views: 475
  • 166.jpg
    166.jpg
    95.2 KB · Views: 454
Ah, job done! £50 second hand ebay genuine LandRover/Valeo 150A alt now installed, no more swapping over charged batterys every evening.
What a PITA job tho. One seized bolt, so not too bad I suppose, dropped the compressor and coolant pipes for access from underneath, gave just enough room to replace it.
Hope I don't have to do that again in a hurry.

The alt I removed was by far the cleanest, newest thing in the engine bay.. what a pile o ****e.
Now got a dirty one in there to match the rest of the bay.
 
Pleased you got your alternator sorted:)

With regards to the engine under tray, I got fec**** off with mine looking to remove these fixings i couldn't find, gave up and drilled all the rivets out, including on the front ally bar. Spent about 2 hours messing around!
Still need to find these fixings and remove them so i can rivet the tray back on :p I know your pain!!!!!!!
 
Once I realised the substantial ally frame was infact the undertray rather than just the plastic, it was pretty simple (except the seized rounded head bolt), the front 2 bolts were tucked under the bumper corners, these could be flexed out of the way easily enuff.
Mine's a 2006 TD4
 
I had to snap the front rivets off as one was directly under the AC pump so chiselled it off. Now stuck trying to get the AC pump bolts out. The front one that is directly over the alloy subframe seams to rounded but can't see it so all done blind. What a nightmare. Plus coolent pipe needs removed to get one of the other bolts out. Can't even find the 3rd bolt. Any tips or ideas would be appreciated.v
 
I had to snap the front rivets off as one was directly under the AC pump so chiselled it off. Now stuck trying to get the AC pump bolts out. The front one that is directly over the alloy subframe seams to rounded but can't see it so all done blind. What a nightmare. Plus coolent pipe needs removed to get one of the other bolts out. Can't even find the 3rd bolt. Any tips or ideas would be appreciated.v
Welcome to LandyZone. Change your location to something a bit more generic. :)
 
The front one that is directly over the alloy subframe seams to rounded but can't see it so all done blind.
The alloy guard is unbolted as a unit. The rivets are used to assembly it in the factory, as they're not designed to be removed in maintenance. The bloody thing comes off as a unit. :confused:
Here's a picture of the bolt positions.
Screenshot_20190406-110313_Samsung Internet.jpg

What a nightmare.
It takes 10 minutes to remove the sump guard, as long as the bolts come out.;)

Any tips or ideas would be appreciated.v
What are you trying to do?
 
Last edited:
Back
Top