You are using an out of date browser. It may not display this or other websites correctly.
You should upgrade or use an alternative browser.
You should upgrade or use an alternative browser.
Are the Differential Assemblies the same from 99 to 2004 Discovery 2?
- Thread starter mcbrl
- Start date
This site contains affiliate links for which LandyZone may be compensated if you make a purchase.
sierrafery
Well-Known Member
- Posts
- 18,311
- Location
- Arad/Romania
Yes, they are
- Posts
- 47,775
- Location
- East Dorset
The hubs are not quite the same in that front ones need a big nitrile seal whereas the rears don't but also the fittings on , as well as the length of, the speed sensor cables are different. I had to ride around with a front hub on the rear for a while, bit of a pain. But swopped them around in the end so all was better.Great, thanks!
Now, regarding front and hear differential assemblies, the only difference would be the three / four bolt flange?
And Front/Rear Wheel Hub Assemblies are the same, except for the length of the ABS cable?
Would you mind telling us why you are asking about the flanges? Are you going to fit a front diff to the rear or vice versa?
The hubs are not quite the same in that front ones need a big nitrile seal whereas the rears don't but also the fittings on , as well as the length of, the speed sensor cables are different. I had to ride around with a front hub on the rear for a while, bit of a pain. But swopped them around in the end so all was better.
Would you mind telling us why you are asking about the flanges? Are you going to fit a front diff to the rear or vice versa?
I did find a used front one in a scrap yard near me. Although they tell it is "fine" I can't trust it (if you follow Vera/Christian's channel, I believe used parts here have the same problems).
However, I thought of buying that to be able to open it up, and examine it on a "bench setup", so I can learn what to expect when I remove mine. I am not expecting to be able use any parts (though maybe I will and that would be helpful).
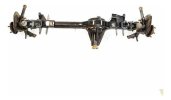
Here is a picture of the assembly - it is actually the whole assembly, including wheel bearings, the axle, etc:
This whole assembly is actually not expensive - so I thought I could use it to learn "in loco" about what I am dealing with (instead of doing that directly to mine).
Hopefully this is not too crazy
Attachments
- Posts
- 47,775
- Location
- East Dorset
Good for you. good idea to learn from a "spare".I did find a used front one in a scrap yard near me. Although they tell it is "fine" I can't trust it (if you follow Vera/Christian's channel, I believe used parts here have the same problems).
However, I thought of buying that to be able to open it up, and examine it on a "bench setup", so I can learn what to expect when I remove mine. I am not expecting to be able use any parts (though maybe I will and that would be helpful).
Here is a picture of the assembly - it is actually the whole assembly, including wheel bearings, the axle, etc:
This whole assembly is actually not expensive - so I thought I could use it to learn "in loco" about what I am dealing with (instead of doing that directly to mine).
Hopefully this is not too crazy
Do you have a dial test indicator? If so, with a magnetic stand you will be able to measure the backlash between the crown wheel and the pinion drive gear.
I had to do that when I took my Discovery 1 rear differential off. Fortunately I already had the tools, except for the one to remove the centralising peg from the pinion flange. That part of the job can be a real sod. in the Haynes they said they used a slide hammer, well good for them it must have been very heavy and handled by a big gorilla! Because I tried that, and freeing off fluid and heat, (not too much) and none of those worked.
In the end I made up a spacer from an old large box spanner cut down and lots of big thick washers so I could put 8 mm threaded bar in the threaded hole and then wind it out using nuts, into the space in the box spanner. Much easier and cheaper than buying the special tool.
I cannot remember what the backlash needs to be and it might be a tad different on a Disco 2 but I think 6 or 7 thousands of an inch sticks in my mind.
If you are scared of doing the measurement of the backlash etc, just mark the nut on the end of the pinion and it's position it sits at on the diff casing and bolt it back up to this position, it should be OK. Mine had come loose (Thanks Mr Dumbmech!) so I had to tighten it while checking the backlash. But you may well not have to go as far as undoing the pinion nut.
Best of luck!
sierrafery
Well-Known Member
- Posts
- 18,311
- Location
- Arad/Romania
For the diff there are rebuild kits available so you can fix it before fitting
Good for you. good idea to learn from a "spare".
Do you have a dial test indicator? If so, with a magnetic stand you will be able to measure the backlash between the crown wheel and the pinion drive gear.
I had to do that when I took my Discovery 1 rear differential off. Fortunately I already had the tools, except for the one to remove the centralising peg from the pinion flange. That part of the job can be a real sod. in the Haynes they said they used a slide hammer, well good for them it must have been very heavy and handled by a big gorilla! Because I tried that, and freeing off fluid and heat, (not too much) and none of those worked.
In the end I made up a spacer from an old large box spanner cut down and lots of big thick washers so I could put 8 mm threaded bar in the threaded hole and then wind it out using nuts, into the space in the box spanner. Much easier and cheaper than buying the special tool.
I cannot remember what the backlash needs to be and it might be a tad different on a Disco 2 but I think 6 or 7 thousands of an inch sticks in my mind.
If you are scared of doing the measurement of the backlash etc, just mark the nut on the end of the pinion and it's position it sits at on the diff casing and bolt it back up to this position, it should be OK. Mine had come loose (Thanks Mr Dumbmech!) so I had to tighten it while checking the backlash. But you may well not have to go as far as undoing the pinion nut.
Best of luck!
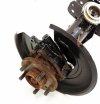
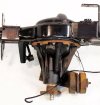
Well, I went there to take a look, it looks more "rusty" than I anticipated. Wondering if it would be useful at all...
They don't have information regarding the reason why the car was scrapped.
Does anybody have experience with this? Can I expect the differential gears to be rotten/rusty, to the point they are completely gone thus defeating the purpose of using this piece as a learning testbed? I see the discs and wheel are toast (or can they be recovered, apart from the bearings?)
They would not let me take additional pictures but sent me new ones from their website - see attached
Cheers
Attachments
Anaconda
Well-Known Member
- Posts
- 5,295
- Location
- Thames Valley
Thought you were looking at the front axle?Well, I went there to take a look, it looks more "rusty" than I anticipated. Wondering if it would be useful at all...
They don't have information regarding the reason why the car was scrapped.
Does anybody have experience with this? Can I expect the differential gears to be rotten/rusty, to the point they are completely gone thus defeating the purpose of using this piece as a learning testbed? I see the discs and wheel are toast (or can they be recovered, apart from the bearings?)
They would not let me take additional pictures but sent me new ones from their website - see attached
Cheers
- Posts
- 47,775
- Location
- East Dorset
What I don't understand about all this is that bits of it look really shiny and good but other bits look crusty and not so good. If there is oil still in the diff I would take a chance on it. If not not! It all depends on how it has been stored.Well, I went there to take a look, it looks more "rusty" than I anticipated. Wondering if it would be useful at all...
They don't have information regarding the reason why the car was scrapped.
Does anybody have experience with this? Can I expect the differential gears to be rotten/rusty, to the point they are completely gone thus defeating the purpose of using this piece as a learning testbed? I see the discs and wheel are toast (or can they be recovered, apart from the bearings?)
They would not let me take additional pictures but sent me new ones from their website - see attached
Cheers
Thought you were looking at the front axle?
In the end they had both (front and rear) on their yard
What I don't understand about all this is that bits of it look really shiny and good but other bits look crusty and not so good. If there is oil still in the diff I would take a chance on it. If not not! It all depends on how it has been stored.
Exactly - but in person it all covered in a lot of dust. I guess it has been sitting there for a while.
I agree about the oil but I can't check it - it is "take it as it is" - can't open it up to check
This has led me to another rabbit hole of people restoring rusty things on YouTube
- Posts
- 47,775
- Location
- East Dorset
TBH if they are not prepared for you to have a look then they are deffo trying to flog you a pig in a poke, so I'd leave well alone.Exactly - but in person it all covered in a lot of dust. I guess it has been sitting there for a while.
I agree about the oil but I can't check it - it is "take it as it is" - can't open it up to check
This has led me to another rabbit hole of people restoring rusty things on YouTube
TBH if they are not prepared for you to have a look then they are deffo trying to flog you a pig in a poke, so I'd leave well alone.
Yes
Well, let's keep investigating - hopefully it is not the transfer case.
- Posts
- 47,775
- Location
- East Dorset
Do you mind telling us what the original problem is/was that set you off looking at replacing diffs?
Do you mind telling us what the original problem is/was that set you off looking at replacing diffs?
You were helping me on the other thread (noise from rear when coasting)

Disco 2 - Noise from rear when coasting
Hi there, posting this here to get help I have a noise coming from the rear that only appears when coasting - I recorded a video, hopefully people can hear it well: Things I have already did myself: - replaced front driveshaft with new one - replaced rear driveshaft ujoints - greased...
 www.landyzone.co.uk
- Posts
- 47,775
- Location
- East Dorset
OK.You were helping me on the other thread (noise from rear when coasting)

Disco 2 - Noise from rear when coasting
Hi there, posting this here to get help I have a noise coming from the rear that only appears when coasting - I recorded a video, hopefully people can hear it well: Things I have already did myself: - replaced front driveshaft with new one - replaced rear driveshaft ujoints - greased...www.landyzone.co.uk

Replacing a diff without sripping it is very easy, if you have to change the flange, more difficult.
But then we know that you are now looking at the handbrake drum.
Re that, it would or should be tested at no more than 20 mph, try it when going too fast could possibly tear the doughnut I suppose.
Don't know though, have never tested one to destruction!
"
Using a decelerometer
If the vehicle or system cannot be tested on a roller brake tester, set up the decelerometer in the vehicle as instructed by the equipment manufacturer.- Drive the vehicle on a level road at a steady speed of approximately 20mph (32kph) and progressively apply the parking brake to maximum."
From the gov.uk MOT testers handbook.
OK.
Replacing a diff without sripping it is very easy, if you have to change the flange, more difficult.
But then we know that you are now looking at the handbrake drum.
Re that, it would or should be tested at no more than 20 mph, try it when going too fast could possibly tear the doughnut I suppose.
Don't know though, have never tested one to destruction!
"
Using a decelerometer
If the vehicle or system cannot be tested on a roller brake tester, set up the decelerometer in the vehicle as instructed by the equipment manufacturer.
- Drive the vehicle on a level road at a steady speed of approximately 20mph (32kph) and progressively apply the parking brake to maximum."
From the gov.uk MOT testers handbook.
I am glad I did that test at low speeds
Similar threads
- Replies
- 15
- Views
- 2K
- Replies
- 18
- Views
- 3K
- Replies
- 3
- Views
- 2K


