A loose bolt on CAM sensor

This site contains affiliate links for which LandyZone may be compensated if you make a purchase.

ajfarrell

Active Member
Posts
124
Hey Landy Lovers,

Just doing a service to try get to bottom of a hard start issue.

So far… did a leak back test on injectors and no major sign of leak. Next to dig deeper and change out gaskets and clean EGR valve.

Next up to change high pressure fuel regulator seal.

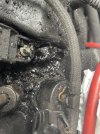
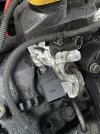
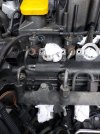
I just changed the CAM position sensor, but the bolt won’t catch the thread when securing back, just runs free in the hole. It only has an 8Nm pressure rating but can’t get any lock on it at all. Bolt shown attached, it’s the same size as the injector wiring harness clamps.

Any ideas to fix, with trying a slightly larger bolt of same thread style and length?

Also noticed allot of carbon build up near the sensor, maybe it’s leaking because not secured in place? Please see photos.

Many thanks,
Anthony
 

Attachments

  • IMG_0758.jpeg
    IMG_0758.jpeg
    528.9 KB · Views: 62
  • IMG_0762.jpeg
    IMG_0762.jpeg
    499.8 KB · Views: 53
  • IMG_0768.jpeg
    IMG_0768.jpeg
    394.3 KB · Views: 56
That is the wrong bolt.
If it is the same as the plastic clamps then it is a self tapping screw.

The cam sensor is held with a threaded bolt.

Check the hole and seen if the thread is undamaged.
From memory it should have a 10mm head size and be a parallel shank bolt.
 
That looks like the same bolt head as in mine, I've never taken it out so couldn't tell you if it's a self tappers or 6mm thread, see pic.
 

Attachments

  • 20201030_113550.jpg
    20201030_113550.jpg
    431.3 KB · Views: 46
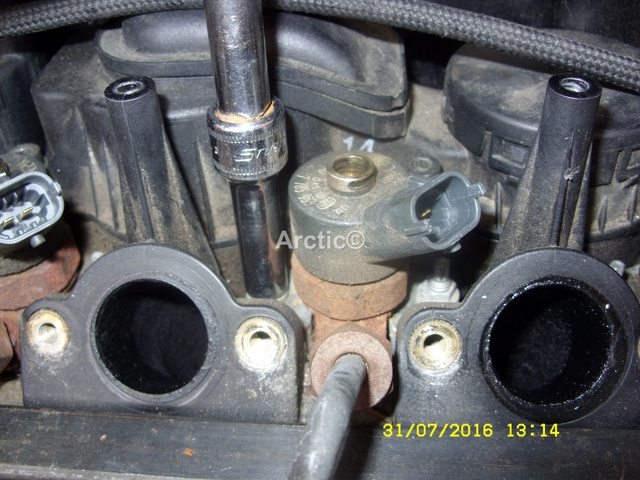
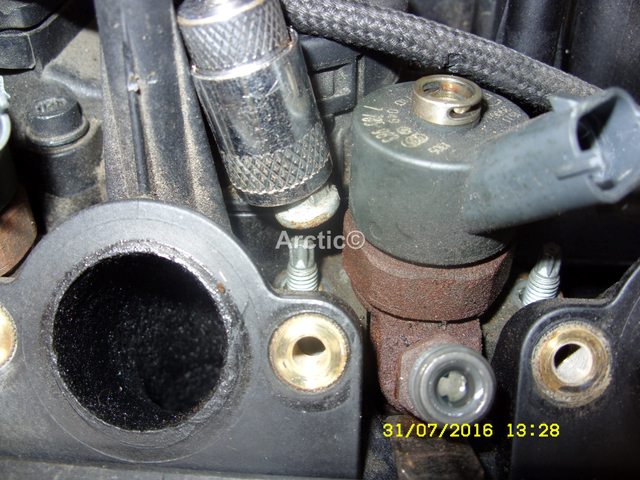
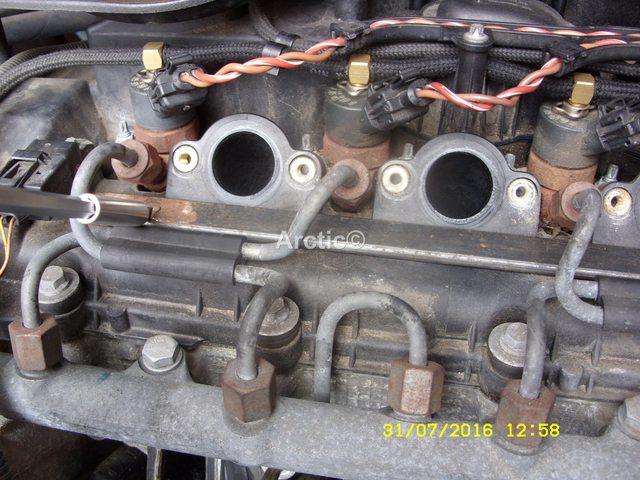
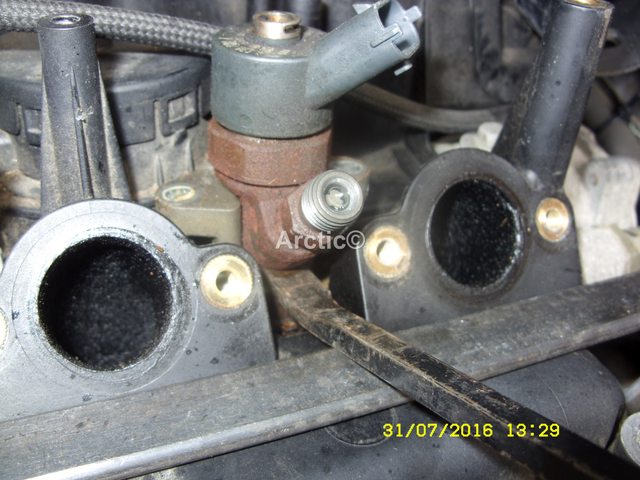
It's the correct bolt/torx a 5mm socket will undo and tighten it up, if no torque then it is nip up and a 1/4 turn always worked for me.
1x7tR8Il.jpg
1

It is similar to the torx holding the injection wiring.
fzCPiyVl.jpg
2

K4ATYOPl.jpg
3

Remove it and check if you have any plastic swarf on the thread if so then the thread in the cam cover is damaged, you may have to move up to the next size, or re-tap it.

RMBU6n8l.jpg
4

What is all that black gunk sealant in the void of injector 1 i wonder if it is leaking from the T joint
 
That looks like the same bolt head as in mine, I've never taken it out so couldn't tell you if it's a self tappers or 6mm thread, see pic.
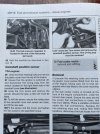
Thanks Andy - yeah looks there very same as the original and similar up the fuel rail harness you took off on that photo - it’s listed as Torx screw in Haynes. Any chance anyone could please check socket size for cam sensor torx one on their freelander? Can’t find anything online atm.
 

Attachments

  • image.jpg
    image.jpg
    472.5 KB · Views: 37
It's the correct bolt/torx a 5mm socket will undo and tighten it up, if no torque then it is nip up and a 1/4 turn always worked for me.
1x7tR8Il.jpg
1

It is similar to the torx holding the injection wiring.
fzCPiyVl.jpg
2

K4ATYOPl.jpg
3

Remove it and check if you have any plastic swarf on the thread if so then the thread in the cam cover is damaged, you may have to move up to the next size, or re-tap it.

RMBU6n8l.jpg
4

What is all that black gunk sealant in the void of injector 1 i wonder if it is leaking from the T joint
Magic thanks Artic,

I’ll check thread as suggested may have to go up a thread size and nip it.

I’ll observe with kitchen paper wrapped around the t joints to see if one is leaking.

Onwards and upwards!
Cheers gents,
A
 
It's the correct bolt/torx a 5mm socket will undo and tighten it up, if no torque then it is nip up and a 1/4 turn always worked for me.
1x7tR8Il.jpg
1

It is similar to the torx holding the injection wiring.
fzCPiyVl.jpg
2

K4ATYOPl.jpg
3

Remove it and check if you have any plastic swarf on the thread if so then the thread in the cam cover is damaged, you may have to move up to the next size, or re-tap it.

RMBU6n8l.jpg
4

What is all that black gunk sealant in the void of injector 1 i wonder if it is leaking from the T joint
Are they brass t-joints you have Artic?
 
All that 'brown gunk' is caused by injector seal blowpast, you need to remove the injector, clean the bore, possibly recut the seat and check the port for the injector tip hasn't been burnt away by venturi effect. Best case is a new injector seal & fixing bolt, worst case is a cylinder head.
 
All that 'brown gunk' is caused by injector seal blowpast, you need to remove the injector, clean the bore, possibly recut the seat and check the port for the injector tip hasn't been burnt away by venturi effect. Best case is a new injector seal & fixing bolt, worst case is a cylinder head.
Thanks G, I tried removing the most likely offending injector but noticed the torx bolt is sheered, so up a creek without a socket!

Any ideas how to remove without having to bring in the professionals?

Cheers 👍
 
Torx bolt? there should be 2 x M6 nuts (10mm A/F) on the studs, there is an external Torx on top of the studs but if that's been sheared off, that won't stop you removing the nuts. I'd suggest getting a can of Liqui-Moly 3379 (exactly that, not a cheap equivalent) and dissolving all the carbon with that before going any further.
 
Torx bolt? there should be 2 x M6 nuts (10mm A/F) on the studs, there is an external Torx on top of the studs but if that's been sheared off, that won't stop you removing the nuts. I'd suggest getting a can of Liqui-Moly 3379 (exactly that, not a cheap equivalent) and dissolving all the carbon with that before going any further.
As above remembering before you remove any injector that you clean around it first, you do not want any debris falling into the injector ports.

The two little nuts holding the collar of the injector are or should be 8mm
q3m74aZl.jpg
1

5ptqkHal.jpg
2

always make sure the engine is hot when removing the injectors, and use a flat bar to pry off, so you do not crack or hole the cam cover.
A786ABdl.jpg
3

bO2JjPal.jpg
4

When the injector is removed make sure the cooper washer comes out with it, a new one must always be fitted, and clean the port out, i have an adapted hand held hoover for that job.
jdPEVQEl.jpg
5

This is the tool i made for removing washers that get stuck or stay in the injector port hole, 9mm all thread bent with a rubber handle on it.
7NJi2ZQl.jpg
6

CBX3Rl2l.jpg
7

It is inserted and turned slowly so it picks up the washer.

m8zzjwrl.jpg
8

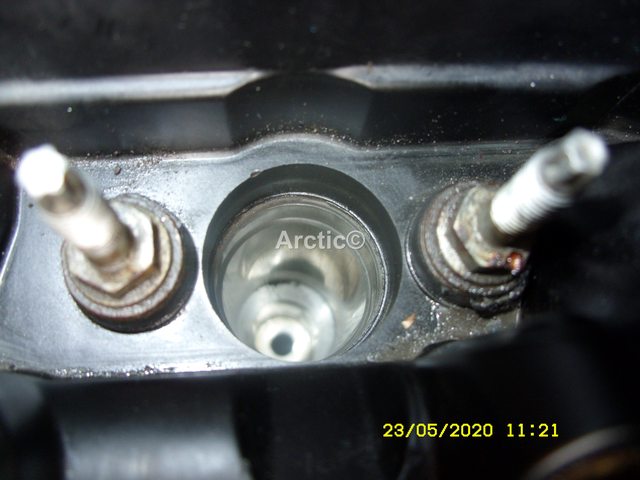
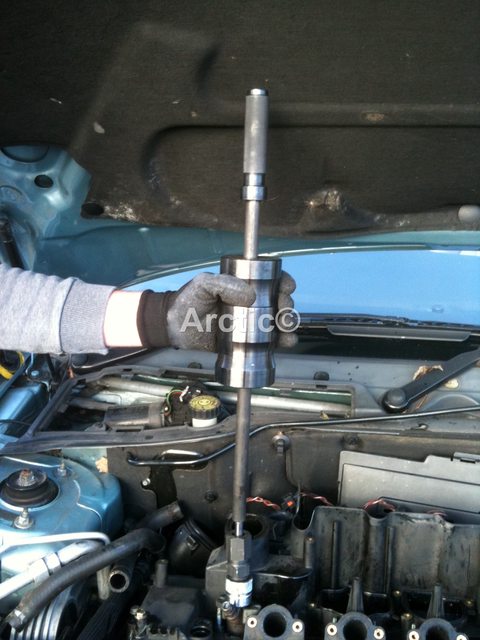
Sometimes a slide hammer is needed for hard to remove injectors.
fYWLWpEl.jpg
9

cvitZyXl.jpg
10

do let us know how you get on.

Yes brass T injector joints.

Others maybe found on the net.
Fantastic thanks very much 👍
 
As above remembering before you remove any injector that you clean around it first, you do not want any debris falling into the injector ports.

The two little nuts holding the collar of the injector are or should be 8mm
q3m74aZl.jpg
1

5ptqkHal.jpg
2

always make sure the engine is hot when removing the injectors, and use a flat bar to pry off, so you do not crack or hole the cam cover.
A786ABdl.jpg
3

bO2JjPal.jpg
4

When the injector is removed make sure the cooper washer comes out with it, a new one must always be fitted, and clean the port out, i have an adapted hand held hoover for that job.
jdPEVQEl.jpg
5

This is the tool i made for removing washers that get stuck or stay in the injector port hole, 9mm all thread bent with a rubber handle on it.
7NJi2ZQl.jpg
6

CBX3Rl2l.jpg
7

It is inserted and turned slowly so it picks up the washer.

m8zzjwrl.jpg
8

Sometimes a slide hammer is needed for hard to remove injectors.
fYWLWpEl.jpg
9

cvitZyXl.jpg
10

do let us know how you get on.

Yes brass T injector joints.

Others maybe found on the net.
Thanks Artic,

Managed to remove three injectors, clean and replace the washers, each looked in great condition.

The first injector - drivers side of engine block - where the gunk build up was, was ‘impossible’ to budge. Worked on it for 4 hours and no joy at all.

So looks like a slide hammer may be needed!

Is there a single size available rather than buying a full kit?

Cheers,
Anthony
 

Attachments

  • IMG_0818.jpeg
    IMG_0818.jpeg
    478.3 KB · Views: 25
As above remembering before you remove any injector that you clean around it first, you do not want any debris falling into the injector ports.

The two little nuts holding the collar of the injector are or should be 8mm
q3m74aZl.jpg
1

5ptqkHal.jpg
2

always make sure the engine is hot when removing the injectors, and use a flat bar to pry off, so you do not crack or hole the cam cover.
A786ABdl.jpg
3

bO2JjPal.jpg
4

When the injector is removed make sure the cooper washer comes out with it, a new one must always be fitted, and clean the port out, i have an adapted hand held hoover for that job.
jdPEVQEl.jpg
5

This is the tool i made for removing washers that get stuck or stay in the injector port hole, 9mm all thread bent with a rubber handle on it.
7NJi2ZQl.jpg
6

CBX3Rl2l.jpg
7

It is inserted and turned slowly so it picks up the washer.

m8zzjwrl.jpg
8

Sometimes a slide hammer is needed for hard to remove injectors.
fYWLWpEl.jpg
9

cvitZyXl.jpg
10

do let us know how you get on.

Yes brass T injector joints.

Others maybe found on the net.
Hi Artic,

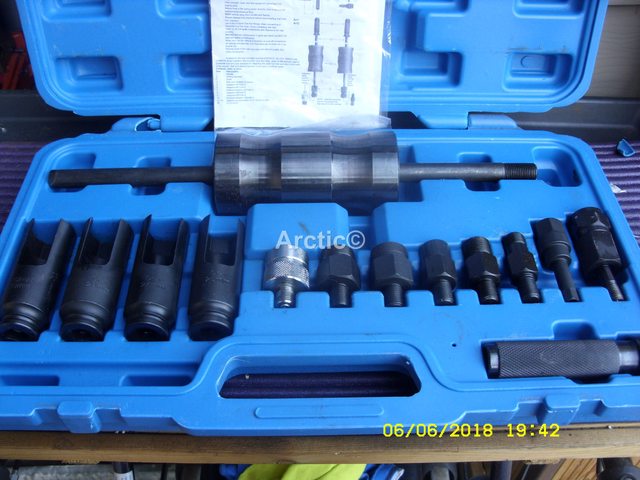
Will this kit do the trick?


Cheers,
A
 
Thanks Artic,

Managed to remove three injectors, clean and replace the washers, each looked in great condition.

The first injector - drivers side of engine block - where the gunk build up was, was ‘impossible’ to budge. Worked on it for 4 hours and no joy at all.

So looks like a slide hammer may be needed!

Is there a single size available rather than buying a full kit?

Cheers,
Anthony
Use the Liqui-Moly stuff I mentioned earlier.
 
Hi Artic,

Will this kit do the trick?


Cheers,
A
Yes that is the slide hammer I have, you could of cause if you have fitted the injectors taken out, try this undo the collar injector nuts a little with the nuts half way up the thread, start the car or crank it a few times and see if the injector will pop up a little, if not then hammer is the way forward, or even try what (Graculas) as suggested but i would imagine that could take some time? never used so can not really say.
 
Yes that is the slide hammer I have, you could of cause if you have fitted the injectors taken out, try this undo the collar injector nuts a little with the nuts half way up the thread, start the car or crank it a few times and see if the injector will pop up a little, if not then hammer is the way forward, or even try what (Graculas) as suggested but i would imagine that could take some time? never used so can not really say.
Hi artic, how do you Connect the slide hammer to the injector? The cable connector at top is in way of connecting as shown b in your photo?
 
As above remembering before you remove any injector that you clean around it first, you do not want any debris falling into the injector ports.

The two little nuts holding the collar of the injector are or should be 8mm
q3m74aZl.jpg
1

5ptqkHal.jpg
2

always make sure the engine is hot when removing the injectors, and use a flat bar to pry off, so you do not crack or hole the cam cover.
A786ABdl.jpg
3

bO2JjPal.jpg
4

When the injector is removed make sure the cooper washer comes out with it, a new one must always be fitted, and clean the port out, i have an adapted hand held hoover for that job.
jdPEVQEl.jpg
5

This is the tool i made for removing washers that get stuck or stay in the injector port hole, 9mm all thread bent with a rubber handle on it.
7NJi2ZQl.jpg
6

CBX3Rl2l.jpg
7

It is inserted and turned slowly so it picks up the washer.

m8zzjwrl.jpg
8

Sometimes a slide hammer is needed for hard to remove injectors.
fYWLWpEl.jpg
9

cvitZyXl.jpg
10

do let us know how you get on.

Yes brass T injector joints.

Others maybe found on the net.
How did you remove the injector head cap in photo - the side hammer socket won’t allow unscrewing it as the oil housing is in the way?

Cheers,
A
 
How did you remove the injector head cap in photo - the side hammer socket won’t allow unscrewing it as the oil housing is in the way?

Cheers,
A
I will double check tomorrow it's been so long now 2012 i think it was, will need to go through my photos, but i think once you have got it started the top unscrews.
 
Back
Top