2nd try- T Max split charger system users.. please cast an eye and share thoughts!!

This site contains affiliate links for which LandyZone may be compensated if you make a purchase.
Go for a durite VSR (Unless you have a 'smart alternator) about £40 (or £70 with cables/fuses etc)

Simple to fit AND ultra reliable .
I have fitted several with no problems including the one that helps to charge the 3 x 100ah leisure batteries in our Transit camper ...along with 2 x 100w solar panels on the roof .
Runs a 3000w inverter to power microwave/kettle/slow cooker/toaster etc
Batteries also power eberspacher and Waeco coolbox without any need for hook up .

--------------------———

many thks for the info , really helpful and will check that out

pretty sure i haven't got the smart alternator, mine will produce the 14.5 volts which i believe the later ones don't ??

alternator fitted on mine is 150amps

got an exide crank battery 100 a/h 900 cca , only a few months old

later on i wish to get a deep cycle agm battery , got an aux battery tray the other side of the engine bay which is very handy , did wonder if i should hook up a solar system to the aux battery so it can top it up when the engine is off

so as i'm using the aux battery , the solar may provide a small amount of recharge to it , until i start the engine

before i fit the aux system i'm going to look for a solar kit with a controller , to fit on my main crank battery as i sometimes don't use my landy for a few weeks , maybe a 30 watt panel

it is all new to me so been seeing plenty of reading, lol
 
The Durite VSR will close and supply charge to the starter battery when the Aux is fully charged by solar etc .

many thks, just been reading up about that through the web site , is indeed a simple but clever system

if i'm reading it right , with the engine off it will automatically switch over to the aux battery , therefore won't flatten my main battery

with the solar regulator fitted is it therefore ok to leave it permanently connected with the engine running , i.e. won't do any harm to the solar system

which battery is it better to connect the solar to , basically if the crank battery is flat from leaving the vehicle for a few weeks would it automatically switch over to the aux battery or would i have to do that manually by adding a wire plse

thks again and apologies asking the dim questions
 
The VSR basically automatically connects the starter battery to the aux battery/ies and allows the aux to be charged by the alternator when the engine is running and the starter battery has been charged ...
With the engine off the relay disconnects so the aux battery/ies and loads on them cannot draw current from the starter ...
IF you then fully charge the aux battery/ies via solar/wind/external charger the VSR will connect the batteries together again and allow excess charge to be applied to the starter as well .
Essentially the solar charge controller does pretty much the same job as the regulator on the alternator ...SO either or both will look after how much charge is going into the batteries .
Doesnt really make too much difference which battery you are feeding charge into as long as you have a VSR fitted BUT I'd connect the solar into whichever you consider to be most important to you (IF you are fitting solar mainly to keep the starter battery topped up then wire to starter IF it's mainly (as in my case) for habitation power then connect the solar to the aux battery .
As a guide I work on watts being equal to the AH rating of the battery ...(I really need to stick another 100w panel to match the 300ah of leisure batteries we have ) I get about 10 amps on a good sunny day and 6 amps on a average sun day .

that's brilliant and actually understand that , many thks

that's some serious amount of battery storage u have, but seeing u use it for camping an ideal amount for ur needs

my battery is 100ah , so 100 watts will be ok, seeing it will be attached to a solar regulator

wish to put a solar panel on the back boot side window , only trouble is the window is tinted , haven't got any sunroofs , but suppose when i get a panel can attach my multimeter , move it around the landy to see what location is the best and what kind of volts i get through the tinted window

may i ask where did u get ur solar regulator and voltage unit from please

once again many thks for the information

will post some pics etc up of the installation when i get round to it
 
Tinted windows will cut down on the amount of power you get ....
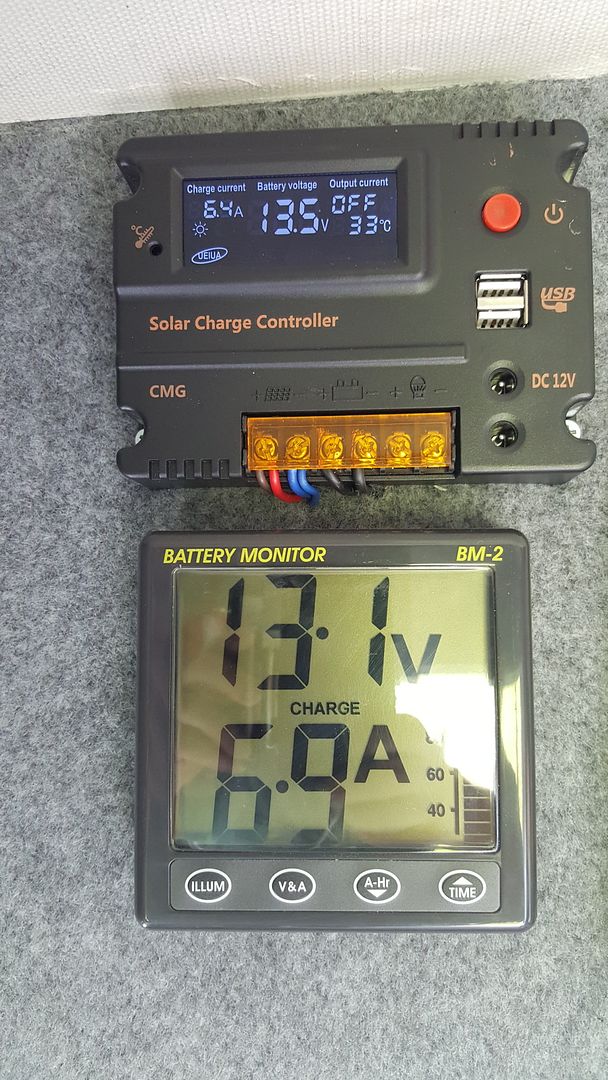
solar controller was a cheap 20 amp PWM type (about £20) not as efficient as a MPPT type BUT vastly cheaper
NASA BM2 battery monitor was about £100 again from Ebay ...expensive BUT makes sure you can monitor battery states to make sure we dont over discharge them beyond the theoretical 50% safe discharge rate .

thks, it's not a heavy tint but of course understand it will cut the power down

will have a look ref the regulator and monitor , understand what u mean now ref the discharge levels as i believe u mustn't allow agm leisure batteries to go flat or as u say beyond 50% , will check out what amp rating of regulator i need , know 20 amps will easily cover a 200 watt panel

also will be limited in a way to the size of the solar panel according to the size of window

is it better to fit the controller near as possible to the battery and extend the solar panel wires , thought of fitting the unit inside my top glove box, plenty of room and then will be a case of going straight through the bulkhead to the main and aux batteries

ref the discharge meter could always try and wire some form of alarm , to warn of low discharge
 
Closer to the battery the better BUT I kept mine where it was visible.
Plenty of cheaper options regarding battery useage out there...

many thks, there isn't any where i can display the controller on my dashboard , apart from the upper glove box, got another glove box under i use for other bits so could dedicate the top one for the controller and monitor , might be able to fit. a small monitor low in the centre console , have one already in the cig lighter port which displays the voltage but good to have another one for the aux battery , could easily run a simple digital volt meter from the aux battery

put some pics of the glove box, then dashboard , also some volt gauges someone else

so then it's ok to run the wires from the controller to the panel. which would be around 10 x foot from front to back

IMG_1171.JPG
IMG_1583.JPG
IMG_0399.JPG
IMG_0814.JPG
 
Last edited:
Back
Top