200TDI Fuel Injector Removal - It's being a pig!

This site contains affiliate links for which LandyZone may be compensated if you make a purchase.

NightShadow91

Active Member
Posts
111
Location
UK
Hi all,

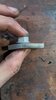
Hope all's well. I have removed 3 fuel injectors and the last one at the back is proving to be a pig, I've used plusgas, heat, slide hammer, it hasn't even moved a mm, maybe 1mm, not sure ha. I will try again tomorrow, but I guess the only way if it's stuck is removing the head and gently knocking out from the inside? Which I don't want to do, but fear I might have to.

Thanks in advance.
Jim
 
Can you get it turning?
It runs fine, I think the spray pattern was the issue, as upon revving hard, it would almost stall. So decided to just take out all 4 injectors and get them refurbed. I could put the 3 I've taken out back to get it running again, attach leak off pipes etc, but would rather avoid. Is it best removing them after running for a bit? Cheers
 
Can you get it turning?
Oh sorry, you mean the actual injector physically turning left and right, wiggle it? No, not really, the others did, this one though, not really. Which seemed an issue, as I'm not sure if it's be damaged or bent, though looks straight by eye. Normally when I do the slide hammer up they tend to turn a bit when tightening. This one is nicely seized.
 
Refit the three injectors, put a heavy peace of tarpaulin or something similar over the engine and start her up,
The heat and pressure will get it moving, totally against elf and safety so extreme care needed but has worked for me in the past,
 
Refit the three injectors, put a heavy peace of tarpaulin or something similar over the engine and start her up,
The heat and pressure will get it moving, totally against elf and safety so extreme care needed but has worked for me in the past,
sounds like fun, how long should i run for? ta
 
I've done that with my Sprinter - long Bosch injectors held in by a 'U' shaped clamp, much the same as the 200/300 & suffer from leakage from the cylinder blowing past the copper sealing washer at the bottom of the injector body which effectively glues the injector into position. Known in MB circles as 'The black death'.
Slackened the nut holding the clamp so some free movement - but not to allow the injector to be shot out - & started the engine.
Didn't take long at all before I could see slight movement of the injector.
You need all injectors connected up & all cylinders firing.

ETA If you need to do this job on a MB use new genuine bolts but don't bother with their copper washers. I had two leak within weeks of doing the job. They're very hard. The seats were good , so not down to damaged seats.
Found a link on the net which recommended using Honda ones & followed the instructions given.
Their copper washers are the same as MB but slightly thicker & much softer.
No issues since.
http://www.mercedes.gen.in/mercedes-diesel-injector-advice-sprinter-others/
 
Last edited:
Thanks all, I will refit the 3 injectors tomorrow and pipes and then fire up. I guess it's not worth doing, but the shaft of the slide hammer is only 200mm, maybe 240mm, I might get some mild steel round bar and drill and tap the centre and attach to the end of the current slide hammer first, as I should imagine a longer shaft would allow for much more force when pulling upwards? Or considering the lack of movement thus far, would I just be ****ing in the wind!? Thanks
 
If you have it to hand might be worth a try. Bigger sliding weight to give greater impact.
Might be worth a watch:
 
If you have it to hand might be worth a try. Bigger sliding weight to give greater impact.
Might be worth a watch:

I'll try that first as I have plenty of steel knocking about, worst comes to worst ill weld it together. I think it did budge a touch, maybe a mm or 1.5mm, but annoying that it won't turn left and right. If no joy, I'll reassemble and fire up. Thanks all, much appreciated.
 
Quick question, putting the injector clamps back in, does anyone know which way up the clamps go? I didn't check before taking them out. Say it's a dog head, the ears are slightly up turned in the tips, I think that faces up? Ha cheers
 
911570DE-3473-417D-9FDA-4315925BBB4E.jpeg
 
As you look at them they curve up from the injectors then down towards the fulcrum point,
So as you look they are convex,
 
I've done that with my Sprinter - long Bosch injectors held in by a 'U' shaped clamp, much the same as the 200/300 & suffer from leakage from the cylinder blowing past the copper sealing washer at the bottom of the injector body which effectively glues the injector into position. Known in MB circles as 'The black death'.
Slackened the nut holding the clamp so some free movement - but not to allow the injector to be shot out - & started the engine.
Didn't take long at all before I could see slight movement of the injector.
You need all injectors connected up & all cylinders firing.

ETA If you need to do this job on a MB use new genuine bolts but don't bother with their copper washers. I had two leak within weeks of doing the job. They're very hard. The seats were good , so not down to damaged seats.
Found a link on the net which recommended using Honda ones & followed the instructions given.
Their copper washers are the same as MB but slightly thicker & much softer.
No issues since.
http://www.mercedes.gen.in/mercedes-diesel-injector-advice-sprinter-others/
Thanks for the info. Going to try this tomorrow. I've out all injectors back, connected clamps to torque and fuel leak off pipes. I slightly loosened the clamp in the stuck injector, not so it's loose, just a few turns undone. I will fire up for a few mins and see what happens. I guess if it still doesn't budge, try again, but loosen but some more? Thanks
 
Sprinter type.
https://www.ebay.com/itm/Injector-S...C-Sprinter-Vito-2-0cdi-W169-W204/264884903925
Whoever thought a long thin bolt was a good idea needs stuffing! Doing them up as per MB is something of a buttock clencher & they are definitely a single use item.
If you are too enthusiastic cleaning out the bolt hole after removal you can break through the bottom of the hole into the coolant galleries! And if you don't clean out the bolt hole any dirt can prevent the new bolt seating, leading to breaking into the gallery or shearing the new bolt.......

The yellow band is sealant - standard on the genuine ones.

Slacken so the clamp has a little bit of free upward movement.
 
Last edited:
Back
Top