1976 series 3 rebuild

This site contains affiliate links for which LandyZone may be compensated if you make a purchase.
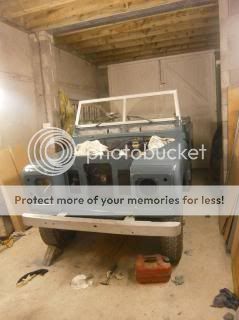
Well then, tonight Dad and I got the bonnet, wings and apron painted (again with a brush and roller). For this we just brushed the paint on and then went over it with a good quality foam roller from wilkos to get rid of the brush marks. Gave a pretty decent finish I think :)


List of jobs to do now (probably over the weekend) are:
fit front end lights,
Fit vent flaps,
fit grill,
fit bonnet,
turn roof over and paint the top
 
Last edited:
Good stuff! Can you tell it's been brush/rollered rather than sprayed?

With the first coat, if you look really really closely you can see a bit of an orange peel type effect but this is only the first coat. From about 2-3ft plus you cant really see a difference between spray and roller Going to give it a bit of t-cut when finished which will hopefully make it a bit smoother as it will probably give a finer finish than flatting back with wet and dry
 
Last edited:
Right then, today we managed to do that whole list Ii put up in the last post and got the front end practically finished. Only thing that needs doing bodywork wise is bolting the wings and wing stays up properly as there is a large gap between bonnet and wing on the passenger side.


Also got the roof rubbed down and painted in limestone tonight :) Going to do the sides when its actually on the vehicle


Tomorrow we'll hopefully all being well get the brakes bled and the roof on :)
 
Got the roof on tonight, all be it on blocks so we can stick mastic down before finally fitting it in place


The more observant amongst you may realise its facing the opposite direction to yesterday, that's because we bled the brakes this morning and my dad backed it out the garage, turned it and backed it in to make it easier to get the roof on. And yes this time I have a video of it (filmed by my brother on his phone hence the funny quality - will do a better one tomorrow with the proper camera after sorting out the tappets)


Moving the land rover out of the garage for the first time - YouTube
 
Thanks for the good comments guys :)

looking good, can you get a closeup of the paint job and where did you get the paint? :)

I will try and get a close up tomorrow after work if my camera can work enough to get a good close up shot :D

The paint is ordinary paint from paddocks straight out the tin :) I find the quality to be excellent and the paint coverage is very good too :)
 
Thanks for the good comments guys :)


I will try and get a close up tomorrow after work if my camera can work enough to get a good close up shot :D

The paint is ordinary paint from paddocks straight out the tin :) I find the quality to be excellent and the paint coverage is very good too :)

nice, lets see if you can get it all done before the snow :D
 
Been adjusting my fuel pump today as it was kicking off a lot of white smoke and running a bit lumpy (i.e. it was firing a bit too late so a lot of excess diesel was going through the exhaust)

To set the timing on the 2.5 N/A diesel, you slacken off the 3 nuts holding the pump to the front timing case just enough so you can lever the pump. Start up the engine and while its running use a long pry-bar to tilt the pump towards the wing to bring the timing in (and the opposite to make it fire later). Its amazing how much difference a little bit of pump movement makes, 1 second it was running lumpy and with a slight nudge the engine note changed for the better and the smoke started to disappear. Result now is its running far far smoother than it was in the video with no white smoke at all.

Today we also painted the roof sides in limestone (will get pics tomorrow after work and will try and get a decent video of the engine running) :)
 
This is still only the first coat remember, going to flat it back with fine wet and dry (probably something like 1200 grit and above), paint another coat and then polish that back with t-cut to get rid of the air bubbles (well thats the plan) :)
 
Back
Top