1968 series 2a restoration

This site contains affiliate links for which LandyZone may be compensated if you make a purchase.
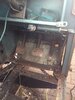
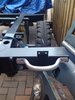
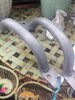
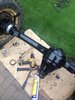
Got my dumb iron welded in place and ground back ready to paint. Haven't taken a photo yet, I also started on drivers footwell today, got the old one stripped out and I managed just (weather was really bad) in between rain showers to get new one in place. Will complete installing it tomorrow hopefully then I'm onto undercoating dumb irons and footwells then painting them a couple of coats before stripping axle down to replace swivel seals etc.
 

Attachments

  • image.jpg
    image.jpg
    315 KB · Views: 148
A few more photos of completed jobs so far, I saved the old grab handles from old crossmember that had been painted silver and l wire brushed them on the grinder before painting to look galvanised. Going to do cappings the same way. Front axle painted ready to reassemble in next few days then onto brakes.
 

Attachments

  • image.jpg
    image.jpg
    291.2 KB · Views: 174
  • image.jpg
    image.jpg
    311.4 KB · Views: 191
  • image.jpg
    image.jpg
    384.1 KB · Views: 166
A few more photos of completed jobs so far, I saved the old grab handles from old crossmember that had been painted silver and l wire brushed them on the grinder before painting to look galvanised. Going to do cappings the same way. Front axle painted ready to reassemble in next few days then onto brakes.
What paint did you use for that? They looks a lot better at imitating old galv than other paint jobs I have seen that just end up looking like cheap shiny silver..
 
Cheers, it was a bit of a "make it up as you go" sort of thing. I rubbed them back with the wire wheel then have them 3 coats of etch primer grey colour, then I sprayed them with screwfix own make of cold galvanising spray paint which I hoped would have looked more galv like, but instead it was too shiney silvery, so I then took an old paintbrush and lightly stippled a tiny drop of etch primer over the top to give it texture and build up the colour to dull the brightness of the silver, cheers, mark
 
These ones I salvaged had previously been gavanaised, I preferred the look of the galv against the satin black rear crossmember. Glad you think they look pretty authentic, looking forward to seeing the rest of the cappings done, Cheers.
 
So I got my front brakes stripped down today an cleaned the drums up and painted them along with the backing plates. When I fitted the new shoes and springs as per exiting were everything seems to work great when I doing the hub, however once the drum is back on with the two retaining screws, there's a bit of resitance there, I took them back apart and everything seems right. The snail cams adjusted to the minimum. The cylinders are new also. Any suggestions on how to get rid of the resistance ? Thanks.
 

Attachments

  • image.jpg
    image.jpg
    297.9 KB · Views: 140
Did you tap the drum with hide mallet to centralise it before tightening retaining screws
If the drum came off easily there cant be too much resistance
If it turns you will normally hear it drag a bit when adjusted up
Have you replaced snail adjusters , two sizes come in the kits , I never know which ones to use.
 
Cheers Steve. I just kept the original adjusters, do you recon that could make the difference? I did tap the drum before tightening. It's not overly tight. Just can hear when spinning the wheel, it takes a good bit of force to turn wheel and you can hear the rubbing/grinding.
 
I’ve got the 11 inch drums on front and possible to have adjusters backed off and it will spin easily with one hand and then nip adjusters up till,it drags a bit should still turn with one hand
Not that it’s related but I chamfer the shoes as I go had probs with them locking up
Does it help if you bleed when pushing the pistons back in
 
The cylinders aren't yet connected as I'm replacing the brake lines, I manually pushed the empty cylinders closed before fitting the shoes, so when the adjusters are fully closed up ie, minimum adjustment, the wheels have enough resitance to require two hands to turn the wheel. Do you think chamfering the leading edge of the shoe would make the difference? I noticed the two sizes of adjusters in the box so il see of any of these would let them sit further in slightly. First time doing drum brakes so wasn't sure how much resitance should be there.
 
Problem solved, when I took drums back off I could see where the drums had rubbed on the shoes, so I took a file to them and everything spinning freely now. Thanks for your help.
 
Finished prepping the tub, seat box and couple of other bits and gave them an etch prime. Then a high build primer then I gave them a first coat tonight with a cheap sprayer, basically i was going to brush/roller the coach ennmel on but instead I gave the sprayer a go and it turned out pretty well (I think) for a first attempt. Couple of wee runs in the internal of tub but il rub back in a couple of days and then give it another 2 coats.
 

Attachments

  • image.jpg
    image.jpg
    415.3 KB · Views: 169
  • image.jpg
    image.jpg
    371.4 KB · Views: 162
  • image.jpg
    image.jpg
    367.6 KB · Views: 150
  • image.jpg
    image.jpg
    376.9 KB · Views: 146
  • image.jpg
    image.jpg
    352.9 KB · Views: 156
Finished prepping the tub, seat box and couple of other bits and gave them an etch prime. Then a high build primer then I gave them a first coat tonight with a cheap sprayer, basically i was going to brush/roller the coach ennmel on but instead I gave the sprayer a go and it turned out pretty well (I think) for a first attempt. Couple of wee runs in the internal of tub but il rub back in a couple of days and then give it another 2 coats.
I like the colour..
 
Cheers Marmaduke! It's landrover marine blue but does look a bit darker in the photos. It was after 9 at night when I took the photos so less
Light showing up the colour.
 
I've fitted britpart overhaul brake cylinders all round and at the stage of connecting brake pipes up. I replaced them al back to the 4 way splitter at the brake pressure switch union. So I have imperial on that end at original spliter and I have changed all the other ends to
Metric, however when I fittet the britpart flexis they fitted into cylinders no problem but the rear cylinders won't accept my metric thread males. But the flexi hoses fit the threads no problem as a test, and when I then take the same flexis they then fit onto a female metric fitting as a double check. Can anyone confirm that the replacement brake cylinders from paddocks are definetely metric? Cheers
 
As far as I know, the cylinder threads are 3/8" x 24 UNF. Everything on the brakes on my 1972 Series 3 was UNF. The replacement cylinders I bought were also UNF.

M10 x 1 metric Is very close in size to this, and they can be difficult to tell apart visually.

3/8" UNF male will screw loosely into M10x1 female by hand, but will not tighten up properly.

M10x1 male will not fit into 3/8 UNF female as the UNF thread is slightly smaller.
 
Thanks for your quick reply, what confused me was that I tried one of the old unf males that I took off the original and it still didn't seem to fit the thread, that's what was confusing me. So do you recon the britpart flexis must be unf and that's why they are fitting the cylinders? Il take a new unf male tomorrow and see if that fits the cylinder.
 
Last edited:
Can anyone confirm if there's are metric or imperial ? Many thanks for any help, minds fried trying to work out threads!
 

Attachments

  • image.jpg
    image.jpg
    208.5 KB · Views: 122
Back
Top