1965 Series 2a Station Wagon in Holland

This site contains affiliate links for which LandyZone may be compensated if you make a purchase.
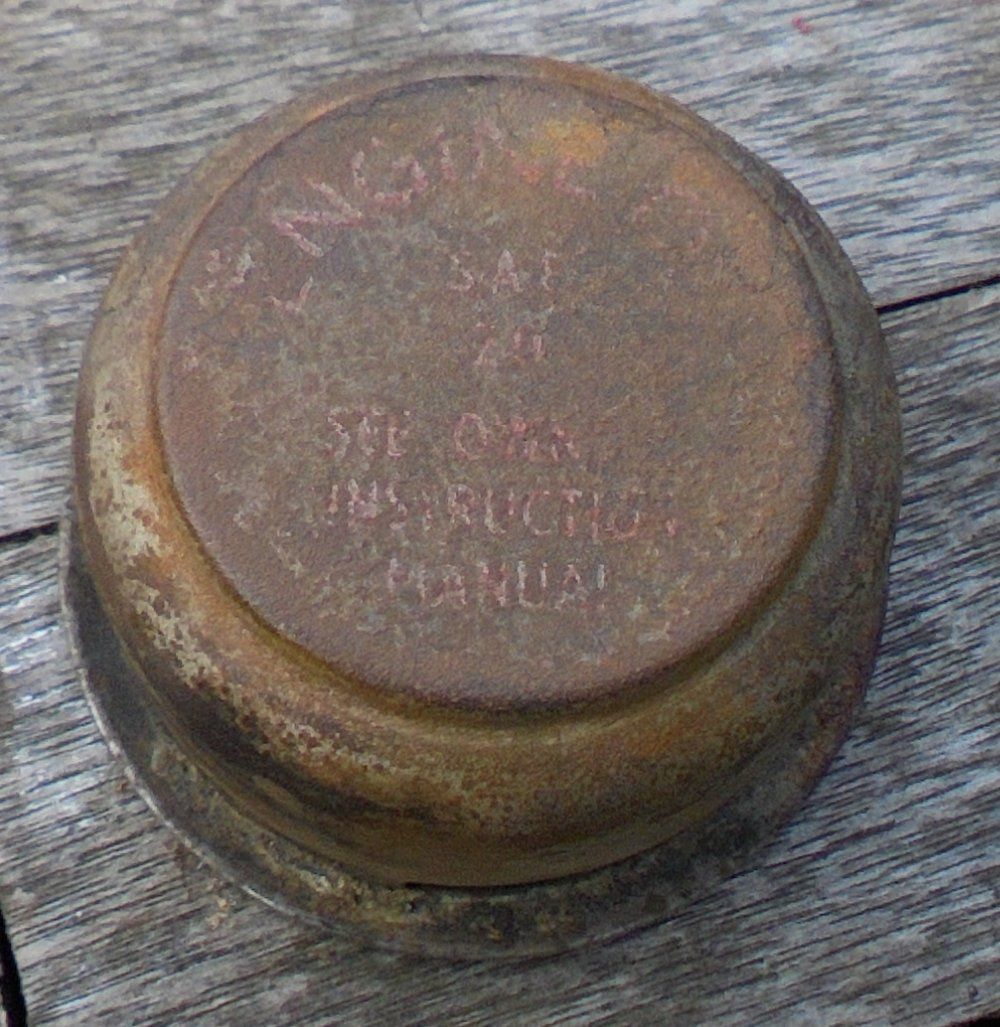
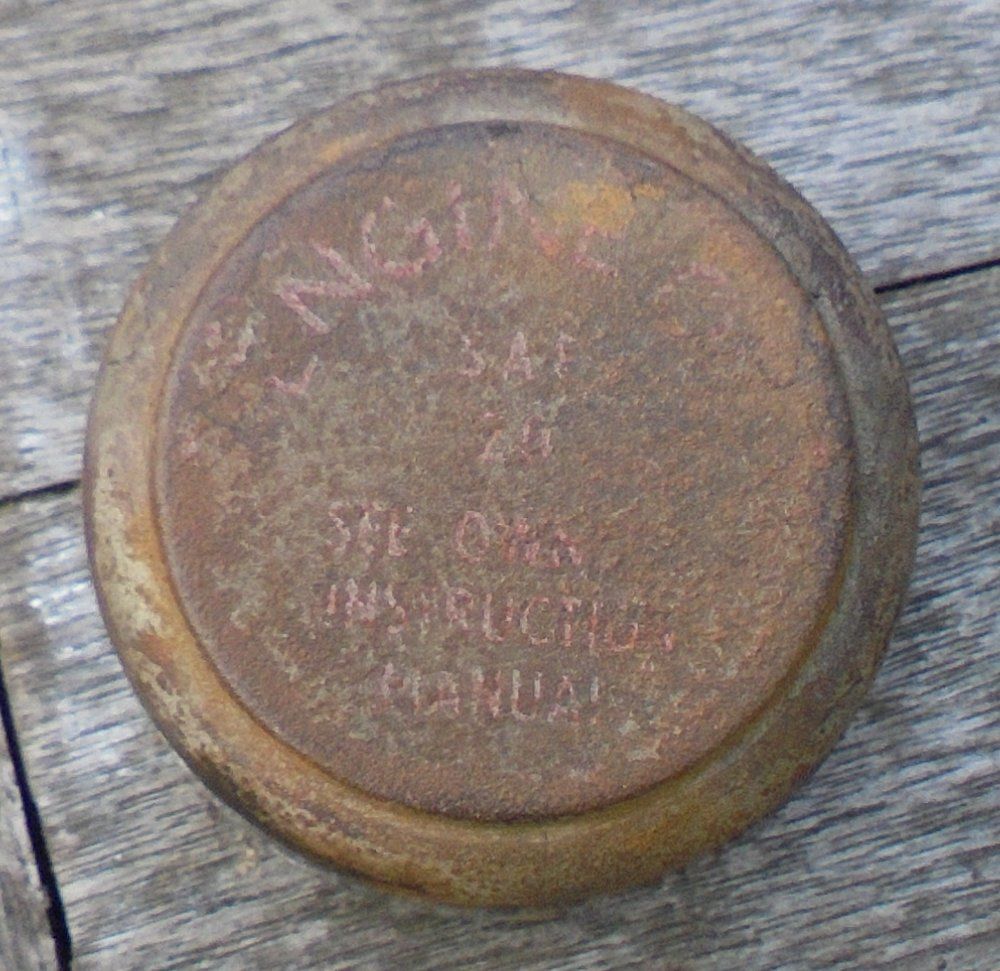
Right does any one remember this from a few pages back?

My lovely oil filler / vent cap?

1965-series-2a-station-wagon-diesel-engine-oil-filler-and-breather-cap2-jpg.103472


1965-series-2a-station-wagon-diesel-engine-oil-filler-and-breather-cap1-jpg.103471


Well I asked about (here and on the series 2 owners' club forum) about these letters and I was promptly informed about the stickers you can get on ebay =>

http://www.ebay.co.uk/itm/Land-Rove...r-Cap-Label-Decal-Red-on-White-/271797015580?

All nice and good but I'd rather have a painted version like the original.

So how on earth am I gonna do that?

...


{Lots of thinking time}


...


Step one I downloaded a copy of the picture of the sticker on ebay and put it into the following online font finding service =>

https://www.fontspring.com

This service allows you to crop the image and rotate it so you can get a better chance of finding something meaningful (other services were tried but they weren't too hot)

Anyway long story cut short - the most likely font in that website's database was one called Halifax which is a modern interpretation of "classic English sans types such as Gill and Johnston" =>

https://www.myfonts.com/fonts/hoftype/halifax/

So after a bit more faffing about on the interweb I've reached the conclusion that "Gill Sans" is gonna be a pretty good match if not the correct original font that was used.

Now it just so happens you can get Gill Sans transfers for model railway modeling purposes so perhaps there's a way forward there (but that's not much better than the sticker) =>

http://www.railtec-models.com/showitem.php?id=1303

I'd rather get some stencils...

...so any way I'm off looking for stencils so I can posh up me oil filler cap in red paint - wish me luck!


{Alternatively if any one already knows more about this please pass the gen on!}
Nice bit of detective work. That's the kind of attention to detail that makes the difference. I also like alternative solutions to problems.
 
Nice bit of detective work. That's the kind of attention to detail that makes the difference. I also like alternative solutions to problems.
I think I might have found an even easier solution to the problem - I'm waiting for a response from a laser cutting company to see if they can make a small stencil for me. Most things they do are company sign sized so I'm not sure if they can do the small stuff - lasers in my experience don't necessarily mean better=> Just think about wheel alignment machines and compare those results with time effort and bits of string!
 
'aving a go at the dynamo =>

Quick test to see if any juice comes out of it before it gets stripped down

1965 series 2a station wagon testing dynamo before strip down.JPG


Naughty naughty not an impact socket...

1965 series 2a station wagon stripping down dynamo1.JPG


(Still is isn't many many Nm from a 10.8V cordless impact driver)

Best way to remove one of those nuts though - many a time I've been faffing about with straps and locks in the cooling fins - that will only bend (!)

Carefully does it with the three legged puller - don't bend the pulley

1965 series 2a station wagon stripping down dynamo2.JPG


Shift to outer edge to give both sides a chance to bend out of shape (!)

1965 series 2a station wagon stripping down dynamo3.JPG


Removing cooling fan was a bit tricky - it had spun round on the shaft a little bit so the notch didn't line up with the woodruff key. Luckily putting the nut back on a quick twist with a ratchet handle helped to spin it back

Wiggle off by hand - no pulling tools on this bit (please)

1965 series 2a station wagon stripping down dynamo4.JPG


Woodruff key and bolts for main casing are not playing ball.

I'm leaving them to soak in penetrating oil for the night before I break out the fire.

1965 series 2a station wagon stripping down dynamo6.JPG
 
Well that doesn't happen very often (even with Mercedes spares) - second hand spare parts for sale within 3km of my house!

Saw a second dynamo advertised so went and got it for a back up just in case Mungo makes a mistake...

1965 series 2a station wagon second dynamo bought as a spare.JPG


Not is as good condition as the one I already have - yes I know - hard to believe isn't it?
 
Hmmm

I've been busy with the steering box - following the instructions in the Green book - come up with a few problems though

1965 series 2a station wagon steering box instructions.JPG


I thought I had all the bits

1965 series 2a station wagon steering box all the parts.JPG


After cleaning and fiddling with the rocker shaft and the fit in the output bearing I decided to be like Sir Robin the brave and not fit the new output shaft bearing partly because you need to hone it (apparently). The fit is good. I reckon it'll do another trip...

1965 series 2a station wagon steering box not fitting output shaft bushing.JPG


1965 series 2a station wagon steering box fitting o ring on output shaft.JPG


If you follow the instructions in the green book it says to remove the washer for the output shaft to reach the 'o' ring. I don't think this is necessary. I was hoping this washer would be in the repair kit - it isn't so I need to fit it later on after I've ordered it. Fitting the 'o' ring isn't difficult - but you need to push it in place with a match stick to make sure you don't pinch it.

1965 series 2a station wagon steering box pushing o ring into place.JPG


The book also says to fit the rocker shaft at this stage (as shown in the picture above). This is wrong as you'll see in a bit =>

Anyway being good and going back to the procedure in the green book it then says to fit the bushing on the end of the outer steering tube

The one I have is the early series 2a type

1965 series 2a station wagon steering box old type bushing near steering wheel.JPG


In the picture above the bushing on the right is the old one. There's what the book calls a sealing ring that needs to go on the new one - this is more what I consider to be a spring clip: Go careful if you fit one the bushing is a paper based item...

...fitting it to the outer steering tube =>

1965 series 2a station wagon steering box fitting upper bush1.JPG


1965 series 2a station wagon steering box fitting upper bush2.JPG


I used a hammer and a block of wood (no mention of a method in the book)

1965 series 2a station wagon steering box fitting upper bush3.JPG


Before fitting the inner shaft (the bit with the worm gear that I bought new <= eeeek!) I greased it all up a bit so the new shaft didn't knacker the bushing as I pushed it though

1965 series 2a station wagon steering box greasing upper bushing.JPG
 
Steering box continued:

Next you need to think about fitting the inner bearing cup for the end of the inner (worm geared) steering shaft

1965 series 2a station wagon steering box fitting bearing race for inner shaft.JPG


(make sure you get it the right way round!)

Sliding this shaft in through the expensive bushing at the top of the outer steering column tube is a bit scary - despite the greasing shown above

Next up fitting the first of the bearings

1965 series 2a station wagon steering box fitting inner shaft bearings1.JPG


I'm using grease to hold me balls in place

1965 series 2a station wagon steering box fitting inner shaft bearings2.JPG


The main casing will go on top of the outer tube in a bit - I'm using hylomar as a gasket dressing

1965 series 2a station wagon steering box using hylomar as gasket dressing.JPG


Book says to then fit the large ball bearings to the main nut assembly

1965 series 2a station wagon steering box fitting main nut bearings2.JPG


1965 series 2a station wagon steering box fitting main nut bearings3.JPG


The order of assembly in the book is wrong at this point as it says to carefully fit the main nut to the inner steering shaft worm

You can't do this however if you've been good as the rocker shaft will be in the way!

1965 series 2a station wagon steering box problem with the instructions.JPG


To get round it I pulled the rocker shaft out the way =>

1965 series 2a station wagon steering box fitting the main nut to inner shaft.JPG
 

Attachments

  • 1965 series 2a station wagon steering box problem with the instructions.JPG
    1965 series 2a station wagon steering box problem with the instructions.JPG
    165.5 KB · Views: 170
Steering box continued (again):

If you rely on the rebuild kit you'll find that there are not enough gaskets. You need one for the steering column tube connection to the main casing and two for either side of the shims for the bottom plate (you only get 2 in the kit)

1965 series 2a station wagon steering box not enough gaskets in repair kit.JPG


Again (this season) all the shims and the gaskets are being dressed in Hylomar

I hope this makes a leak free unit (!)

Pushing the rocker shaft into position =>

1965 series 2a station wagon steering box main nut and rocker arm fitted.JPG


Pushing that bloody 'o' ring back into place again

1965 series 2a station wagon steering box fitting o ring on output shaft again.JPG


Now greasing up and fitting the lower bearings for the inner steering shaft (the wormed one)

1965 series 2a station wagon steering box fitting lower bearing race on inner shaft1.JPG


The end play and stiffness of the shaft is adjusted by the shims

1965 series 2a station wagon steering box lower shims and gaskets.JPG


Guess who needs to get some more?

If the steering shaft is too tight you need more shims (think about it!)
 
The picture below almost shows a finished steering box

Unfortunately I need to get a washer for seating the 'o' ring on the output shaft and few extra shims to make sure the end float on the small bearings is OK

Still nearly done

1965 series 2a station wagon steering box almost done awaiting parts again.JPG
 
This job drove me up the wall on my series 3. Got it all together and there was no where near enough shimage to adjust it up right. I used ALL shims/gaskets including the old ones and the bottom plate would not seal up! It was almost as if the new (Britpart) column was a fraction longer than the original, I had to make a thicker gasket from thickish card and that did the job. I coated the card in boiled linseed oil to waterproof it and I used Wellseal to seal the threads and on all the gasket surfaces. It seems to be doing it's job as there is no sign of leaking after weeks, ahem, months in the loft. Oh and the upper column bearing on the S3 would not fit on the shaft, not a fecking chance. I tried 2, one bearmach and a proper rover one and neither fit. In the end I had to use a file and roll the shaft on a flat surface to file it down to the correct size. It only took about 1.5 hours to do! Oh for a properly equipped workshop.

Just had a check of my misc parts and I still have the washer as I didn't take the original one out of mine. It's yours if you want it, as long as it's not £50 to post a washer to Holland!
 
Last edited:
This job drove me up the wall on my series 3. Got it all together and there was no where near enough shimage to adjust it up right. I used ALL shims/gaskets including the old ones and the bottom plate would not seal up! It was almost as if the new (Britpart) column was a fraction longer than the original, I had to make a thicker gasket from thickish card and that did the job. I coated the card in boiled linseed oil to waterproof it and I used Wellseal to seal the threads and on all the gasket surfaces. It seems to be doing it's job as there is no sign of leaking after weeks, ahem, months in the loft. Oh and the upper column bearing on the S3 would not fit on the shaft, not a fecking chance. I tried 2, one bearmach and a proper rover one and neither fit. In the end I had to use a file and roll the shaft on a flat surface to file it down to the correct size. It only took about 1.5 hours to do! Oh for a properly equipped workshop.

Just had a check of my misc parts and I still have the washer as I didn't take the original one out of mine. It's yours if you want it, as long as it's not £50 to post a washer to Holland!
Thanks for the offer of the washer - it probably would cost two quid these days - mad - still if nobody sends letters anymore it is turning into a bit of an elite thing which will always be expensive. If I get stuck I'll give you a shout but my list of needed parts gets longer and longer every day. Hopefully I'll get it all ordered and sorted so I can finish things off soon:

It has got to be all done for the summer!
 
Back to the dynamo (for a bit)

The woodruff key is very soft and likes to deform with encouragement from a chisel - still wouldn't come out

1965 series 2a station wagon dynamo stubborn woodruff key1.JPG


I then ground it off

1965 series 2a station wagon dynamo stubborn woodruff key2.JPG


(Something to fix later on I guess)

Removed the main body fixing bolts by grinding the heads off them too - I'm always hopeful that penetrating oil will do the trick - I usually threaten things with fire but this time I reckoned I'd probably bugger it even more than it is already. Used a stud extractor to get the remains of the bolts out. They weren't planning to move =>

1965 series 2a station wagon dynamo removal of casing bolts with stud extractor.JPG


(Excellent tool that stud extractor)

Pulled the armature free from the casing after a bit of wiggling.

Rather rusty as expected

1965 series 2a station wagon dynamo bit rusty on the inside1.JPG


1965 series 2a station wagon dynamo bit rusty on the inside2.JPG


If I could get away with it I'd leave the magnets in place (like the previous rebuilders - hence red paint - numpties) but I think they need a bit of attention...

...of course the screws are rusted solid and painted (re numpties) in place - so drilling is my only option =>

1965 series 2a station wagon dynamo drilling out magnet screws.JPG


(Note to self - get a bigger drill numpty)

I'm also a bit stuck removing the end casing which holds the bearing. The bearing isn't mega dreadful - still spins - but is a bit noisy. So that needs to come out. I think this part will have to be heated as a three legged puller isn't budging it when cold.

(As always to be continued)
 
Oh yeah - sometimes going with the flow isn't so bad. Normally I break out the wood turning lathe to clean up armatures but this time the cordless drill just fitted onto the end of the shaft and with that pesky bearing still stuck in the end casing I could waz it in the workmate and =>

1965 series 2a station wagon dynamo cleaning armature1.JPG


Careful application of some gucci coloured sand paper gets this

1965 series 2a station wagon dynamo cleaning armature2.JPG


A bit more cleaning and it'll be clear coated with high temperature varnish
 
Yesterday my good friend (my very good friend) brought me my paintman paint order from the UK.

Broke out the can of duck egg blue engine paint I ordered this morning and repainted the oil filter housing.

It now has the correct colour - the HMG pot of paint I got here in Holland was probably incorrectly labeled.

1965 series 2a station wagon duck egg blue fixed1.JPG
1965 series 2a station wagon duck egg blue fixed2.JPG


As usual the difference of showing this with a point and shoot camera is pretty difficult. The stick in the last picture shows the greeny colour that I was sure was too green and the filter housing on the right shows a much bluer colour.

I'm happy with what I've got now.
 
Whilst the more demanding stuff is going on (rebuilding differentials and the dynamo etc) the boring still needs to be to be done

Still need to clean

Still need to de-rust

Still need to paint

1965 series 2a station wagon fan and dynamo fan derusted.JPG


1965 series 2a station wagon series 3 diff at back.JPG


It looks like the rear differential (which is a series 3 diff not the original 2a version) has been rebuilt in the past as it has been painted on the inside.

The bearings on the pinion are in pretty good shape but as I've gone this far and got the spares I'll be fitting new ones. The pinion has a very loose fit on the existing small bearing which isn't great...
 
Please allow me to introduce you to my latest acquisition =>

1965 series 2a station wagon new gearbox almost in bits.JPG


It is almost perfect as it is almost in bits!
 
Success with some little problems

#1

Fill plug on the rear differential was being a pain in the arse - would not come out.

Tried cleaning and soaking in penetrating oil - tried mole grips - tried heat and mole grips

1965 series 2a station wagon differential fill plug removal1.JPG


Got nowhere until teddy left the cot and I got the hammer and chisel out

1965 series 2a station wagon differential fill plug removal2.JPG


Finally got the casing in ferpox undercoat

1965 series 2a station wagon rear differential casing painted in ferpox at last.JPG
 
Next problem (#2) was with the dynamo

I'd left the bearing soaking in penetrating oil for a few days and was expecting to have to use fire but it came off with the puller in the end

1965 series 2a station wagon dynamo removal of end cap with puller.JPG


The bearing is held in the end casing with a retaining ring so the whole bearing and the end casing has to come off the shaft first

1965 series 2a station wagon dynamo clip behind bearing.JPG
 
Back
Top