- Posts
- 16,482
I am a big fan of Preventative Maintenance - makes my life easier, the ability to try and spot potential faults or failures in advance and also prevents further damage to other components.
A couple of weeks ago in the very hot weather we have had (not that the recent days have been any better) but on the long slog between Guildford Train Station and the A31 Hogs Back which is a few miles long up a moderate but steady gradient after being stuck in Guildford town centre traffic and stop start driving popping into B&Q, Wickes, Tile Warehouse.....etc etc etc, the Gearbox went into its cooling stratergy, it holds the lower gears and prevents upshifts to raise engine revs and as such gearbox pump speed to try and circulate as much fluid through the cooler as possible to reduce box temperature.
This process is totally normal and should prevent the dreaded TRANS. OVERHEAT warning....if you ge tthat - you have issues that require looking at ASAP to try and save the box!
In a over a year of ownership, this is the first time it has ever gone into the Cool Down stratergy and hasn't done it since.
Last week on my girlfriends birthday, we went to Woburn Safari Park (we go every year on her birthday, she loves the place) and we spent 8 hours crawling around in 27degC heat, A/C on (off whenever we had the windows open in the pens were we weren't going to get eaten!) stopping and starting, hills, no shade etc and she never even murmoured, gearbox fine, cooling system fine.
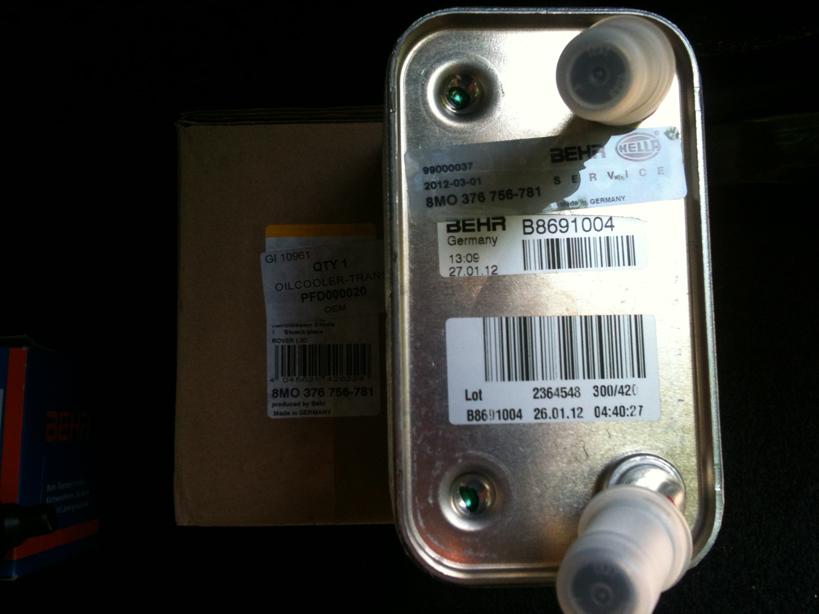
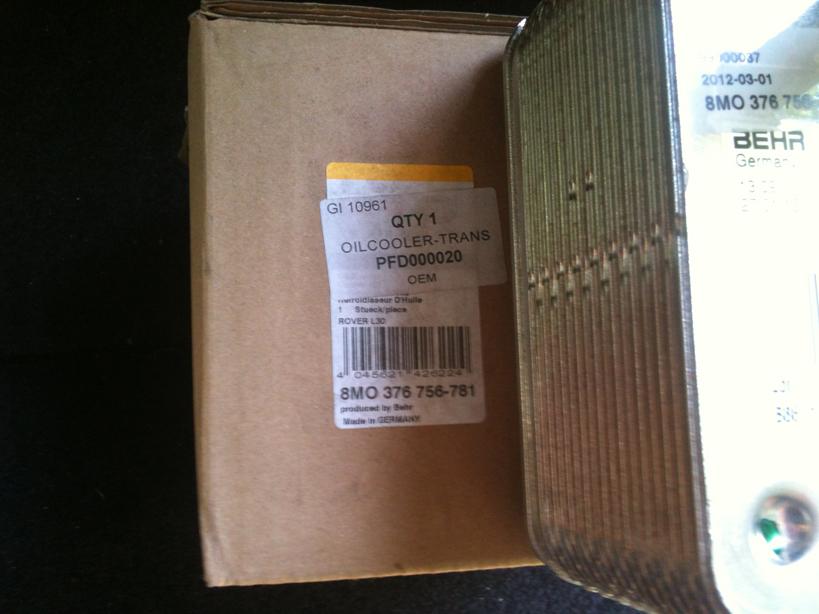
BUT, taking note of the cooling stratergy and the reports that the oil cooler is only just capable of the job, I thought best to replace it in anycase and whilst I was there also replace the Cooler thermostat and back plate too.
The Back Plate is plastic and over years of heating and cooling, can become brittle and leak coolant - this is apparently a common fail item (what isn't on these things?) so for the sake of another £30 odd best replace it.
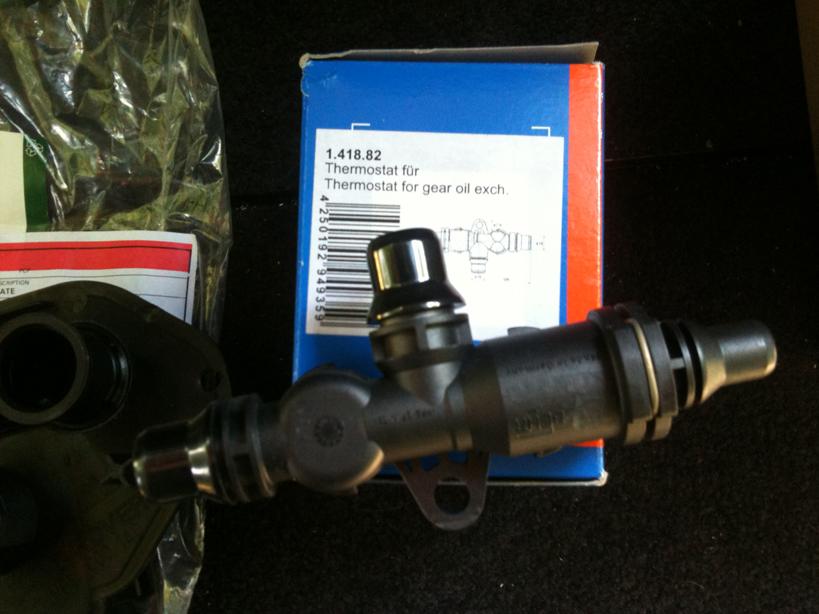
The Thermostat has been known to fail, I wouldn't say rare, but not a common item so I can find out, but again prevention is better than a cure and for another £30 odd and your already under the car, you may aswell.
On to the job:
Parts Required (prices not incl. VAT and from Island4x4 - no affiliation):
1 x Oil Cooler Gearbox / Transmission L322 4.4 V8 Petrol ZF Steptronic £83.33
1 x Thermostat Oil Cooler 5-Speed (BEHR) PBM000010 £30.00
1 x Thermostat Oil Cooler Mounting Plate (OEM) PCU000140 £30.00
 
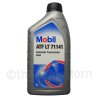
The correct grade ATF for the L322 - I use Volkswagon ATF G-052-162-A2 as it is a few quid cheaper than the Land Rover branded stuff, but aslong as it is compatible with the Esso LT71141 as specified for the ZF5HP24.
 
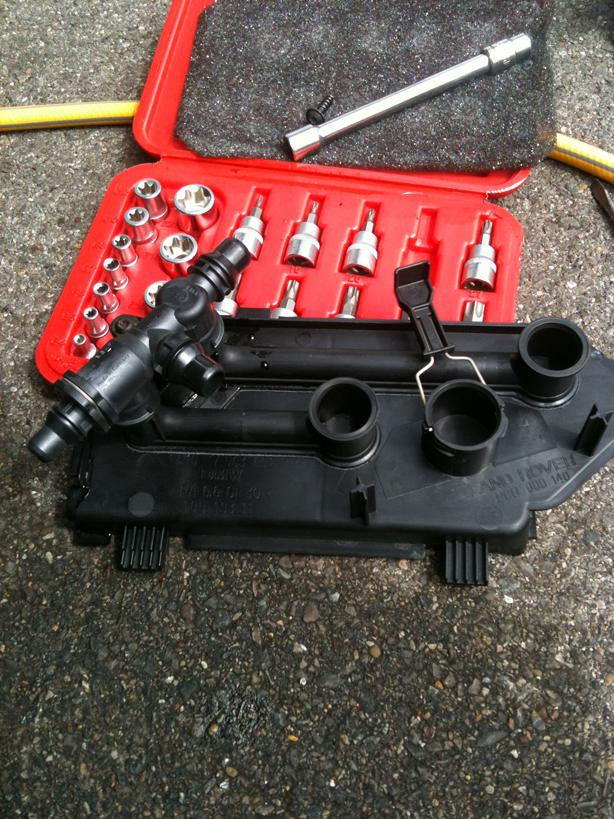
Only tools required are a 10mm socket and ratchet, T25 drive bit, 8mm allen key, flat screwdriver, 15mm spanner (or thereabouts), long nose pliers, A method of refilling the gearbox sump and waste oil recepticles.
 
The Job:
 
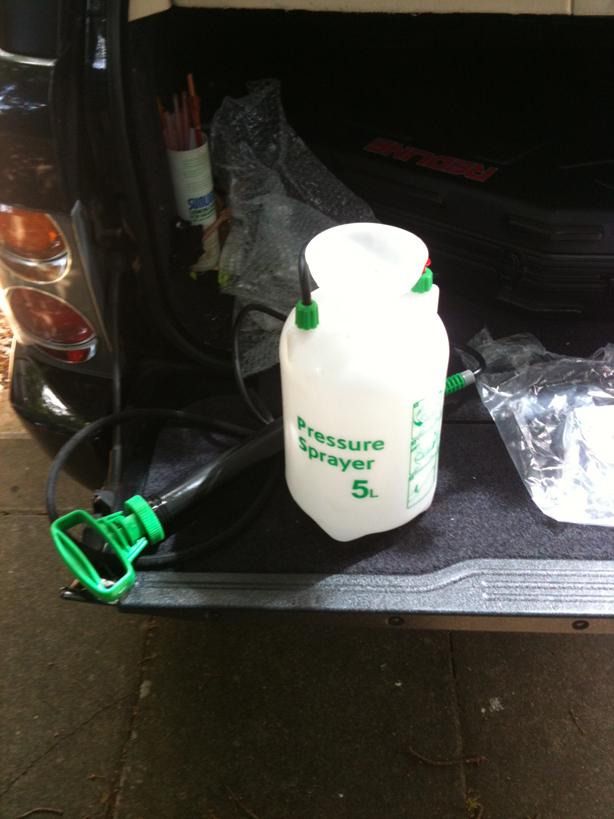
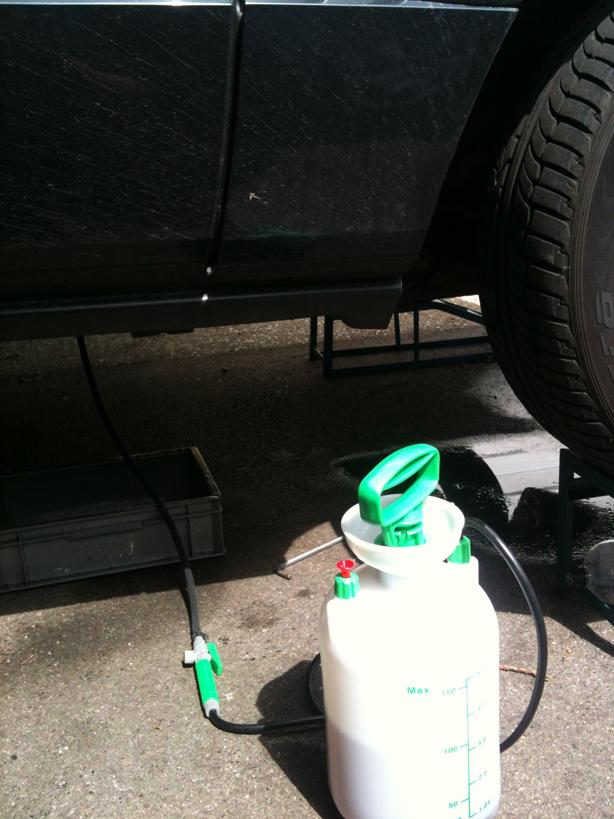
First and foremost, make sure you can get the Gearbox drain and fill plug open before you start - it can be exceptionally tight....if you can't get this open, you won't be able to top up or refill the gearbox sump....make sure you can get it open first. Also similarly, make sure you have a method of getting fluid back in, I use a pressure sprayer to pump oil back in.
 
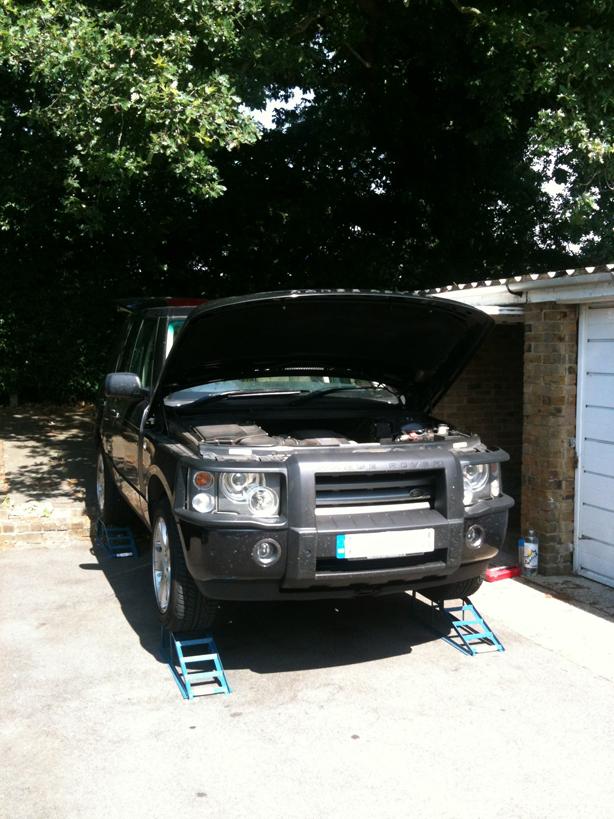
Raise vehicle to allow you working space under car - in order to check the gearbox oil level the vehicle will need to be level, hence why I have (naughtily) used 4 ramps.
 
 
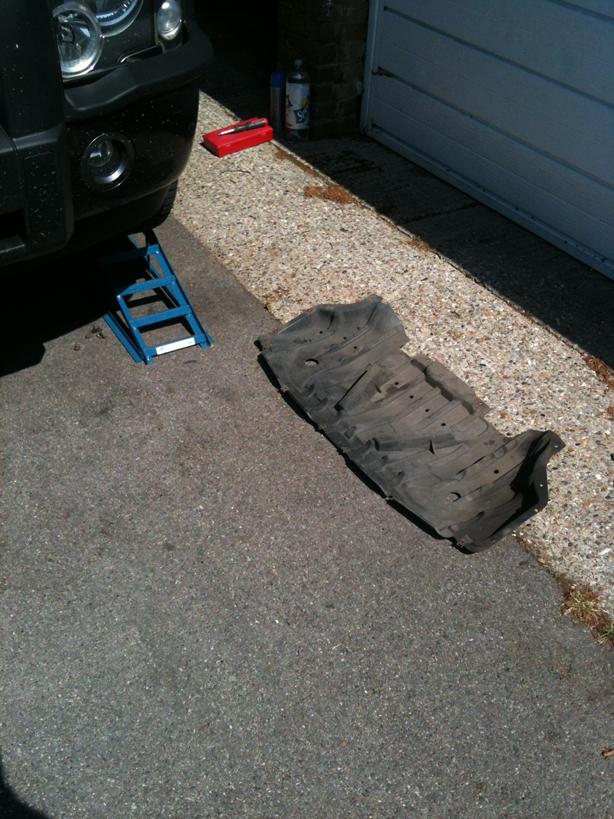
Undo the many bolts holding the undertray in place and move to one side
 
 
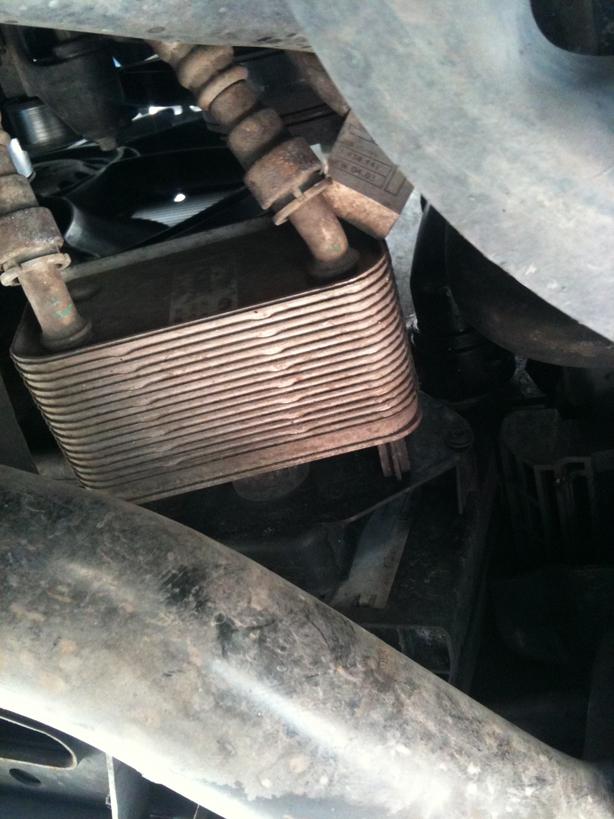
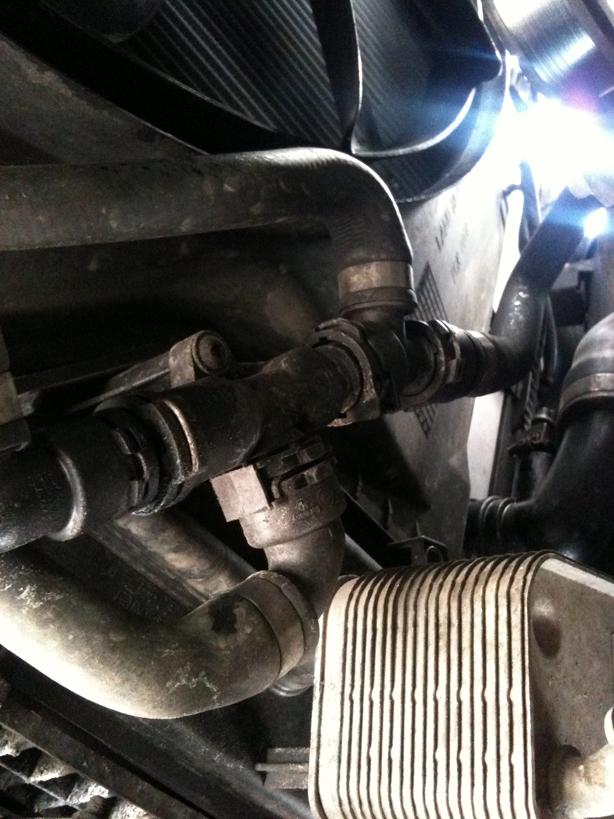
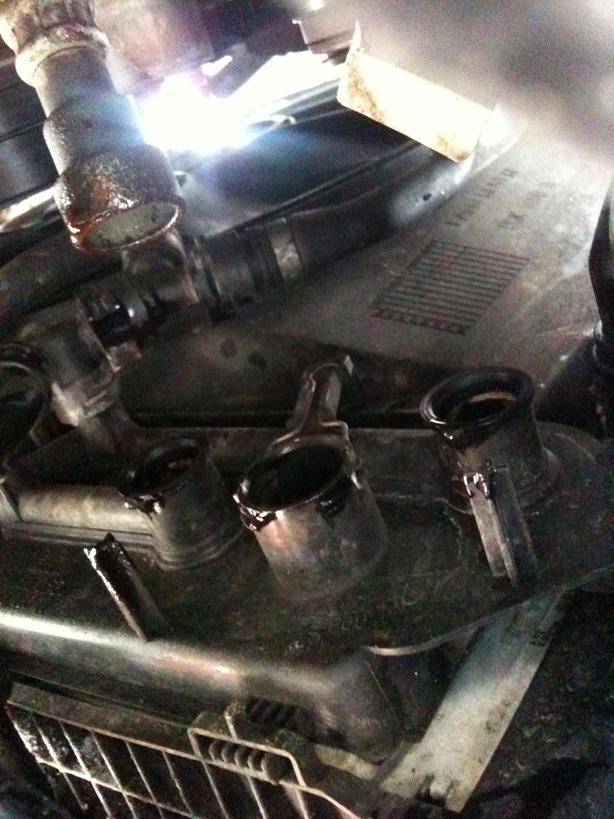
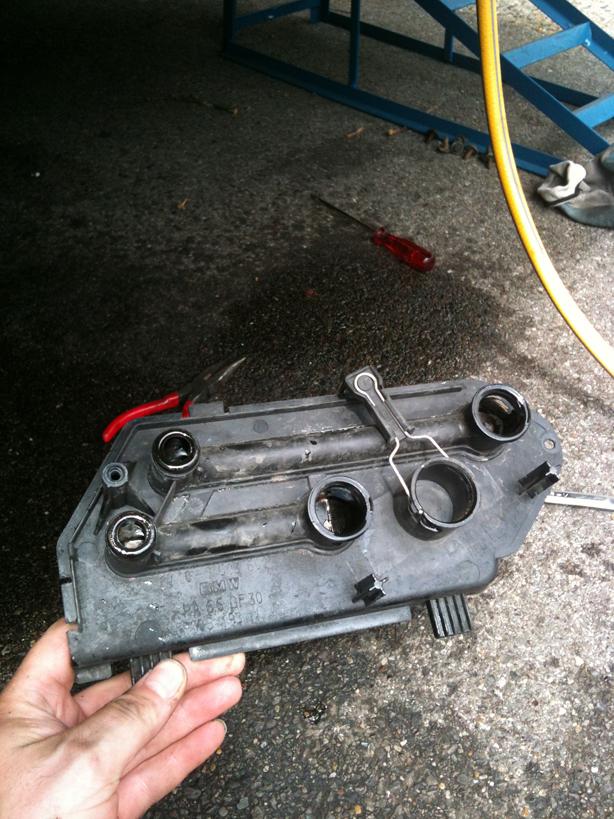
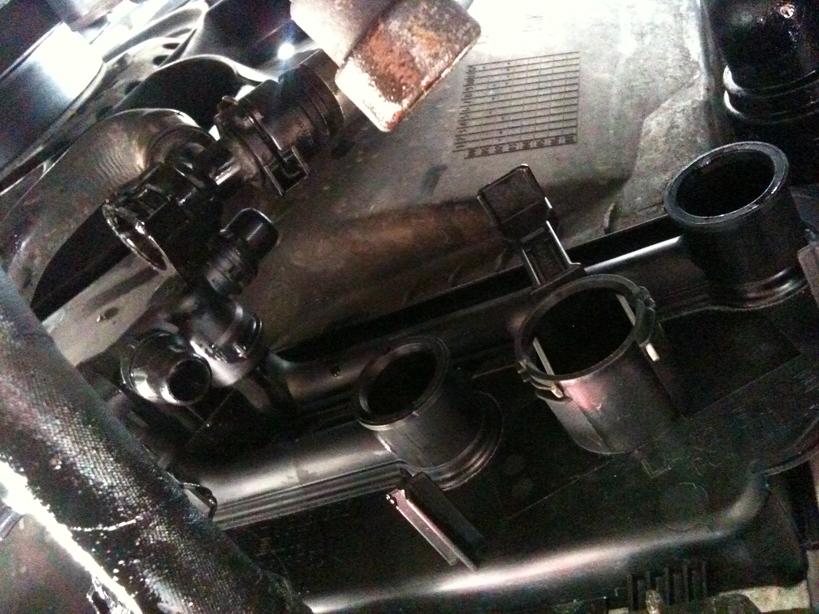
This allows you access to the Gearbox cooler mounted on the bottom corner of the main radiator, along with the thermostat and mounting plate.


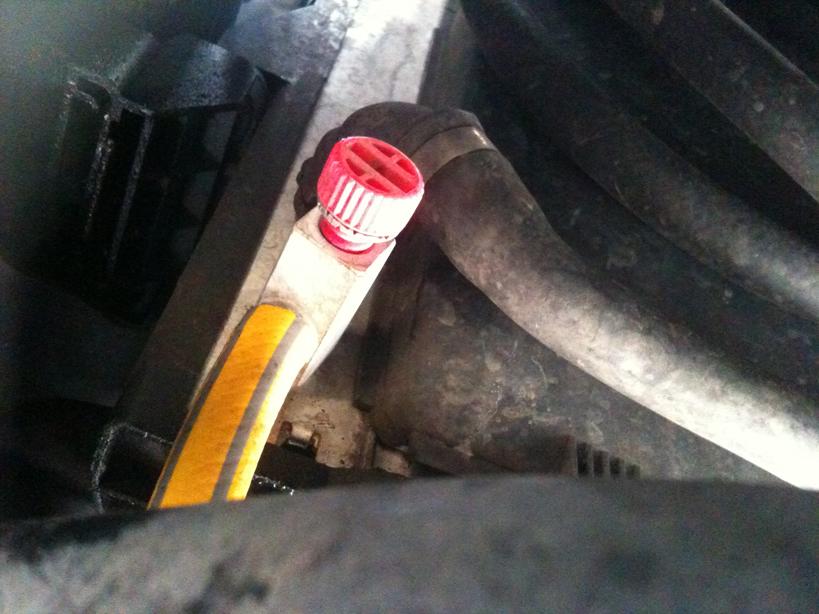
Time to drain the cooling system. The rad has a drain cock but use this at your peril, the tap is plastic and very very brittle....better to pull a hose off from the bottom of the rad and the hoses from the cooler thermostat.
 
 
Once the coolant has been drained, time to wrestle with the gearbox oil pipes...these are fun!! There is a plastic push in collet to release the connection. I used a 15mm spanner to push the collet back and then remove the hose.
 
I did break one of the plastic collets, but with care I could bend the internal locking tabs back to release the hose, then I reshaped the locking tabs and reused on the refit - so far it seems to be holding fine!
 
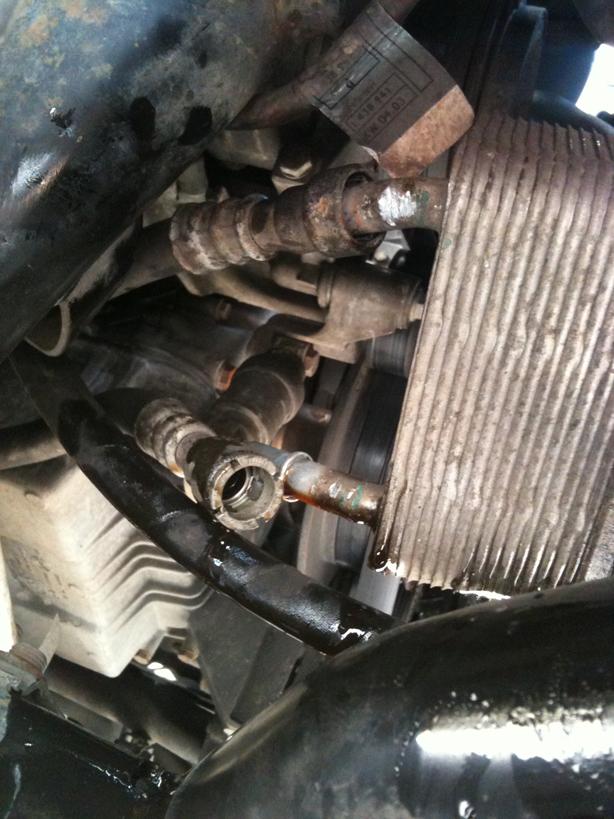
 
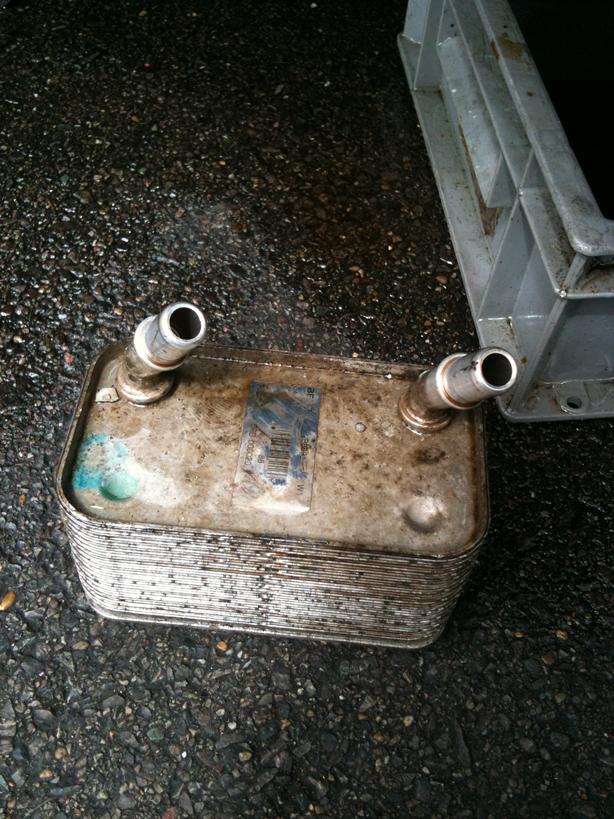
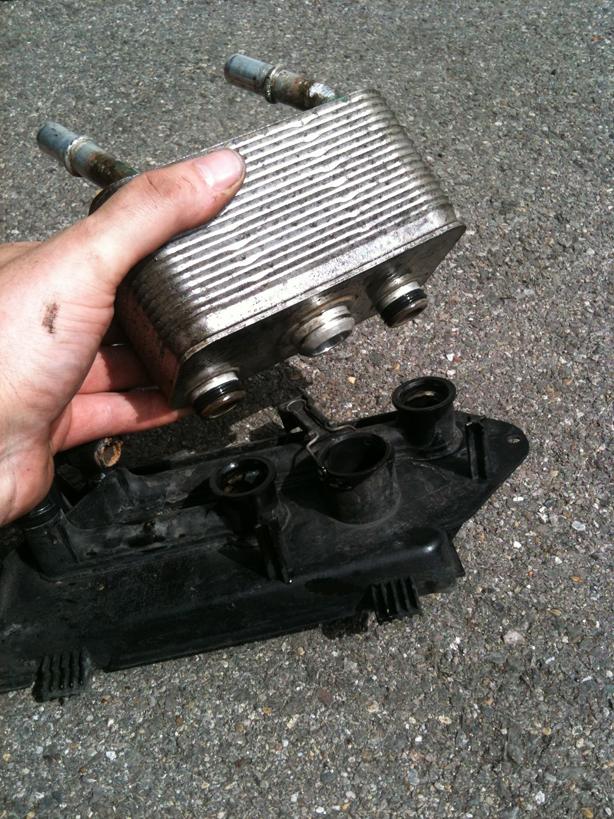
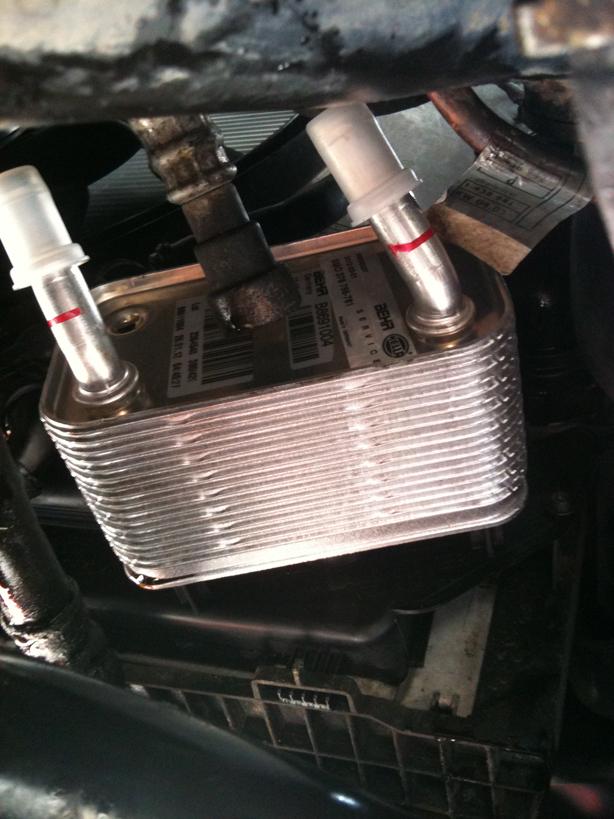
Next is to remove the cooler from the mounting plate. There is a plastic pull tab above the cooler to release the locking pins to allow the cooler to be removed. I used a long screwdriver to push the bottom of these locking pins upwards, the pulled the plastic tab to release the cooler.....be warned, there will be coolant in it that will flood out, so try not to be underneath it!
 
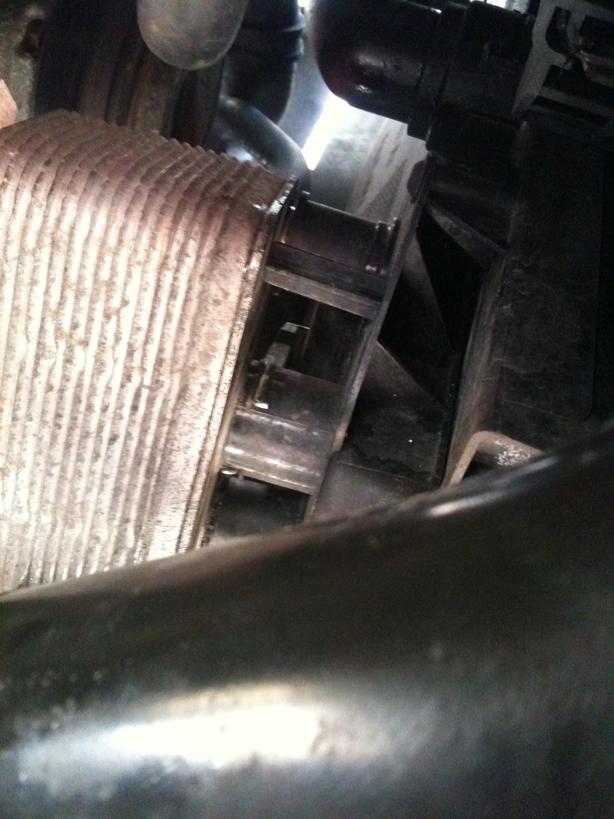
 
 
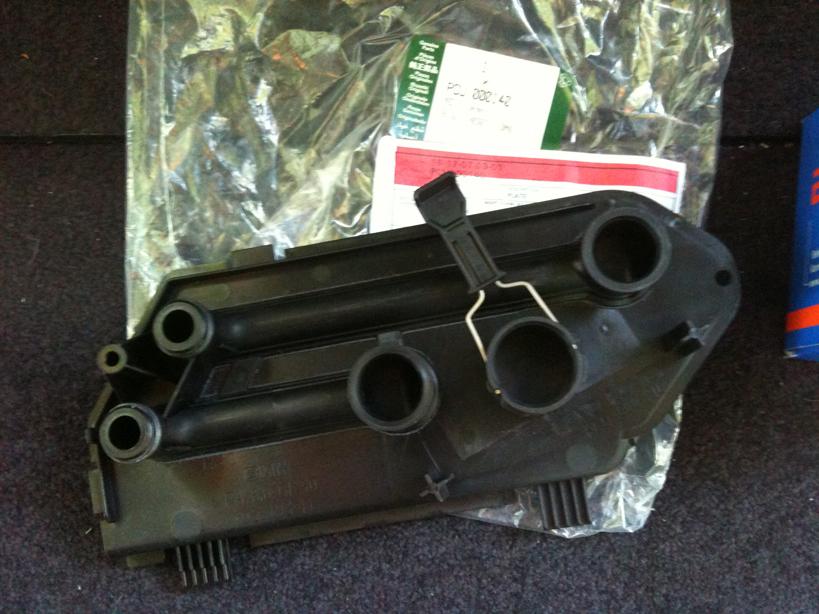
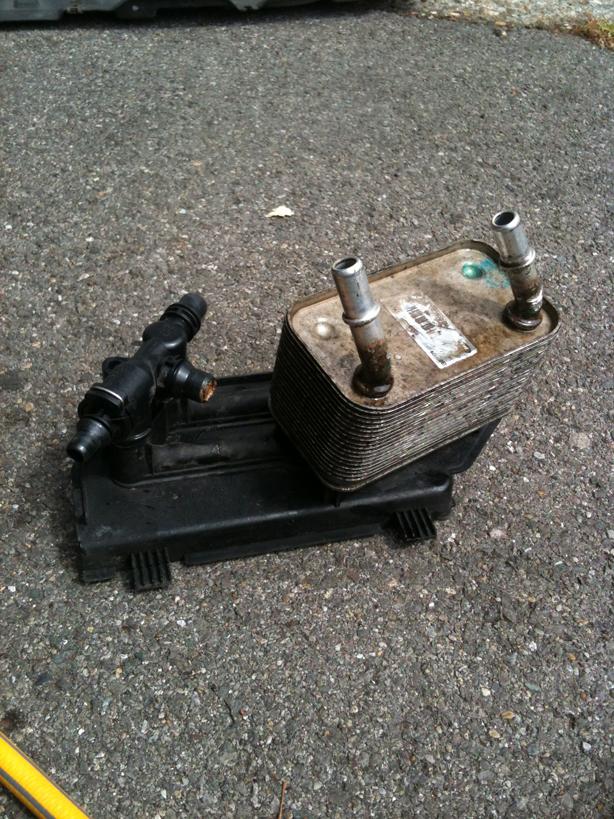
The Mounting plate....
 
 
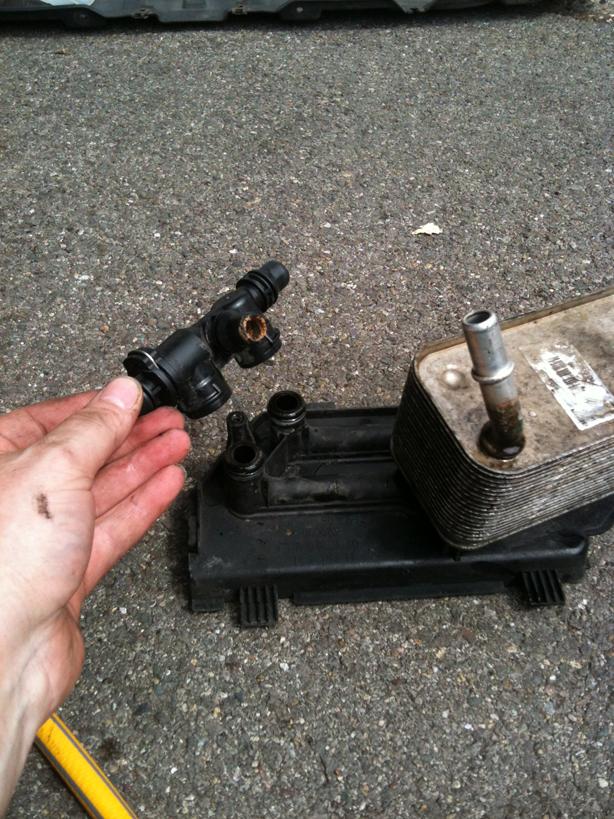
Using a T25 Torx drive bit, undo the single screw holding the thermostat in place and disconnect the 3 hoses to the stat housing. Pull and wiggle the thermostat off the mounting plate.
 
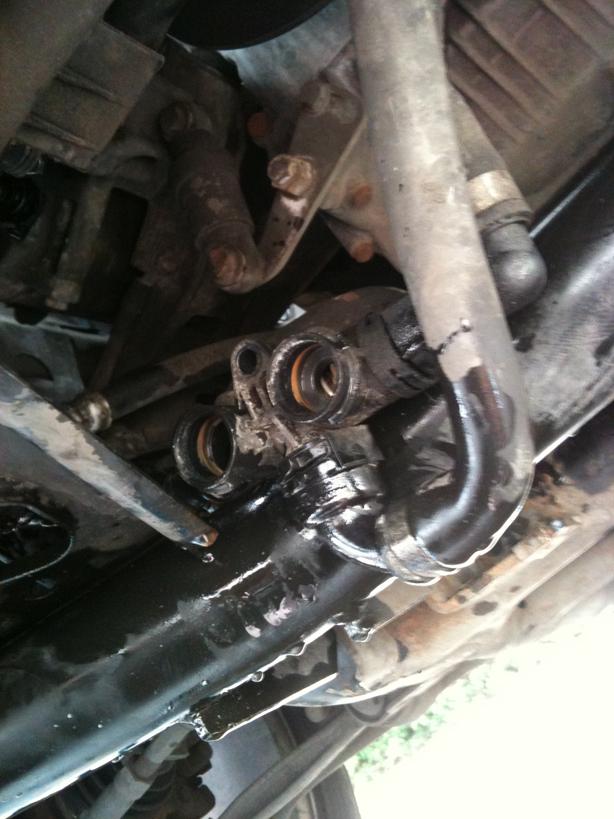
 
 
Again using a T25 bit, undo the single mounting screw on the mounting plate and remove.
 
 
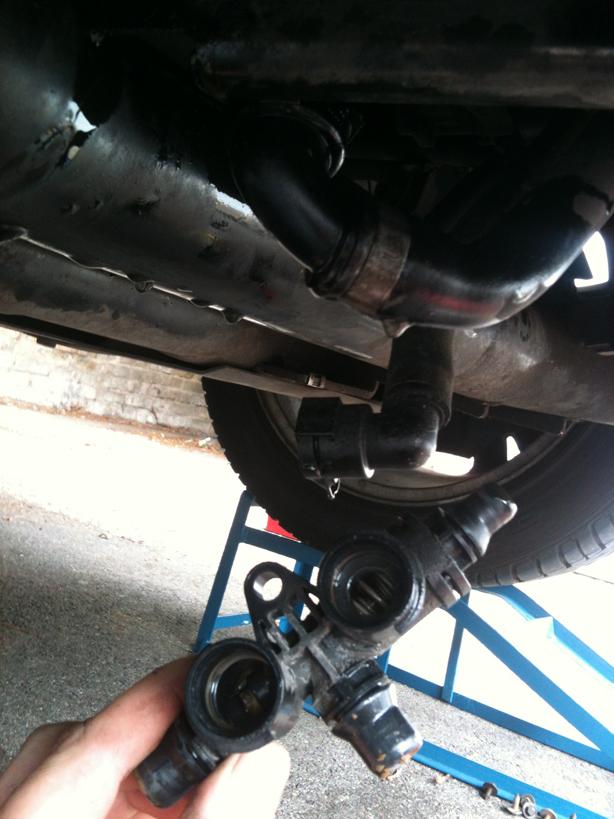
This is how it is all assembled for reference....


For the refit, I installed the thermostat onto the plate first, remember to lubricate the O'rings first, I used vaseline. This prevents the O'ring snagging and getting damaged.
 
 
Refit the mounting plate locating the bottom tags into the slots at the bottom of the radiator surround.
 
 
Refit the cooler, remebering to lube the O'rings using fresh ATF to prevent seal damage.
 
 
Refit the gearbox oil lines just a push and a click....


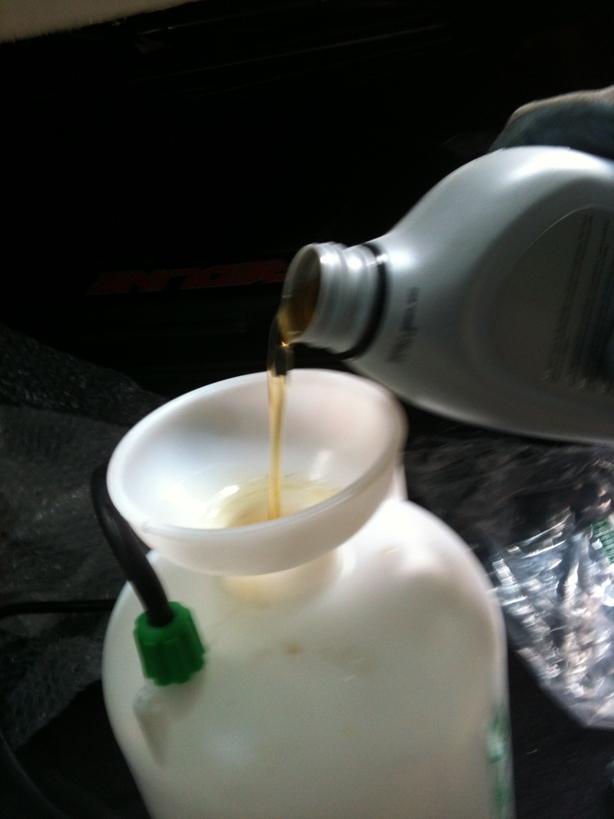
I took this opportunity to change the gearbox fluid, not all of it, just what was in the sump about 4.5 litres or so as I had changed the majority of it earlier in the year (see the How To section) so a few litres of fresh wouldn't go a miss.
 
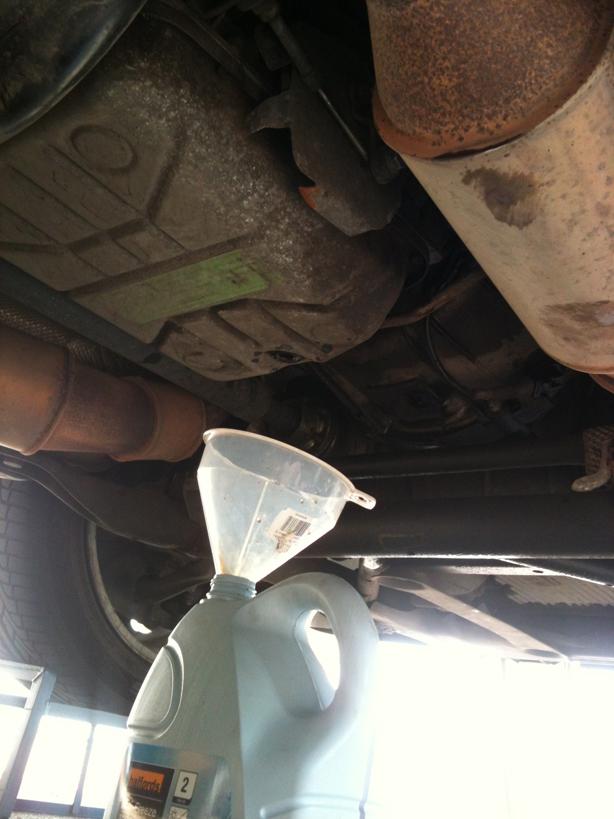
 
Prepare your method of filling and fill the sump DO NOT START THE ENGINE....


Now refill the cooling system (see the How To on radiator change for the refill process)
 
Once the cooling system is filled, start the engine, and top up the cooling system as necessary, and you can now do the gearbox oil leveling (see the How To on the ZF5HP24 Fluid and Filter Change for the process).
 
Refit the under tray and clean your workspace, lower vehicle switch off and wait for the cooling system to cool and recheck the coolant level....
Job Done!
A couple of weeks ago in the very hot weather we have had (not that the recent days have been any better) but on the long slog between Guildford Train Station and the A31 Hogs Back which is a few miles long up a moderate but steady gradient after being stuck in Guildford town centre traffic and stop start driving popping into B&Q, Wickes, Tile Warehouse.....etc etc etc, the Gearbox went into its cooling stratergy, it holds the lower gears and prevents upshifts to raise engine revs and as such gearbox pump speed to try and circulate as much fluid through the cooler as possible to reduce box temperature.
This process is totally normal and should prevent the dreaded TRANS. OVERHEAT warning....if you ge tthat - you have issues that require looking at ASAP to try and save the box!
In a over a year of ownership, this is the first time it has ever gone into the Cool Down stratergy and hasn't done it since.
Last week on my girlfriends birthday, we went to Woburn Safari Park (we go every year on her birthday, she loves the place) and we spent 8 hours crawling around in 27degC heat, A/C on (off whenever we had the windows open in the pens were we weren't going to get eaten!) stopping and starting, hills, no shade etc and she never even murmoured, gearbox fine, cooling system fine.
BUT, taking note of the cooling stratergy and the reports that the oil cooler is only just capable of the job, I thought best to replace it in anycase and whilst I was there also replace the Cooler thermostat and back plate too.
The Back Plate is plastic and over years of heating and cooling, can become brittle and leak coolant - this is apparently a common fail item (what isn't on these things?) so for the sake of another £30 odd best replace it.
The Thermostat has been known to fail, I wouldn't say rare, but not a common item so I can find out, but again prevention is better than a cure and for another £30 odd and your already under the car, you may aswell.
On to the job:
Parts Required (prices not incl. VAT and from Island4x4 - no affiliation):
1 x Oil Cooler Gearbox / Transmission L322 4.4 V8 Petrol ZF Steptronic £83.33
1 x Thermostat Oil Cooler 5-Speed (BEHR) PBM000010 £30.00
1 x Thermostat Oil Cooler Mounting Plate (OEM) PCU000140 £30.00
 
The correct grade ATF for the L322 - I use Volkswagon ATF G-052-162-A2 as it is a few quid cheaper than the Land Rover branded stuff, but aslong as it is compatible with the Esso LT71141 as specified for the ZF5HP24.
 
Only tools required are a 10mm socket and ratchet, T25 drive bit, 8mm allen key, flat screwdriver, 15mm spanner (or thereabouts), long nose pliers, A method of refilling the gearbox sump and waste oil recepticles.
 
The Job:
 
First and foremost, make sure you can get the Gearbox drain and fill plug open before you start - it can be exceptionally tight....if you can't get this open, you won't be able to top up or refill the gearbox sump....make sure you can get it open first. Also similarly, make sure you have a method of getting fluid back in, I use a pressure sprayer to pump oil back in.
 
Raise vehicle to allow you working space under car - in order to check the gearbox oil level the vehicle will need to be level, hence why I have (naughtily) used 4 ramps.
 
 
Undo the many bolts holding the undertray in place and move to one side
 
 
This allows you access to the Gearbox cooler mounted on the bottom corner of the main radiator, along with the thermostat and mounting plate.


Time to drain the cooling system. The rad has a drain cock but use this at your peril, the tap is plastic and very very brittle....better to pull a hose off from the bottom of the rad and the hoses from the cooler thermostat.
 
 
Once the coolant has been drained, time to wrestle with the gearbox oil pipes...these are fun!! There is a plastic push in collet to release the connection. I used a 15mm spanner to push the collet back and then remove the hose.
 
I did break one of the plastic collets, but with care I could bend the internal locking tabs back to release the hose, then I reshaped the locking tabs and reused on the refit - so far it seems to be holding fine!
 
 
Next is to remove the cooler from the mounting plate. There is a plastic pull tab above the cooler to release the locking pins to allow the cooler to be removed. I used a long screwdriver to push the bottom of these locking pins upwards, the pulled the plastic tab to release the cooler.....be warned, there will be coolant in it that will flood out, so try not to be underneath it!


The Mounting plate....
 
 
Using a T25 Torx drive bit, undo the single screw holding the thermostat in place and disconnect the 3 hoses to the stat housing. Pull and wiggle the thermostat off the mounting plate.


Again using a T25 bit, undo the single mounting screw on the mounting plate and remove.
 
 
This is how it is all assembled for reference....


For the refit, I installed the thermostat onto the plate first, remember to lubricate the O'rings first, I used vaseline. This prevents the O'ring snagging and getting damaged.
 
 
Refit the mounting plate locating the bottom tags into the slots at the bottom of the radiator surround.
 
 
Refit the cooler, remebering to lube the O'rings using fresh ATF to prevent seal damage.
 
 
Refit the gearbox oil lines just a push and a click....
 
 
I took this opportunity to change the gearbox fluid, not all of it, just what was in the sump about 4.5 litres or so as I had changed the majority of it earlier in the year (see the How To section) so a few litres of fresh wouldn't go a miss.
 
 
Prepare your method of filling and fill the sump DO NOT START THE ENGINE....


Now refill the cooling system (see the How To on radiator change for the refill process)
 
Once the cooling system is filled, start the engine, and top up the cooling system as necessary, and you can now do the gearbox oil leveling (see the How To on the ZF5HP24 Fluid and Filter Change for the process).
 
Refit the under tray and clean your workspace, lower vehicle switch off and wait for the cooling system to cool and recheck the coolant level....
Job Done!
Last edited: