discomark10
Well-Known Member
- Posts
- 3,977
- Location
- Milton Keynes
Did u manage to bleed the breaks? it might be a fuked caliper or master cylinder, Also MERRY CHRISTMAS!!
i take it that was ment to say this afternoonYeah I have been thinking the master cylinder but dare not believe it lol. Anyhow we will see after boxing day.

i take it that was ment to say this afternoon
As thats when I will be making a start on fitting my bumper winch etc
I might just take a walk down and see how things are going if I have time. Bet you will be having fun

Damn good read on xmas day!!
Forums need these kind of threads.
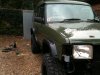
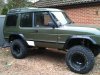
Well done, the truck looks great.
Thanks.
where were ya I was waiting in all day lol
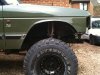
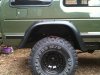
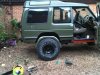
anyway as its Christmas I thought it best to spend some time with the missus so 10 mins later I was out in the garage and this is todays efforts
just need to find sonwhere to get stuck now
Yup had it fitted on Wednesday well chuffed with itYES! Result mate!!
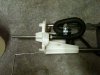
But, WTF, you have a wheel-less lift in your garage?!?!?!?! Jealous!
what size are those kumhos?
Have you read mine yet?! Have you read mine yet?! Have you read mine yet?!
, I did.... you and Greenhornet are my heroes! The fact you chaps have achieved so much gives me heart that i might be able to do something to my old girl..... might have to brush up on my welding thoughYes
Dave
Damn good read on xmas day!!
Forums need these kind of threads.
Well done, the truck looks great.
Thanks.
Not gonna be on the road for Christmas then???
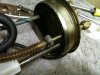
) so I have repaired the pipework from the sender.

 ) - under the waist line depicted by the body groove moulding. ) then you're done.
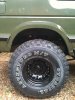


Welcome To LandyZone, the Land Rover Forums!
Here at LandyZone we have plenty of very knowledgable members so if you have any questions about your Land Rover or just want to connect with other Landy owners, you're in the right place.
Registering is free and easy just click here, we hope to see you on the forums soon!