Disco Body Lift ??????

This site contains affiliate links for which LandyZone may be compensated if you make a purchase.

Paul D

Old, nackered 'n broke, but the Landy is fine . :)
Events Planner
Posts
14,902
Location
Doncaster
Hi,

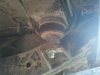
Got to the point where I now want/need a body lift on the Disco. I've had 31" tyres since I got it, I've had HD springs for a while but now want to lift the body, so what's involved?

I can get nylon spacers machined up, it looks like at least ten are needed, but I dunno what else is needed. I've heard from various places that the radiator also needs lifting, the steering linkage needs changing and the seat belt anchorage points ... but where can I find _definitively_ what needs doing for both my family's safety and to pass an MOT?

Don't mind hard work and can fabricate various bits and pieces if necessary and if I have a pic/dimensions etc, but although I know various things need doing I don't quite know how to do them, or where to get the bits from.

Cheers ...
 
Cheers karlo. Not seen that and it seems a lot easier to do than people make out.

Now to get the bits and pieces ... ;)
 
i've done a few on jeeps (same kind of issues)
fuel filler pipe may need adapting.
rad is easy, just lift same amount.
auto g/box linkage may need adjusting/lengthening.
bumber gaps can be lived with.
use proper grade bolts (a front end hit and your body will shoot off)
not sure on the diff lock likage
just have a good look around the engine bay for stretched cables, hoses etc.
you could also lift the engine by the same amount to offset some problems.
squirt all the bolts with anti-sieze every day for 3 days before you start.
 
why do you want to lift the body??

Surely a suspension lift is all you need and maybe spacers if really needed??

Im running 32" tyres with a 2 " lift and no rubbing at all and im now planning to go even bigger possibly 37" !!!!! Just got to figure out how to make them fit :D:D:D:D
 
A suspension lift should do you. I'm running 33x12.50x15 mud terrains on 10x15 rims & a 2" suspension lift. only mods are wide arch extensions, no probs with rubbing or scuffing anywhere.
 
why do you want to lift the body??

Surely a suspension lift is all you need and maybe spacers if really needed??

Im running 32" tyres with a 2 " lift and no rubbing at all and im now planning to go even bigger possibly 37" !!!!! Just got to figure out how to make them fit :D:D:D:D


longranger get 33's on with just a bit off cutting standard sus
 
why do you want to lift the body??

Surely a suspension lift is all you need and maybe spacers if really needed??

Im running 32" tyres with a 2 " lift and no rubbing at all and im now planning to go even bigger possibly 37" !!!!! Just got to figure out how to make them fit :D:D:D:D

for 37s u need to do a fair bit , im on 37" boggers
iv a 4" suspention lift and 2" body , very chopped arches and its a 2 door
 
Does this help?


Wizard said:
Ere you go, this is a basic guide I put together.

wizard
icon_twisted.gif


Installing a Body Lift.

A basic guide for a Land Rover Discovery Tdi


A body lift is not as straightforward as it may seem. You need to do a bit more than put in a set of spacers under the body mounts. This is a basic guide to lifting the body on a Discovery and can be use for other lifts as and when required.

The first job you need to do is replace the five flexible rubber brake lines.

There are two on each front wheel and one over the back axle.

If you install a two-inch body lift I would recommend having plus 4 inch extended brake lines fitted.


Below is a list of “other” parts required to do the job.

10 body spacers

10 long bolts (3/8 unf x 6 inch long)

4 rear floor support spacers

4 extended body tie rods

2 radiator mounts

2 rear bumper brackets

2 front bumper brackets.


A few days before you begin your body lift its advisable to spray the mounting bolts with a good quality penetrating oil.


Begin with taking off the bumpers, or just the plastic end caps if you want to lift the bumpers at a later date. Bear in mind that the bumpers are attached to the chassis so once you have lifted the body you will have a 2-inch gap between the body and bumper.

Remove the 4 body tie rods; these attach the seat belts to the chassis.

Slacken off the steering column bolts; don’t remove the bolts, as the splines on the shaft will only need to move about 10mm as the body is lifted.

Undo and remove the 5 body mounting bolts on one side, and remove the nuts on the bolts on the other side (leave the bolts in position)

With the aid of a Hi Lift jack begin to lift the side with the bolts removed. Periodically check that no electrical wires etc are being pulled out of place; also keep an eye on the air filter pipe work as this is mounted on the body. The clutch pipe work will need to be kept in mind as this is also attached to the body. There is enough slack in both of these components so no extra modifications should be required.


Once you have gained enough lift you can start putting in the spacers. When one side is complete continue with the other side. Secure all the body mounting bolts once all the spacers are in.


The rear floor support spacers bolt onto the brackets on either side of the rear suspension spring, and support the floor !


The radiator is chassis mounted so when you have lifted the body fit the two top mounting spacers onto the two pins located on the sides of the radiator.


Attach the extended body tie rods.

Check the steering shaft and re tighten the bolts. Lift the bumpers as and when required
 
Back
Top