- Posts
- 16,482
Following the purchase of the 4.0 SE P38 a couple of weeks ago, the only major fault it has is an oil leak. We all know Land Rovers like to mark the territory where ever they go, but I park in the same spot at work and the puddle is getting a tad embarrassing!
It is leaking from above the Oil Filter from the region around the Oil Pressure Relief valve or the Oil Pressure switch.
I changed the Oil Filter last week and also pulled the coolant pipe off that covers the Oil Relief Valve port and couldnt see anything untoward.
So further research led me to a post about the Oil Pressure Switch/Sensor...so for the sake of a few quid for a new sensor I thought Id change it out ....
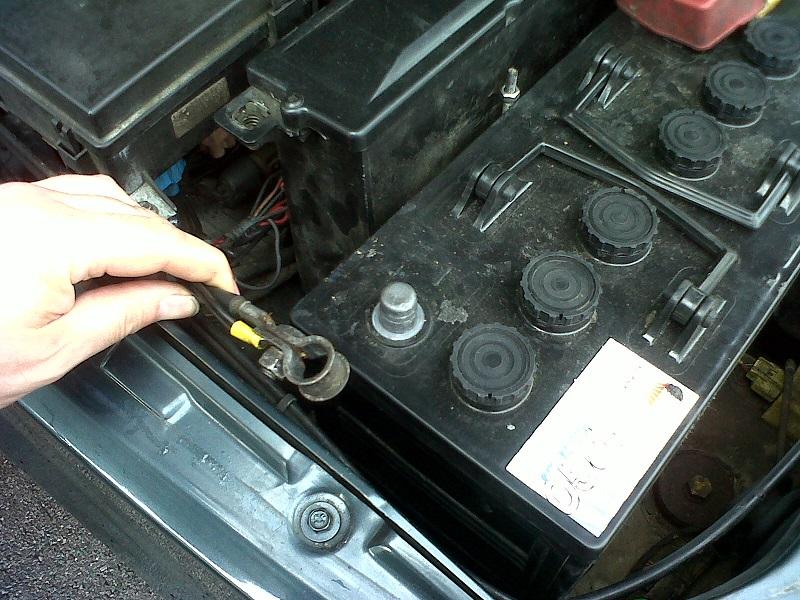
First things first, as I will be taking the Alternator off, you must disconnect the battery
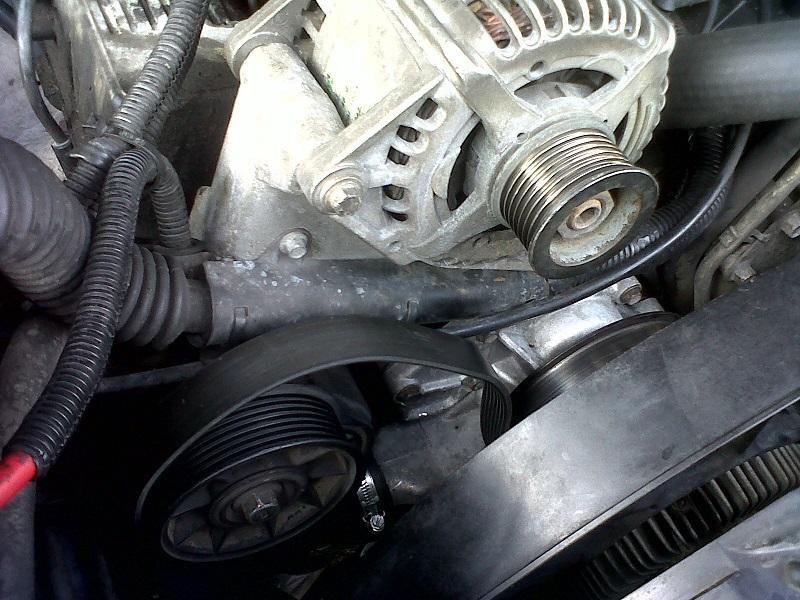
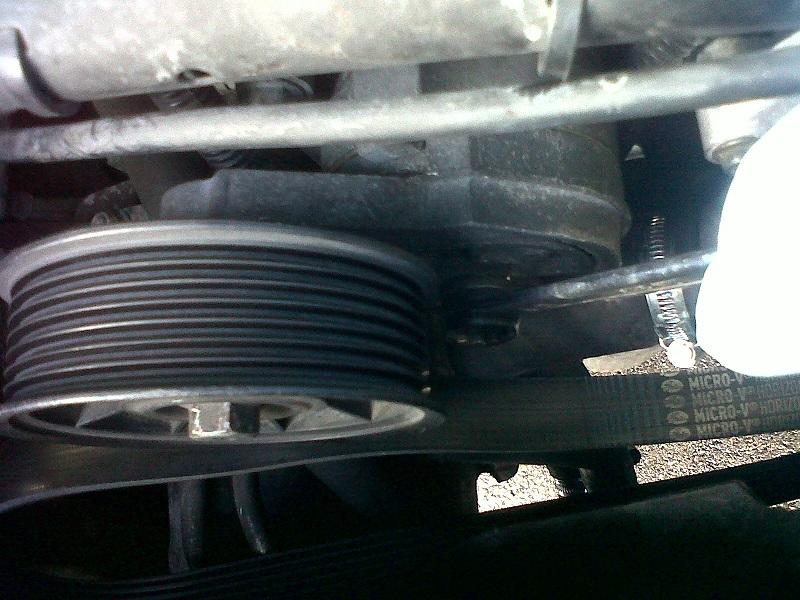
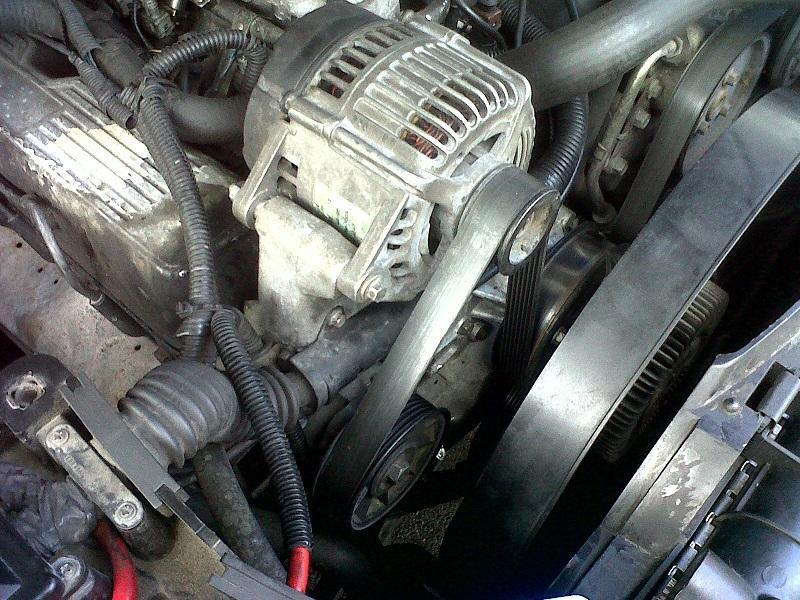
Using a 15mm Spanner on the tensioner pulley nut, apply pressure to loosen the drive belt and slip off the Alternator pulley.

Next remove the pins that hold the Alternator on to the bracket
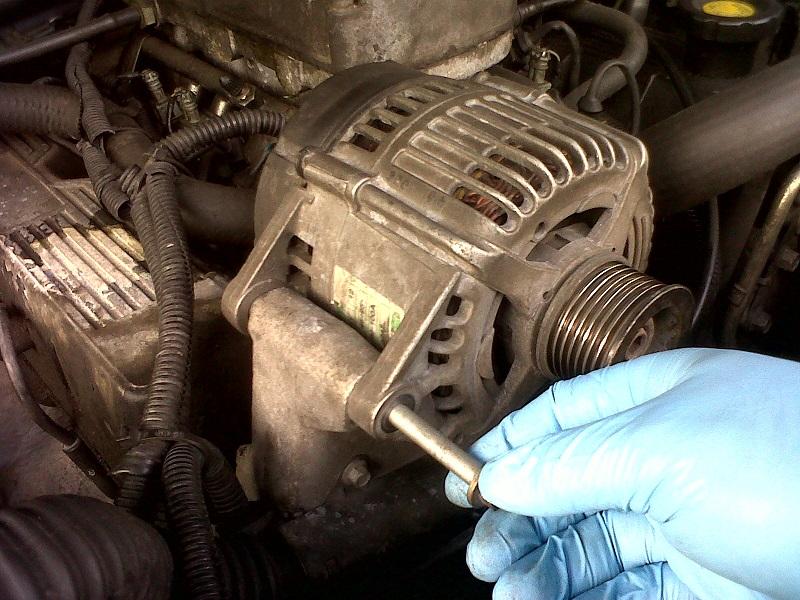
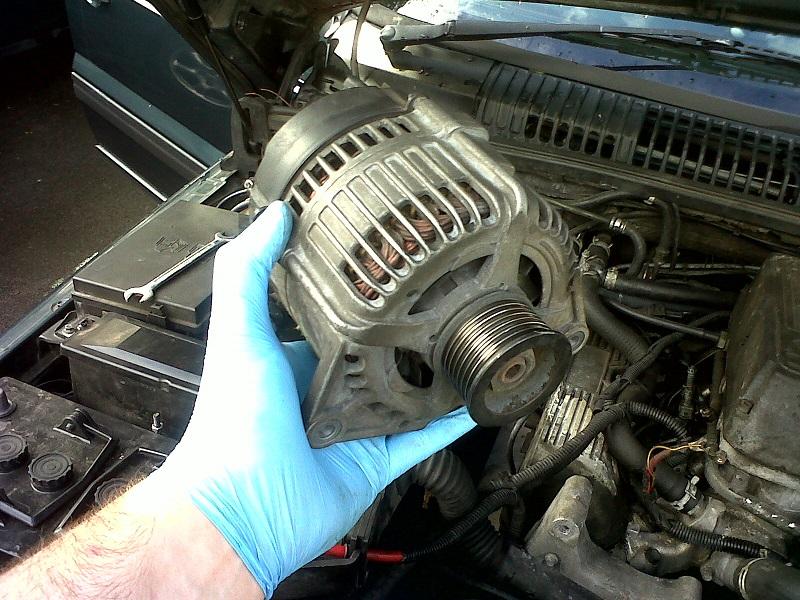
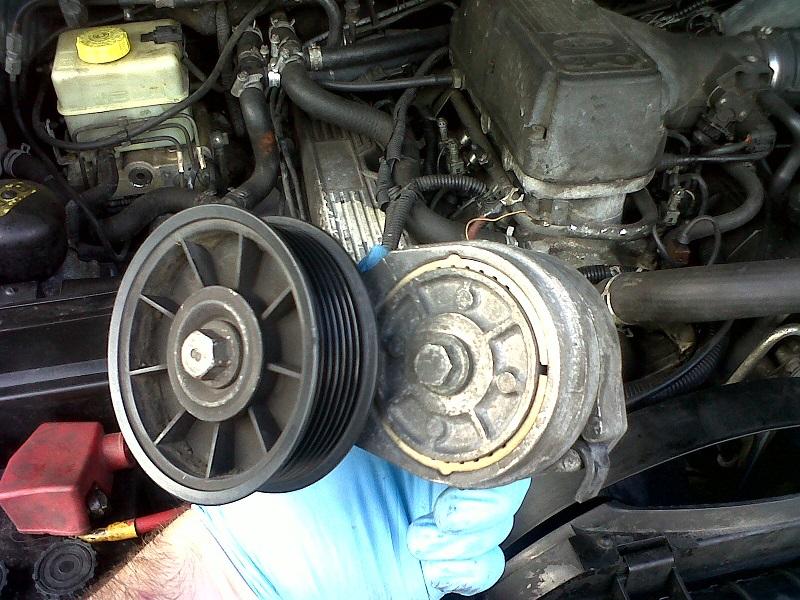
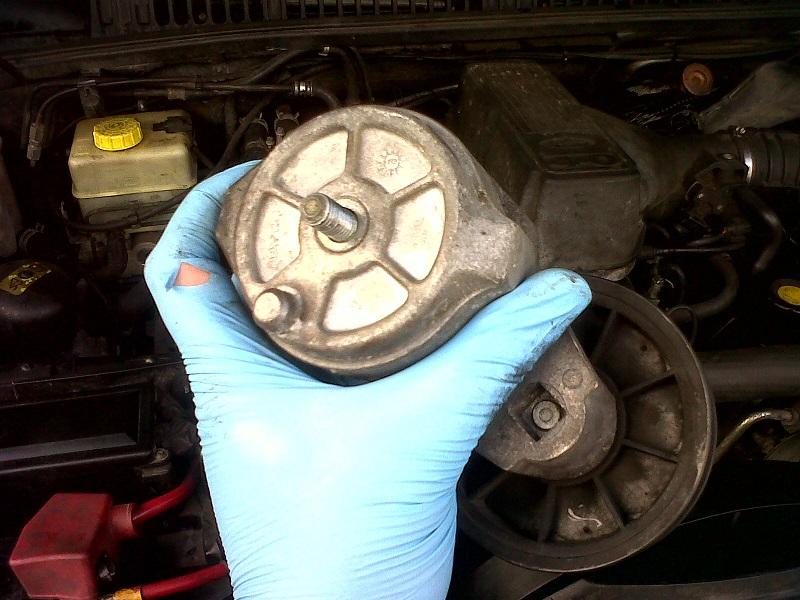
Undo the two wires on the back and lift the Alternator off the bracket
A 13mm spanner on the Tensioner assembly bolt and remove
The next couple of points arent mentioned in RAVE...!!!
Next is to remove the heat shield that covers the engine wiring harness, the P clip on the side and a tiny earth strap on the bottom of the bracket.
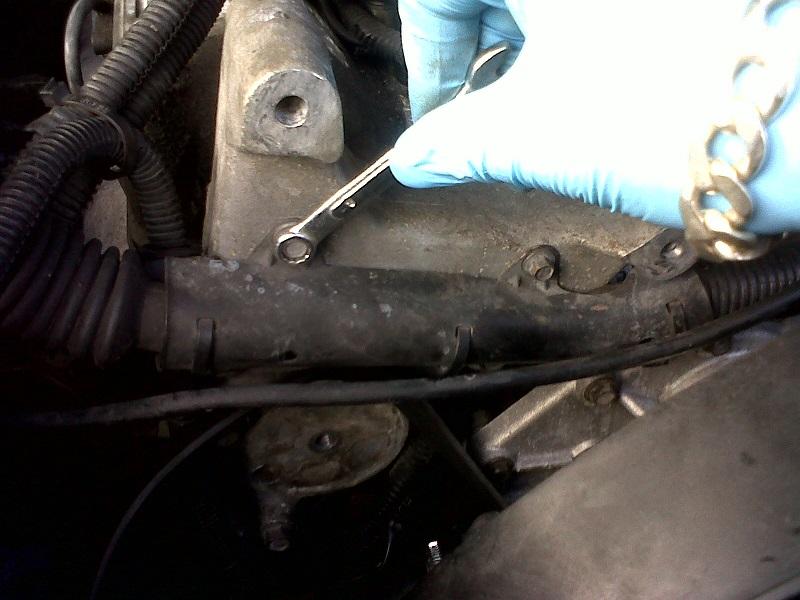
Then undo the 4 bolts that hold the bracket onto the engine and lift out

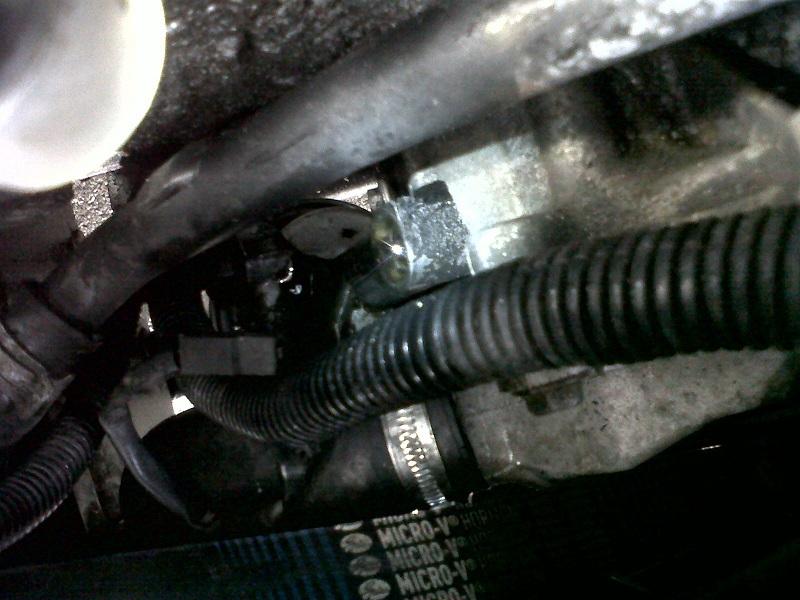
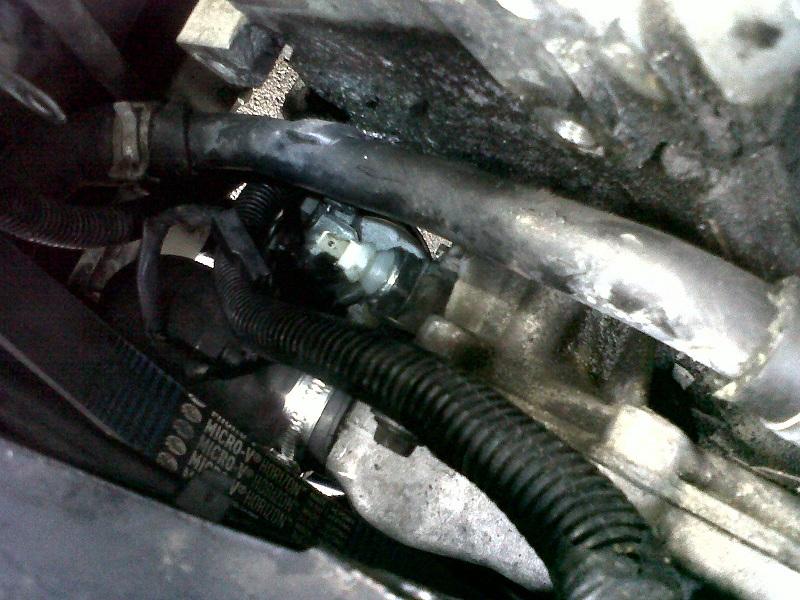
The Oil Pressure Switch/Sensor is now visable
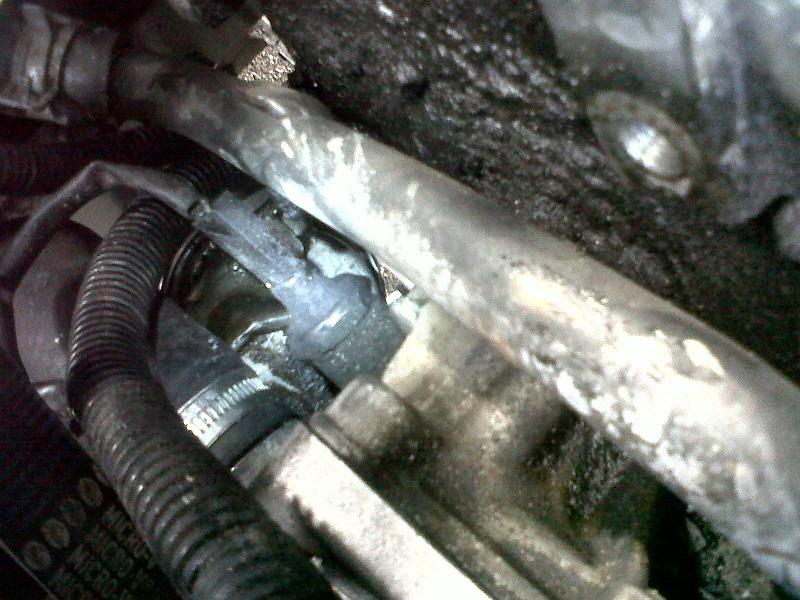
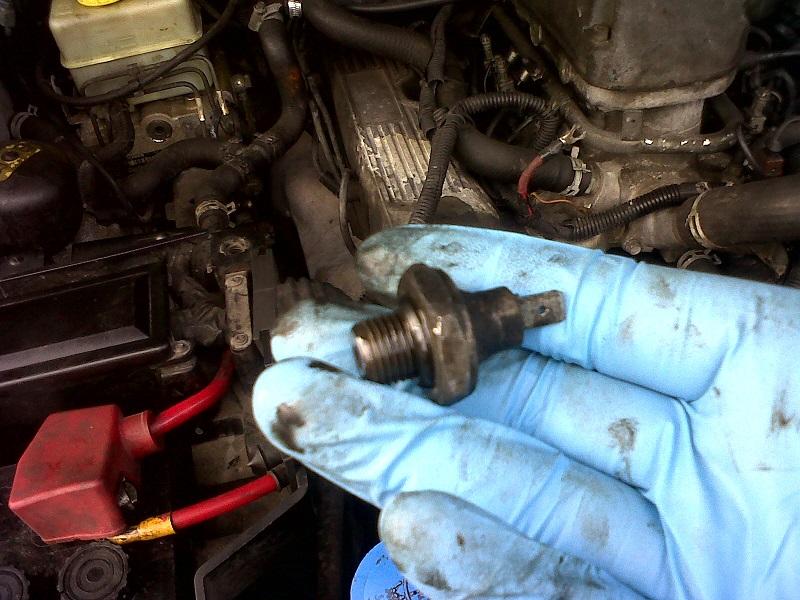
The old Switch was a 24mm spanner and space is tight but can be undone with little movements, once it was cracked off, I could undo with fingers!
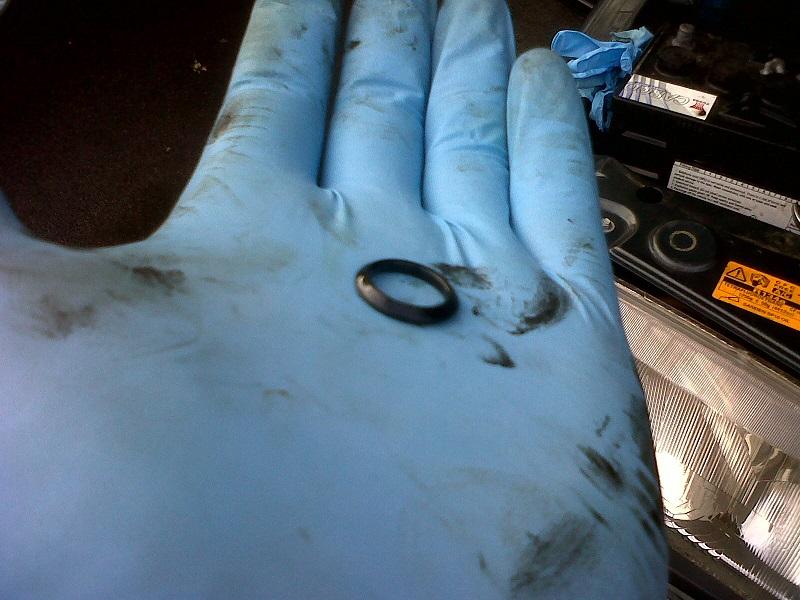
Looking at the ORing that seals the switch it looks a bit squished so fingers crossed the new one will sort the leak.
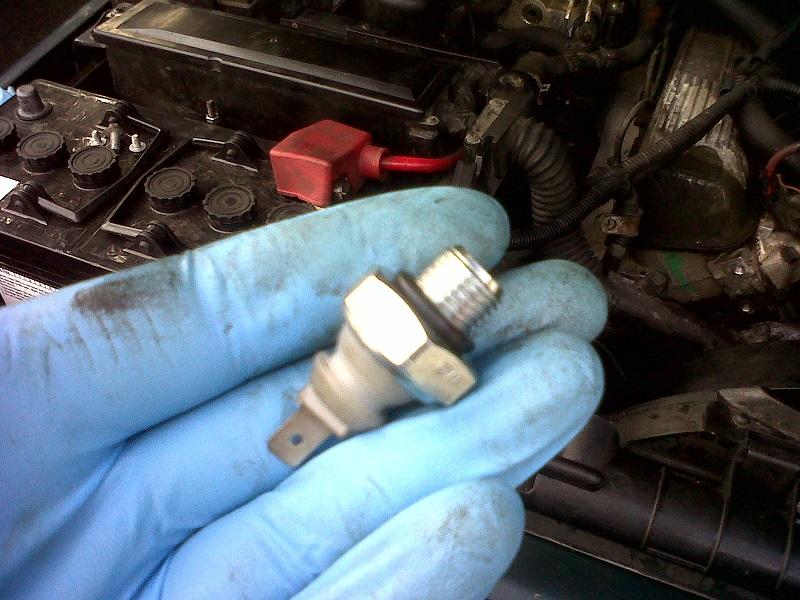
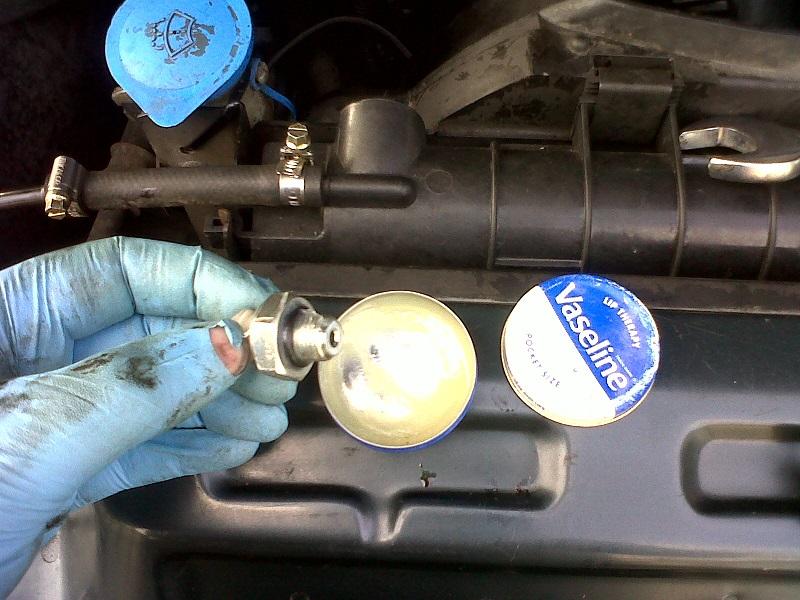
New Switch and sealing ring
Before refitting, you should never fit Orings or seals dry, so a smearing of vaseline or petrolium jelly to moisten the seal is prudent.
Refit the bracket and the P clip, Earth Strap and Heat sheild. When refitting the Tensioner, there is a dowel on the back which needs to locate into the bracket on refitment
Then refit the Alternator and wires and using the same method to release the drive belt, replace it!!
Reconnect battery and resync the keys and job done....
Unfortunatly it hasnt cured the leak, so further investigation is needed....kinda hoping the front cover isnt cracked as replacing that is a bit of a pig of a job!
Ho hum, love Range Rover ownership!
It is leaking from above the Oil Filter from the region around the Oil Pressure Relief valve or the Oil Pressure switch.
I changed the Oil Filter last week and also pulled the coolant pipe off that covers the Oil Relief Valve port and couldnt see anything untoward.
So further research led me to a post about the Oil Pressure Switch/Sensor...so for the sake of a few quid for a new sensor I thought Id change it out ....
First things first, as I will be taking the Alternator off, you must disconnect the battery
Using a 15mm Spanner on the tensioner pulley nut, apply pressure to loosen the drive belt and slip off the Alternator pulley.
Next remove the pins that hold the Alternator on to the bracket
Undo the two wires on the back and lift the Alternator off the bracket
A 13mm spanner on the Tensioner assembly bolt and remove
The next couple of points arent mentioned in RAVE...!!!
Next is to remove the heat shield that covers the engine wiring harness, the P clip on the side and a tiny earth strap on the bottom of the bracket.
Then undo the 4 bolts that hold the bracket onto the engine and lift out
The Oil Pressure Switch/Sensor is now visable
The old Switch was a 24mm spanner and space is tight but can be undone with little movements, once it was cracked off, I could undo with fingers!
Looking at the ORing that seals the switch it looks a bit squished so fingers crossed the new one will sort the leak.
New Switch and sealing ring
Before refitting, you should never fit Orings or seals dry, so a smearing of vaseline or petrolium jelly to moisten the seal is prudent.
Refit the bracket and the P clip, Earth Strap and Heat sheild. When refitting the Tensioner, there is a dowel on the back which needs to locate into the bracket on refitment
Then refit the Alternator and wires and using the same method to release the drive belt, replace it!!
Reconnect battery and resync the keys and job done....
Unfortunatly it hasnt cured the leak, so further investigation is needed....kinda hoping the front cover isnt cracked as replacing that is a bit of a pig of a job!
Ho hum, love Range Rover ownership!
Last edited:
")