illy
Active Member
- Posts
- 117
- Location
- Staffordshire
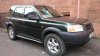
GKN VCU and FAG propshaft bearings arrived today. Just ordered a set of Continental CrossContact AT in 215/80/15..... The build commences
Continental ContiCrosContactAT
")
I got them tyres on mine about 2 months ago, they seem ok, 215 80 15
illy