Tiny1000
Active Member
- Posts
- 245
- Location
- Reading, Berkshire
Fitted new rear light guards


Painted the top of my instrument cowl black as per dave21478 and krisboats.


Changed the diff center mount, took 20 minutes and four bolts.
Not quite sure why people struggle with this one, jack the car up, take out the (uk) drivers side rear bolt entirely, take the three bolts out of the front mount. Insert jack handle between front of diff and front mount subframe anchor, lever nose of diff over to passenger side. Pull old bushing, insert new and button it all up... no need to pull the prop or anything?
But yeah, the front mount was completely cheesed:
So much so that I could actually move the core of it to the outside by hand with little in the way of force.
New one in new home:

This is my next job.
When you say "take out the (uk) drivers side rear bolt entirely" which bolt do you mean?

mocked up the new grille badge... now to cobble something together to give it a secure mounting, in place of the plastic bar
Cleaned out my intake manifold, I just couldn't believe how much crap came out of it, so I've temperory blocked up the EGR to stop the soot, until I get a bypass valve and I've ordered a pcv valve to stop the oil....Just one thing to mention if you do this make sure you have plenty of old clothes or rags and DON'T WEAR YOUR SHOES INDOORS
mocked up the new grille badge... now to cobble something together to give it a secure mounting, in place of the plastic bar
Have you decided which one you're keeping yet? Shimmed my top mount like you suggested as well, 2mm aluminium insert has tightened it up pretty well ready until i can get an upper polybush. Got my rear door lock in as well, it was considerably easier than the front one!
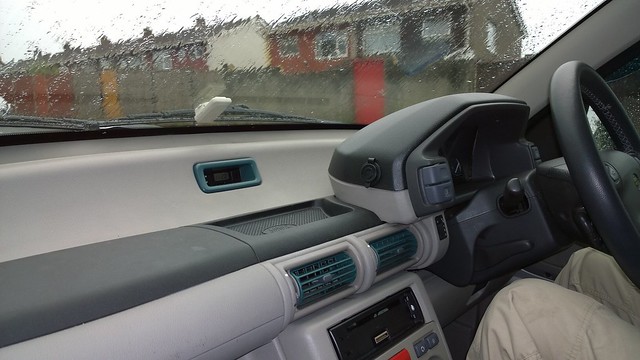
Dismantled and painted my air vent grills as well so they aren't a putrid green colour anymore. Did my scratched heater dial facia plate as well to tidy it up a bit.
You should mount them poking out of the bonnet with some bent back 'metal' as if they've been blown out of the engine!


Welcome To LandyZone, the Land Rover Forums!
Here at LandyZone we have plenty of very knowledgable members so if you have any questions about your Land Rover or just want to connect with other Landy owners, you're in the right place.
Registering is free and easy just click here, we hope to see you on the forums soon!

