Winu
Active Member
- Posts
- 795
- Location
- Poland,Warsaw
 Ooops...
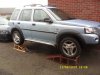
No. 3 & 4 , those are my friend set
2003 Td4 & 2006 Td4 Ooops...
2003 Td4 & 2006 Td4Cleaned her to within an inch of her life and put her up for sale
Fitted the turbo vent, now to contemplate the thermostat problem, btw now developed a clunking noise going over slightly rough roads (that will be all of the west midlands then) so will have to get the suspension looked at near the weekend.....oh dear:frown:
Getting another gaylander next weekend.


Haven't seen you round these parts much lately. You're Freelander been to reliable so you need to get one with a few faults? You ain't had the current one that long.


Had a productive morning.
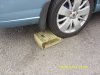
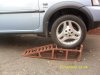
Step 1 - ride up on some ramps (dear god, why did I never buy any before, so much easier!)
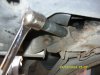
Step 2 - make sure you chock the rear wheels, in my case, with a holset turbine housing
crawl under, and laugh at your gearchange linkage that's sloppier than porridge made with water....
Does the job :lol:


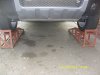
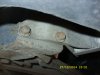
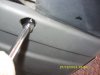
When I have to do an oil change or inspect the lower engine I now only have to remove 8 stainless steel screws 2 rear, 2 front and 2 either side, then just lower the plastic part of the under tray
so now you have to remove 8 screws instead of 12...
that does not seem so much improvement besides when you remove the whole sump access is much better. But fine for me if it works for you.
and the 13mm bolts can get seized needed a good socket and bar sometimes to remove them Welcome To LandyZone, the Land Rover Forums!
Here at LandyZone we have plenty of very knowledgable members so if you have any questions about your Land Rover or just want to connect with other Landy owners, you're in the right place.
Registering is free and easy just click here, we hope to see you on the forums soon!