Classic Vertical ridge on cylinder wall

This site contains affiliate links for which LandyZone may be compensated if you make a purchase.
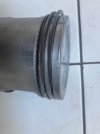
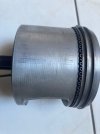
Yes mate your right pics come out with that bronze or rusty color, in your pics rings look pitted, piston pic looks unscored but looks to be discolored from rust in the bore hard to tell from pics, would be most concerned about pitting in the bores and work around that hopefully honing and new rings maybe, berrymans chem dip is great for removing carbon from pistons
 
The shells seems to be good enougth (colour effect for the bronze) as the rings!
I follow the manual for the oil ring : Position the oil control piston rings so that the ring gaps are all at one side, between the piston pin and piston thrust face. Space the gaps in the ring rails approximately 25 mm (1in) each side of the expander ring joint.
I sand gently with 2000 paper , all was nicely cleaned with hot water, soap and brakes cleaner, and compressed air.
Once again, i can't feel the scratches with my nails.
I dont want to have a competition truck , and put 1000 euros more again, just ride around with it and recover a litte more compressions (between 12, 3 to 13,3 bars before dismantling).
IMG_4786.jpgIMG_4783.jpg
 
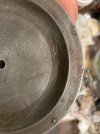
Results of chinese camsahft debris ? only one piston like this ...and only on this side of the piston head.
IMG_4787.jpg
 
Meant the debris marks on the piston top will get filled in !!

BTW, I used one of these when doing my V8 rebuild. Much easier than sandpaper or small screwdriver

1709476057620.png
 
Back
Top