Henry_b
Think outside, no box required.
- Posts
- 15,509
- Location
- somewhere else
For anyone interested here is me guide for checking height sensors on the P38.. 
So what is the EAS height sensor I hear you ask? In basic terms it is a it's a potentiometer used as a potential divider..
To check whether it is still functioning correctly you're going to need a multimeter one like this, ideally you want a slightly better unit than my 25yr old one
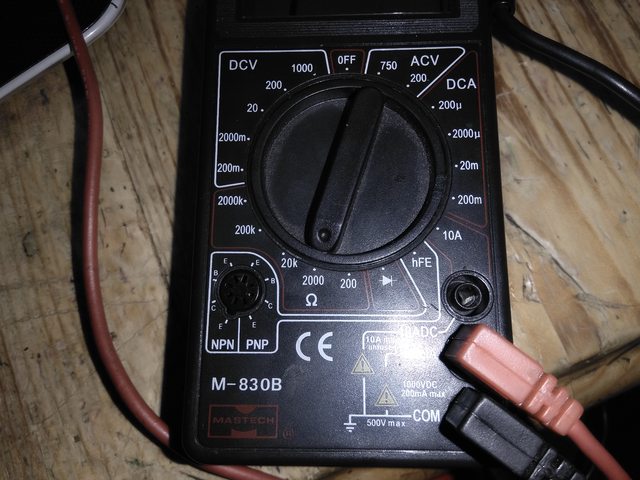
You want it on the "resistance" scale..
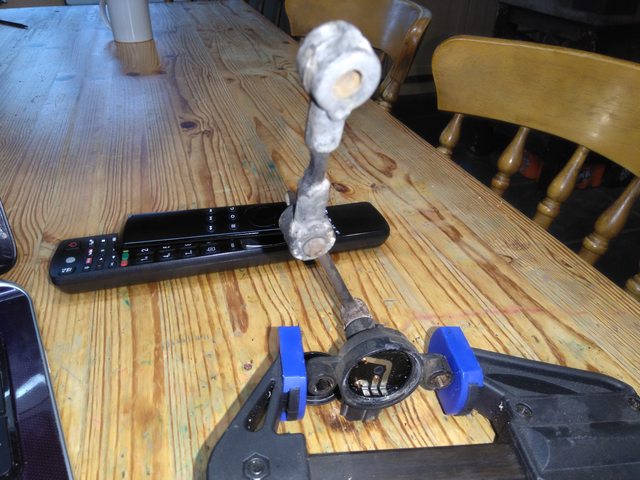
Next you need the sensor itself..
It lives on the chassis and uses the radius arm as a point of reference of the height, it is secured to the chassis by 2 - 8mm bolts and 1- 13mm nut ,

Next up "this is optional for 2 reasons" take the lid off and check the innards, underneath that plastic cap is a nice juicy O ring "fnarr" the issue "which is quite common" is it can fail and let water inside which fooks up the internals.
2nd reason, back when i were a wee lad I had to sit at the back of the bus due to being thought as retarded, the real issue was tremors, you'll note the nice pins on the inside which are much easier to get to with a multi meter when your hands are shaking around like a drunk..
You'll need a pick and some patience to get the cover off "if you want to"
Next up you should hook your peepers on the pins inside, there are 3 pins in total, the two pins at either end you should stick your meter on/
This will show you the resistance of the track itself you should be reading around 2kOhms - If you get an open circuit, throw the sensor in the bin and stop reading here
Next up putting your meter Between one of the end pins and the middle, at one end of the travel, you should be seeing a low figure ( around 200 Ohms), progressively rising as you move through the travel up to close to the 2 kOhms.
You'll either need an assistant or a 3rd hand for this bit in particular!
While you're holding the meter on the pins, get someone to slowly move the arm from one end of the track to the other, you should see a steady "increase" of the resistance as you move, you don't want to see any spikes up/down as the arm moves, if this happens it signifies a problem with the track and subsequently what is probably causing your fault!
The fault "in my case" was it going open circuit at certain points on the track which caused a repetitive fault!
--------------------------------
Faults!
What faults will a height sensor show?
Hmm..
The most common are.......
" Sensor Out of Range "
" Valve stuck closed " whether it be the RHF RHR LHF LHR etc etc.
The latter is because the sensor is not seeing a change from the height sensor(s) when it's commanded the solenoid/valve to flop open so it assumes the valve is stuck
This happens if it comes across a worn or "dead" point in the track in the height sensor.
To rule out an solenoid coil or driver pack issues you'll have to check both..
This diagram is of use

Connect 12V to pins 12 and 13 (using a spade terminal you can connect to both pins at once) ground to pins 10 and 11. Then apply 12v to pins 1, 2, 3, 4, 5, 6, and 8. When you put power to any of them, you should hear a nice solenoid click pay special attention to the side your fault is recorded - to check the connection between the driver pack and the valve block. That's the pink wire on pin 8, check for weak tension on the connector if that is the case suspect driver pack issues.
HTH
H
So what is the EAS height sensor I hear you ask? In basic terms it is a it's a potentiometer used as a potential divider..
To check whether it is still functioning correctly you're going to need a multimeter one like this, ideally you want a slightly better unit than my 25yr old one
You want it on the "resistance" scale..
Next you need the sensor itself..
It lives on the chassis and uses the radius arm as a point of reference of the height, it is secured to the chassis by 2 - 8mm bolts and 1- 13mm nut ,
Next up "this is optional for 2 reasons" take the lid off and check the innards, underneath that plastic cap is a nice juicy O ring "fnarr" the issue "which is quite common" is it can fail and let water inside which fooks up the internals.
2nd reason, back when i were a wee lad I had to sit at the back of the bus due to being thought as retarded, the real issue was tremors, you'll note the nice pins on the inside which are much easier to get to with a multi meter when your hands are shaking around like a drunk..
You'll need a pick and some patience to get the cover off "if you want to"
Next up you should hook your peepers on the pins inside, there are 3 pins in total, the two pins at either end you should stick your meter on/
This will show you the resistance of the track itself you should be reading around 2kOhms - If you get an open circuit, throw the sensor in the bin and stop reading here
Next up putting your meter Between one of the end pins and the middle, at one end of the travel, you should be seeing a low figure ( around 200 Ohms), progressively rising as you move through the travel up to close to the 2 kOhms.
You'll either need an assistant or a 3rd hand for this bit in particular!
While you're holding the meter on the pins, get someone to slowly move the arm from one end of the track to the other, you should see a steady "increase" of the resistance as you move, you don't want to see any spikes up/down as the arm moves, if this happens it signifies a problem with the track and subsequently what is probably causing your fault!
The fault "in my case" was it going open circuit at certain points on the track which caused a repetitive fault!
--------------------------------
Faults!
What faults will a height sensor show?
Hmm..
The most common are.......
" Sensor Out of Range "
" Valve stuck closed " whether it be the RHF RHR LHF LHR etc etc.
The latter is because the sensor is not seeing a change from the height sensor(s) when it's commanded the solenoid/valve to flop open so it assumes the valve is stuck
This happens if it comes across a worn or "dead" point in the track in the height sensor.
To rule out an solenoid coil or driver pack issues you'll have to check both..
This diagram is of use
Connect 12V to pins 12 and 13 (using a spade terminal you can connect to both pins at once) ground to pins 10 and 11. Then apply 12v to pins 1, 2, 3, 4, 5, 6, and 8. When you put power to any of them, you should hear a nice solenoid click pay special attention to the side your fault is recorded - to check the connection between the driver pack and the valve block. That's the pink wire on pin 8, check for weak tension on the connector if that is the case suspect driver pack issues.
HTH
H