Bife
Active Member
- Posts
- 230
- Location
- Lisbon Portugal
It may not rip your sunroof off, but it'll have a good go at the head lining
My sunroof works. I know cos I never use it in case it breaksHowever, I occasionally hit the wrong button when I open the window and it opens
No need to open it anyway as I have AC - however, I'm to tight to pay the extra diesel to turn that on! It only goes on when we're in tour mode for visiting friends and family.
Hahaha!
I thought of that approach - but thought that probably keeping it moving would be better to keep it free
I also know what to do next time too, and have a couple of spare mechanisms now
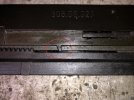
I glued up the Headlining yesterday AAMOF
Its already starting to come down in places
as the foam is crumbly - Portuguese summers are a bit aggressive in this respectMy AC has never had any fluid in it - I looked at the state of the rubber tubing and decided it wasnt worth it
But, I am going to finally replace the rear window winder mechanisms next week after 5 years so that's a start
With the sunroof open the exhaust gases dont come in through the open tailgate window either