Bobsticle
De Villes Advocaat
- Posts
- 27,632
- Location
- Manchester
After my recent trials with a wiper motor and not being able to find much on changing brushes, I thought I'd post this in case anyone could benefit from my mistakes.
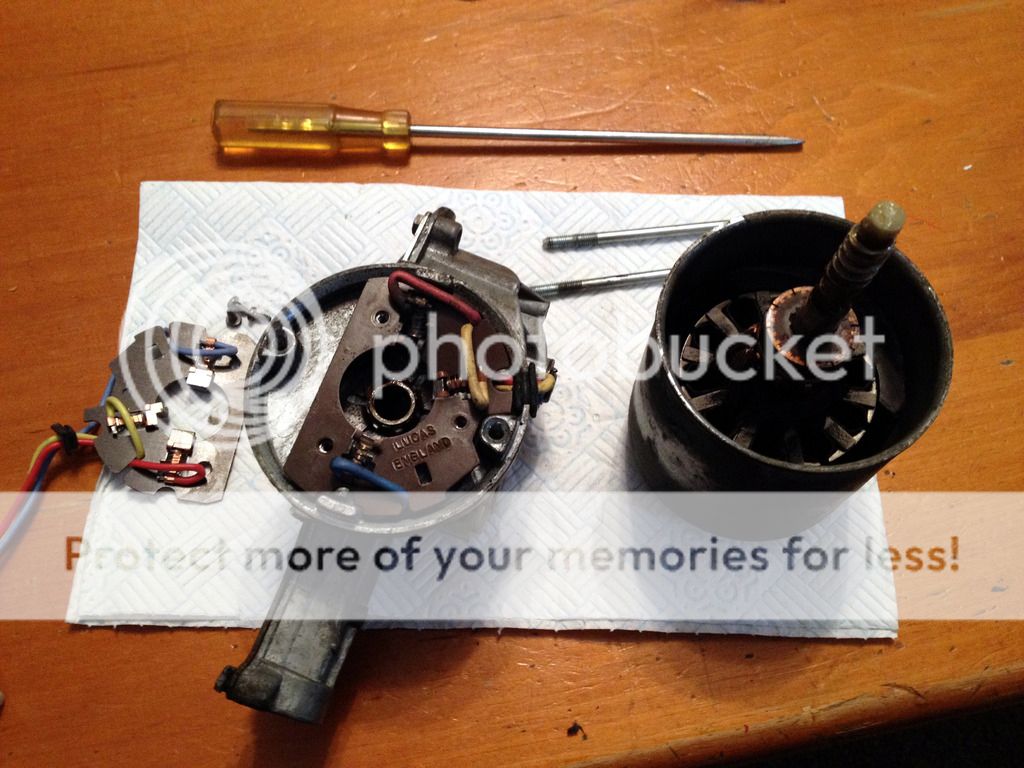
When you buy new brushes they come mounted on a card for direct replacement including the wires.
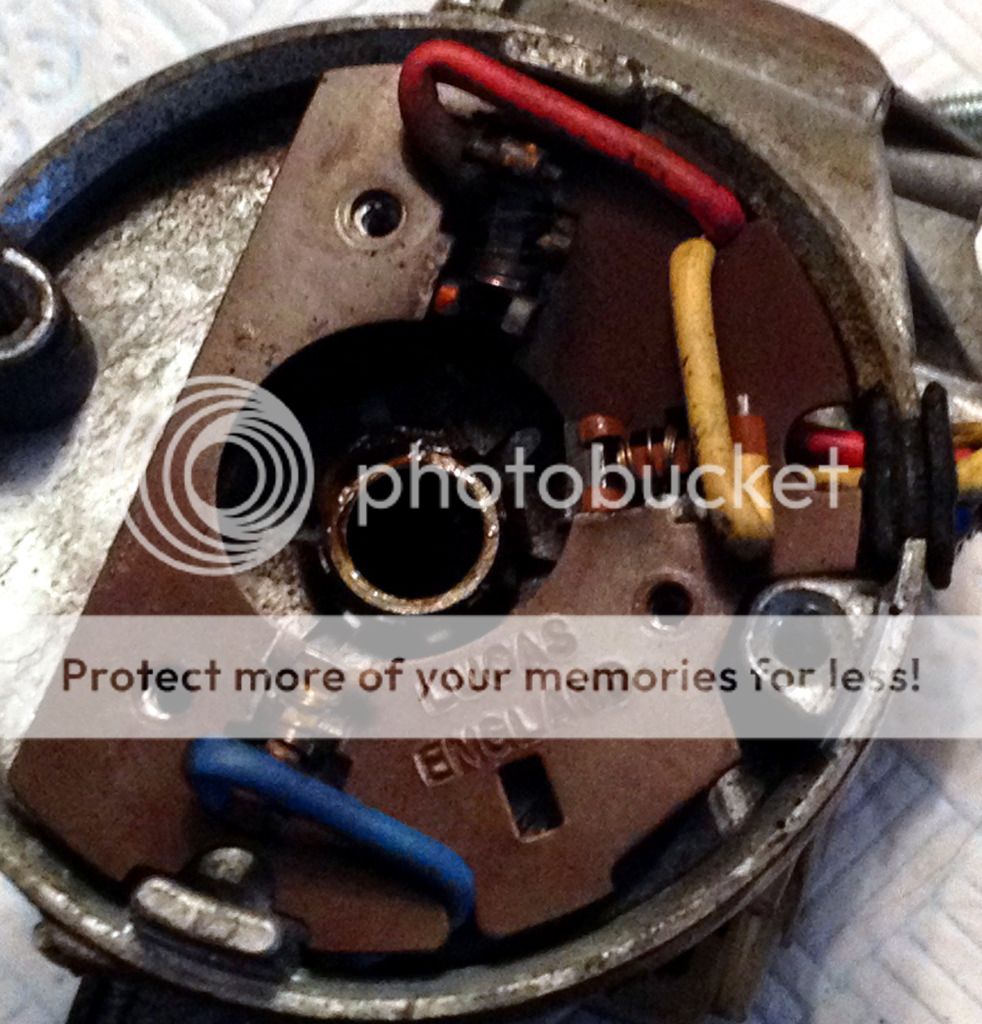
In this shot the motor has been removed by simply unscrewing the two long nuts on the bottom of the cylinder body and gently pulling apart. The new brushes are now ready to install.
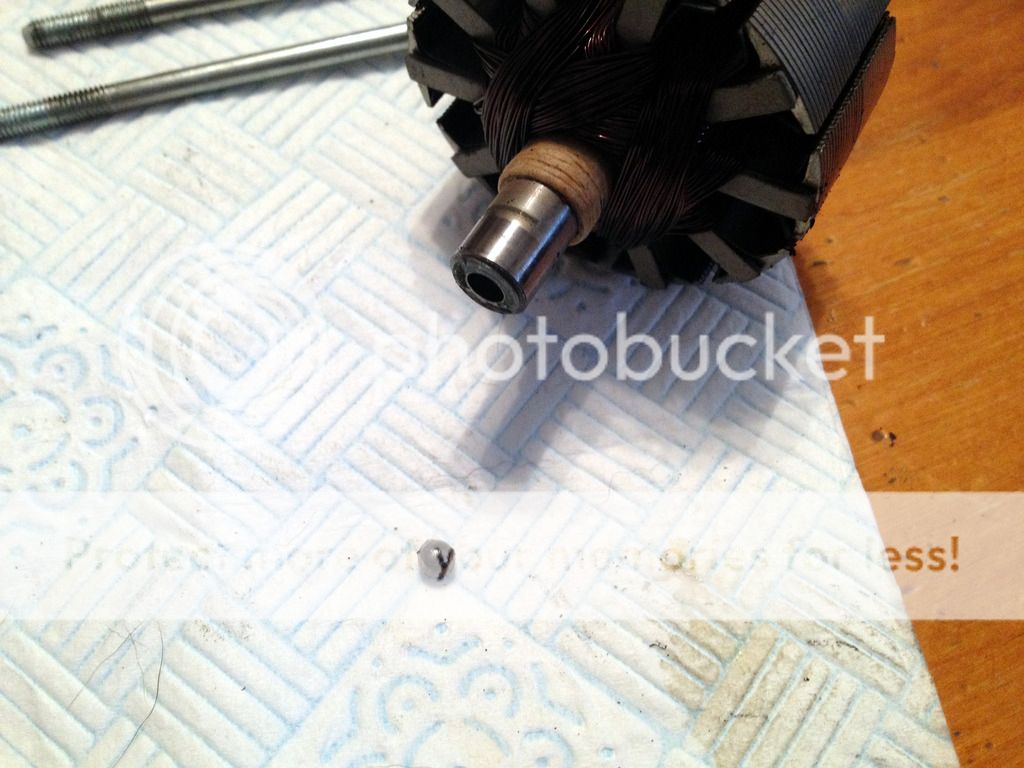
You need to take the motor from the cylinder for later but when you do the magnets on the inside of the cylinder will give you a little tug of war. Once you have won this 3 second battle dont lose the little ball bearing that is no doubt by now stuck to one of the magnets. It lives in the hole at the bottom end of the shaft.
Back at the brushes, you can take out the three retaining screws and before removing the wiring do yourself a favor and screw the new one in place.
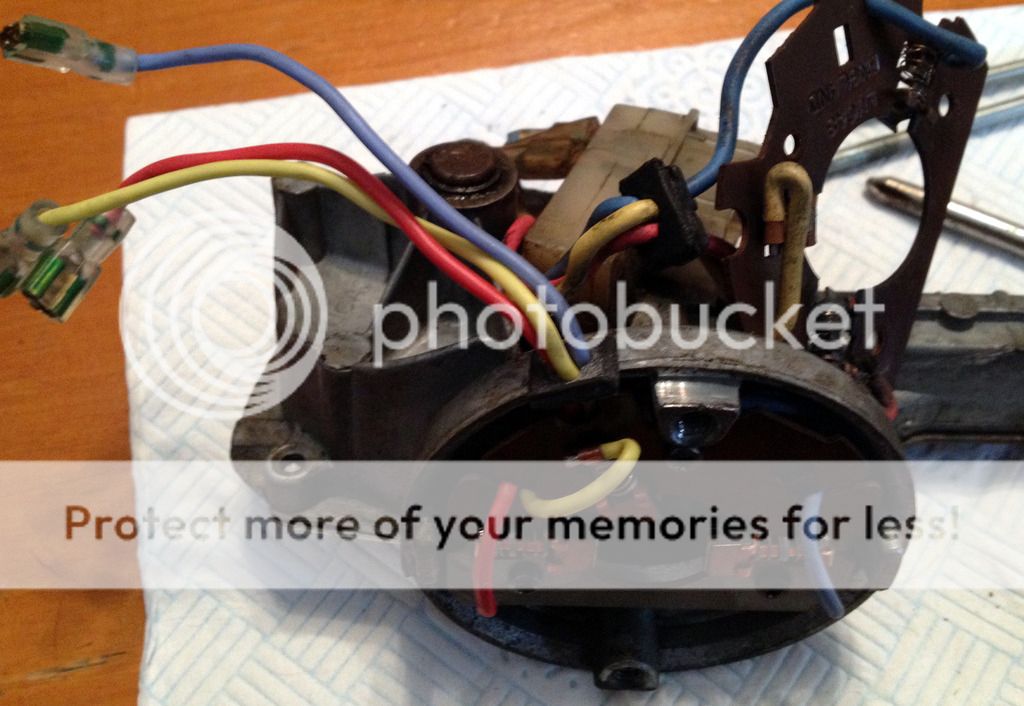
This gives you half a chance of getting the spade connections in the right order.
So fit the spades and bin the old brushes easy peasy.
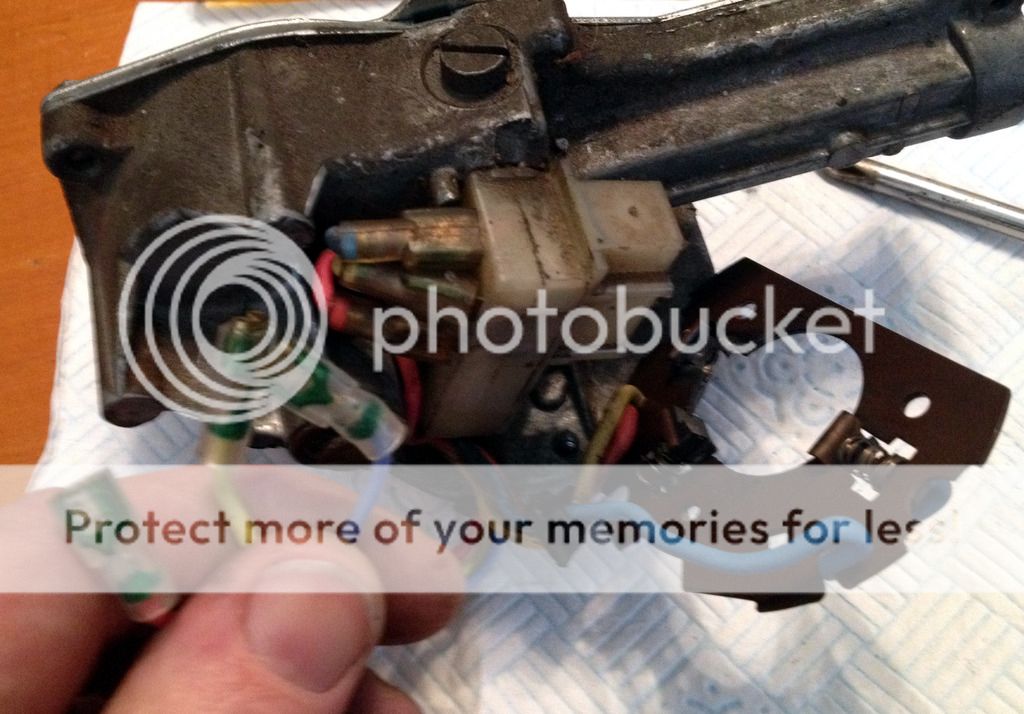
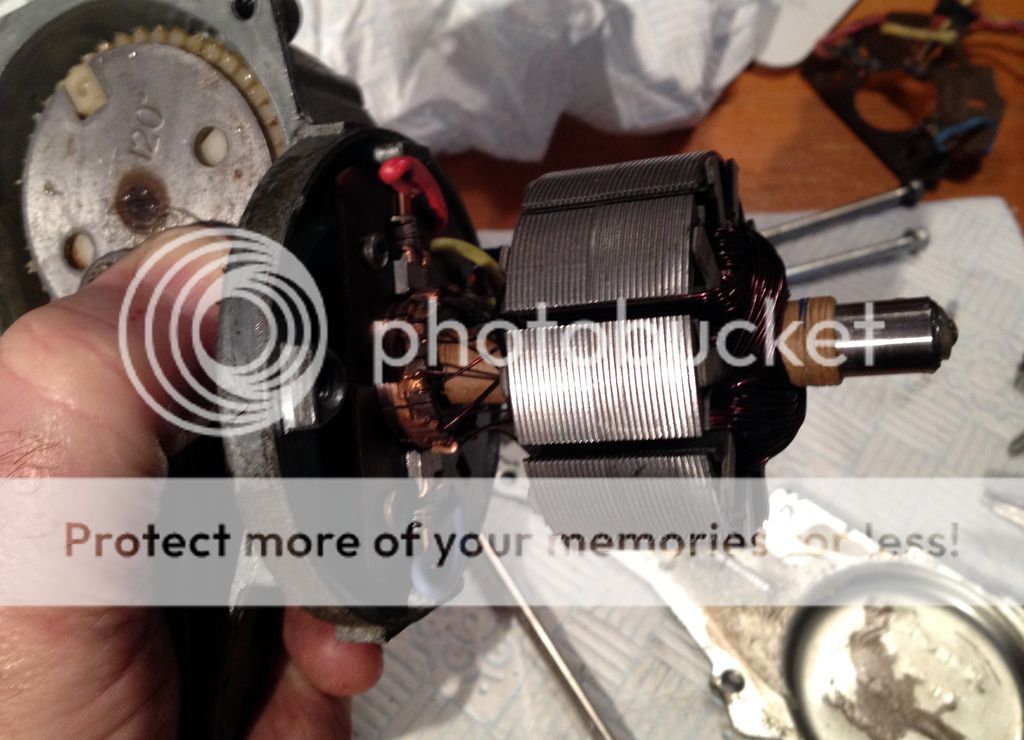
The commutator and motor can now be fitted back to the unit. Dont put the motor back in its case. This is important. You see in the dark and rain whilst panicking about getting to work the next day this is just what I did and when it wouldnt go back together I forced it. Thats why I am changing these brushes at all.
I destroyed the old ones as you can see below. Totally smashed out of their brackets and burnt out when switched on.
You can see that the commutator does not slip back in between the brushes as easily as it came out.
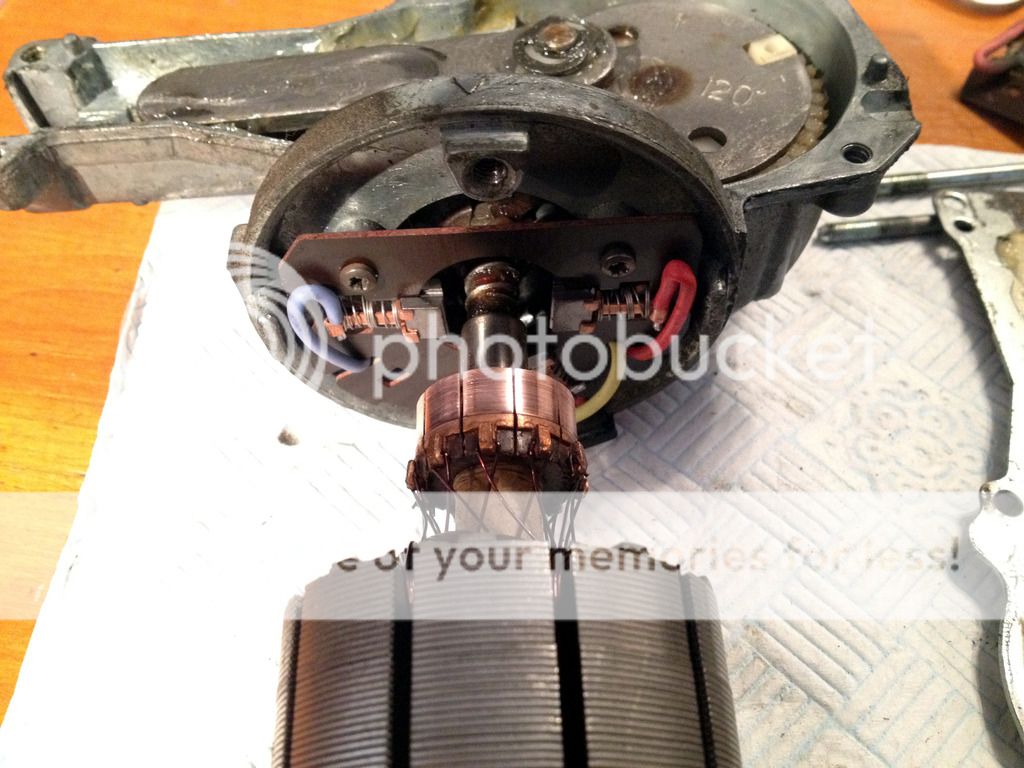
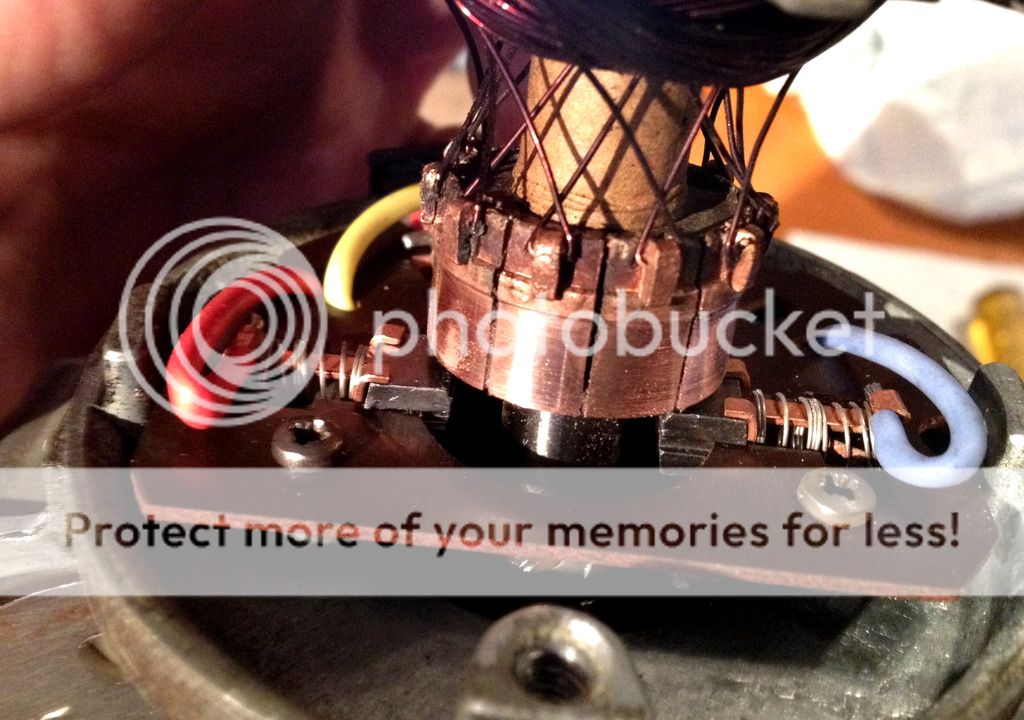
You will notice that the brush with the yellow wire is stepped. You should be able to pull this back with a small screwdriver whilst leaning the commutator towards it and catching it on the copper edge.
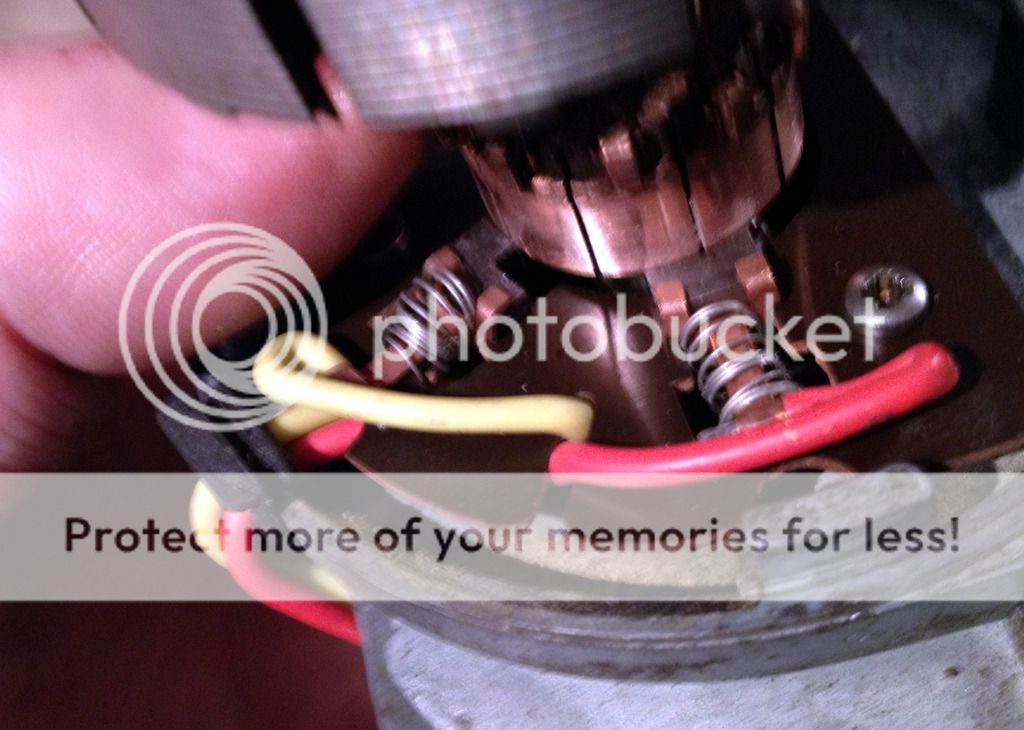
Once gently trapped you can do the same with the red one, catching both on the edge. Then finally the blue. The shaft should lean enough to trap each brush in turn until the motor slides into position.
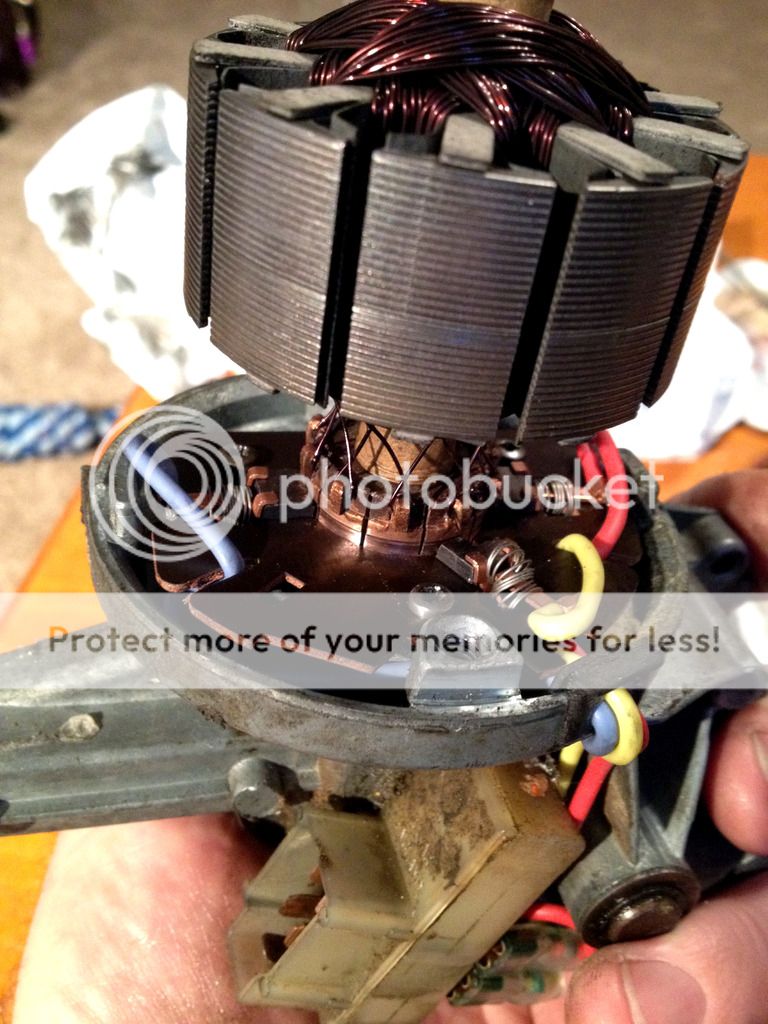
Now the fun bit. You have to hold onto the gearing at the top of the shaft for dear life whilst you slide the motor cover into place with the magnets doing all they can to balls things up.
Stick the ball bearing in position with a dab of grease. Clamp your thumb down on the gearing and after a little prayer to Swarf the god of series land rovers, slide the cover back on.
If for any reason the commutator pulls out then start over. Remember your not going to get that shaft past the brushes.
Once the cylindrical cover is back in place make sure everything looks nice and square. The first time I did this I completely rebuilt everything, fitted it all back on the vehicle and switched on. It was catching somewhere inside and would only run for a few seconds before grinding to a halt.
On the second fitting I held the cylinder onto the unit by hand and powered it up whilst it was still disconnected from the wiper gear. This gave me the opportunity to keep it running while I replaced the long retaining screws and tightened everything up.
You can then re fit to the bulkhead and connect the wiper gear. Everything should be good to go.
When you buy new brushes they come mounted on a card for direct replacement including the wires.
In this shot the motor has been removed by simply unscrewing the two long nuts on the bottom of the cylinder body and gently pulling apart. The new brushes are now ready to install.
You need to take the motor from the cylinder for later but when you do the magnets on the inside of the cylinder will give you a little tug of war. Once you have won this 3 second battle dont lose the little ball bearing that is no doubt by now stuck to one of the magnets. It lives in the hole at the bottom end of the shaft.
Back at the brushes, you can take out the three retaining screws and before removing the wiring do yourself a favor and screw the new one in place.
This gives you half a chance of getting the spade connections in the right order.
So fit the spades and bin the old brushes easy peasy.
The commutator and motor can now be fitted back to the unit. Dont put the motor back in its case. This is important. You see in the dark and rain whilst panicking about getting to work the next day this is just what I did and when it wouldnt go back together I forced it. Thats why I am changing these brushes at all.
I destroyed the old ones as you can see below. Totally smashed out of their brackets and burnt out when switched on.
You can see that the commutator does not slip back in between the brushes as easily as it came out.
You will notice that the brush with the yellow wire is stepped. You should be able to pull this back with a small screwdriver whilst leaning the commutator towards it and catching it on the copper edge.
Once gently trapped you can do the same with the red one, catching both on the edge. Then finally the blue. The shaft should lean enough to trap each brush in turn until the motor slides into position.
Now the fun bit. You have to hold onto the gearing at the top of the shaft for dear life whilst you slide the motor cover into place with the magnets doing all they can to balls things up.
Stick the ball bearing in position with a dab of grease. Clamp your thumb down on the gearing and after a little prayer to Swarf the god of series land rovers, slide the cover back on.
If for any reason the commutator pulls out then start over. Remember your not going to get that shaft past the brushes.
Once the cylindrical cover is back in place make sure everything looks nice and square. The first time I did this I completely rebuilt everything, fitted it all back on the vehicle and switched on. It was catching somewhere inside and would only run for a few seconds before grinding to a halt.
On the second fitting I held the cylinder onto the unit by hand and powered it up whilst it was still disconnected from the wiper gear. This gave me the opportunity to keep it running while I replaced the long retaining screws and tightened everything up.
You can then re fit to the bulkhead and connect the wiper gear. Everything should be good to go.
Last edited:
")