P38_Ireland
Well-Known Member
- Posts
- 1,392
- Location
- Co Wexford, Ireland
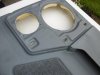
your dead right. the devil is in the details. its concourse condition. how often are you looking to drive the machine?
your dead right. the devil is in the details. its concourse condition. how often are you looking to drive the machine?
")


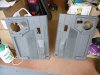
Very nice, much smarter than mine.
PS Give 2010 a poke to answer my email!
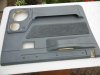
Wow looks great amazing job
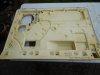
Great work Dunkan.. i suppose i should gliptone the 1990 3.9. -- Or if you are in the Surrey region.. you could umm show me how its done !


Welcome To LandyZone, the Land Rover Forums!
Here at LandyZone we have plenty of very knowledgable members so if you have any questions about your Land Rover or just want to connect with other Landy owners, you're in the right place.
Registering is free and easy just click here, we hope to see you on the forums soon!