Series 3 109 Station Wagon, full ground up resto and 88 redo careless resto driving project

This site contains affiliate links for which LandyZone may be compensated if you make a purchase.
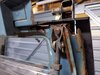
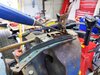
Was hoping to get all the bulkhead structural welding done before getting pulled back to work. But with time running out, I had to service my Subaru XV diesel, which I do in-between the main dealers service. 12K or a year is too long for a diesel if you want to keep it for twenty years. I traded my 20 year old Volvo in for it, which I ran for 17 years.
Also needed to service my wee C1, daughter's learning to drive and a great wee run about. So the Landy has been put on hold for a week.
I also have a woodland and needed to take my small tractor back, which has also had a service, plus needed to cut some logs.
Lastly I managed to break my mobiles screen when the strap got caught on the landies front wheel hub , so I've fitted a new screen and it's like new again .
Tomorrow I really want to continue with the Landy, until they drag me back to work, which will be very very soon.
Please Lord let me have three more days
 
IMG_20200608_113517.jpg
finally got back to the Landy,
Welding the small panel
IMG_20200608_124946.jpg
IMG_20200608_124846.jpg

At last I can do the driver side which should be much more simple, and quicker because of what has been learn't from the passenger side.
When I finally got round to putting the summer wheels back on my Scooby XV, found the rear pads to be very worn, so have replaced them.
Now what lockdown freedom I have left is split between online work, some decorating and the Landy.
 
So got the A pillar off the other side. It is worst down at the foot, which didn't want to come off
15917865215836748596357063655292.jpg
The pillar wasn't so bad, and I think it has been partly replaced in the past.
1591786654923513554274609470854.jpg
15917867046441945242246205025567.jpg

So it's on with getting the A pillar and new foot in before taking the footwell and brake servo, clutch and steering apart.
The idea is to disturb the bulkhead as little as possible. Once the A pillar is in it will support the rest so I can remove and replace as needed.
15917869514457004266060003248369.jpg
 
15918013384254898299168875227665.jpg
15918013819618377319110330800097.jpg
15918014357428427733708060930190.jpg

At least on this side everything internal is very clear. Unlike the other side where it had all been eaten by the tinworm.
Some repair needed, but it is so much easier having the original parts mostly intact
15918016700228503049021106900515.jpg

I can see that a previous repair just covered over internal rot. No surprises there then.
I think in the past the car was gifted up for sale in the traditional Author Dailey way lol.
15918033170548395679590568753679.jpg
15918033879765048922554768874895.jpg

Just getting a rough idea of how the prefab repair panels will fit.
I will make some small repair panels and weld them in before anything is fitted.
 

Attachments

  • 15918035786965002577456314728180.jpg
    15918035786965002577456314728180.jpg
    233 KB · Views: 124
This is so interesting. I've got all this to do soon. It's going to be a real help for me to see how it's done. Watching with interest.
 
I hope so, but I'm kind of learning as I go.
I have some experience having worked in a garage in a previous lifetime. However this is my first venture into Landy territory.
On my third Subaru, and have a woodland which has made it clear I need a proper Landy. Not one of those new Defender all leather and no ladder lol, you would never want to chuck a in the back of something so posh lol.
The new ones aren't much different from my Scooby either in construction and axle design.
When stripping the windscreen wiper mechanism of the Landy, I discovered it all came apart, so if it became worn you could just turn the pinion gear a bit to a non worn bit. Brilliant .
The bulkhead is taking me ages because it's new to me, and mine was completely disintegrated on the passenger side upper.
20200422_091118.jpg
20200422_171930.jpg

This proved quite a challenge. Maybe I should have started with the less bad driver side lol.
But it got there in the end with lots of small panels made and fettling, and some distortion which I was able to check for by re-fitting the window again
IMG_20200608_124946.jpg
 
15920543225436188217597333024641.jpg
15920543919443462803840749083837.jpg

It would be the middle bit which is the most corroded lol.
So I'm taking apart so I can repair the outer and make a repair part for the middle bit.
The outer part is good apart from the side
1592054732437193356996497197411.jpg
15920547718358999210948814279525.jpg
15920548515612000941269618655489.jpg
15920549203736762897928719980139.jpg

Time to make a pattern and remake top outer third
 
Making patterns to replace corroded parts
15921362327116289847187573991518.jpg
15921363109856421927246267056621.jpg
Old corroded metal will be cut out and new butt welded
15921364356646607918744988714625.jpg

In to replace after area is treated with
15921365628601322133110772350460.jpg
And lastly all cavities will be sprayed with Waxol or Etch primed then Waxol as appropriate.
 
1592214693188348373096806891204.jpg

Quite happy with how this panel repair has turned out
1592214769868251376424214515233.jpg

Small part behind is welded in
1592214849843882682220466190066.jpg

So I can weld this part back in
15922153799641756418172490917078.jpg

Held in place by a couple of roofing bolts and ready to weld.
After that the repair section can be fettled and fitted, then the A pillar.
Something like this
15922156443168647900664814847359.jpg
15922156824614672911920471125700.jpg

Following which I can focus on the footwell, but with everything well supported by the A pillar.
 
Thank you,
Back at work now, but only for a few hours a day . So welded the top when I got home, and had a wee tidy up with the grinder
IMG_20200615_181407.jpg
IMG_20200615_181505.jpg
IMG_20200615_181531.jpg

So now there's something solid to cut and butt weld the prefab repair panel in to.
Hoping to make a paper pattern to transfer to the repair panel as it's tight to the outer window support. I spent some time with an engineer's ruler measuring from the support to the outside and if I cut the repair panel just right it should fit giving the perfect spacing. Then I'll cut further down for the continued butt weld. I would love to have minimal distortion this time, so small tacks and big patience will be the order of the day.
Thanks for the positive responses
 
IMG_20200616_075735.jpg

Made a paper template this morning for trimming my repair panel precisely
IMG_20200616_075748.jpg

Where the repair panel fits will be close to strengthened areas which I have cut back to. There is no point replacing good metal, but to get the repair panel very close to these edges required a paper template to transfer to the metal.
I poke holes with a really sharp pencil and dot through, in this instance with a white paint pen as the metal's black
IMG_20200616_083705.jpg
IMG_20200616_085549.jpg
IMG_20200616_085623.jpg
 

Attachments

  • IMG_20200616_075754.jpg
    IMG_20200616_075754.jpg
    270.1 KB · Views: 134
Yes I am.
I'm shure CO2 gas with wire would be easier, but I have found flux cored wire can give as good a weld if the flux is dry.
If the flux has become slightly damp from being open for a period of time, the roll can be taken off and put in very warm dry place for a few hours, days. Even slightly damp flux will spit everywhere, and not give such a good gas shield for the weld.
But I'm always learning and open to any suggestions.
I put my welding rods for arc welding in the oven at 60deg C for a couple of hours. But the plastic reel for the mig wire would probably melt.
 
Back
Top