Series 3 109 Station Wagon, full ground up resto and 88 redo careless resto driving project

This site contains affiliate links for which LandyZone may be compensated if you make a purchase.
Next job to tackle on the 88 is her gearbox woes.
PXL_20211029_193202430.jpg
PXL_20211029_193156127.jpg
PXL_20211029_193217594.jpg

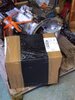
So these are what came out with the gearbox oil change.
They were attracted to the magnetic drain plug. What a good idea.
So the box is leaking oil into the bell housing and I think reverse gear teeth and third and fourth gears have damage too .·´¯`(>▂<)´¯`·.
But after many hours of research online, I've come to the conclusion that it is cheaper for me to get a rebuilt gearbox and transfer box. Because so many parts need replacing in mind it's just not economical to do so.
There was some small shiny bits came out too, which are likely to be bearing material.
A replacement set of seals and bearings for this Suffix A gearbox are very reasonably priced. But when you start to add matched gear wheels things start to get expensive. Plus the bearings in the transfer box are gone and it's very noisy too.
The Suffix C or D box on the 109 only has a synchromesh gone as far as I can tell. It has a label on the bell housing as a Gold factory reconditioned gearbox and transfer box, so I'm going to rebuild them myself and hoping the parts required won't be too excessive.
Have found a chap down in Cornwall who rebuilds Landy gearboxes, and he has lots of parts available to choose from, so hopefully he may build a good one. A couple of years use will tell, and U know there's some supposedly reconditioned ones out there which are just bad.
Fingers crossed I get lucky.
 
Happy Days
16367206832897904669019632173169.jpg

One rebuilt gear and transfer box
16367208160656920281927753391560.jpg

Just got to finish putting a new sill on the Bug and can get busy with the Landy Gigi.
Going to replace the rear main oil seal at the same time, so may pull the engine oot to do that.
Must be delivery day!
20L of 20W50 oil just got delivered too
 

Attachments

  • 16367212844157453555370839793276.jpg
    16367212844157453555370839793276.jpg
    285.2 KB · Views: 74
Thanks, it's very clean.
I can't wait to get busy fitting it, but first I'm finishing fabricating a new sill for the C1
PXL_20211113_172906713.jpg

Which had some rot along the bottom, so have replaced most of it with new metal.
I noticed some damage on the bell housing of the rebuilt gearbox, where the starter fits.
It looks like the bell housing and starter had a fight and the starter won making a small hole.
The plan is to braze it with some aluminium repair rods, they need the metal to be heated to 700°C which will be hard as the thick aluminium will suck all the heat away!
Hmm, gotta try and fill the small hole though before fitting.
 
Last edited:
I noticed some damage on the bell housing of the rebuilt gearbox, where the starter fits.
It looks like the bell housing and starter had a fight and the starter won making a small hole.

if you're refering to the hole in this photi
16367206832897904669019632173169-jpg.252534

it looks like someone's wiped it with an anglegrindero_O you or someone else?

as to welding / brazing, I'd try to find someone locally with a tig set as getting the bellhousing hot enough with a blowlamp to braze will take some effort:(


on the subject of alloy repair, I bought a 240v Camarc 'spoolgun' migset to do a job (not content with that I bought another (415v) for spares -although it does work) decent equipment is out there for cheap if you're lucky & in the right place:cool:

Rich.
 
That was my first thought, when it arrived on the pallet, but I couldn't figure why someone would have done that ??
The mig spool gun with 100% Argon gas I's a thought, because to tig weld it would be a huge fight with all the crud which would keep coming out of the casting.
Or maybe I should just leave it alone, but I'm not keen on having a hole in me bell.
The other option is to swap with the bell housing from my box, which would entail pressing the first motion shaft bearing into the new old housing and fettling it all back together. With a new oil seal and gasket which I could fabricate.
Hmm, what to do..
 
Last edited:
Getting a nice collection of gaskets, also bought gasket paper, so I can use quite a few of the new gaskets as the pattern to cut more spares
16370635875372396586418492274413.jpg

Since the engine will likely have to come out for the main crank oil seal, I may clean and paint the engine. The engine bay could use a tidy too, but there has to be a point at which to stop lol.
 
So finally got paint on the sill fabrication, so when it's all back together, can get busy with the Landy gearbox change and engine tidy up + new seals.
PXL_20211118_182049024.jpg

I also ordered an engine/gearbox stand, which had a good discount at £50 delivered.
Since I'll take the engine out to fettle and change the crank seals. Also since I've quite a bit of baby blue 2 pack paint left over from another job, which I can modify to duck blue, might as well clean and repaint the engine too. Also paint the fan something like this..
https://images.app.goo.gl/w4KGJYvYb48hnn6t6
All of which will be easier with the engine stand, then the 5 bearing engine from the 109 can be mounted on the stand and worked through. If I'm really lucky the 5 bearing 109 engine will be able to fit back into the corner where it is currently. But would be much more convenient to have the engine on wheeled stand, so it can be worked on and put away as suits. But that will be another year lol.
Just happy to be getting the Bug C1 finished and clear to make space for Gigi to get her recon gearbox
16367208160656920281927753391560.jpg

and some much needed tidying up done in the engine bay.
 
If your ever down Forfar way and happen to have the box in the back of your car I will tig it for free for you .. However if you want to have a go with the mig and some Argon I can tell you that if you use a teflon liner and a 0.8 tip and 0.6 ali wire turn the wire speed up and you wont need a spool for the small amount of welding you have to do there . It wont be pretty but its hole filling not structural , just clean it up with a flap wheel but give the flap wheel a good dose of WD40 to stop the ali sticking and clogging it .
 
Thanks auld duffer,
That's also interesting what you say bought the WD40 to stop Alu sticking to a flappy wheel, would that also work with carbide burrs on the air tools would you think?
I have a very powerful blow torch, the type plumbers use for bigger pipes and it runs on MapGas so it's an ideal brazing torch.
Also have special Alu repair rods for doing a brazed repairs specifically for Alu. They melt at a much lower temp, so I don't need to get the area all that hot for the rods to work.
If I can get enough heat for them to do their job, they should make a clean looking repair which would be more like soldering than braising, which could then be cleaned up, using your tip of the WD40 flappy wheel thanks.
The engine/gearbox stand arrived really quickly which was great. Unfortunately there was no mounting hardware to bolt it together with (ᗒᗩᗕ) Chasing that up but the instructions lists all the parts missing so may end up using my own.
At least the Bugs out of my workshop. Now it can get cleaned up and organised for doing work on the Landy.
My garage is too low to fit the Landy, so she'll get parked across the front, and parts pulled into the shop to work on.
IMG-20211120-WA0002.jpeg
 
PXL_20211122_154309447.NIGHT.jpg

So the dogs come to help with the gearbox.
But first things first.
PXL_20211123_120829927.jpg

The problem of the hole in the bell housing.
Using the stainless steel brush from the aluminium repair rods kit, cleaned up the wounded area
PXL_20211123_120811211.jpg

And experimented with measuring the temperatures in various places when heating the affected area, using the infrared thermometer; ( cheap one from Aldi, but works great).
PXL_20211123_121709205.jpg

My concern being since aluminium is such a fantastic conductor of heat, I may not be able to get the working area hot enough before too much heat got to the new first motion shaft bearing seal. This would be bad.
Here is the kit details I'm using
PXL_20211123_142247942.jpg


I need to get the working area to just under 400°C for the rods to melt, but must not let the seal area reach 45°C approx, to avoid damaging it.
My other concern is that the flowing rod would just run out through the hole, and some did
PXL_20211123_131608184.jpg

Falling onto the clutch slave housing area.

I heated the Mapgas cylinder up in warm water as it's about 6°C in my workshop, and I need full power.
PXL_20211123_123020902.jpg

And success
PXL_20211123_131152143.jpg

The other side looked like this
PXL_20211123_130119964.jpg

Cleaned it up
PXL_20211123_150537124.jpg

PXL_20211123_160352065.jpg

It turned out better than I was expecting
PXL_20211123_160344527.jpg
PXL_20211123_160329208.jpg
 
PXL_20211128_130520796.jpg
working away to get the old gearbox oot.
I don't think this seat box has been out in a very long time. There is so much galvanic corrosion I'll have to rebuild the seat box when it comes out. New ends needed and also the toolbox will have to be replaced or made, maybe with galvanised sheet I have handy. Hmm that opens up some possibilities as some I've seen have a double battery capacity for the six pot I think. But a bigger tool box would be useful for storing stuff out of sight.
Parts of the 'restored' bulkhead need work too like here.....
PXL_20211128_130542668.jpg

That's just nasty, but can be cut out and re fabricated with galvanised sheet.
Got to be very careful of the poisonous fumes when welding, but the galvanised metal can protect over the weld which is a little future proofing I hope.
PXL_20211128_130527159.jpg

There's other areas needing repair/restoration too.
PXL_20211128_135121932.jpg

But now has to be the time to rebuild the seat box and do the small repairs.
The seat box is s whole mini project in it's elf!
PXL_20211128_145920347.jpg
PXL_20211128_145849563.jpg


Lastly, I can fit the new fuel sender if I can figure out how the wiring should actually be?
PXL_20211128_150019521.PORTRAIT.jpg

My reading of the wiring diagram is that the feed wire + from the guage, should go to the sender, then from the other terminal go to Earth. The variable resistance potentiometer within changing the meter reading.
I don't like what I see, as it's a confused mess and the tank is I think being used as an earth ?
Start again I will, and what's that terminal on the oval part for ??
PXL_20211128_145934569.jpg

Getting ready for lift out :cool:
 
The terminal on the oval part has been used as the earth by the looks of .. Two insulated connectors on the sender are likely to be the signal wire to the gauge and possibly a low fuel warning light .. the usual path for a fuel gauge is one signal wire to the gauge and an earth using one of the mount screws for the sender to chassis ground .. that can be via the tank if the tank is mounted metal to metal and the chassis and gauges have a good earth circuit.

The other insulated terminal is usually a source to a warning light ..

Its probably a generic sender that does the job but doesnt require the other terminal , If your gauge isnt working its likely because the wire the fitter thought was an earth, viz the short wire to the oval tab, which looks like it was connected to the other insulated connection on the sender, isnt an earth connection.. If you remove the spade , fit an eye and secure it to the sender plate screws the sender should then work, providing the tank has a good earth to the chassis :)
 
Thanks,
Got these repair rods for the birmabright body repairs. But they did a sterling job on a difficult fix.
I will use them to fill the holes in the seat box front from the spot welds. Then I can have better spaced rivets in fixing
1638287784265624288981181231226.jpg
the new repair sections.
I just need to source the correct rivets, for the seat box.
 
Rumor has it that "birmabright " is nothing more than a standard grade ally. Im not sure what grade but when making ali body panels I always used H14 which was a half hard alloy that allowed for some working before it would need softened again by annealing . Ive welded the landrover panels easily with the tig without any problem other than dirt contamination , hard to avoid with ancient aluminium.

I read somewhere that birmabright was a shortened slang for aluminium used in the factory .. a jokey term for Birmingham Bright basically describing the volume of nice shiny ali sheet they used in the factory Might not be true but its a good story :)
 
Lol, probably.
I thought it had a bit of magnesium thrown in, and was excess Spitfire construction material, more available than steel after WW2.
I would love a TIG, and I would spend many hours making the most tiny welds look beautiful. Such a versatile bit of kit.
The rods and map gas torch doesn't pull the junk out of the old metal. Maybe one day I'll get a TIG, but the rods should suffice for the meantime.
If it doesn't snow too much tomorrow, may be able to get levers disconnected and some bolts out of the old bell housing.
 
Back
Top