Footwells

This site contains affiliate links for which LandyZone may be compensated if you make a purchase.
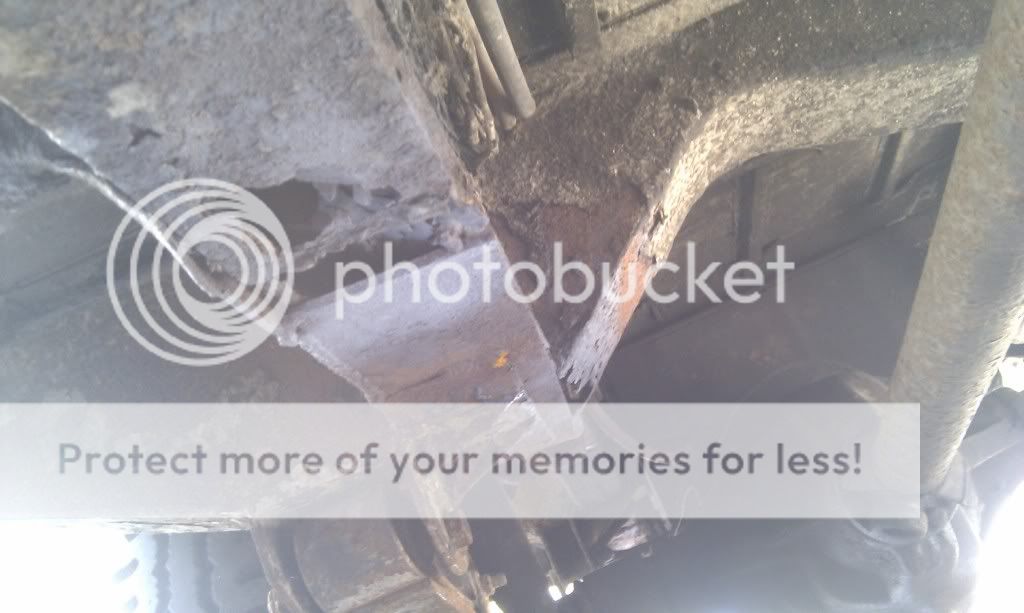
Looks like that's plated behind the hanger-oddly only partially along the leg though :confused:
IMAG0141.jpg


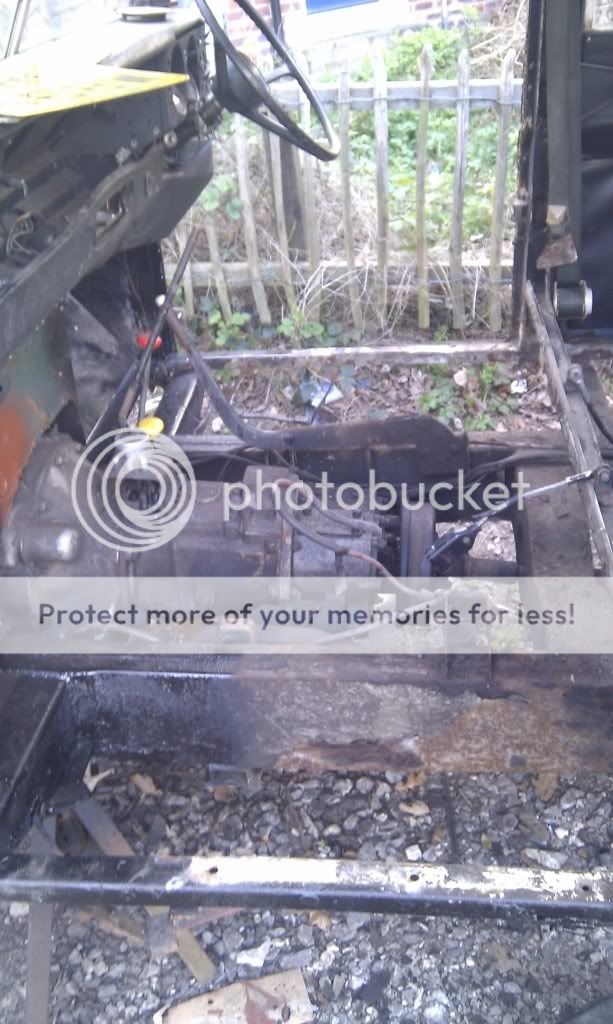
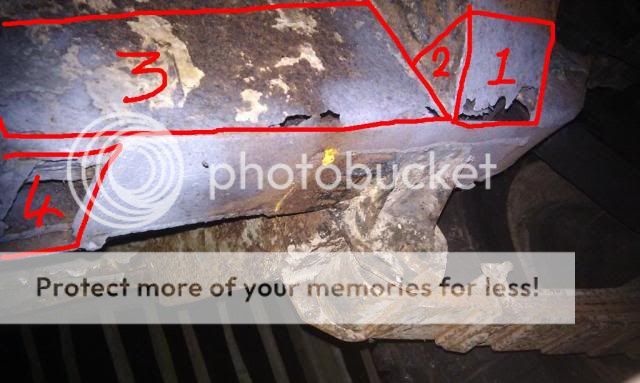
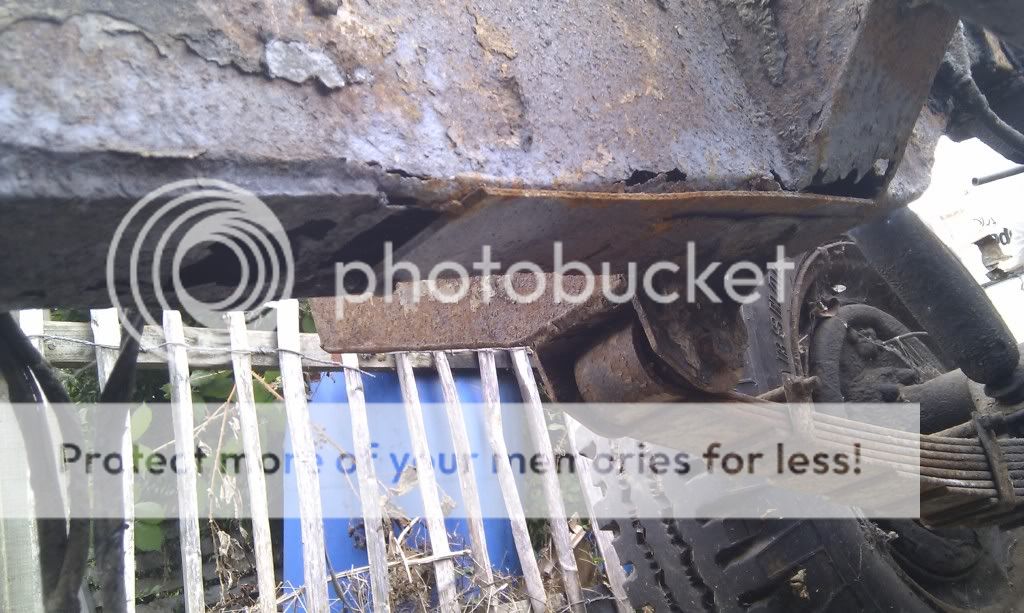
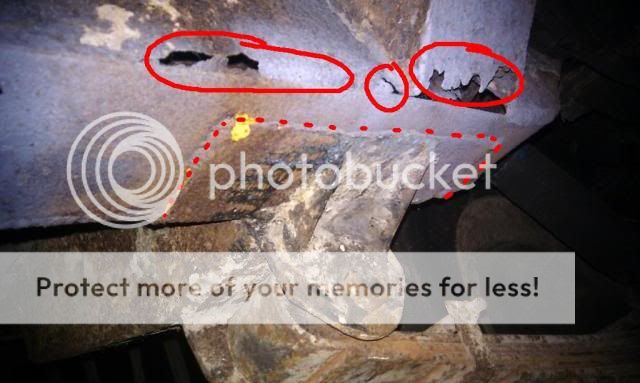
That'll need cleaning up and plating properly, and where the rots set in, that'll need chopping out, treating and plating to make it all nice and solid. last thing ya want is for the hanger to collapse on you mid-journey. From the pics, that plate looks OK, and so does the weld...I think. tell me to bugger off, but if yer keen on doing it, i'd suggest spending some time on some chassis plating......

If this overlap goes the whole length of that plate - your onto a winner, as it's make a great butt for welding a decent side plate onto it cos it'll help fight gravity :D
Also, see that plate alongside the gaping hole....that'll help with a bottom plate aswell.
IMAG0140.jpg


Chop out the ****e, get it treated, and then get some 4mm plate cut to shape and have some fun with yer Mig :D
IMAG0142.jpg
 
Cheers, will look in to it. When i first had her, me and my dad kept getting pulled because she was crabbing. Im guessing that this is how she was fixed (if you call it that). Looks like they cut the mount off and moved it a few inchs. Although at the time of the fix, it may not have been bad.
 
nice job on the footwells for your first time welding - i certainly didnt take on anything that ambitious for my first project !

think your 90amp might struggle with 4mm plate - and not blowing holes in whats left of that chassis from heat concentraition to get penetration on the 4mm plate ! - but im no expert - only been welding hands on since december (strangely that coincides with my land rover ownership beginning)
 
You'll definitely struggle to weld a chassis with a 90A MIG :(

I've got a 150A and 3mm is about the limit for decent penetration.

The other option is a cheap MMA welder - buy one off eBay, use it to repair your chassis (the welds don't need to be pretty, just strong!) and then flog it afterwards.
 
Last edited:
bloody hell a 90A mig youd have better luck with a Bic lighter i have got a cheapo arc welder for anything thicker than 2 mm works a bloody treat with 2 mm rods
 
would agree with rhino, and give the chassis a severe looking over, specially
prior to starting to patch up.
seen too many people start patching and discovering more rot, then it turning into a
major patchwork quilt job.
find all the rot first, then decide if its repairable!

fantastic advise tho from rhino, if it is repairable.
 
It's a great big Mecanno kit - albeit with some very rusty nuts and bolts! If you take the approach that you'll be replacing all the nuts and bolts, don't be afraid to grind them off. I dismantled my truck cab down to the chassis in a day, on my own. You'll have some heavier bits, so it'll be easier if you've got an extra pair of hands. But honestly mate, it's pretty much obvious how it all comes apart, once you get started.
 
Yup, just been googleing, Start from the roof down. been having a look on sites for replacement bolts and stuff. Not sure were to go for them, would it be best to buy a lucky bag from toolstation and fit as i go.

I have a extra pair of hands, my uncle is helping out. And he is very keen on taking off the body showing the rabbit to the dog so to speak.

Im just worried ill get it in bits and well, i can not exspect him to be here helping all the time so im hoping i dont forget were bits go to be able to put it back together

Been looking for a cross member, whats the difference in one with extentions and one with out? Do i need one with extensions?
 
nuts and bolts can be bought from your local fasteners stockists by the box.
i use mainly 8mm, and a few 10mm. from memory i pay about 4 or 5 quid per 100, so
20-25 quid should see you with a box of 100 nuts bolts washers both 8 & 10mm

and from experience, it takes 8 people to lift a complete body from a 109 station wagon comfortably, before hiding it down the garden before the old folks get back off holiday....

wait and see with the x member, you may need more than you think.

edit-
local stockists for fasteners round ere, places like bradford bolt and nut, dixon hall, jack penningtons.
suspect you'll have a dixon hall somewhere in sheffield.
 
Been at it today, sure will be needing a stock off nuts, bolts and washers. the were all stuck solid, i have been grinder happy.

Before

1.jpg


Back seats and bench's out

2.jpg

3.jpg

4.jpg

5.jpg

6.jpg

7.jpg

8.jpg

9.jpg


Even had a helper :D
 
coming along real nice now, seems you have a little helper (is that allowed? lol)
keep going mate, i have come to a bit of a standstill with mine but will post some pics when i can get round to it.
 
This is a great thread.

I'm going to be replacing both footwells when I have a few days off in early September and was hoping that I'd not have to remove the bulkhead as my project is my daily runner and so can't really afford to be stripping her completely and being off the road for more than a couple of days.

those photos are really helpful.

Can this be done in a couple of days and be fully built back up and running again? it looks so.

I could patch the small patch of corrosion but since I have the time off and my engineering workshop to do it I might aswell rip the whole footwells out and do it properly.

I also have the base pan of the box underneath the driver's seat to replace, and although the battery box floor is not corroded excessively i'll replace that also while I'm at it. (I'm a fabricator by trade with my own family business, which is handy!)

Is the removal of the seat box as straightforward as simply undoing all of the visible bolts and off it comes?

Once those two jobs are done everything else I need to do is either cosmetic (bumper, tree sliders, modify my roofrack) and then replace the rear body cappings then line, soundproof and carpet the rear ready for winter camping expeditions.

Exciting times ahead.

Hope you get sorted pal :).
 
This is the little bits i have done since last posted (not much i know)


IMAG0258.jpg


IMAG0257.jpg


Been having a look at this today. Wondering weather to carry on, or break for parts and weigh in. Then maybe buy something else.


IMAG0137-2.jpg


IMAG0367.jpg
 
So you are going to weld all the bad places out?? :confused: looks like a lot of work!! good luck with it! Sandblasting the chassis would be a easy way to clean all the rust from chassis. doesn't it?
 
Back
Top