Disco 1 Discovery 300tdi 5 Door Auto

This site contains affiliate links for which LandyZone may be compensated if you make a purchase.

Toonarf

Active Member
Posts
79
Location
Hesketh Bank West Lancashire
Hello everyone, I thought I would start a thread about my new Discovery, I am new to this site having never owned a Land Rover before although I have always liked them. It is a 20 odd year old vehicle that has for a while lived with a cheap car level of maintenance so has quite a few outstanding minor issues, but no major problems that I can see. I do not have any major plans for it except use, enjoy and keep. I want to record the trials and tribulations along with the happy times here as I go along.

I bought with body structure condition as the main consideration, the paint work passes the 5 yard test but is not great. I did not really want an auto having always driven manuals, but I figured it would be easier to swap the transmission than weld a body, however I am getting used to the auto and have shelved plans to convert it to manual for a while. The body cilles and the front and rear cross members all look good with just slight surface rust, and just need a clean up and preserve job rather than wholesale welding. The boot floor is rotten though and will need attending to. The previous owner was a member of The Discovery Owners Club which I may join, and seemed an honest guy who told me he had never had any problems with it and was only selling it because he had got a newer Discovery. So far a 1000 miles in and I am loving it.

Here are couple of the many photos that the previous owner sent me before the trip down to Northampton to have a look and then buy.


[/URL
]


The Discovery in the background is his new one.


[URL=http://s1375.photobucket.com/user/davidsmarsden/media/unnamed%204_zpsov8n2tix.jpg.html]
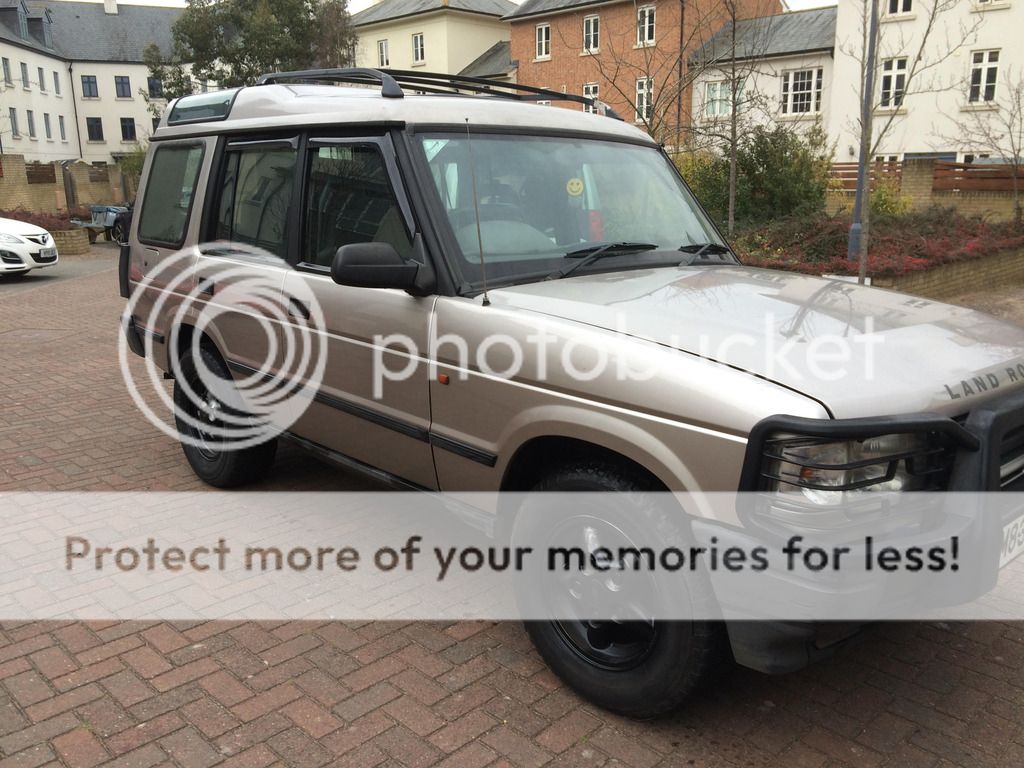
[/URL
]


I am not a big fan of unnecessary protection so all the ironwork was removed pronto, It will be up for sale soon.


[URL=http://s1375.photobucket.com/user/davidsmarsden/media/Disco%20Blossom_zpsyk7ljsue.jpg.html]
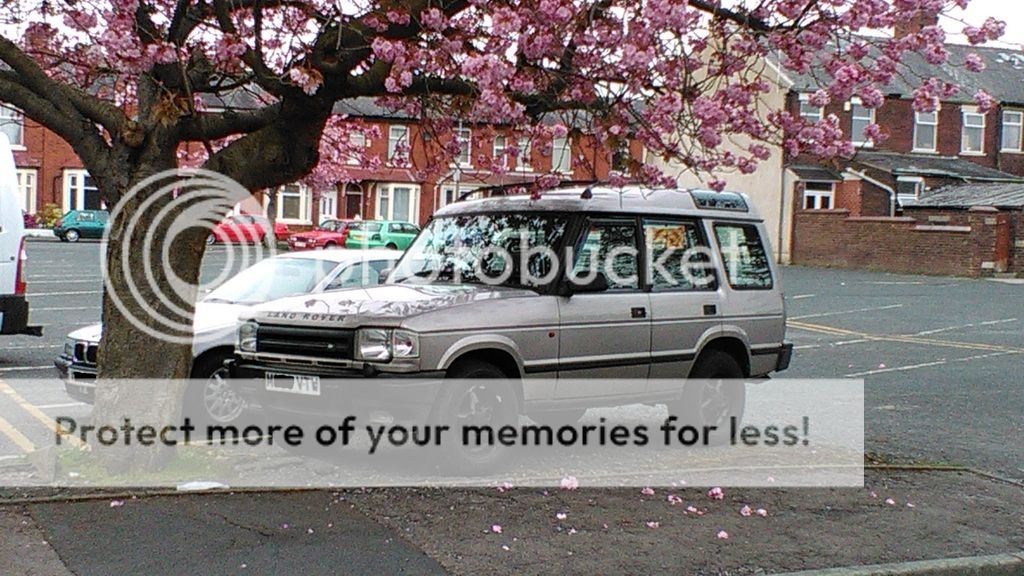
[/URL
]


So this is how things look at the moment.


Jobs done so far include
Iron work removed
Front Tyres changed, rears still to do
Engine service inc rear chassis filter which happily was only a ¼ full of crap
Spill pipes changed
2 wiper blades changed happily the recent new ones swapped over from my old car
Steering shaft removed to check for tightness
Rear spray flaps
Valve clearances adjusted they were quite wide
Battery replaced gone bad due to standing since January when it was last on the road.

Jobs still to do
Lack of power assistance on steering on first start.
Cam belt and Crank damper pulley
Transmission oil service
Protect body work
2 rear tyres to match the 2 fronts.
Diff lock / low range seized.
Front spray flaps
Rear anti roll bar drop links
A Frame ball joint.


Thanks for looking and feel free to comment if you wish.


David
[/URL][/URL]
 
Looks good chap send me a message to let me know how much you may want for the ironwork
Cheers
 
Hi All


Sorry this is most likely a dumb question but how did LR number the 300 tdi's? I am trying to order a cam belt kit and a fan belt, but from LRdirect I plan to order STC 4096L for the cam belt which should mean all new parts and that the upgrade will be done this time if it has not been done before. When I come to order the fan belt I am offered a choice of 2 belts either ERR3287 which fits very early engines or ERR5911 for all later engines. But my engine number is type 22L correct for a Discovery Auto with EGR but the number is 04236A, LRdirect say use ERR3287 for engines up to 16L 25164, so is my 22L later than this change point and do the numbers reset each time there is a spec change? The A on the end does not look like a 4 at all but could it be a 4? A 4 would make it a later engine and mean I have answered my own question.


Cheers


David
 
Last edited:
Today saw the cam belt and crank damper/ pulley replaced which is another job off my to do list. The belt did not look very old at all, but the previous owner said as far as he knew it was over due for a change, he had certainly not changed it in the 4 years he had had it. It is a positive though because the pump timing was a jot out and the idle speed needed slowing down afterwards and throttle response is now greatly improved. The down side is that I now know that I need to replace the radiator sooner rather than later, the fins are all falling apart.
I also need to get the other fan belt, the later shorter one I got was the wrong one. I should have got the early longer one.

Cheers
David
 
Last edited:
Hi All

Sometimes it’s the little things that get to you, and when things get to me I always have to do something and hopefully find a solution. My tailgate latch was a case in point, unlock it with the fob and the tailgate would open once, and then annoyingly if you shut it and then tried to re open it, it would then lock its self. More annoyingly it would start to open but to the first catch before locking. Also if you had driven anywhere after unlocking but before opening the tailgate again it would open to the first catch and lock. It unlocked every time by cycling the fob, lock and then unlock. I felt sure that if I unlocked the tailgate with the key when I wanted to open it all would be good but you guessed it after 20 odd years with little or no use that was seized…… or I had the wrong key for it.

So thinking that the problem was the usual Disco door lock spring problem, and having >>>>>SEARCHED<<<<< the topic within this forum, I had ordered the springs from the bay of E and decided to go for it. So the other night I stripped out the door card and marvelled at the over complicated linkage system.


Sorry this is the only photo that I took mainly because the inside of the door was covered in Waxoyl and my hands quickly followed rendering touching my phone unwise. So linkage photographed, Haynes studied let battle commence…. I removed the latch after disconnecting the linkages; Haynes is very good on this strip procedure with lots of photos, just why did they use a dark project car? With the latch removed you guessed it the Disco door lock spring problem was not the problem, the spring was still there and working smartly on the over centre action and I could see nothing else wrong.

I then removed the outer door handle cover, again full marks to Haynes. This allowed access to the outer door lock barrel assembly which I had tried to lubricate externally a couple of times previously. I undid the lock barrel holder from the plastic cover and then removed the lock barrel from the metal holder. I tried the key in again as you would but it was still solid and would not turn. So I removed the U clip that holds the plastic and metal extension shaft to the rear of the barrel and separated the 2 parts.

I gave everything a good clean up to see if I could see a clip or pin holding the inner barrel to the outer case without finding anything so feeling brave I inserted my spare key and using a small socket to protect the end of the key where it pokes out of the inner barrel I gently tapped the socket with a hammer and out popped a nice greasy inner barrel. Plainly the two were seized together only by the 3 or 4 mm which is situated outside the rubber O ring seal that sits inside to keep dirt out.

I scraped the remainder of the corrosion from the 2 parts and fitted them back together. Total success the barrel worked perfectly so I put it all back together, following Haynes as they say backwards.

So the conclusion is that I now have a fully working outer lock barrel which locks and unlocks with the key and the central locking still works fine. However the initial lock problem is also solved so I still do not know if unlocking with the key will / would solve the problem I set out to rectify……… I doubt it was a lubrication issue although obviously everything got a good new covering in spray grease.

Hope this helps someone and thanks for looking, any comments are welcome.

David
 
Last edited:
Hi All


I have not updated for a while, we have had a sudden family medical issue which is improving but is going to be long process. This has not left much time for Land Rover fixing, knew I should have bought a nice reliable little Japanese car………………not……… I love my Disco and wish I had bought one years ago.

Anyway to the point, one of the lesser jobs on the “to do” list is that the diff lock lever was seized solid. I searched the forum for tips on how to free it off and had tried the lubricate and be rough method with no luck. I had put it on the back burner until the weather worsens but the other day I noticed that my hand brake was not its usual efficient self. A quick look underneath revealed oil dripping from the edge of the hand brake drum and being flung onto the chassis, so the rear output seal has gone. Rather than replace the seal and then find that for some reason the transfer box needed removal afterwards to free the diff lock I decided to free off the diff lock first to make sure it was all working correctly. I used SEARCH and found this www.landyzone.co.uk/land-rover/freeing-up-your-discovery-1-difflock-linkage.59819/#post-1544990 very useful, pity the pictures have gone but the write up is very good.

I only took photos during reassembly, so some are pre lubed.

Follow the instructions on the link above and the Haynes manual to remove the centre console and associated parts.

After removing the centre console this will be your view showing the under layer of sound deadening.

[/URL
]

The red line points to the top layer of sound deadening and the green line to a console support bracket that needs removing, the screws are shown below.

[URL=http://s1375.photobucket.com/user/davidsmarsden/media/2016-07-07%2019.10.09_zpsoauc79pl.jpg.html][/URL
]

You now need to drill the heads off these rivets circled in red, some are hidden under the carpet which needs to be eased back out of the way after the heater ducts are unclipped at the front end.

[URL=http://s1375.photobucket.com/user/davidsmarsden/media/2016-07-07%2019.05.59_zpsurvzgauz.jpg.html][/URL
]

Removal of this plate and rubber cover will reveal the top of the transfer box finally, to remove the selector lever housing rubber boot remove the 4 x 8mm headed screws holding the boot down.

[URL=http://s1375.photobucket.com/user/davidsmarsden/media/2016-07-07%2018.58.10_zpscprojtgj.jpg.html][/URL
]

Finally to remove the selector lever housing, I undid the clevis pin and bolt shown with the green circles and finally the 4 bolts shown with the red circles. Remember to collect the 2 plastic bushes which are loose and able to fall out once the hi / low speed selector clevis pin is removed. The copper coloured gloop covering everything is copperslip which I applied liberally.

[URL=http://s1375.photobucket.com/user/davidsmarsden/media/2016-07-07%2018.54.41_zpshpvspfbc.jpg.html][/URL
]

The clevis pin for the Hi /Low speed selector will come out as you lift the selector lever housing upwards. At this stage if the 2 loose selector rods are fastened together with a tyrap the vehicle can be driven, you may want to put some sound deadening back though.

With the selector lever housing removed I used a selection of large and small sockets along with a vice to get it moving along with penetrating oil, it was well seized. Got it moving with a lots of penetrating oil followed by copper slip and ended up with a silky smooth action. Are you allowed to say silky smooth in a 300tdi Disco 1 context?

Reassembly as always is the reverse of the strip down.

The pop rivets being re fitted

[URL=http://s1375.photobucket.com/user/davidsmarsden/media/2016-07-07%2019.02.03_zps6dvbvpya.jpg.html][/URL
]


Not a big job but it made me happy and its all back together and working properly .

[URL=http://s1375.photobucket.com/user/davidsmarsden/media/2016-07-07%2012.15.11_zpskhzkxq2f.jpg.html][/URL
]


Thanks for looking, all comments welcome.

David
[/URL][/URL][/URL][/URL][/URL][/URL]
 
Hi All

Life is settling down a bit so I thought I would spend the evening finishing fitting the home made mud flaps. I started not long after buying the old girl but other more important jobs have been cropping up putting the flaps back down the list. I had to get replacement front brackets but the rear ones were OK. I have made them a bit bigger than they were originally and I like the way they look.

I also changed the oil seal in the transfer box but forgot to take any photos.


Thanks for looking

David
 
Good stuff. Thinking of buying a disco 1 same age, going to see it on Friday any pointers? I've had defenders and series but never a disco.
 
Hi Farriermatt, firstly I am new to Land Rovers so I am no expert on either Land Rovers in general or Discovery's in particular. My take is that a Disco 1 is basically a Defender in a once pretty party frock, so all the running gear is as weak or strong as equivalent Defender running gear. The body is basically the same structure as Range Rover Classic with all its abilities to rot . So if I were looking at a Disco I would look at body condition in all the usual rot spots, boot floor, body cills front and rear body mountings inner wings front and rear seat belt mountings door post bottoms etc as well as the known chassis rot places as well. I would imagine that the better bodied Discos still about have not been off road much so a good sign maybe a seized up diff lock lever like mine had. As far as the mechanics are concerned anything is fixable at probably less money than paying for a weldathon, but again that depends on how many major mechanical faults there are.

Hope this helps

David
 
Hi All

When I got the Disco I noticed a fair few rattles on the engine when it was running, nothing serious sounding, just the general 300tdi clatter of tappets, diesel knock, etc and one I could not quite decide what it was, but it was not the loudest and it did not sound serious amongst the other rattles. Anyway, engine serviced, valve clearances set, Millers added to the fuel and summer days with the window down whilst driving and the undecided noise has either got worse or the rest have got much quieter, either way it is now annoying. So I borrowed a mates engine stethoscope and had a listen round. The vacuum pump as well as leaking oil from its gasket to the engine sounded like a Ford Pinto engine with the cam knocked out, so time for a replacement.

I got a Bearmack replacement, apparently the Wabco originals are not as good now, the one I removed did not look too old (good paint) but was badly worn on the lifter part see photo below and was a Wabco.


The position of the vacuum pump on the engine.

A quick read through Haynes and the important point seems to be set engine set at TDC to relieve the tension from the pump, as it is cam driven, exact TDC setting is not too critical a good few degrees either side of TDC is fine. You will see from my photo I went a little past TDC so could not get my drill in fully but it showed I was in the right area.

So first job is remove the viscous fan coupling to get a bit of access to the crank pulley, this is not needed if you have an assistant to watch injector pump wheel go around, you can turn the crank from underneath. Next remove the 3 screws holding the timing cover plate so you or your assistant can see the injector pump wheel and its timing slot. Set to TDC and you are good to go. At this stage you could put the front end of the engine back together because unless you turn the engine for some reason you are finished with setting the engine.


Fan removed


Close up of the injector pump timing pin, note, this has just gone past the correct point which is at about 11 oclock.

The rest of the job is totally straight forward remove the vacuum pipe to the servo via the hose clip on the short rubber section where it connects to the pump. Then remove the 6 bolts securing the pump to the engine. Remove the pump, clean up or replace the gasket and add a couple of guide pins to make re fitting even easier.


Engine side with pump removed, note cam is passed its lowest point and so about to start lifting.


Guide studs fitted with pump and gasket sliding up them.

To refit, clean the oil from the gasket surfaces add hylomar or your favourite gasket gloop and re fit, there is a torque setting for the bolts so I used it. Vacuum pipe back on and it is time for the acid test, start her up and marvel at how well a tdi can sound when restored to full health with minimum rattles.

I do not know how common a noisy vacuum pump is but there are lots of posts about oil leaks from the pump its self, I will probably take the pump to bits and see if I can see what was causing the noise. I may of course simply be this wear on the foot that follows the cam lobe, as I said earlier it did sound like an old Ford Pinto.


The old pump


A close up of the worn pad


Thanks for looking any comments welcome.

David
 
Last edited:
Hi Everyone

Being fed up with the constant overcast skies and frequent rain showers that this bit of Lancashire is receiving this year as a summer, I asked SWMBO if she fancied a trip to the seaside, perhaps have a walk in the cold and then sit in the Disco and have a brew.

So coats packed brew box checked and replenished as necessary off we set to Southport. We noted on route that it seemed to be brightening up in the direction of travel but this is an old family joke when travelling………. But it did brighten up and a couple of miles from Southport it was actually warm.

So we parked up on Ainsdale beach had a walk without the coats and then had a brew.


A good day out and proper use of the Disco.

Thanks for looking and all comments welcome.


David
 
Last edited:
Sorry its been months since I posted here and the fred was way back at page 28. Recent jobs have been front and rear pads, new thermostat, coz when the weather went cold so did the heater...................... And using the heater plugs instead of going straight to start did not seem to make starting faster so a check revealed than non worked . Took one out and tested it and nope not working so I replaced all 4. Made bugger all difference to the starting, but to be fair it would have to start before I turned they key to be better, but maybe this winter they will be useful.

Cheers

David
 
Good to see you making progress with this, and enjoying it too:). D1's are a fine vehicle, IMHO;).
I agree that the Wabco vac pumps are now chocolate:(, and am contemplating an electric one, which, if large enough, would run the cruise control on mine as well as the brakes.... seems a popular mod in Oz, but carries a price tag..... like about £200... but I guess it should last for the life of the vehicle.. maybe :rolleyes:....

Thanks for the pic on the beach :cool:- we take ours onto black rock sands.... I'll see if we have any piccies :)
 
Hello Toonarf, with regard to your boot floor I have a very personal idea that most of the wet comes from condensation forming on the inspection plate to the tank. This soaks the soundproofing completely.
MY old 1996 300Tdi auto(Jap reimport) had a little sign of surface rust and the carpet/soundproofing was absolutely soaking. After removal took about a week to dry out properly.
What I did was to put a complete newspaper over the plate to absorb water/condensation and replace every 2/3 months. I had the car for 9 years and changed for a Td5 auto.
The boot floor was perfectly dry and rustproof after 17 years. Just my personal thoughts but try it out.
 
Thanks for your comments Disco1BFG and Janderson41.

Is Black Rock beach near Portmadoc? If so I was last there probably 40 years ago (as a very young child).

I did think about fitting one of the electric vac pumps, I believe some Audis have them as standard, probably the ones that are allowed to run 12 inches from your rear bumper. If the new pump that I fitted goes down I will look for an electrical one. Judging by the state of the follower on the old pump I worry that my cam may be a mess, it looked and felt OK but one part cannot wear without the other.

It is rapidly becoming a forever car, it does everything I want and should continue to do so.

After this winter is over I will have the interior out and check all the floors and rot spots out. I know the front sound deadening is a bit damp but the boot mat seemed dry when I checked during the summer. My MOT guy has had a good look at the boot floor and says its no worse than pass and advise at this stage so it will be on my to do list during next year. The MOT is in late December.

Finally a couple of pictures of the gauge pod I made.


With Flash


Without Flash


Thanks for looking

David
 
Last edited:
Thanks for the thread, good photos and write ups are worth there weight in gold. Hope your boot floor is OK it's a PITA as far as I'm concerned.
 
Back
Top