Defender 110 Re-Wire

This site contains affiliate links for which LandyZone may be compensated if you make a purchase.

JohnM70

Seen Your Member
LZIR Despatch Agent
Posts
48,994
Location
Over there
Ok, so not an entire re-wire, as all the dodgy terminal strip has already been got rid of (unless there is some lurking that I am yet to find), but a partial re-wire to include a selection of new switches / gizmos both now and in the future.

My aim it to achieve a useable and reasonable looking dashboard area, a simple yet effective distribution and cable management system.

As always, its 1st Fix - Cable management and cables, copper, colours various - well actually the 'Colours Various' is a lie as I do not intend to purchase an entire colour spectrum of cables.

Thought #1: Being an electrician, I have a nice load of cable numbers in a neat little dispenser. I shall simply (!) produce a numbered cable chart that will match up with a copy of the existing LR wiring diagram.


Cable Management: How to get cables from the well-positioned battery box to the dash switched, back to the fuses and off to various 'trinkets'/

Thought #2: I have rolls of 20mm flexible plastic conduit that can do this job. This has the advantage of both mechanical protection and also increased water ingress protection - a previous owner has cut many, many not very round holes, so a set-drill session will be in order. Couple this with a decent cable / conduit gland to IP 44 or 67 (spoilt for choice) this will kill many birds with not many stones.

Distribution Centre. I have an idea that rather than locate relays all over the place, I want to keep them all together in one place, along with the fuse board etc. Obviously this will be under the passenger's seat but will be built into a decent waterproof box.

So, That is the plan so far. I could take a picture of a pile of bits, but that would be dull, so instead I will take pics as I go along.
 
When I did mine, I eventually pulled the battery box out and built a new one.
All my extra wiring goes out the battry box IIRC, following the main live cable to the starter. The wiring is cable tied to the battery cable under the floor. Does that make sense ?

There is also on the left side of the bulkhead, above the main fuse box, A small hole put there in production. I think it's for the old rod throttle. Anyway I've also used that as where the main loom goes into the bulkhead is now over full with wires.

I also have fuse boxes in the battery box.
One of the neates things I saw done on a ZA Defender, was to cut the side of the battry box open. Put a flap there on a hinge with the fuse box on the inside, open the flap and there are the fuses.

This link shews how I made my battery box, well I think it does

Land Rover Owner • View topic - Relocating Battery

HTH

mike
 
Looking forward to this progress :)


As nice as it is and all... my 110 is wreaking my head with a few electrical problems such as the usual indicator... it's working, its not working.. it's working... oh no, wait...it's not working and a few other little things :p

Also will be re-wiring my trayback soon as well even if its relatively basic
 
I had all my aux relays in the tool compartment of the battery-box, a perminantly live fuse-box in the side of the battery-box and a switched fuse-box on the bulkhead. A very neat installation with all wires colour-coded and extensive use of corrugated conduit (20mm & 8mm) to protect the cables as they ran along the top of the chassis. Worked fine for many years but with my current rebuild I decided to relocate the relays & switched fuses to the bulkhead, the reasons for this were to reduce the number & length of the cables and also because some really nice fuse & relay boxes are now available and I don't feel the need to hide them away so much.
 
Something I seem to keep coming up against is what appears to be a lack of choice when it comes to additional 52mm gauges that don't look like they will fall apart in 2 weeks - as can be found on fleabag.

Any ideas?
 
Something I seem to keep coming up against is what appears to be a lack of choice when it comes to additional 52mm gauges that don't look like they will fall apart in 2 weeks - as can be found on fleabag.

Any ideas?

Yep. These are what I use. Super quality and very accurate


SPA Car Gauges

I have one of these for a coolant gauge
SPA Water Temperature Gauge WT-120

Oil pressure/ voltage
SPA Oil Pressure and Volts Gauge

Ambiant/ internal temperature
SPA Temperature/Temperature Gauge

Be sittinbg down with a good stiff drink when you look at the price :D :D

mike
 
SQUEAK!

They look very smart, but SQUEAK........!!

That's somewhere between "What?" and "How Much??"
 
I didn't look at the prices.
I paid about 120 quid for each on 2006 when I fitted them. I bet they've nearly doubled now.

I paid 50 quid for my rev counter.

I have an Engel switch and volt metre for my fridge. I paid less them 50 quid for that. I know they're just under 100 now.
How prices have shot up.

As you have a 300Tdi, have you a coolant loss system fitted ?

mike
 
I'll try and also try to find a link for you.

There are two problems with a 300Tdi.
One the radiator has the inlet and the outlet on the same tank. Sometimes the coolant doesn't flow through the matrix. The answer is the South African fix. The left tank with the hoses on is blocke 1/ 3 of the way up with just a small belld hole. That's to try to force the coolant through the matrix.

Secondly. The water pump is set very high on the engine. If you look the top of the thermostat housing is higher then the water level in the header tank.

Any coolant loss means the head is very quickly empty of water.

The Range Rover and some Discovery models have a float in the header tank to warn you of the loss.

Some time ago we on Difflock forum had a long discussion about this. One guy made some warning modules to use with the Range Rover, Discovery float.
The float works the "wrong" way so it's got to be done like that.

I'll look tomorrow for you.

mike
 
Thanks Mike, I shall order one asap - I take it you have improved on the LED Design shown and incorporated one of those flashy (and expensive) gauges?

DaveM - no link shown??
 
Starship Defender


Uploaded with ImageShack.us
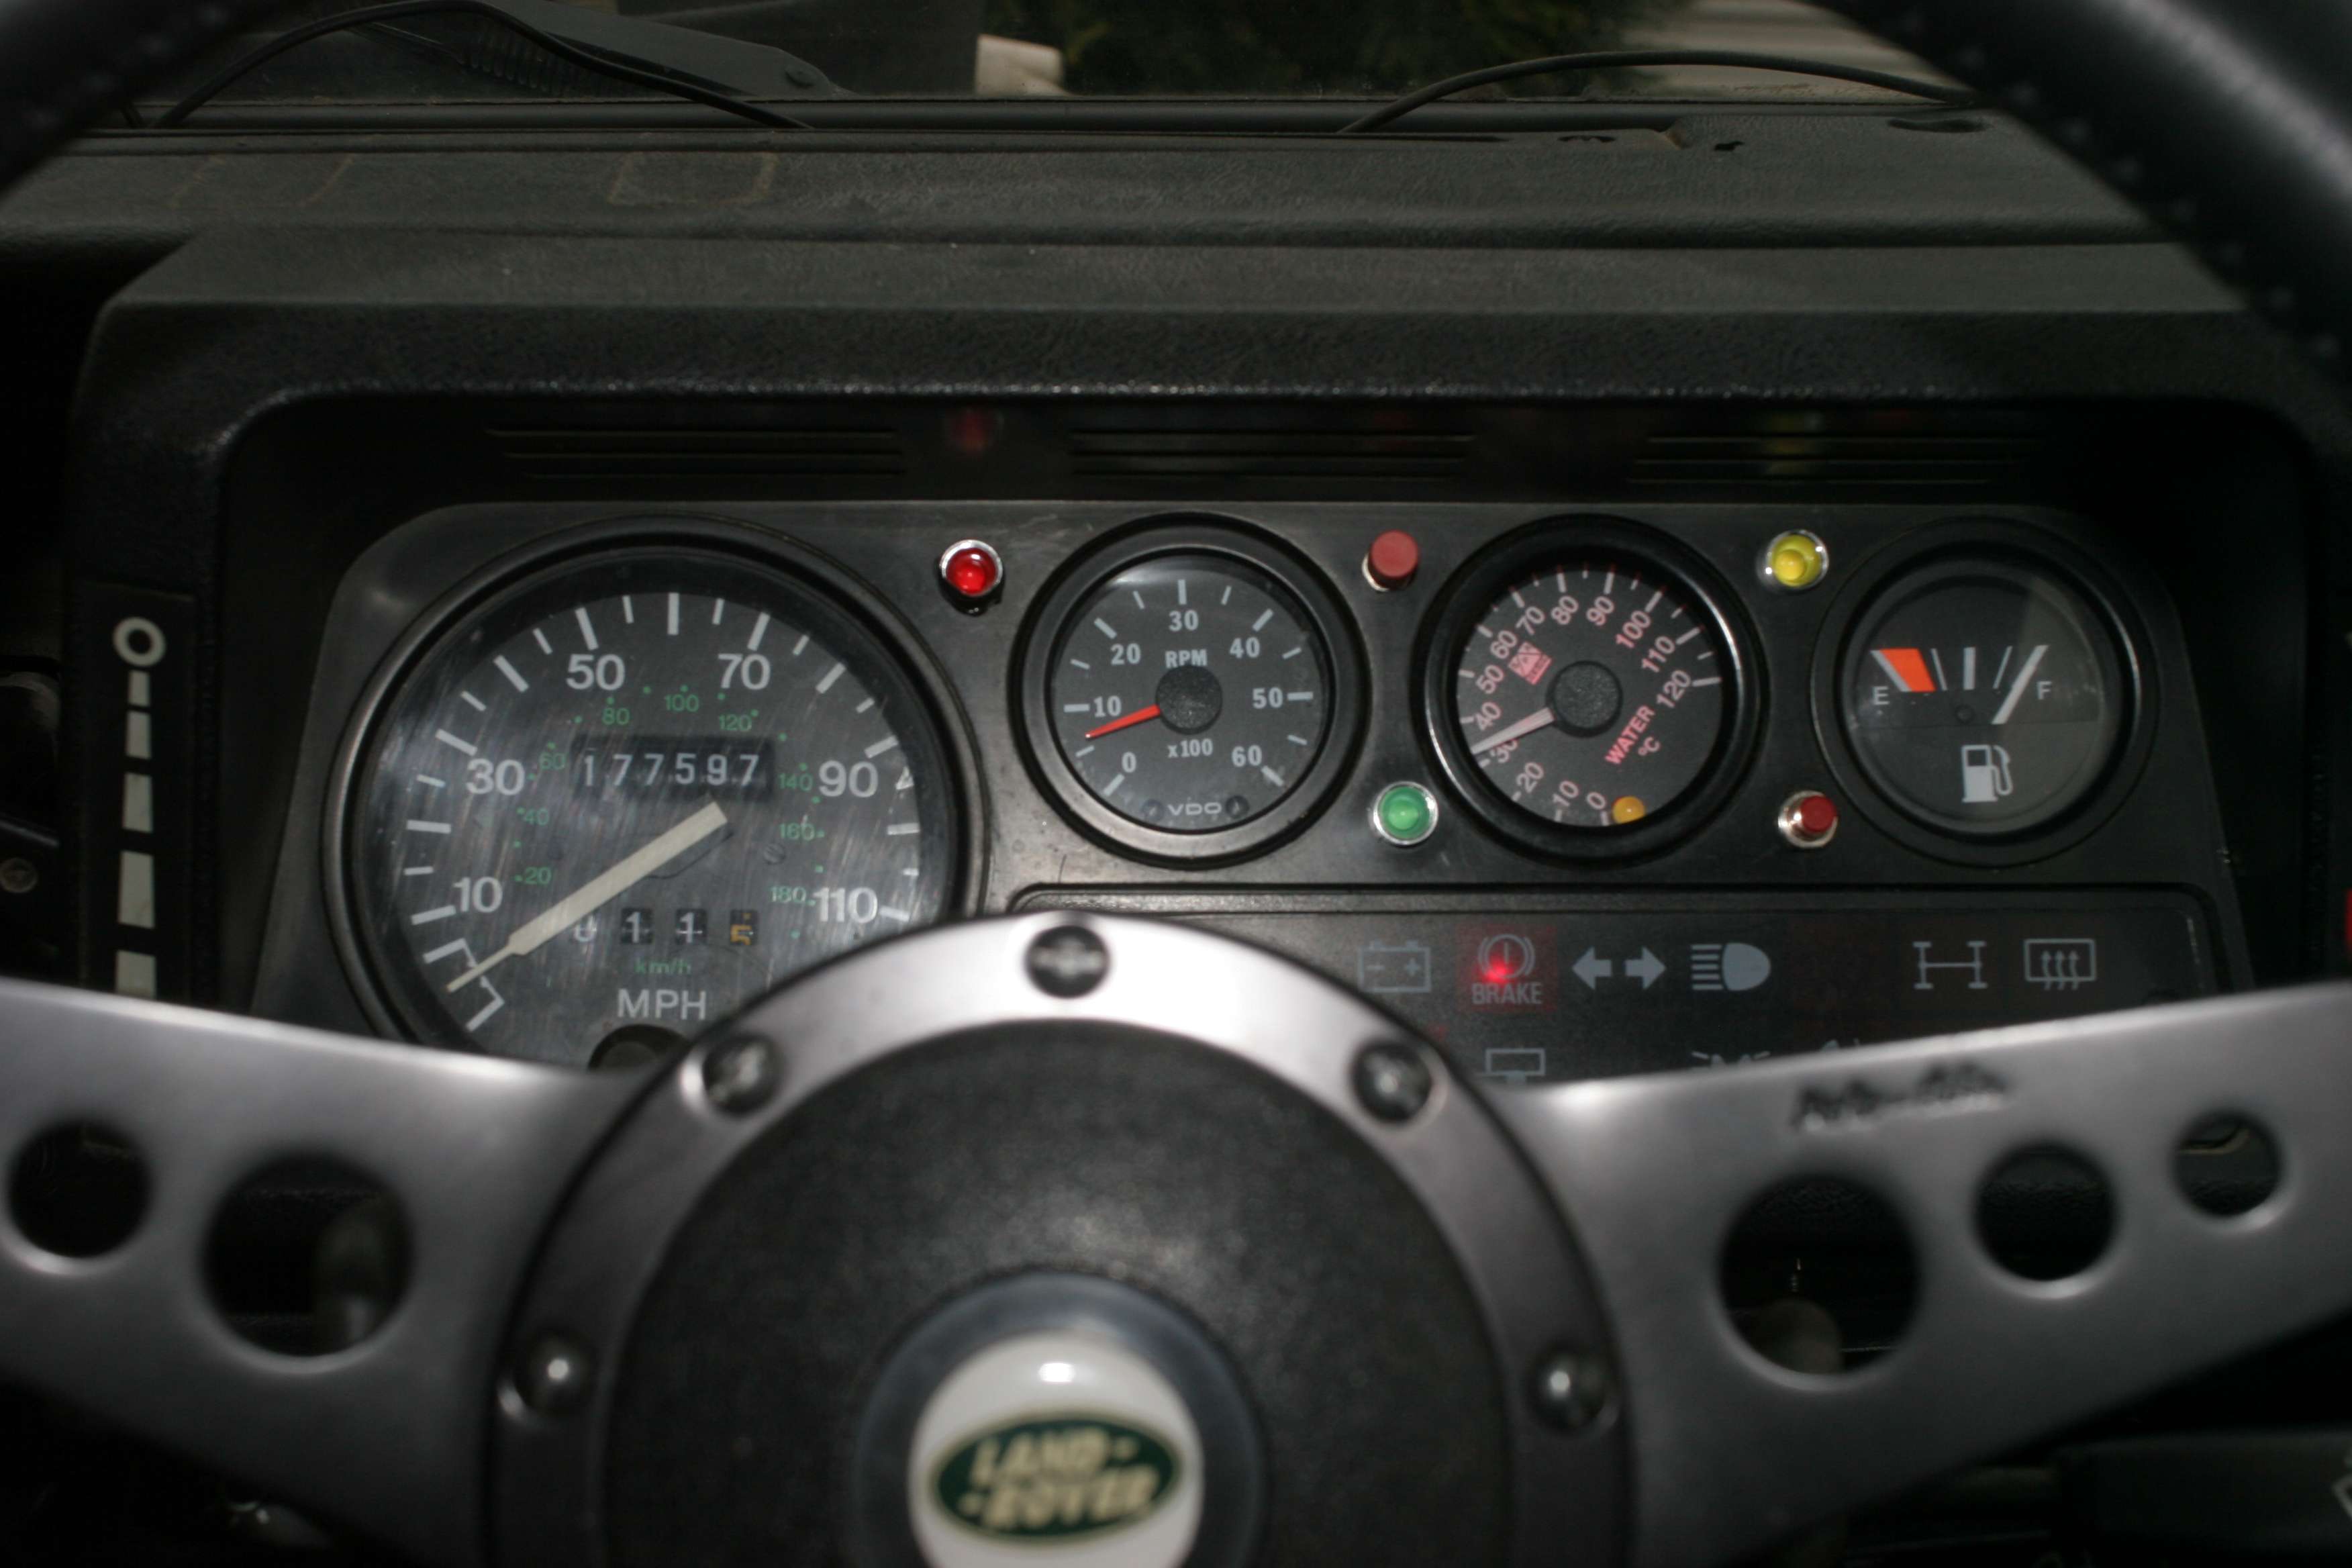
Extra warning lights etc
L to R top fan "ON" warning light. Red switch to set warning light on coolant gauge. Amber low coolant warning light. Green, coolant level check light. Red switch, coolant level check light switch


Uploaded with ImageShack.us

L to R. Clock, internal ambiant temp, oil pressure, set at 14lb for warning light, main battery volt metre.

The GPS cradle has been moved up to where the int mirror was. Left cradle binned.

With the steering wheel I can see all the dash warning ights.....

mike
 
Those dials are just so Guuci and Bling..................

I must get some!

How much are they as the online shop won't work.... (the Madman link)

The Prosport ones also look very 'Blingy' and I shall have to buy some asap - Crap truck, nice dials....
 
Last edited:
Very quick question;
Managed to pick up an original voltmeter for a quid today, but no matter how much reading on various forums I do, I can't find the wiring diagram for it - Obviously the 2 terminals are Pos + and Neg - , but which is which?

On one website, it says wire the Pos to a permanent live, but this can't be right as it will show battery output all the time - my guess is wire it to an on with ignition??

++UPDATE++ Sorted!

Multi-tasking as well - spraying up new steering column cover and roll bar, whilst primer / gloss dries, wiring 'stuff'!!
 
Last edited:
Back
Top