Dating my Series 2A

This site contains affiliate links for which LandyZone may be compensated if you make a purchase.

Guidoma

Member
Posts
45
Good afternoon from OZ

I am seeking a bit of advice as to how I would go about getting an approximate built date for my LR 109 Series 2A.

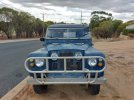
Long story short, the LR arrived in Australia originally as a single cab utility and at some stage was converted to a delivery van, extra headlights added to the wings and numerous other cosmetic changes. The additional headlights sit proud on the front wings and are not recessed like the later production 2A's

The plate affixed to the bulkhead lists Vehicle No 27800374a. Does anyone have any knowledge of the production year for that number?

The front suspension hangers were replaced with Series 3 suspension hangers, which by welding standards of today were crudely done, so I do not have the chassis number from the chassis itself. A Series 3 steering damper was also added.

The front apron is the early flat type, which I believe dates it pre-1965? The vehicle is also fitted it is fitted with a 3 spoke pinch type steering wheel.
The engine is a 2.25 diesel, which I believe is a Series 3 engine as the number on the block is 906548XXX. I think it is a 3 bearing crank shaft engine as I cannot see the additional ribs cast into the engine block. Would anyone know of the year for the engine?

The person I purchased the LR from it from brought it unlicensed when he was living on the other side of Australia and brought it with him when he moved to Western Australia as a project, but never had the opportunity to do anything with it. From what I learnt from him it had at least two other owners before him who were going to do it up but again never got started on it.

I ask these questions is I will probably have to do a rebuild of the chassis when I restore it and our Transport Department over here will likely consider the rebuild work as a full chassis replacement so I will have some hoops to jump through. Being able to specify a year manufacture will make sorting paperwork a little easier.

Any assistance would be greatly appreciated.

Guido
 
Any pics..? An early 2a can be seen from steering wheel, vent controls, grill panel...
 
Any pics..? An early 2a can be seen from steering wheel, vent controls, grill panel...
Blast

I knew I should have attached them!

These are the only three I have loaded onto my computer, I have a swag of them on another drive at work. Will probably be another day or so before I can load them up


20230407_154801.jpg20230407_154747.jpg20230407_091707.jpg
20230407_091707.jpg


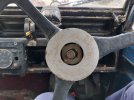
The steering wheel has seen better days and I need to sort out another horn push button.

Some bright person removed the land Rover badge from the grill and screwed it to the apron. I removed the badge because the LR was parked on my verge for a few weeks before I could make room for it in my back yard.

I am slowly sourcing new electrics before I commence on the big stuff. Rear stop, tail and indicator are Lucas type 691 & 692 and front indicators and park lights appear to be Lucas L539. I will be replacing them with the same. They may not have been the original fitted lights when the Landy arrived in Australia, but I will stick with them as they are correct for the period the vehicle was rebuilt as a delivery van.
 
Of course Parts can be mixed-added from later/earlier model years.
The Lucas FW2 wiper motors were carried over from the late series 1's until around 64/65. The steering wheel is from 65 onwards. If its an early model, pre 65 The gearbox was Suffix A/B and uprated, suffix C with larger intermediate Shaft around 66.
Have a look on the series 2 club and compare to your machine..
 
Hiya G, I have some details of your Landy in an old book " the LAND ROVER" a collectors guide.
The number series starting 278 show it to be a CKD RHD LWB export 1962-1964 The 4 at the end may mean 1964 but not 100% on this.
In case you do not know "CKD" were export models sent as a box of parts to be assembled locally.
Hwyl from Wales.
 
Of course Parts can be mixed-added from later/earlier model years.
The Lucas FW2 wiper motors were carried over from the late series 1's until around 64/65. The steering wheel is from 65 onwards. If its an early model, pre 65 The gearbox was Suffix A/B and uprated, suffix C with larger intermediate Shaft around 66.
Have a look on the series 2 club and compare to your machine..
Thank you Tony for that. I appreciate the information. I am working pretty intently at the moment and will have a look in a couple of days when I finish my work task. I should also be able to upload some more photos of my bitzer.
Guido
 
Hiya G, I have some details of your Landy in an old book " the LAND ROVER" a collectors guide.
The number series starting 278 show it to be a CKD RHD LWB export 1962-1964 The 4 at the end may mean 1964 but not 100% on this.
In case you do not know "CKD" were export models sent as a box of parts to be assembled locally.
Hwyl from Wales.
Excellent. Thank you for that. I did think it was around a 63 -64 model. When I have some more time in a couple of days I will try and send some more close up photos of some of the interior fittings. The old girl has seen quite a bit of abuse and finding some parts to rebuild the cab could pose a problem. I could possibly salvage bits from the hard top to try and make a single cab but that would mean numerous joins and rivets where there weren't any on the original version. I may end up converting it to a canvas top.
Guido
 
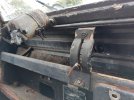
Look forward to see more pics, that steering wheel is awful:p Yours would have had a wire spoked type as on series one's. What are the strange fittings near the bonnet hinges?
 
Look forward to see more pics, that steering wheel is awful:p Yours would have had a wire spoked type as on series one's. What are the strange fittings near the bonnet hinges?
Hello Tottot

Sorry for the late reply - I have been busy with work and illness, still not quite right.

I agree the steering wheel is awful. It looks like someone has just added more and more plastibond to the spokes to try and cover up fractures. They certainly thought rough enough is good enough!!

I have no idea why the pop up vents would have been fitted to the bonnet.

One theory is the vehicle was modified for deep water crossings (it was a delivery van at some stage) and the vents may have been to allow the passage of water out of the engine bay as the vehicle traversed deepwater??? The hole in the bonnet might support that theory as it could have been to allow for the fitting of a bonnet mounted air filter perhaps.

There is a lot of work to be done and I am probably in line for a new bulkhead.

I will get to post some more photos soon.

Regards

Guido
I will try and commence some work on it tomorrow. I had a look at the bolts securing the alloy bull bar to the steel bumper. Access to the nuts at the rear securing the alloy bar to the bumper is restricted as there are steel flanges which are welded to the back of the bumper, leaving very little room to insert a spanner to access the nuts. The nuts themselves are so rusted I can't get a spanner onto them anyway. It looks like I am going to have to cut the bolt heads off with a grinder and then push the bolts out. If I damage the alloy bar no real drama as there are a number of fractures in the welds and I was going to dispose of the bull bar anyway.
 
Hello chaps

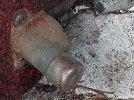
Unfortunately due to illness this week I couldn't do too much on the old girl. I did remove one headlight though but couldn't get the steel bowl out as the bolts holding it in are rusted solid. Unfortunately it looks like I will have to get behind the fender with a dremel tool and cutting disc and cut the little fellows off.

This brings me to my next question - you may recall earlier in my post I mentioned it was an early model 109 Series 2A, that had been modified into a delivery van at some point, extra headlights etc... Anyway, the extra headlights (on the front wing panels) have both got steel headlight bowls fitted, whereas the two headlights on the radiator panel panel do not have headlight bowls. Would I be correct in assuming they should have headlight bowls but someone has removed them?

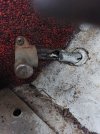
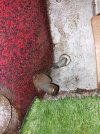
Also, the floor mounted headlight dip switch is secured to the side of the transmission tunnel (see photos). This seems to be an awkward location as it requires a sideways action with the foot to operate it, rather than a foot to the floor movement as in most of the older vehicles which still have floor mounted dip switches. Is this the correct position for the dip switch it or has it been relocated at some stage?


20230407_155125.jpg20230407_155216.jpg20230816_105802.jpg

Thanks

Guidoma.
 
Headlamp bowls are usually fitted for lamps in grill, replacements today are plastic.
You are right in thinking switch should be on the floor, just above where wires come through.
 
Headlamp bowls are usually fitted for lamps in grill, replacements today are plastic.
You are right in thinking switch should be on the floor, just above where wires come through.
Beauty tottot
Thanks for that.

When I get the steel headlight bowl out from the front wing l I will check to ensure it will fit the grill light recess. It should do. If it does, I will also get replacement bowls for the grill lights also.

In regards to the dip switch, if I understood you correctly, it should be positioned slightly above the hole where the wires protrude through the floor, so we will still see some wire, but a lot less than we see now?

Helo Gidoma, Recon that is correct for dip switch, will have a look at my 2a and come back.
Okey Dokey

Thanks
 
Beauty tottot
Thanks for that.

When I get the steel headlight bowl out from the front wing l I will check to ensure it will fit the grill light recess. It should do. If it does, I will also get replacement bowls for the grill lights also.

In regards to the dip switch, if I understood you correctly, it should be positioned slightly above the hole where the wires protrude through the floor, so we will still see some wire, but a lot less than we see now?
I think ref the dip switch you will find the proper early one mounts from the underside so only the button is visible, most that are mounted inside are the wrong switch as the older underfloor one is not available anymore?
If it is a proper early bulkhead it will have dip switch floor oval cut outs both footwells, lhd/rhd with the unused side blanked off with a blank plate.
Yes you are correct it should be floor mounted, not side mounted.
Thank you for that Lynall. I shall have a good look at the switch and either replace it or relocate it when I do up the Old Girl.
Guidoma
 
Back
Top