flanagaj
Active Member
- Posts
- 248
- Location
- Blandford, Dorset
Ok. If there is one reason to love the internet it has to be because of this forum. It has saved me a fortune over the years and without it I would never have started doing the work on my Wife's hippo. So I thought I'd take the opportunity to give some tips on how I changed the crank pulley on the Freelander 1 TD4 in under an hour. Hope it helps someone out there.
Here goes. Having jacked up the wheels, supported driver side with axle stand (Never work without axle stands!), removed driver side wheel and plastic protector which exposes crank pulley I did the following.
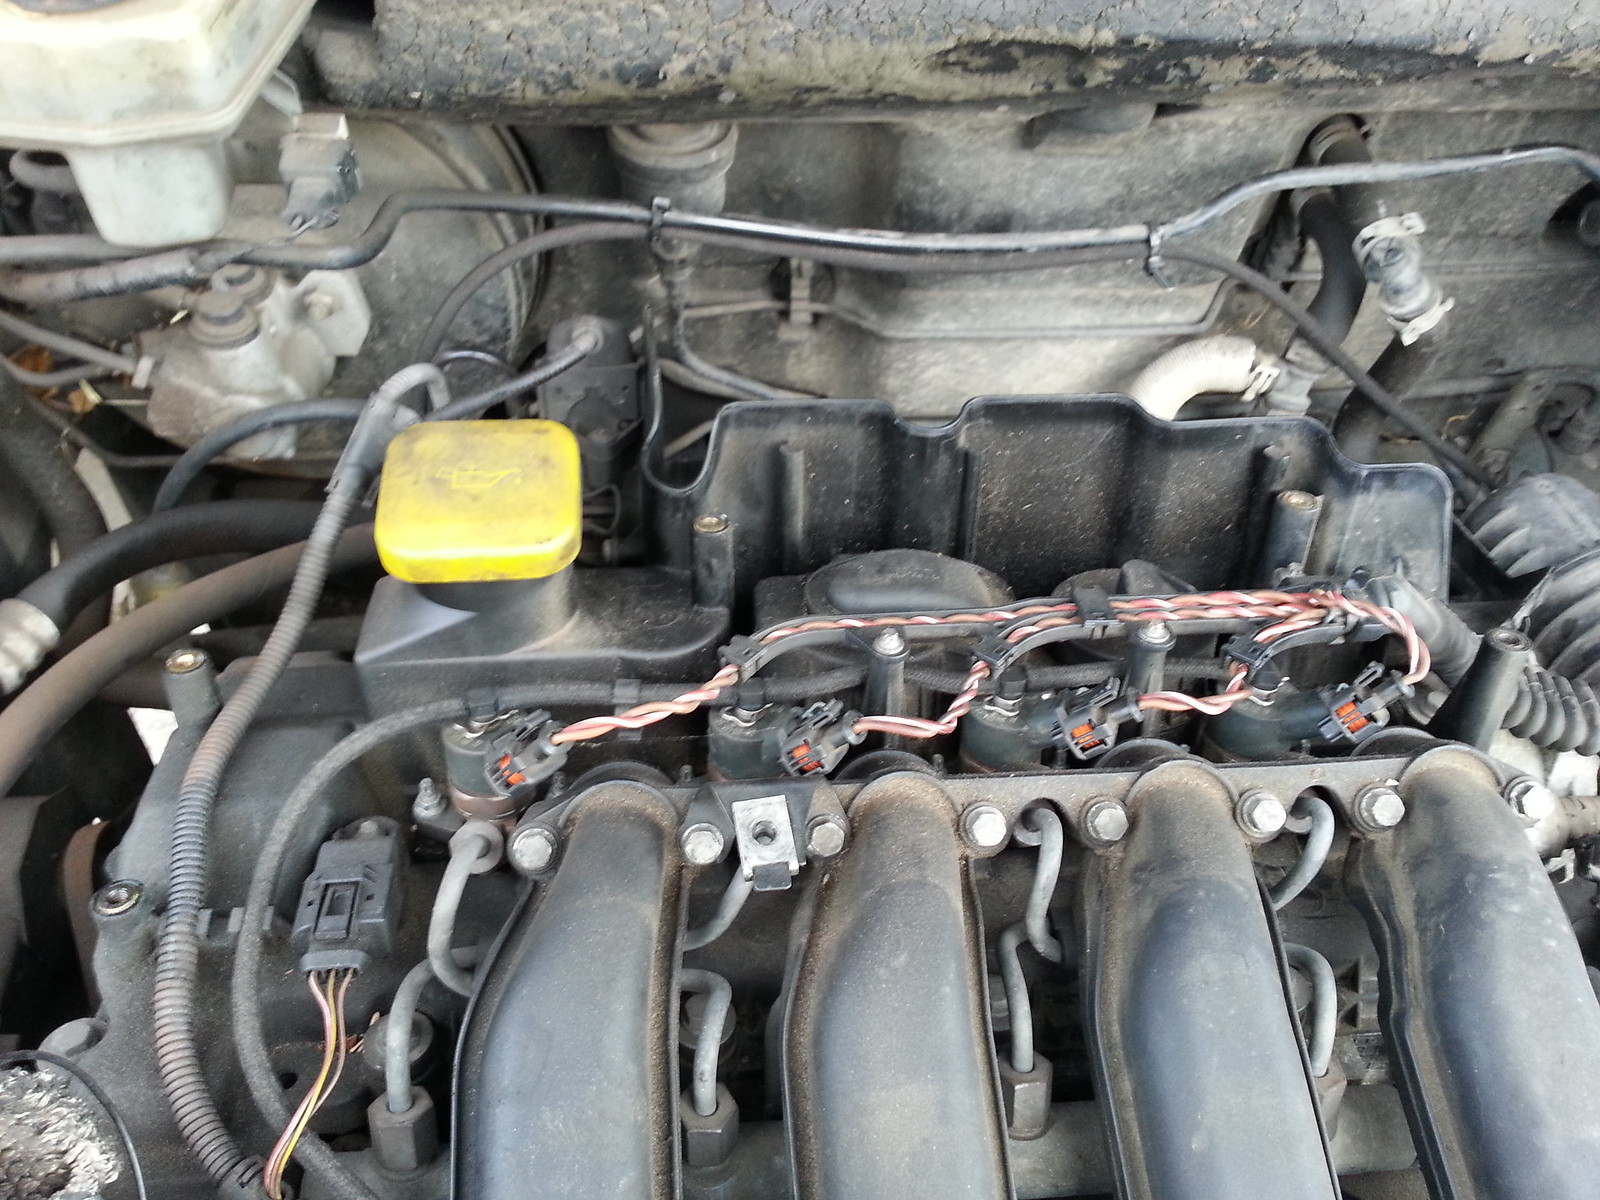
1. Removed the engine covers so as to expose the fuel injector multi plugs and disconnected them from the injectors (step 2 explains why). Great opportunity to drop a new air filter in whilst it's removed ;-)
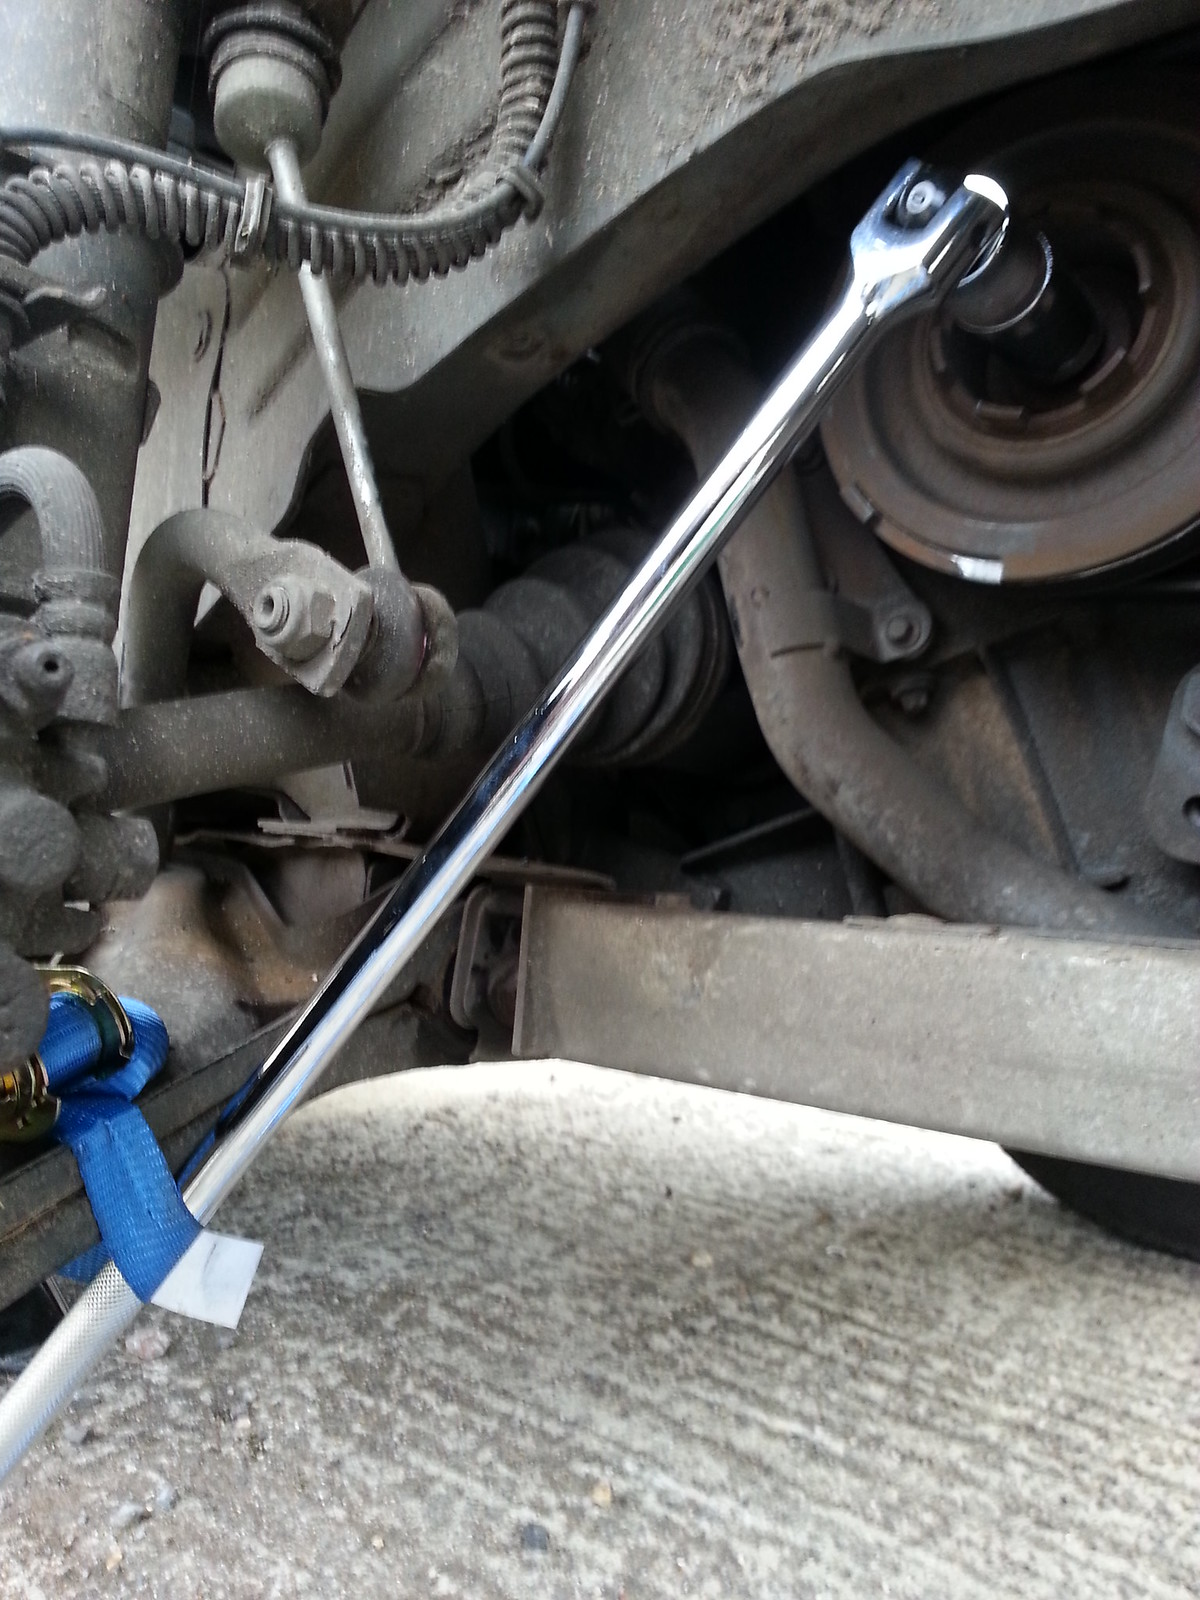
2. Having read so many stories of people trying 4ft long bars ... trying to get the crank bolt loosened, I decided I'd get the engine to do it for me") I discovered this tip on youtube. I wanted to stay safe though, so I put the socket bar under the wishbone and secured it tightly to the wishbone with a ratchet strap. The crank pulley rotates clockwise so the bar will be pressing against the wishbone the whole time.
I discovered this tip on youtube. I wanted to stay safe though, so I put the socket bar under the wishbone and secured it tightly to the wishbone with a ratchet strap. The crank pulley rotates clockwise so the bar will be pressing against the wishbone the whole time.
3. Now that everything was secured in place and I had disconnected the injector multi plugs so the engine would not fire, I ensured the vehicle was in neutral and flicked the ignition. After a 3 - 4 thuds where nothing seemed to happen, I got a thud and then the engine turned over (not firing of course). As soon as I heard the engine spin I flicked off the key. Bolt was now free
I then used a 15/16" slight offset ring spanner instead of a 24mm to release the tension on the tensioner. The 15/16" was a much snugger fit than the recommended 24mm and I avoided skinning the knuckes. The compressor belt was very tight and only came off when I pulled the pulley off the crank.
4. The pulley was easy to remove and I put the new one on with the compressor belt already over it so as to save struggling to loop it over.
5. Before I started the job I decided that without the pulley locking tool torquing up the crank bolt would be impossible so I spent the £40 and ordered the one below off ebay. (£32 delivered if anyone wants it as I hopefully won't).
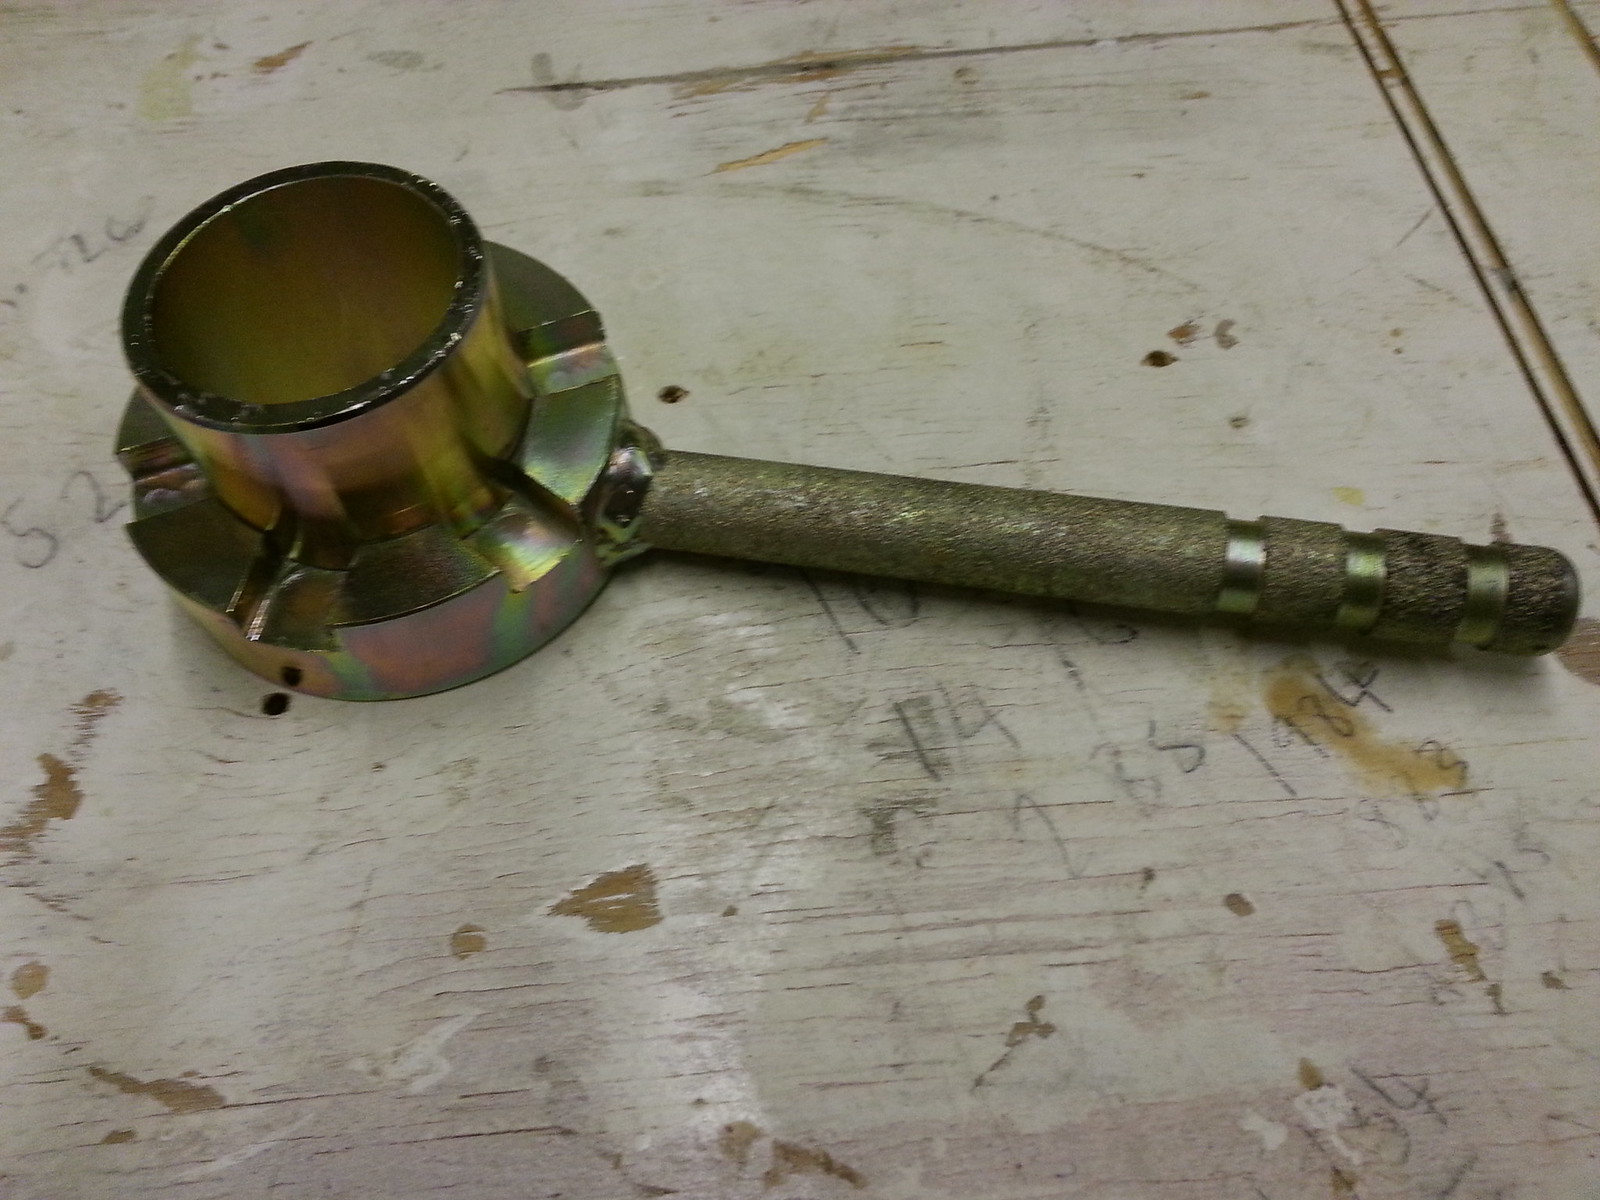
The arm of the locking tool enables the handle to sit on the top of the engine subtray. I put a ratchet strap around the handle and once again around the wishbone. This ensure the end of the locking tool was pulled down tight on the top of the engine under tray. It rests on a very thick section of metal so plenty strong enough.
I then tightened the nut to 100Nm and then used some nail varnish to mark the nut and the 60, 60 and 30 degree marks on the pulley. I didn't have a protractor, but worked back from 180 degrees to what I worked out was 150.
With the crank pulley secured solid, I had to stand in front of the car and basically stand on the bar to get it to tighten to the 150 degree mark. Go safe here as you are using some serious force to tighten the bolt to the specified level and you must ensure the 22mm socket is pushed right onto the bolt. The bolt is deep so there is plenty of contact on the socket and I never felt like it would slip. A deep 22mm socket ensured you don't need an extension bar.
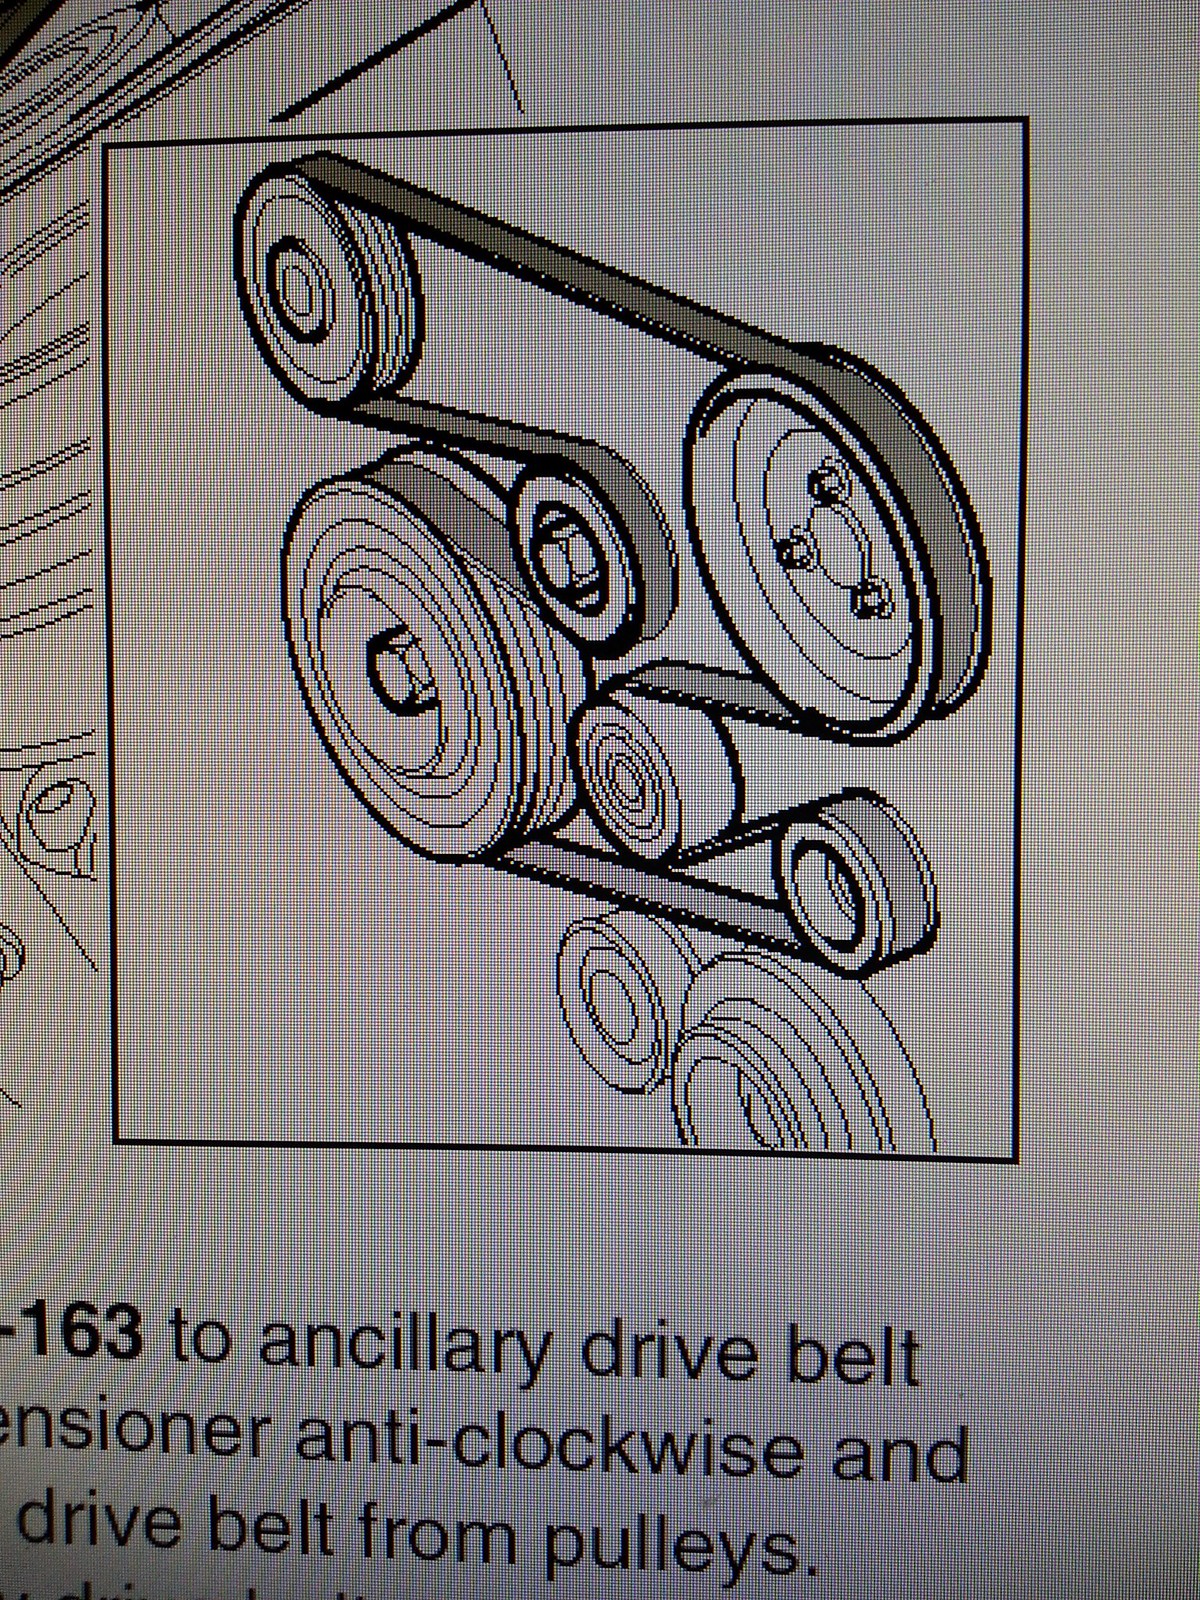
6. The new belt was then looped onto the all of the pulleys as shown below (pulled tight to remove any slack areas) and onto the crank pulley as much as possible. From underneath the car it was a simple case of levering the 15/16" ring spanner anti clockwise (pulling toward the front of the vehicle) and then feeding the rest over the crank pulley. This wasn't as tricky as I was expecting.
7. Refit the injector multi plugs and the rest of the other parts and pat yourself on the back for a job well done and a few £££ saved.
Note : I decided to fit a Corteco pulley. £94 + VAT from Island 4*4 (you'll need to buy the bolt too.) was the cheapest I found.
Hope you find this useful.
Here goes. Having jacked up the wheels, supported driver side with axle stand (Never work without axle stands!), removed driver side wheel and plastic protector which exposes crank pulley I did the following.
1. Removed the engine covers so as to expose the fuel injector multi plugs and disconnected them from the injectors (step 2 explains why). Great opportunity to drop a new air filter in whilst it's removed ;-)
2. Having read so many stories of people trying 4ft long bars ... trying to get the crank bolt loosened, I decided I'd get the engine to do it for me
I discovered this tip on youtube. I wanted to stay safe though, so I put the socket bar under the wishbone and secured it tightly to the wishbone with a ratchet strap. The crank pulley rotates clockwise so the bar will be pressing against the wishbone the whole time.
3. Now that everything was secured in place and I had disconnected the injector multi plugs so the engine would not fire, I ensured the vehicle was in neutral and flicked the ignition. After a 3 - 4 thuds where nothing seemed to happen, I got a thud and then the engine turned over (not firing of course). As soon as I heard the engine spin I flicked off the key. Bolt was now free
I then used a 15/16" slight offset ring spanner instead of a 24mm to release the tension on the tensioner. The 15/16" was a much snugger fit than the recommended 24mm and I avoided skinning the knuckes. The compressor belt was very tight and only came off when I pulled the pulley off the crank.
4. The pulley was easy to remove and I put the new one on with the compressor belt already over it so as to save struggling to loop it over.
5. Before I started the job I decided that without the pulley locking tool torquing up the crank bolt would be impossible so I spent the £40 and ordered the one below off ebay. (£32 delivered if anyone wants it as I hopefully won't).
The arm of the locking tool enables the handle to sit on the top of the engine subtray. I put a ratchet strap around the handle and once again around the wishbone. This ensure the end of the locking tool was pulled down tight on the top of the engine under tray. It rests on a very thick section of metal so plenty strong enough.
I then tightened the nut to 100Nm and then used some nail varnish to mark the nut and the 60, 60 and 30 degree marks on the pulley. I didn't have a protractor, but worked back from 180 degrees to what I worked out was 150.
With the crank pulley secured solid, I had to stand in front of the car and basically stand on the bar to get it to tighten to the 150 degree mark. Go safe here as you are using some serious force to tighten the bolt to the specified level and you must ensure the 22mm socket is pushed right onto the bolt. The bolt is deep so there is plenty of contact on the socket and I never felt like it would slip. A deep 22mm socket ensured you don't need an extension bar.
6. The new belt was then looped onto the all of the pulleys as shown below (pulled tight to remove any slack areas) and onto the crank pulley as much as possible. From underneath the car it was a simple case of levering the 15/16" ring spanner anti clockwise (pulling toward the front of the vehicle) and then feeding the rest over the crank pulley. This wasn't as tricky as I was expecting.
7. Refit the injector multi plugs and the rest of the other parts and pat yourself on the back for a job well done and a few £££ saved.
Note : I decided to fit a Corteco pulley. £94 + VAT from Island 4*4 (you'll need to buy the bolt too.) was the cheapest I found.
Hope you find this useful.
Last edited: