3D Printed Stereo Binnacle

This site contains affiliate links for which LandyZone may be compensated if you make a purchase.

OscarBoy

Member
Posts
16
Location
Southampton
Hi All,

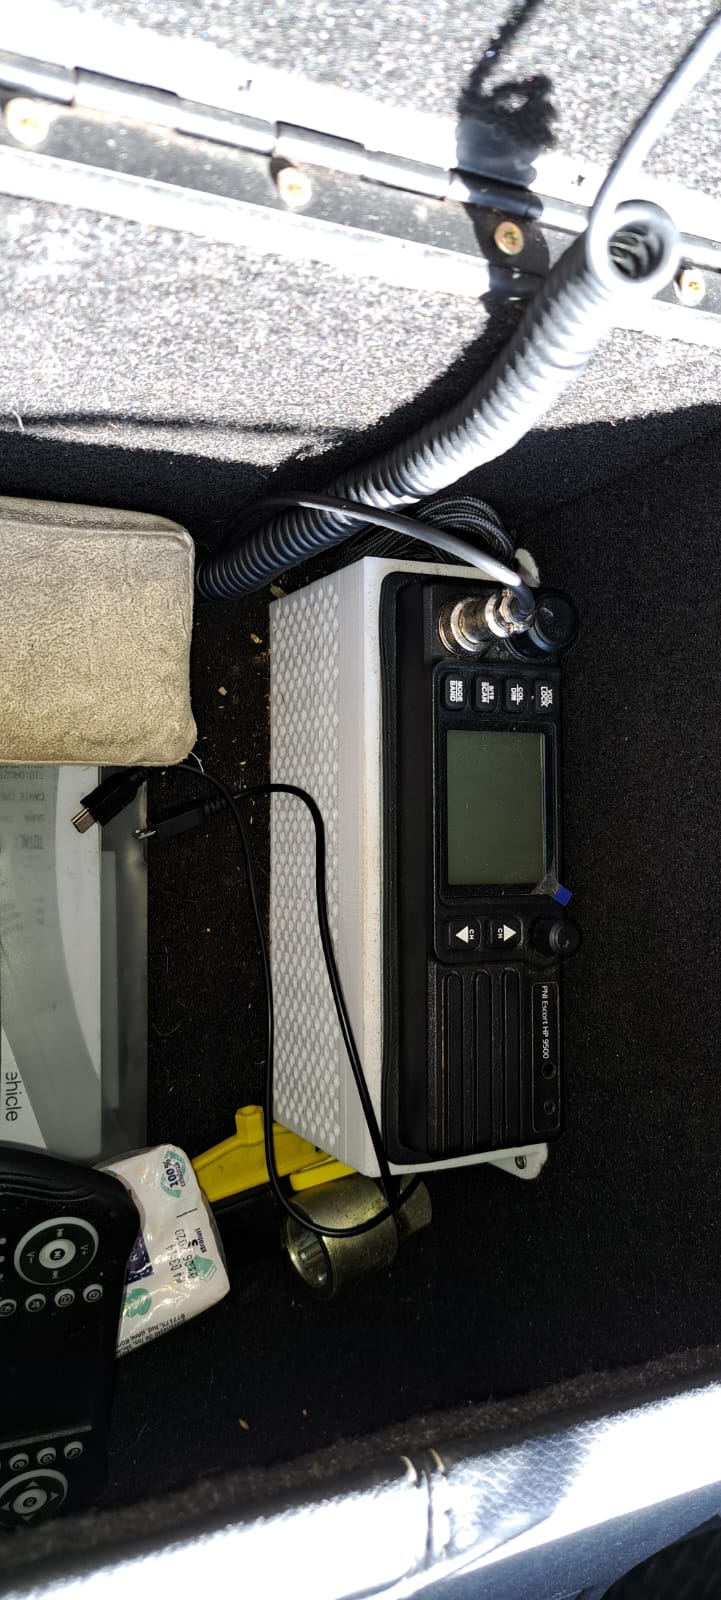
This is a project I did back in April 2021. The project was to design and print a dashboard binnacle for an android head unit installation in my 1998 Defender (pre-TD5).

Binnacle-01.jpg


Binnacle-02.jpg


Binnacle-03.jpg


Binnacle-04.jpg


Binnacle-05.jpg


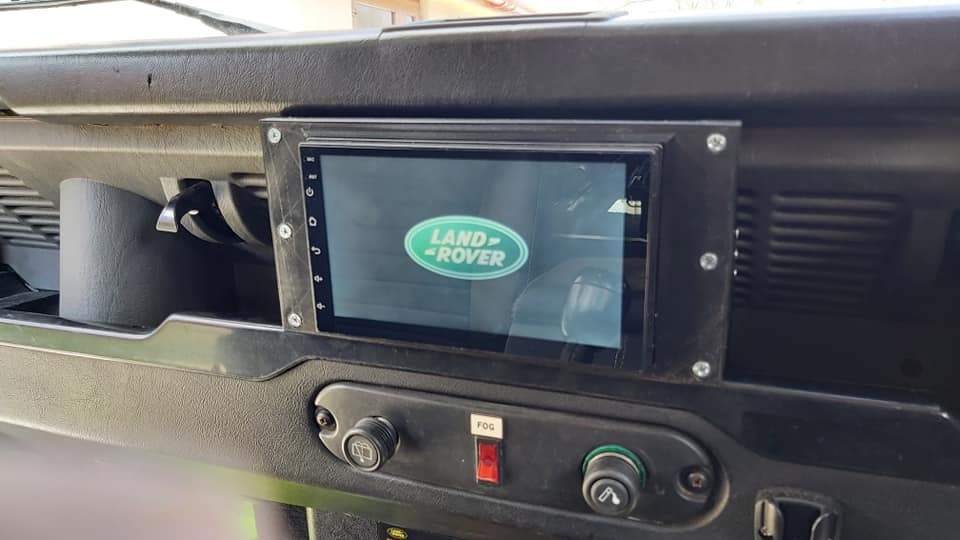
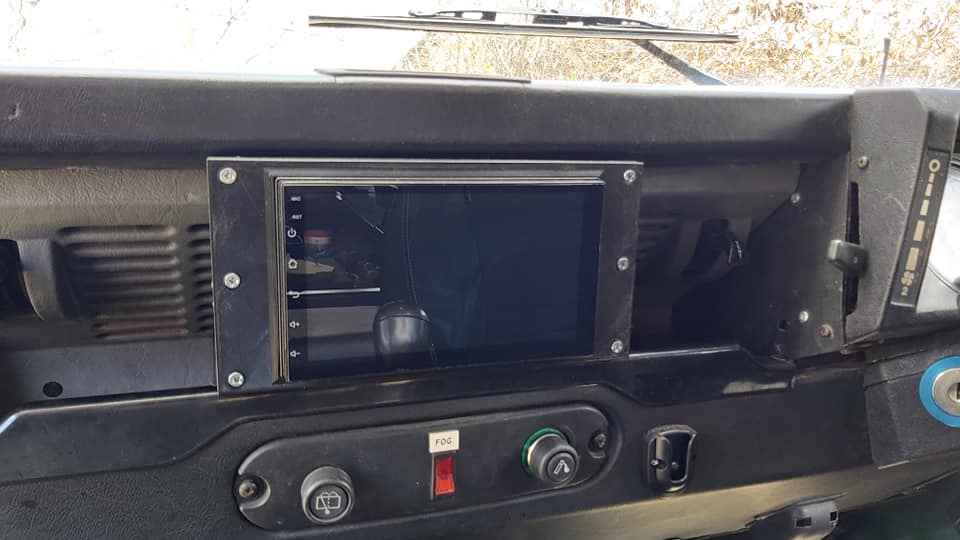
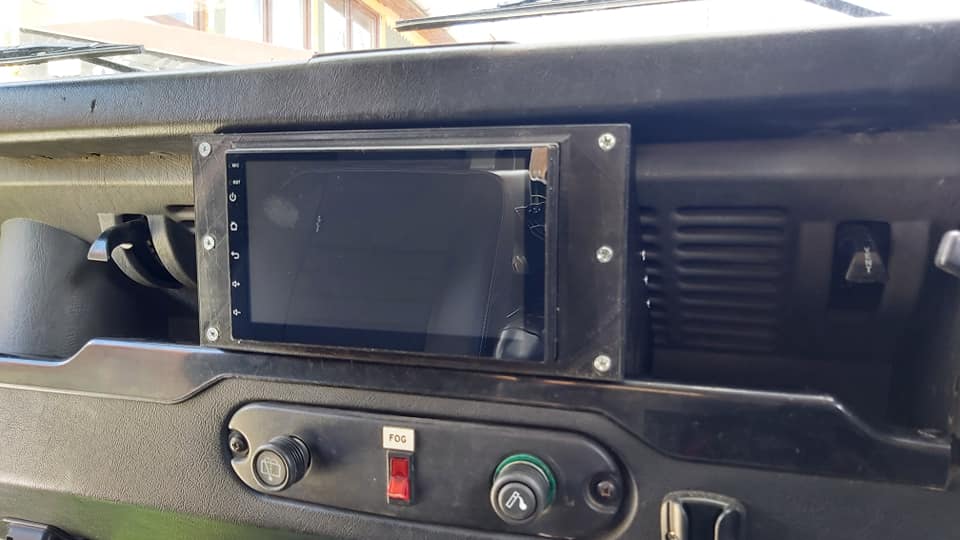
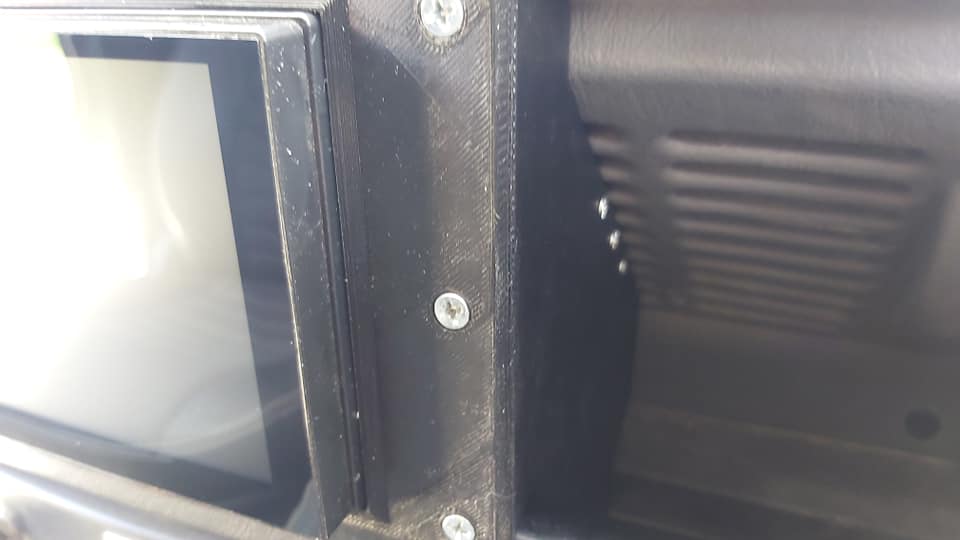
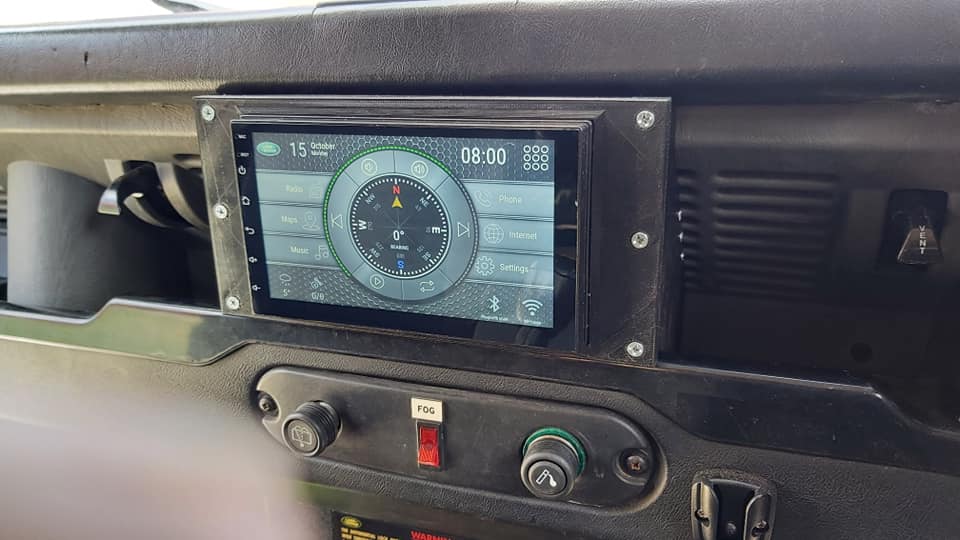
This is the 1st revision, so I have only printed it in draft for test fitment. As a result, the finish isn't perfect, but as a proof of concept, it actually came out pretty good.

I installed a generic 7" android unit from eBay (since replaced with another from Amazon with more internal RAM and storage space). In the design, I have space for a 25mm NFC tag behind the front facia to automate connectivity from the phone to the head unit.

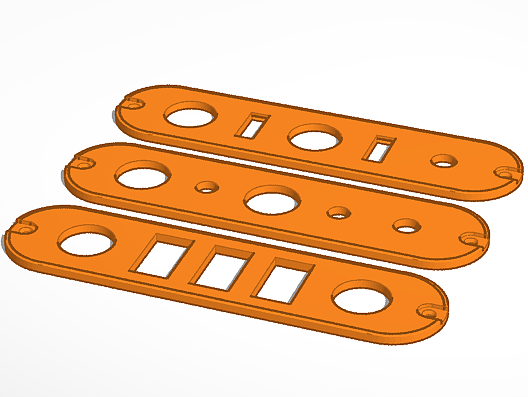
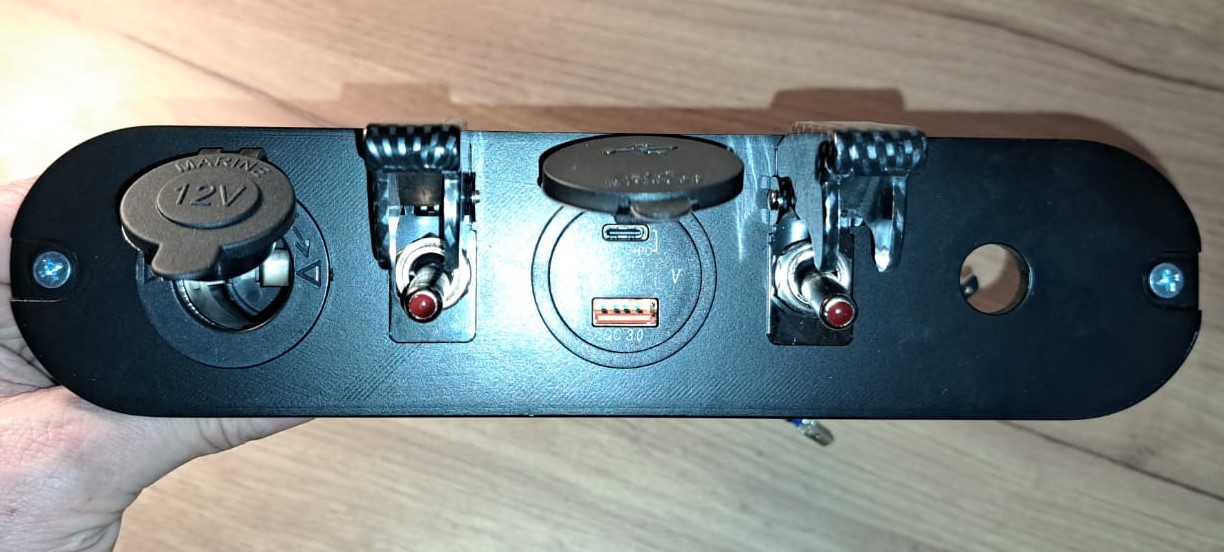
I am thinking of revisiting this project to add some more features. Perhaps try a new design with a wider front plate to accommodate some space for switches.

If there is any interest in this then I'll post some updates as it progresses.

If you want to print this yourself you can download the files from Thingiverse.
https://www.thingiverse.com/thing:5856588
 
Watching with interest.

Have you done any other printed projects for your defender?

Yeah, I've done a few little projects. A couple of pics are below.

--------------------------------------------------
1. Center console switch panel

Various Configurations
1-0.png


This is the 1st version fitted with a blank in the center as I was waiting for a USB charger and volt meter to be delivered. I decided to move the washer/wiper switch to the right-hand side as it seemed like a more logical position.

1-1a.jpg


This is the 2nd revision with some minor tweaks, better switches and the volt meter / USB charger fitted. I also swapped out the normal cigarette lighter socket for a standard power socket as I didn't want the heat in the enclosed area and under the stereo.

1-2a.jpg


1-2b.jpg


--------------------------------------------------

2. Support Pillar Bracket

I made this bracket to wrap around the side panel pilar as I didn't want to drill holes in the bodywork.

2-0.png


2-1.jpg


2-2.jpg


--------------------------------------------------

3. Cubby Box CB Speaker Mount

This was a mount to attach to the underside of the cubby box to support an external CB speaker.

3-0.png


3-1.jpg


--------------------------------------------------

4. Cubby Box 1-DIN CD Mount

This was a basic ISO-sized binnacle mount that I installed inside the cubby box. I printed it in white as I had run out of black filament. I haven't bothered reprinting it in black as I rarely see it with it being inside the cubby box.

4-0.png


4-1.jpg


--------------------------------------------------

5. Number plate supports

I have the lower steering guard installed and I wanted to mount the number plate there. I got an MOT advisory on number plate positioning because it was angled downward slightly. So I made these to solve that issue.

5-0.png


5-1.jpg


5-2.jpg


--------------------------------------------------

I have also done a few other more generic bits like door panel clips, bungs to fill the holes in the battery box, battery support bracket to move the battery bar to the top of the battery, speaker risers, etc...

I am currently working on an aerial mount to fit an after-market aerial onto my roof bar.
 
Cool, what filament did you use, and have you had problems with high temps?
Just a thought...

Although I haven't had any problems with PLA, if you wanted to mitigate the potential problem of heat deformation then you could print in ABS as this has a much higher transition temperature of around 105°C, compare to PLA at 60°C.
 
Jesus :eek: I can't even get the filament to stick to the table well enough to be able to print a simple land rover keyring :confused::confused:
Any tips?
I fancy printing the plastic thing for the gear selector but I've not just looked around for the download yet :)
 
Jesus :eek: I can't even get the filament to stick to the table well enough to be able to print a simple land rover keyring :confused::confused:
Any tips?
I fancy printing the plastic thing for the gear selector but I've not just looked around for the download yet :)

Hi craigoodwood,

It's hard to give a definite answer as I only have experience with my own printer (Geetech A20M).

If you are having trouble getting the print to stick then that would suggest your print bed isn't properly leveled (assuming your printer isn't auto-leveling). I would advise that you spend the time properly leveling the bed before each print as it will save you a lot of wasted filament and time in the long run. Preheat the bed before leveling and then auto-home the print end. Then get a piece of paper under the nozzle as it moves from the auto-home location to the first leveling corner and level with bed screws until you get it to drag back and forth just tight enough not to crease the paper as you move it. Repeat this for all corners and do each corner at least twice.

You are looking for a slight squidge of the filament on the first layer to get a decent adhesion to the print bed. If you are printing in PLA set the initial layer bed temp to 55°C and 60°C for the initial layer. For ABS I use 90°C and for the initial layer 100°C.

The biggest game changer for me was adding a removable magnetic bed sticker. So easy to get the prints of compared to the basic mylar stickers or glass plates.

Hope that helps a bit ;)
 
Apologies for hijacking your thread, I was only thinking earlier about starting a thread about it for some suggestions:oops:
The table is auto leveling and auto honing but the nozzle to table height is manual input as is the print speed, it's PLA filament and the ideal temps are on the box and easy to set yet it seems Tommy that as it does its 180 turn the filament curls up which then inevitability the nozzle touches and 'unsticks' the part from the bed :rolleyes:
I can strip and rebuild an engine but the tech tenacity eludes me :D

If your normal print speed is 60mm/s then try setting the initial layer travel speed to 30mm/s. If you are printing at normal resolution (i.e. 0.15mm height) make your top/bottom thickness in your slicing software at least 1mm or more. So at 0.15mm 7 layers would be 1.05mm. That should help provide a stronger base. Or in fine resolution (0.1mm height) then set your top/bottom layers to 10 to get to the 1mm minimum.
 
If your normal print speed is 60mm/s then try setting the initial layer travel speed to 30mm/s. If you are printing at normal resolution (i.e. 0.15mm height) make your top/bottom thickness in your slicing software at least 1mm or more. So at 0.15mm 7 layers would be 1.05mm. That should help provide a stronger base. Or in fine resolution (0.1mm height) then set your top/bottom layers to 10 to get to the 1mm minimum.
You've confused me there but I'm going to read it 20 times until it goes in :D
 
OscarBoy these are great parts you are making. The centre dash switch plate is one of the first things I want to try. I need to get some PETG on order. Keep sticking photos up if you're designs - very interesting.
 
@craigoodwood excuse me for butting in but, does your print head have a red light that comes on when it's very close to the bed?
I level mine by adjusting each corner to where the light just comes on. To help with adhesion you could try hairspray, I personally use a layer of pritt stick then wait for the bed to cool fully before removing the print. I also set mine to print a 8mm brim around the print so I can make sure the filament is sticking properly.
I hadn't noticed any light, I've not tackled it again yet it frustrates me just thinking about it :rolleyes::D
 
You can add an auto-leveling sensor if your printer supports it. It requires manual editing of the firmware configuration file to support a BLtouch or BLtouch-compatible sensor. It can be done relatively easily, but it does require a bit of technical know-how and confidence to manually edit the command parameters. That said depending on the sensor you purchase the manufacturer will sometimes be able to send you a firmware file for your printer with the sensor parameters predefined.
 
If anyone wants this center panel then let me know. It is unsanded and unpainted but it's perfectly functional. A quick sand and a paint and it will come up nice. It swaps the wiper switch to the right of the panel, has space for two switches and two sockets.

1-1a.jpg


Obviously, I will retain the switches/socket.

I am happy to stick it in the UK post and cover the cost of a stamp. All I'd ask is that you put a couple of pounds in a local charity tin.
 
Back
Top