Grr. New airbags have made it worse!

This site contains affiliate links for which LandyZone may be compensated if you make a purchase.

kooky_guy

Well-Known Member
Posts
2,410
Location
Sandhurst, Berkshire
I had a delightful (not) time on Sunday replacing my rear airbags with Arnott Gen 2s. What a buggr of a job that was!

Actually the hardest part was disconnecting the air pipes from the old bags and reconnecting them to the new ones. Depressing the brass rings seemed to have no effect as they were quite corroded so it was a real struggle to get the pipes out. Not helped by the fact that the old bags were stuck in either and were a right pig to remove.

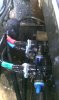
Anyway, eventually got them out and the new ones in, but I had no slack at all on the n/s pipe so it was a real struggle to get the pipe into the new airbag, especially with all my lpg pipes running down the same part of the chassis. Is there a knack to doing this? It's such a tiny amount of space to play in - I don't see what good removing the wheelarch liners would make as there is still no space to play in. Stupid design. RAVE implies that there should be enough slack to allow you to do this with the airbag dismounted, but there was no chance on the n/s on mine.

Unfortunately, now it's dropping 4 inches overnight at the rear (left the tailgate open to disable the self levelling). The front stayed at full off road height all night.

Is it likely that I just haven't seated the pipes in the airbags properly?

It was dropping before I changed the airbags, but I never actually measured it and the self levelling made it hard to tell where it was dropping. I assumed it was the airbags, but mebbe not. Perhaps there's another leak somewhere else. I might have to try the soapy water test. Will washing up liquid do the trick?

Thoughts anyone? (and no I don't want to convert to springs BoB!).

Still got to do my fronts, but my initial enthusiasm for the job has waned somewhat now!

Guy
 
with a windowlene or similar empty spray bottle make up some soapy water and spray the pipe-look for bubbles
 
I had the same problem, but mine was down to the O rings missing from one of the bags.....

Yes, I read your very helpful article before I started - thanks for that. It's part of what inspired me to get on and do it!

Pretty sure the o rings are there on mine as I can detect no hissing sounds and they inflate ok (although there was a very loud initial pop from each one like a tyre bead being seated!), but I'm not very confident that the pipes are seated perfectly given the problems I had getting the bleeding things in. Perhaps I should just buy some longer pliers and try reseating them.

The pipes are so innaccessible, how can one check them except at the ends? They all seem to run along the top of the chassis between the body and the chassis. I was half tempted to replace them all anyway, but they'll be a right pig to locate.

I'll have a go at the soapy water thing - presumably that will show any leaks at the airbag end too. Just hope I haven't mangled the pipe ends!


Guy
 
Last edited:
If you need to add a bit of extra air pipe obtain part number STC 8580 (pipe connector) and some extra pipe (available from Rimmer Bros / ebay etc or from a friendly forum member). I always carry a couple of these connectors just in case (example) a leaking exhaust at the back of the car can melt the air pipe above the rear axle. You must make sure that the pipe going into an air bag must be cut square and no dings on the pipe going into the bag. Long nosed pliers help to push the pipe in, give it a good push for a good fit.
Does sound like a leak to me. When you get it fixed would be interested in how the Arnotts perform ?

Extending the pipes would definitlely help, but I'm not sure there's enough room there for a connector. I might well look into that. Cheers.

I'll keep you posted on the Arnotts. I've only done the rears at the moment, but already it seems more solid and rolls less although I can feel the front wanting to do things at different rates to the rears now so I'll hopefully get the fronts swapped at the weekend too. Just hope I don't buggr them up as well!

Guy
 
I used a smear of vaseline to help the pipes in. seemed to work ok. You may have an issue with the valve block if you dont find any leaks on the unions. There are some great write ups and walkthroughs for replaceing the O rings in the valve block. This was going to be my next job if the new springs hadnt fixed my sagging back end ( Oh err)
 
I used a smear of vaseline to help the pipes in. seemed to work ok. You may have an issue with the valve block if you dont find any leaks on the unions. There are some great write ups and walkthroughs for replaceing the O rings in the valve block. This was going to be my next job if the new springs hadnt fixed my sagging back end ( Oh err)

Oh. I didn't think of doing that. What a thicko.

You've got me thinking now - When you said your o rings were missing in your new airbags, were they rubber, and should they be visible from the opening? All I could see in mine where brass bits...

I've often considered rebuilding the valve block on the basis that all the rubber must be past it's best by now, but the overhaul kits I've seen are silly money. £70+ for a bunch of o rings!? It's not just LR that wants to fleece us poor RR owners!

I'll try the soapy stuff and see what I find.

Cheers

Guy
 
Yes, I read your very helpful article before I started - thanks for that. It's part of what inspired me to get on and do it!

Pretty sure the o rings are there on mine as I can detect no hissing sounds and they inflate ok (although there was a very loud initial pop from each one like a tyre bead being seated!), but I'm not very confident that the pipes are seated perfectly given the problems I had getting the bleeding things in. Perhaps I should just buy some longer pliers and try reseating them.

The pipes are so innaccessible, how can one check them except at the ends? They all seem to run along the top of the chassis between the body and the chassis. I was half tempted to replace them all anyway, but they'll be a right pig to locate.

I'll have a go at the soapy water thing - presumably that will show any leaks at the airbag end too. Just hope I haven't mangled the pipe ends!


Guy

There should not be a loud pop as there are pressurised. If you ever do it again and for others, make sure there is at least some pressure in the bags BEFORE you let car down off jack.
 
An idiots (that's me) guide to EAS airbag replacement.

FIRST OFF Anyone following this guide does so at their own risk. This is just how I did the job, I don't say it's the best way but it worked well for me.


Thanks to Andy for the initial advice on how to do one corner at a time.

You can see the bad state of the old air bags compared to a new Arnott Gen 2

OK, so car on the level with the wheels chocked. Open the rear tailgate to freeze the suspension. On mine it was only necessary to open the upper part for this.


Jack up one rear corner per the photo until the suspension is fully extended, no need for the wheel to be off the ground. Secure with an axle stand under the chassis.


In the next photo you can see the air pipe and the point of entry to the air bag, no need to remove the wheel arch liner.

Wear Goggles for the next move and gloves if you are sensitive!! With a long flat bladed screwdriver push on the brass collar adjacent to the air pipe and when the collar is fully depressed at the same time pull on the pipe. It will come out with a blast of air.

If yours is like mine, DO NOT BE TEMPTED TO CUT THE PIPE AS SOME RECOMMEND, on mine the pipes have a very small raised collar about 25mm from the end of the pipe. If you cut the pipe off, it is possible the pipe will not go back into the air bag fitting or, if you cut off the collar too the pipe may be too short. See photo's of the collars. There are some who say these collars do not exist, my photo's show otherwise. Maybe they are not present on all cars but I know they exist on a 98 model and my 2000 DHSE. They are not caused by a phenomenon called necking as the are too far away from the entry collar.


Use the piece of welding rod to hook out the R clips top and bottom. If you are lucky, and your air bags have plastic end caps they will come out easily, if the end caps are alloy, by all accounts they could be a right barsteward. I can't advise on this as mine were plastic and easy!

You can now remove the air bag if it is not corroded to the chassis. Clean up the rust in the housings and put the new air bag into place, with a second jack under the axle lift the axle until the new air bag is held in held place.

Fit the new R clips top and bottom to secure. Make sure the end of the air pipe is clean and refit into the air bag. This may take quite a push, I lubricated mine with a solution of washing up liquid and water. The little collars aided me in getting a good grip with some modified forceps.

Remove the axle stand and lower the car a little, UNTIL THE AIRBAG JUST STARTS TO COMPRESS, remove the jack under the axle, start the engine, close the rear tailgate and wait for the bag to inflate, I had to push the button for max height to make this happen, once the bag is inflated, remove the jack, lower the car via the button to normal height.

If all is well on to the other rear air bag.

I found the fronts a little more difficult, the top clips are a fiddle but on a diesel can be removed without touching the wheel arch liners. Access is a bit restricted on the battery side but do-able with the aid of my bit of welding rod.

The bolts for the lower clips were well rusted in and were a job to remove.

Otherwise the method is the same as for the rears.

The ride heights needed, no adjustment after this as with the tailgate open the ECU is unaware of what you have been up to, however there is the possibility the one of the height sensors may play up after it has moved beyond it's normal range, if so, disconnect the linkage and move it through it's range of travel a few times (tailgate open of course) put an ohm meter on it and see that as you move it the reading changes smoothly with no breaks and then try again. If you still have a corner miss behaving you may have to change a sensor.

Good luck if you try this.

I am new to the P38 so not an expert but I do have experience of air systems and vehicles. Still got lots to learn on the P38 tho.

Can't work out how to get the bloody pictures in! If you want the full document PM me with your email address
 
There should not be a loud pop as there are pressurised. If you ever do it again and for others, make sure there is at least some pressure in the bags BEFORE you let car down off jack.

I did do that (ie pressure them before lowering the jacks) and it still went POP! Scared the wife anyway, so was worth it! :D

Guy
 
The O rings are behind the brass collet and you cant see them unless you remove the collet. My one that was leaking, it was obvious that something was amis as the air was pi**ing out. Ive seen the O ring kits for a lot less than that. Have a Google for Rover Renovations.
 
It might be worth replacing the air lines with slightly longer ones anyway as I'm pretty sure the Arnotts are capable of higher clearances if you reset the heights with the EAS software, and a bit of extra ground clearance is always handy!
 
Thanks for all the replies. I'll try the soapy water test at the weekend - is too dark in the evenings now by the time I get home.

I'll keep you posted.

Guy
 
I bought 4 x airbags yesterday.. The guy at Island 4x4 ... Advised that when you pull out the air tube from the old airbag, it scores the tube, so when you push it back in the new airbags, the score marks are enough for the air to leak.. If poss cut 6mm of the end.? something to think about when i do mine tomorrow morning..
 
Well found the problems. One of them was that the pipe hadn't been pushed properly into the airbag union - it was much easier 2nd time round. Not sure why.

Unfortunately I've just found a load more leaks. Looks like the previous owner has fitted emergency inflation valves and ALL the connections to them are leaking. Grrr. That soapy water trick is excellent!!

I presume the best way to fix it is to replace all four connectors? I'm worried about unplugging any of them in case I make them even worse!

Does anyone know what they're attached to inside the EAS box?

I think I might put off replacing the fronts for a while as they don't seem to actually be leaking!

Guy
 

Attachments

  • EAS_leaks.jpg
    EAS_leaks.jpg
    222.2 KB · Views: 148
Gah. I got bored today after failing to fix my air leaks under the bonnet and decided to fit my new indicator stalk. All seemed fine so I thought I'd treat him to a hoover.

When I turned the ignition on to close the windows I got shed loads of warnings such as ABS Fault, Gearbox fault etc. Looks like the battery has gone flat now!

What's going on!? Pesky Rangeys!
 
Back
Top