Help Needed for series 3 body preparation

This site contains affiliate links for which LandyZone may be compensated if you make a purchase.

LandyBoy007

Member
Posts
52
Location
Suffolk
Hello again,

We have nearly finished the electric on our series 3, just got the wiper and pump motor working, all good.

Now this is where I need some advice for body preparation.

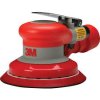
I have watched some videos for this topic and most people seem to use air orbital sanders. Can I ask what you guys would recommend as a sander?

And secondly, I am going to buy an air compressor from SGS Engineers, the 50litre one, this should be fine for spray painting and sanding?

Look forward to your response.

Will
 
50 is probably enough but the 100 would be better but of course it is more expensive

the air flow on the 50 is the same as on the 25 only 9.6 cfm but the 100 has a much greater air flow at 14.5 cfm

I had a 50 some years ago, when it packed up I got a 100 the difference is noticeable.
 
I use an angle grinder with a flap disc or a black and decker sander no idea which model I have they are both quite old
 
Whatever method you use to sand the body, you will create clouds of dust so make sure you are well away from the neighbours washing etc and wear a mask.

Col
 
Will - you may want to look at the 3m style discs - they're good at removing paint while being quite gentle on the metalwork, I found them v useful in doing a few things although no denying they don't last as long as a flap wheel. Something like these.
 
Hi Nick,

Thank you, very helpful.... will this be fine for body preparation and to just hook it on a grinder? What’s the best way of using these?

Will
 
Hi Nick,

Thank you, very helpful.... will this be fine for body preparation and to just hook it on a grinder? What’s the best way of using these?

Will
I think so, that's what I'll be using when I get to that bit! Yes, they're just discs like the flap ones. You can use them edge on or flat, whatever you need for each bit. Sharp edges and whatnot will wear them down really quickly though, so worth buying at least 3 or 4 I'd think for a vehicle. Don't need to press hard.

Obvs as Nick (good name, Sir!) says you need etch primer etc. Get a good paint whatever you go for. Quality tells.
 
I wouldnt go powered at all unless going down to bare aluminium. Even if you want to remove all the paint it will be a nightmare getting it all off, especially round the rivets etc.

As said, if you get down to brimerbright your going to need an etch primer. If this is applied over any original paint left over it will bubble.

A rock and a hard place I know but its a choice of all or nothing.

I would only use a block, wet n dry and soapy water.
 
I wouldnt go powered at all unless going down to bare aluminium. Even if you want to remove all the paint it will be a nightmare getting it all off, especially round the rivets etc.
Yes, absolutely - sorry should have said, don't use one of those wheels if you're just planning on touching up! That's not what I got from your post but I could have imagined it. They won't do a half-job so if you're just keying it they're not the right tool. No need for machinery if you're just keying it to give a good surface to paint over the top of whatever's already there.
 
I think so, that's what I'll be using when I get to that bit! Yes, they're just discs like the flap ones. You can use them edge on or flat, whatever you need for each bit. Sharp edges and whatnot will wear them down really quickly though, so worth buying at least 3 or 4 I'd think for a vehicle. Don't need to press hard.

Obvs as Nick (good name, Sir!) says you need etch primer etc. Get a good paint whatever you go for. Quality tells.

Hi Nick666,

Thanks for the info....I’m still thinking either a grinder with the discs you mentioned or one of these
 

Attachments

  • 2C5A51BD-6749-48E1-8C91-795DC107A476.jpeg
    2C5A51BD-6749-48E1-8C91-795DC107A476.jpeg
    17.5 KB · Views: 121
I wouldnt go powered at all unless going down to bare aluminium. Even if you want to remove all the paint it will be a nightmare getting it all off, especially round the rivets etc.

As said, if you get down to brimerbright your going to need an etch primer. If this is applied over any original paint left over it will bubble.

A rock and a hard place I know but its a choice of all or nothing.

I would only use a block, wet n dry and soapy water.

Hi Bobsticle,

Thanks for the info, what’s better, down to bare ali and start fresh, or smooth surface for painting?
 
Hi Bobsticle,

Thanks for the info, what’s better, down to bare ali and start fresh, or smooth surface for painting?
Unless the original paint is releasing itself from the aluminium it’s fine to use this as a solid base to work from. Starting afresh could bring more problems than it cures.
Key the surface with a medium wet and dry removing any nibs. Use soapy water but not one with silicone in it like some washing up liquids.
Mask off the car then apply a thin coat of contrasting primer. You can then use large flat blocks with the wet and dry to show up dints.
Fill as required, flat the filer and begin high build primers with progressively finer wet n dry until ready for top coats.
Try to imagine your going to varnish the primer rather than paint it. That way you will get the filling and priming spot on. Once you start the top coats it’s too late to hide anything.

I don’t do any of the above as the bodywork is last on my priority list. One day when everything else is done I may go for a decent finish but I’m happy that it looks like a shed. :D
 
Back
Top