My First rebuild - 110 station wagon

This site contains affiliate links for which LandyZone may be compensated if you make a purchase.
Finally got another day off so managed to half fit the roof and even one of the alpine windows. Using my own little tool.
 

Attachments

  • image.jpg
    image.jpg
    251 KB · Views: 211
  • image.jpg
    image.jpg
    167.8 KB · Views: 221
  • image.jpg
    image.jpg
    172.1 KB · Views: 208
Last edited:
Lol, somebody told me once that no garage is complete without a bit of welding rod kicking about. I struggled for over an hour, then searched 'how to fit alpine window seals' when I saw the tool. I would have bought one but I wanted it there and then. And I'm tight:). Made this and lathered everything with tyre soap and it took me about 2 minutes.
 
Well after what started as a busy week has died down, I finished early today so got this side frame in primer. Had a bit left so did the other vent flap and still had a bit left so started on the seat box! Also fitted the other alpine window which is a doddle once you've practised. I'm starting to need a few other bits now, but mainly trying to find another windscreen and windows for the boot. Mine came with just a pane of glass each side and a rubber seal although at some point the correct sliding windows were fitted. 
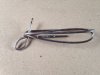
Does anybody know the part number for this seal? It's similar to the alpine seals but obviously much longer. I'd like the correct frames but they're not exactly cheap.

image.jpg
image.jpg
 
Lol. The one at the top of the b pillar just kept hitting bricks where I dug out the soakaway for my house (stupid idea:mad:). That box section is 6x4" stainless steel, about 2' long. I have 6 of them, too good to throw away/weigh in which unfortunately is the story of my life and why I can't get in the garage lol.
 
Haha, when I moved here I never imagined I'd fill a garage. 8 years on and it's bursting at the seams, the drive is full, the area behind the garage is rammed, Ive put half of my motorbike in the loft (sshhh), the playhouse in the background sometimes houses my mountain bike bits, that plastic thing is full of God-knows-what, and that brown wheelie bin is meant to be for garden waste - it's not been out in 7 years! Currently home to the 110's old shocks, springs, wiring, lights, all seals, some glass and two seat bases! And there's still stuff at my dads that I didn't take when I moved out and I can't even face going to fetch it, although I think he sold my kx125 so I don't need to find space for that.
 
Well, not a lot of progress again, despite only working one day this week. I'm at a point where I just can't see the wood for the trees, and I have started so many individual tasks that I've just ended up with a big mess.
Anyway, here are seat boxes. The galvanisers said these would warp, but only one did.

image.jpg

Bit of swearing and some m5 bolts and nuts and pulled it into position. I applied 3x20mm foam type (neoprene) to the mating faces to prevent corrosion, got a few rivets in, I didn't have enough for the whole lot so just got them in where I could. Bought some more but then realised they were countersunk. So bought even more:mad:.

image.jpg

Not a bad finish considering the weather the other day. This is 2k laquer over basecoat (harder wearing)

image.jpg

That's now in place, looking for seats now. Meanwhile, for those that haven't seen my 'name that manifold' thread, I decided to turn my attention to the engine. I'd given it a quick wash before refitting months ago but put it in in a hurry as the engine hoist needed to go back, and I wasn't sure how long for. Turns out I could have waited 20 minutes and borrowed it again but oh well. Inspected the 19j turbo and realised instantly it was fubar. Funds really aren't stretching that far until later in the year so it's being shoved to the very bottom of the pile. If need be I'll run 200di. I don't drive far in my own car and speed isn't important to me so can live with it.

Something I've been itching to do is rewire it. I'm no sparky by any stretch of the imagination but something about re-wiring vehicles really flicks my switch:rolleyes:. I've been thinking for ages what I want, don't want, where I want it, and how to do it. 2 things though. The first being that the moulded rubber connectors don't seem to be available, the second being that there is nothing, absolutely nothing at all, wrong with the existing loom. There is one cable added to illuminate a spare warning light, the fuse box is obviously crap, but I don't see the point in wasting a good harness making a new one. It's not really the harness, but cutting all the connectors off the switches etc to replace with new econoseal connectors just seems really stupid.
image.jpg


The chassis loom on the other hand is a piece of tat, and I've a list ready for making a new one. That will be easy I'm sure.
 
What's wrong with the turbo? can you not rebuild it with a kit off the bay for about £40? ( or are they not available for that blower?)

Love the seat base - that really is going to look the dogs doodahs... and all that galv - it should last forever:)
 
Wish the chassis was galv too:(, still, gives me an excuse to rebuild it again in future. Turbo - about 5mm play side to side, 3mm in and out. The vanes are a lovely shape where they've rubbed. I could and have rebuilt a turbo before, easy enough but a thorough investigation is needed first. Add the cost of oil feed/return pipes, all the induction pipe work (I have none) and it soon becomes a bit more involved. I just need to weigh up my options.
 
Wish the chassis was galv too:(, still, gives me an excuse to rebuild it again in future. Turbo - about 5mm play side to side, 3mm in and out. The vanes are a lovely shape where they've rubbed. I could and have rebuilt a turbo before, easy enough but a thorough investigation is needed first. Add the cost of oil feed/return pipes, all the induction pipe work (I have none) and it soon becomes a bit more involved. I just need to weigh up my options.

Oh yeah I reckon that turbo is U/S ( being polite )...

You have PM....
 
I have their catalogue but only see the single/double etc. I wanted blocks to match the originals, that are 8-way and combine male/female in the same half, if that makes sense. I'm just being fussy really.
 
Well, another day off work so decided to get a few more bits in primer. Here are the days accomplishments, back of seat box, c pillar covers, and gearbox tunnel.

image.jpg
image.jpg
image.jpg


And here is the middle row floor. It's rough, still a few marks in it from the heavy handed removal, but lots of putting too. I'll paint it and fit it anyway but it will be replaced in the future when I find something better. It's only a sheet of alloy with a stiffener welded to the back so will probably make one. On the other hand, I don't intend to fit carpets or whatever so the floor will have a hard life anyway.

image.jpg


And here's the bulkhead diaghram thingy. God knows why the chose to make this out of steel when the other part is aluminium. Wire brush and a sprinkling of Fertan me thinks.
image.jpg
 
Back
Top