My First rebuild - 110 station wagon

This site contains affiliate links for which LandyZone may be compensated if you make a purchase.

Discokids

Well-Known Member
Posts
3,160
Location
Derbyshire
Hi everyone, I'm new to all this posting on forum stuff, so please bear with me. I'm going to attempt to rebuild my recently aqquired 110, it's a disco 200tdi powered station wagon, originally a v8. I figured I may as well log it here as I go, you all seem to be interested in a rebuild and hopefully can give me a few pointers on the way.

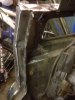
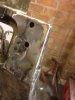
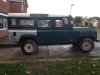
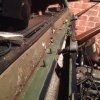
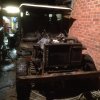
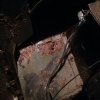
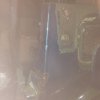
This sorry mess here is what we're starting with. I can't stretch to a galv chassis but this 'seems' fairly solid unlike my old disco which I think had been parked in the sea! I'm not going for a huge OTT off road monster as it still needs to be good for the family at weekends and within a reasonable budget.
 

Attachments

  • image.jpg
    image.jpg
    272 KB · Views: 641
Spent every evening this week stripping the front out, usually start about 7.30 and finish about 10 (early night tonight). Bulkhead not as bad as first expected, all four doors are shot. My plan at this stage is to get the b/h welded up, then I'll move on to the chassis, all the time making a list of all the bolts, bushes, cables and whatever else needs replacing, it will be sometime after Christmas when I'll start splashing the cash. Also this gives me time to compare different bits so I don't end up buying too much crap, or paying over the odds.
 

Attachments

  • image.jpg
    image.jpg
    398.5 KB · Views: 633
RH top corner. I was surprised at the top, thought I would have found rot under the seal.
 

Attachments

  • image.jpg
    image.jpg
    254.2 KB · Views: 501
Yeah, the floor doesn't look too clever. Can't see the other pic very well. Was it foggy when you took it? :)
Been hellish foggy here!
 
Not foggy just pitch black. Not had much chance to work on it the last two days, kids you see - currently sat watching frozen again:) but when it's finished I'll be out cleaning the bulkhead up. I also need to open a photobucket account so I can upload more pics.
 
Ah, I see you started a thread :)
Keep up the good work bud, that bulkhead doesn't look bad at all!
Oh and yes a photobucket account definitely makes life easier.
 
Not foggy just pitch black. Not had much chance to work on it the last two days, kids you see - currently sat watching frozen again:) but when it's finished I'll be out cleaning the bulkhead up. I also need to open a photobucket account so I can upload more pics.

Good luck cleaning up the bulkhead. No surprises I hope.
+1 for the photobucket account. Easy to set up and perfect for putting pics on here. And, the best rebuild threads have loads of pictures :D
 
This is All I've got done this weekend, busy leading up to Christmas and all that.
 

Attachments

  • image.jpg
    image.jpg
    275 KB · Views: 461
Looks worse than it is, the holes are where I drilled so I could weld to what was behind. I'll come up with a better way of doing the drivers side. I've only patched before (had a disco) so this is my first bit of proper welding. Still not got the photo bucket sorted, do I need to use a computer? I like to do everything in my phone but can't see how I can transfer pics from the app to this site - technology like this is something I seem to have evaded throughout my life. Tomorrow evening is the turn of the passenger footwell which will hopefully be a neater job.
 

Attachments

  • image.jpg
    image.jpg
    281.3 KB · Views: 416
Anyway, after a few hectic weeks and only having the odd couple of hours to tinker, the bulkhead is ready for paint.
Peeling away the inner footwell revealed this

to this


Drivers footwell was slightly worse

New one being bent into shape


Top right corner (much neater)

And primed ready for paint


I've a few little bits to do before paint, that I'm not happy with or forgot. There are no holes for the upper hinges and I need to weld the bonnet pull bracket back in. One or two of the welds could do with being redone and I've missed a couple of bits with the seam sealer but in my defence I've done it all in a cluttered garage, at night and its my first real fabrication type welding. Still pretty happy with it though.
 
Yes it is home made, my uncle 'just knocked it up from some scrap'. I've ordered new brake/clutch master cylinders, am painting the pedal boxes and cleaning up the dash, I plan to build as much back onto the bulkhead as possible in the garage out the wind and rain, then put it on the chassis complete when that's ready.
 
Well the last 5 months seem to have flown past, got off to a good start with this project, but after stripping to the bare chassis and seeing just how much welding needed doing I did lose interest a bit. Needless to say, I got there in the end.
New B/H outrigger

This is the rear of the chassis, and the remains of the ARB mount


After cutting out

Not many pics taken of the welding, didn't want to get my new phone dirty and im sure most have seen a rusty chassis before. Here it is being loaded onto my, er, trailer for sand blasting

After blasting

And the painted item two weeks later
 
Here are a few of the bits n bobs being painted black, After searching here I decided on rustoleum combicolour which is excellent!

 
Back
Top