Rebirth of Big Bertha

This site contains affiliate links for which LandyZone may be compensated if you make a purchase.
also added new seals to the sliding windows, just plain old door or window seals bought and cut to size, but they work wonders considering they cost just a few quid.

next up new latches and locks... and those pesky door gaps....

 
Took the day off and installed these new bulbs. I was a little surprised to find the process to install new bulbs is not a quick reach behind and pull it out, but rather removing the entire front cover and optics... but well worth the trouble, new bulbs are fantastic, nice clear white light, about a 50% increase over the old h4 bulbs.


Next step is to seal the soft top. Ive ordered some PLASTIDIP, a type of rubber plastic paint, in camo green, to try on the top of the soft top. So keep fingers crossed as spring a lots of rain in around the corner..
 
Finally had some time this weekend to work on Bertha....
First up and a big issue was the leaking and deteriorated tilt...

As you all can see it was painted over and the paint has since become faded and cracked leading to leaks...

pictures attached....


After doing some research and trying to find some alternative I came across a product called PLASTIDIP or RUBBER DIP... So I called the distributer an consulted on the product charecteristics...
48 hours later I received a 3.5 kg can of Camo green for just under 90 euro...

As per other member tips I bought some small rollers and foam pads and white spirits.
Let the games begin..


Because the recomended appication temp is above 15 degrees, I decided to take the top off and lay it flat, not thinking ahead that the fumes from this stuff are quit aggressive, I would recomend anybody using it to wear respritory protection.


manufacturer recommends diluting with 25% thinner, which I think is fine for the first 2 base coats. But then to get a good cover I would recommend using un-thined.
Application went on smooth, little to no bubbles good coverage. Used up the whole tin, doing multiple coats on high stress areas like the roof. You also need to add allot of pressure in areas where there are cracks or wrinkles to get into all areas.

Overall result was suprising, the tilt now has a rubber matt coating on it, also seems to have firmed it up a bit.


BEFORE AND AFTER.....

 
Next step is to re-apply disruptive pattern by spray and then spray on corp logos using stencils..... Our past attempts to do sticker graphics failed, so in the future if a respray is needed, just buy another tin of this stuff, supposedly you can peel it off.... so we will see in the future...

Layed out the pattern for the black disruptive, but not sure if Im doing it right, probably have to put it back on the car and mark it before painting....

 
So I finally had a chance to take some pictures of the old Lady with her newly finished top. Still some work to do to finish off the graphics, but overall I am happy with the finish and mainly the cabin is DRY.....
Only problem I found that after applying the rubber paint (Plasti Dip) the tilt shrunk a touch...

Time will tell how well the finish will hold up.

 
in the process of replacing the gauge bulbs I thought to fidle with the warning bulbs that werent working... now the 3 that worked have been reduced to 2... ;-(

any tips where I can buy replacement bulbs? or just change out the whole unit...
 
Finally some time to do an update.

Removed the door lining, some sort of Styrofoam and cleaned and applied some Hammerite on the inside before applying insulation.
I plan on adding insulation to the bulkhead, doors and floor. After some reading on the forum Im trying a bubble plastic insulation with silver foil on both sides (Commonly used in heating and air conditioning) and then adding rubber floor covers.

BEFORE


AFTER
 
Also purchase some military antenna, as Im installing a CB... Only problem is the connecter is a little off from where the Coax cable connects to the pineapple, and the Czech pineapple looks like a mini sputnik satellite that wont fit under the wing...

Some some modifications need to be made.

Oddly thought the Antenna itself fits perfect in the pineapple.

 
two more from today... After seeing the shoes on the LandCruiser I def need to up size
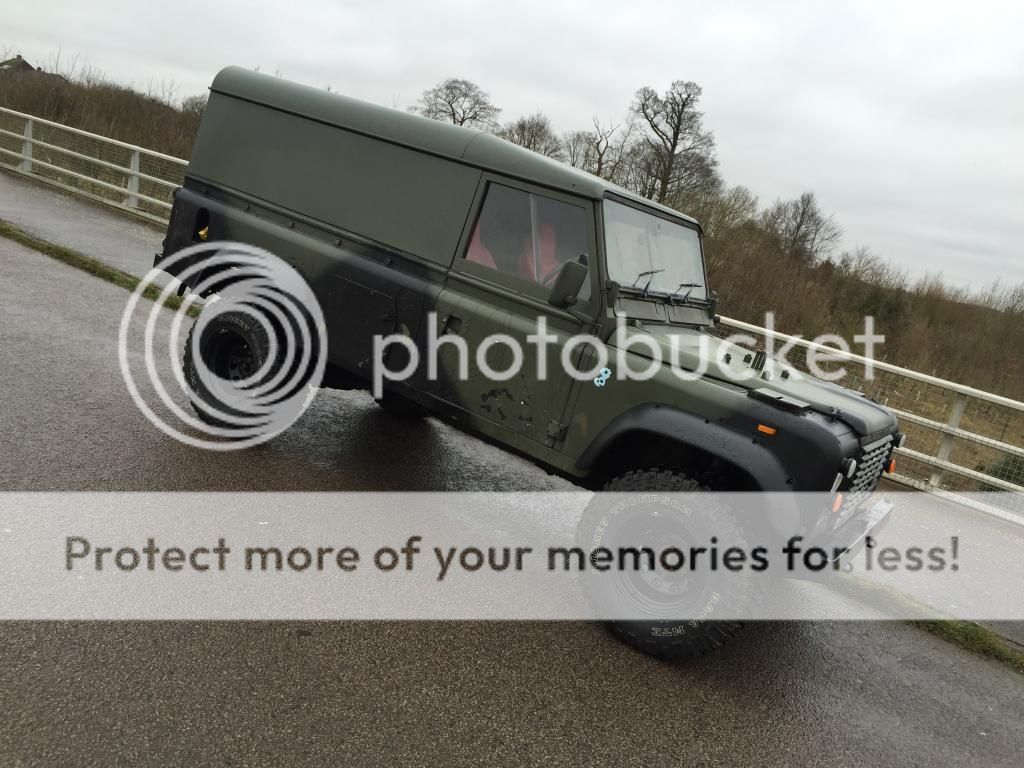

Yes you do!

IMG_1001_zpsqqzwsu1f.jpg
 
thanks @lucifus

Ive got a 2" lift, and now experience tire rub at full lock turning.
Do / Did you have spacers?

BTW love your thread, the 110 is looking tops mate.
 
thanks @lucifus

Ive got a 2" lift, and now experience tire rub at full lock turning.
Do / Did you have spacers?

BTW love your thread, the 110 is looking tops mate.

No spacers with these current wheels/tyres. Maybe you just need to adjust your steering lock?

I'm following this thread also
 
Another chance to get some work done today...

Finally started sound proofing, at least a little bit, the interior.
Decided to take the advise of @lucifus and used a plastic cell with foil on both sides. (Bubble wrap with tin foil on both sides) Its used in air conditioning and heating systems.
I used carpet tape to affix it.


Then covered this in 3mm rubber flooring, which I got at the hardware store, I didnt choose the diamond pattern but just the ribbed one to try out fit.


Also found some rust and a hole :-( so cleaned out the footwells completely and painted and riveted a cover for the hole.. Guess I should start looking for new footwells.

Also installed door handles inside and grab handles for the passenger...


Jobs not finished yet as I ran out of rubber, I plan to do the same to the back bed.


Incidentally also discovered the storage space under the driver seat filled with dirt :)
But could be a good storage area for tools... or a spare battery..
 
And fitted the comunist antenna to the capitalist adapter.... its not functional as I cant connect the coax cable... so this one will stay as a flag mast and I plan to install the CB antenna on the opposite wing where the air intake was....

 
Back
Top