After a long period of boredom with working on cars, I decided to get off my arse and fix up my Landy. This is the first tinkering I have done for quite a while, not counting plodding through routine maintenance and repairs of the daily use cars, and I am pretty chuffed overall. I dont have a huge amount of free time so this will be evenings and weekends only.
Yeah, yeah, I know....its a girls car, not a proper offroader, hairdressers runnabout blah blah blah...you know what? I like it. It actually surprisngly capable off road, only hampered by lack of lo-ratio and on the road its pretty civilised and car-like to drive. This is a van version, so ideal for what I need for daily use and work.
I have had this car for years....5 or 6 years, I think - which is by far one of the longest periods of time I have owned any car, so that must count for something. Its not been without its problems though, having had several not very careful owners before me. I bought it at the bottom of the price range at a clearance car auction in Scotland and since then its provided sterling service with the occasional wallet-denting breakdown...highlights include 4 new injectors, a new turbo and a new VCU. Its also running a Synergy box and Pierburg MAF, Silicon boost hoses and a few other bits n pieces.
I laid it up several months ago due to the clutch being on its way out and the body suffering from rust. Freelanders seem to be one of the better Land Rover products for rot resistance. You only ever really see them either rust-free or the odd totally rotten one. Typically mine is the latter. This was never picked up earlier due to French MOT tests not caring about rust. The last few CT reports have just said "multiple corrosion points" as an advisory. I could have kept on using it but for my own piece of mind I preferred to weld it up. I could also have just lashed a plate over the top of the sills, but that would just prolong the inevitable by a year or two - I preferred to do it properly.
Once the welding is done, I will be changing the clutch - will probably fit a solid flywheel conversion - and then I think a rebuild of the suspension is in order. Springs, shocks, polybushes and it would be rude not to fit a lift kit while its in bits eh?
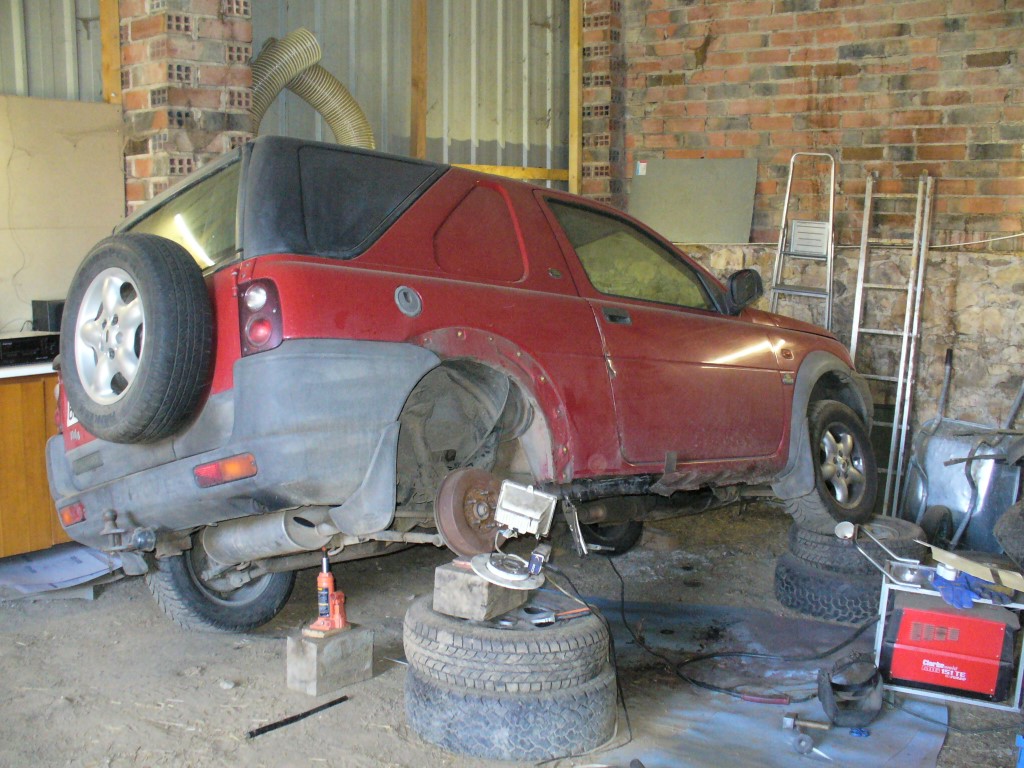
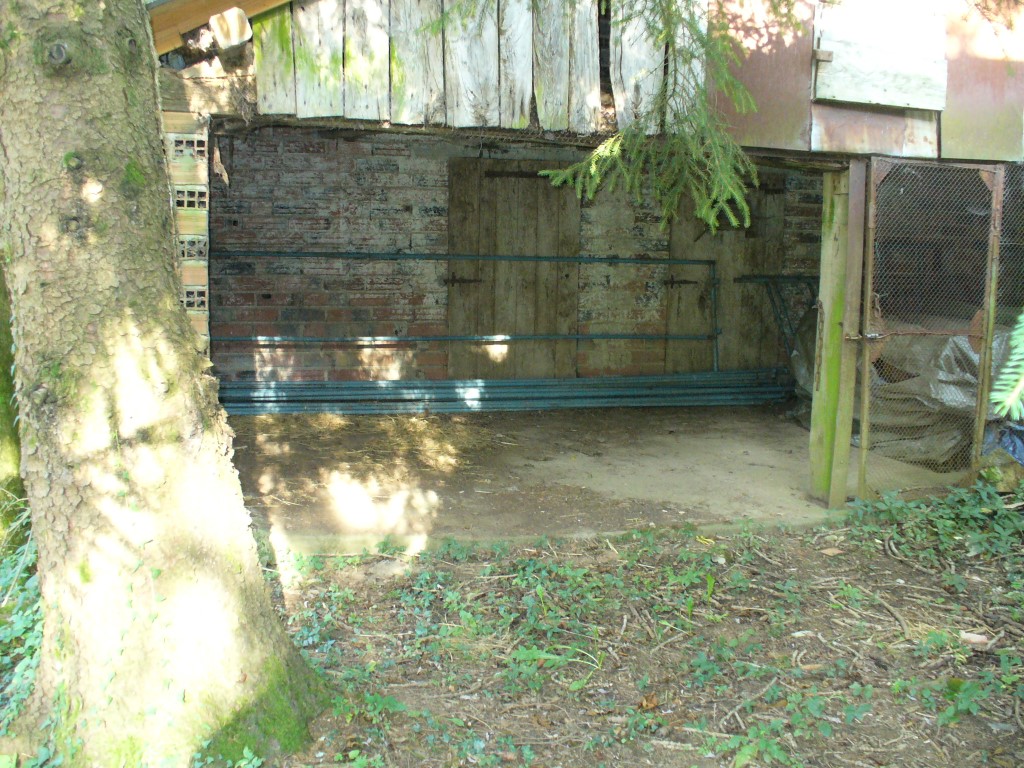
I dug it out of where its been sleeping for months. It took an Austin Powers style 23-point turn to reverse it into there and getting it out today was the same deal, which was tricky with a dud clutch.
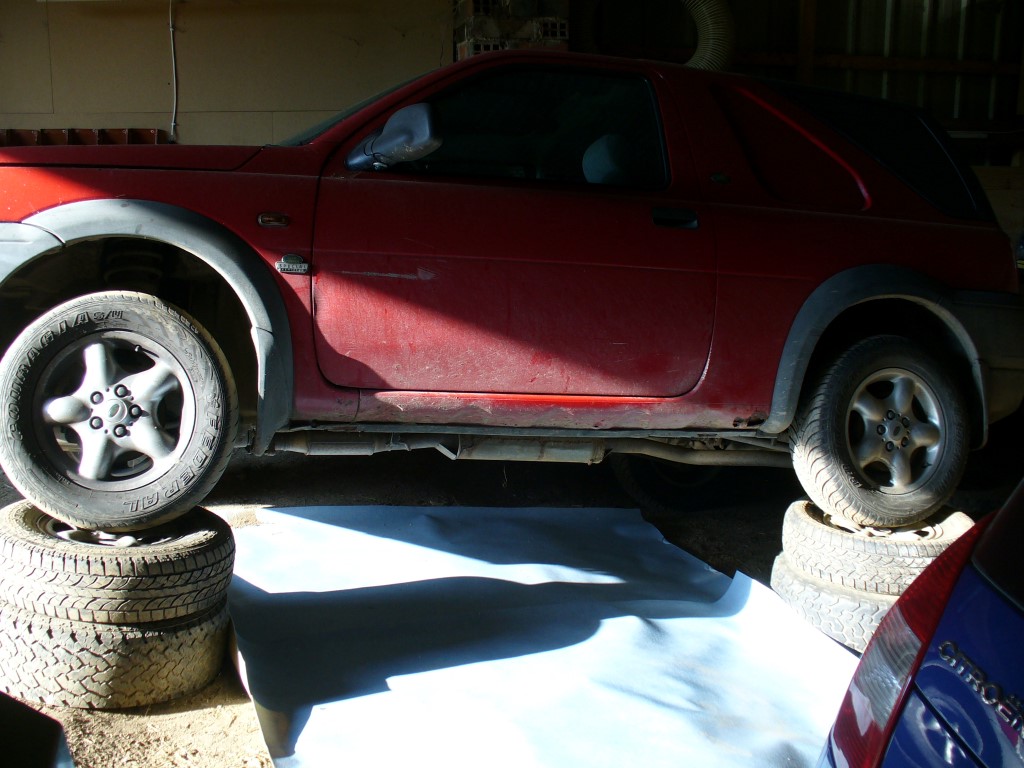
Into the garage and up on some old rims. I hate welding upside down, so wanted to get it nice and high.
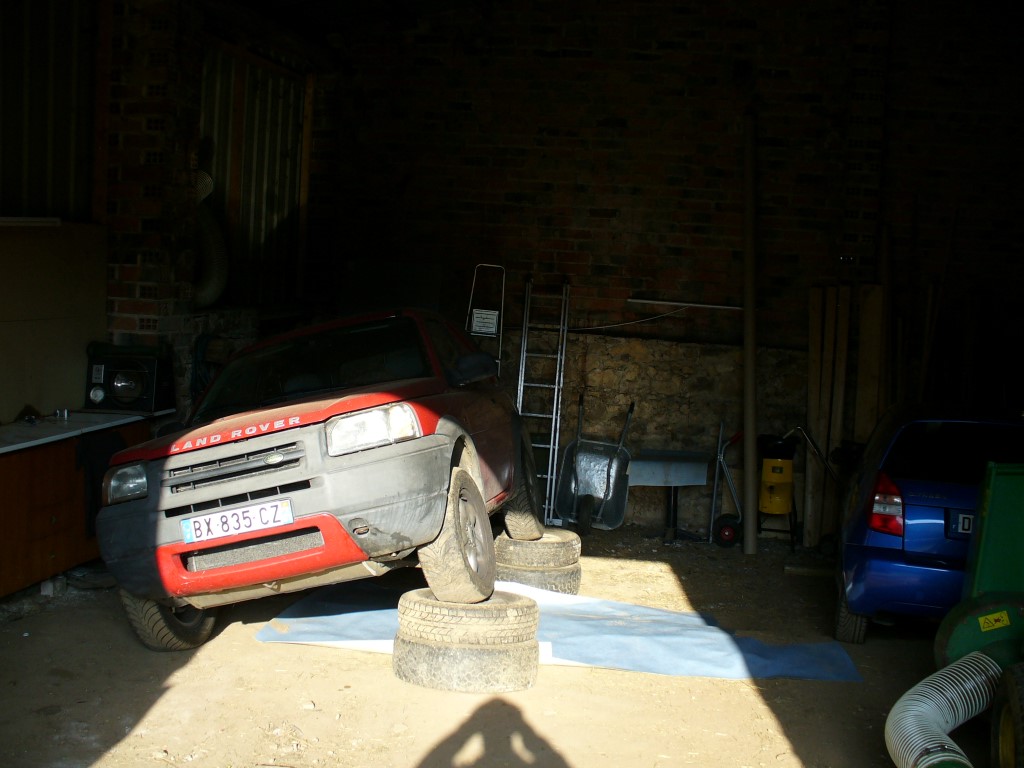
I often lurk around carpet shops and snap up roll-ends of Lino as my garage floor is just dirt. Dusty as hell in summer and muddy as hell in winter.
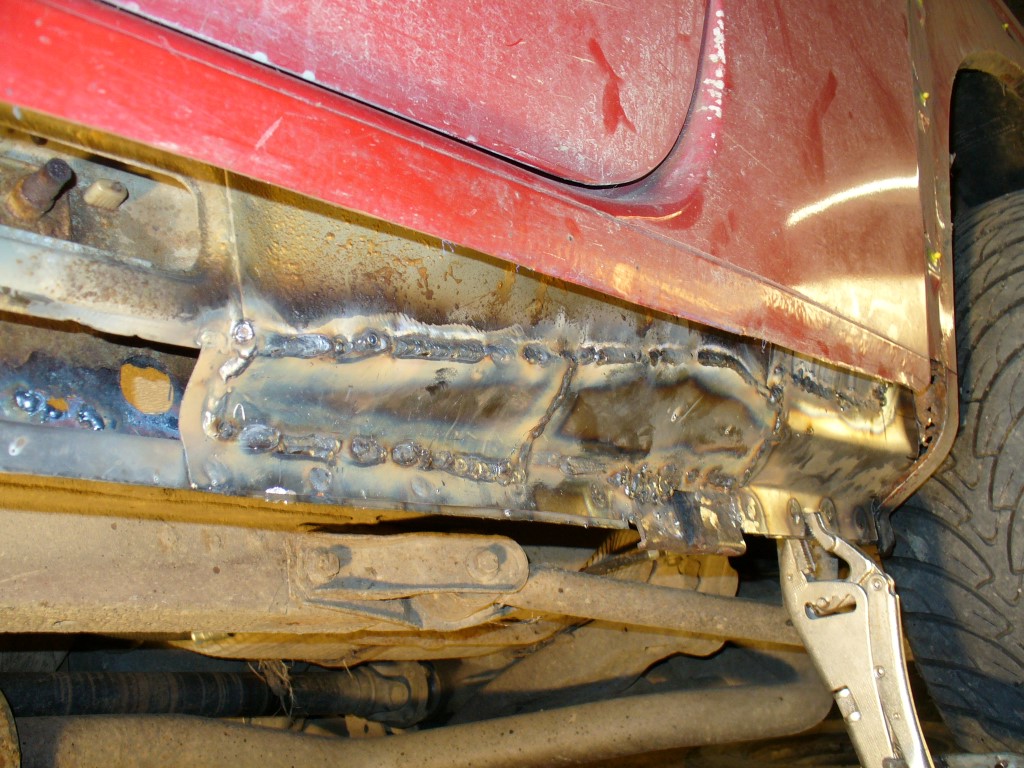
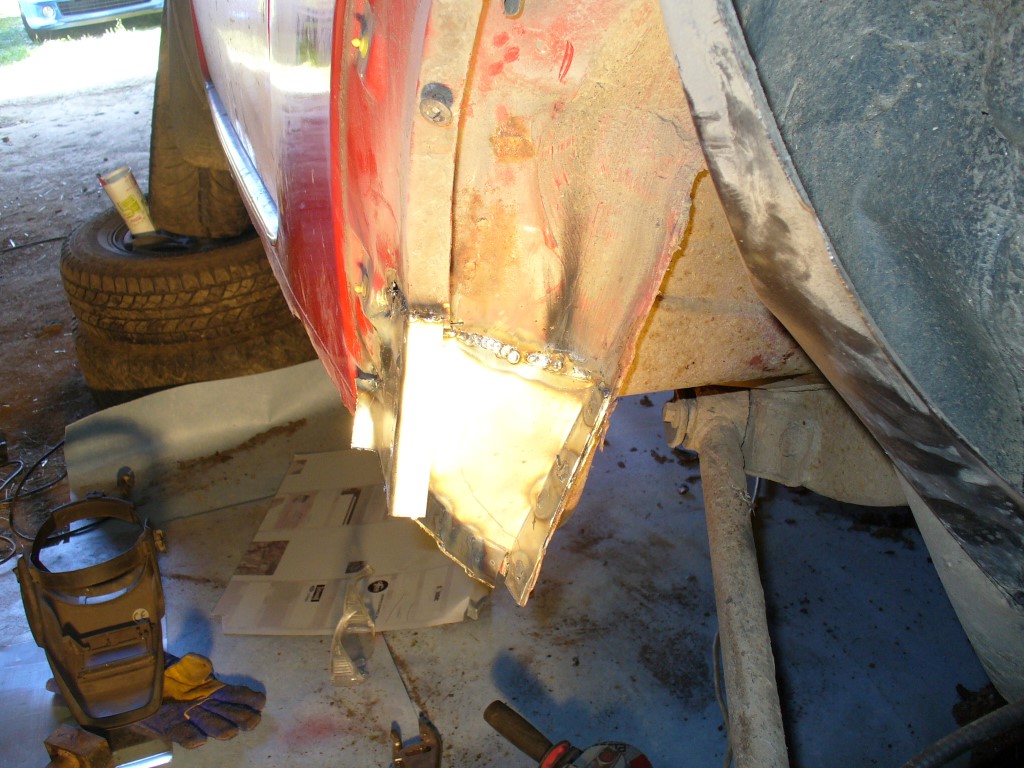
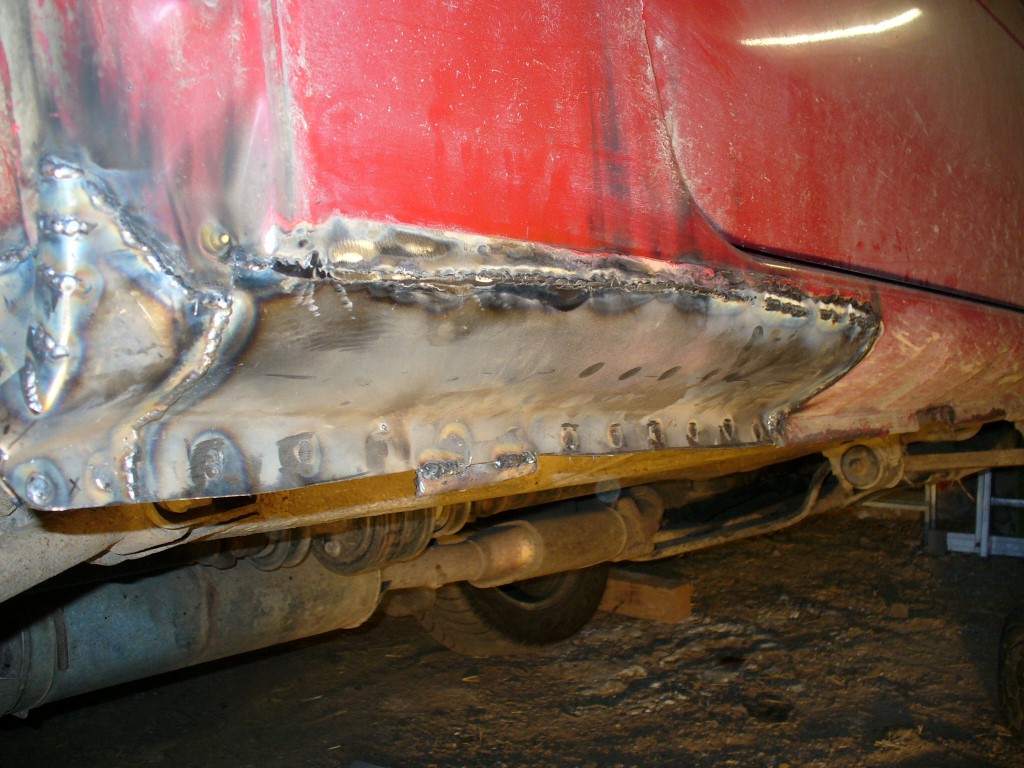
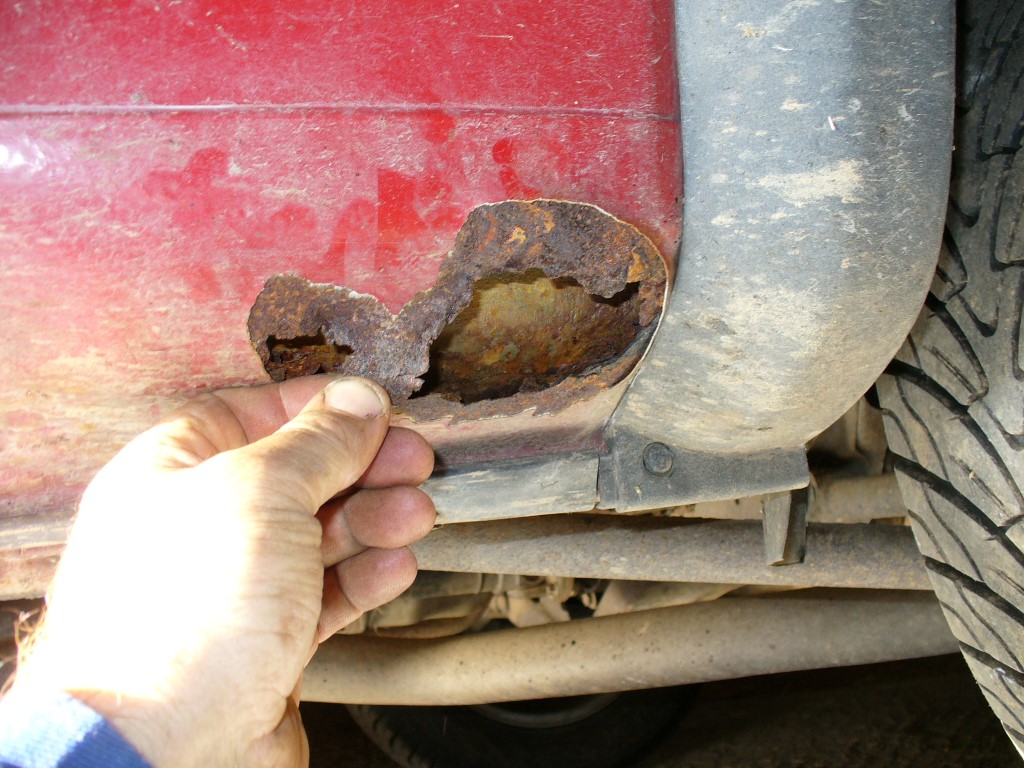
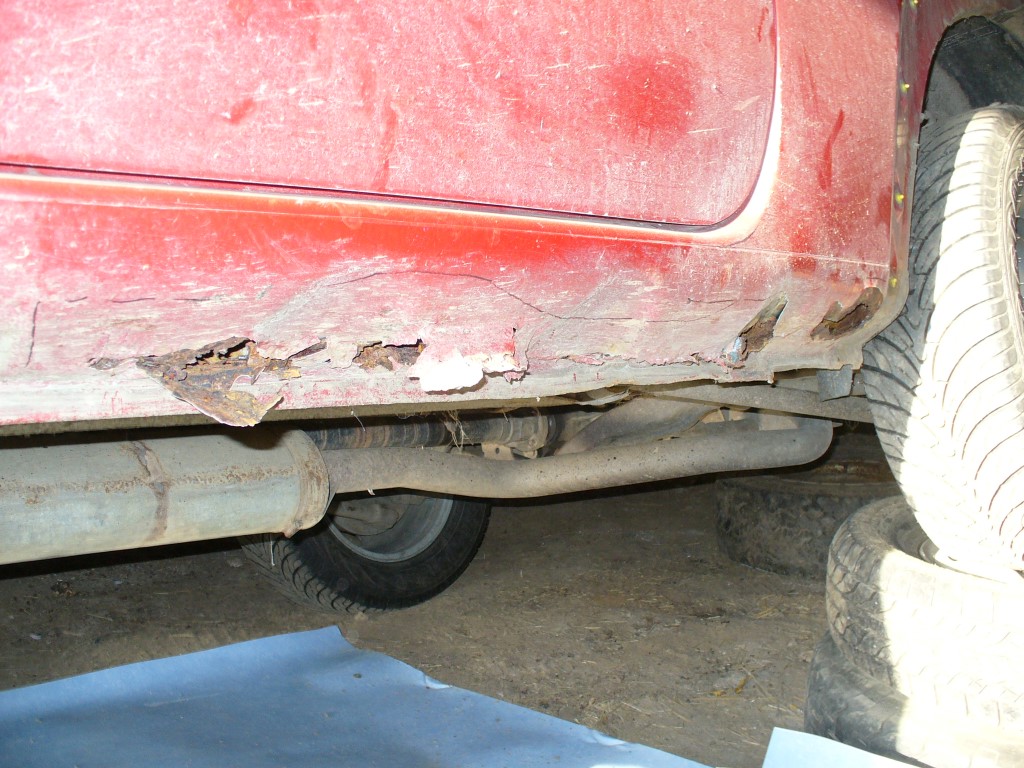
The back of the sill. Another problem with these is the sills are covered with a very thick, tough rubberised paint up to the first swage line which hides grot well. I peeled a chunk off and the metal came with it.
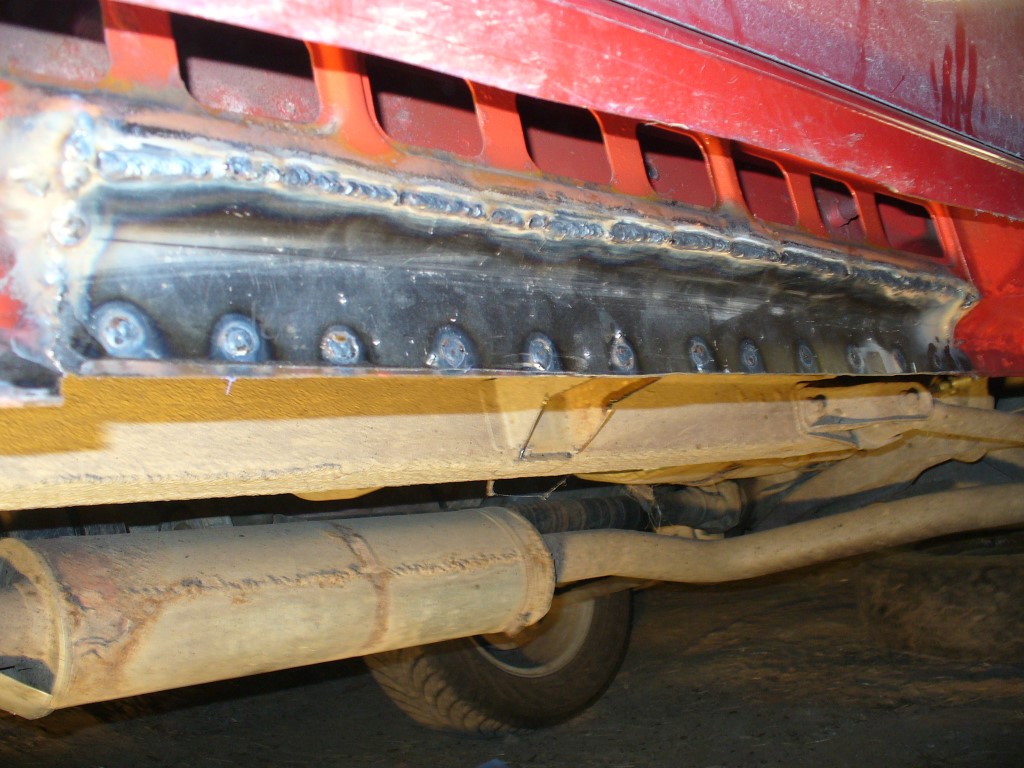
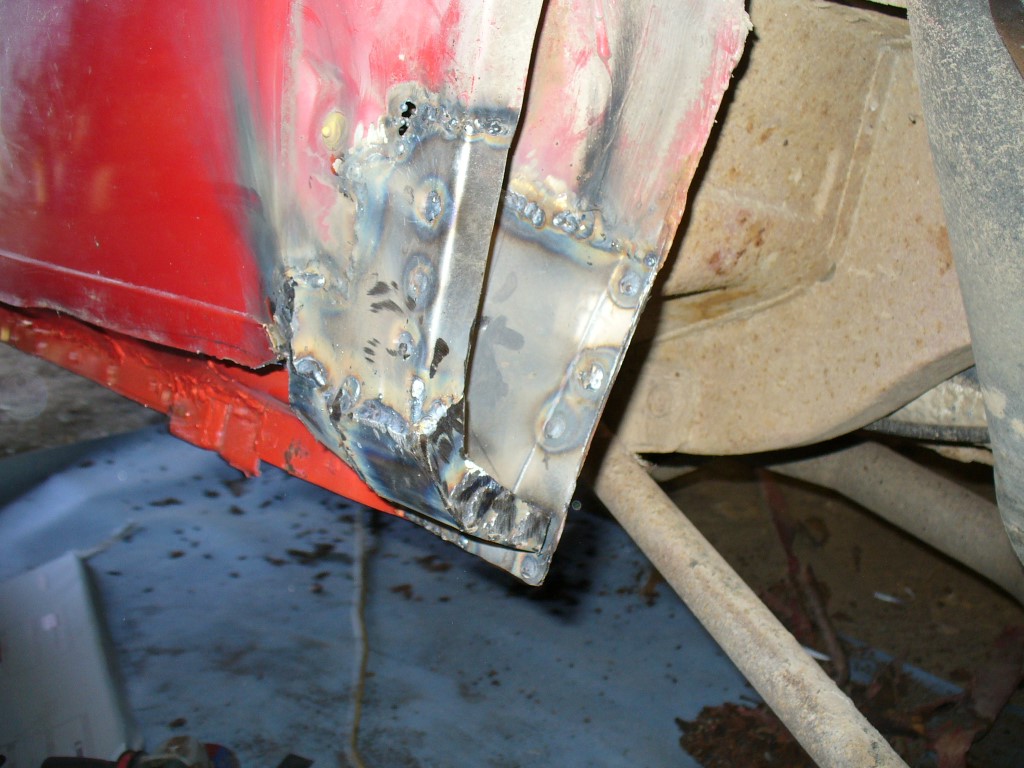
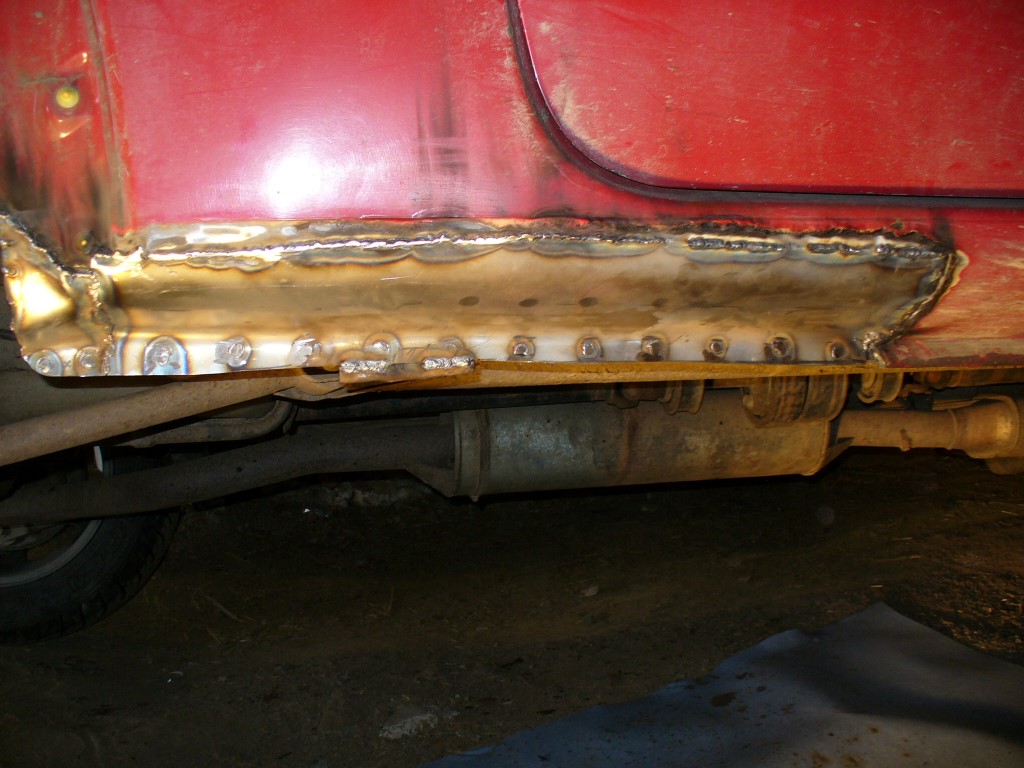
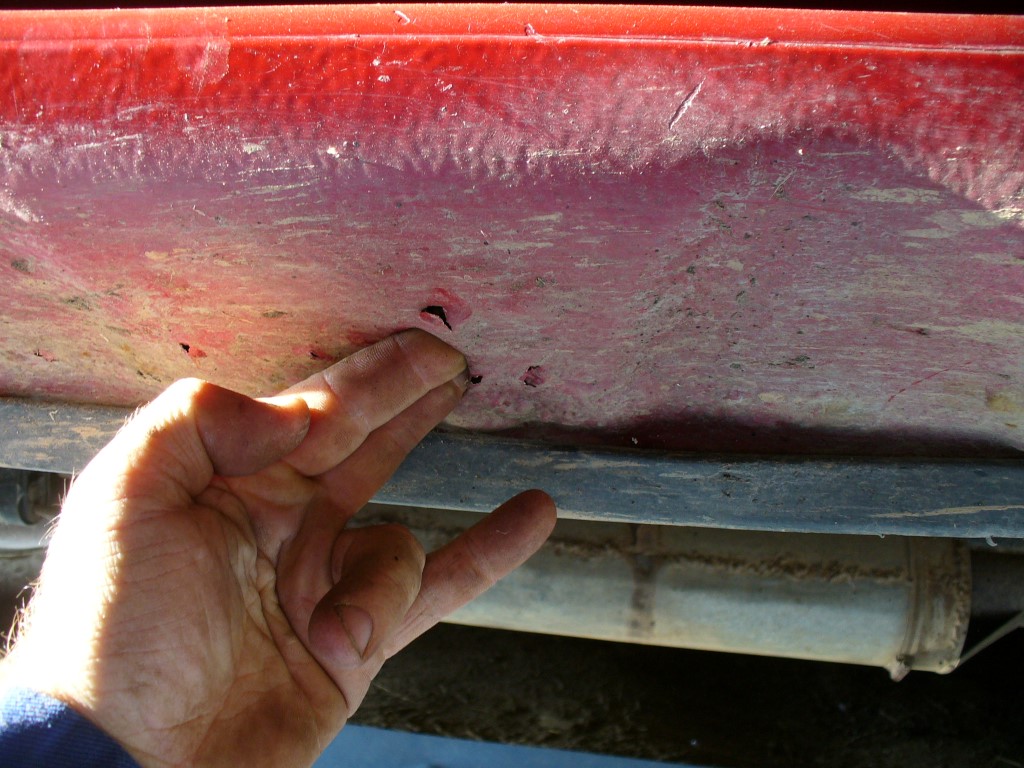
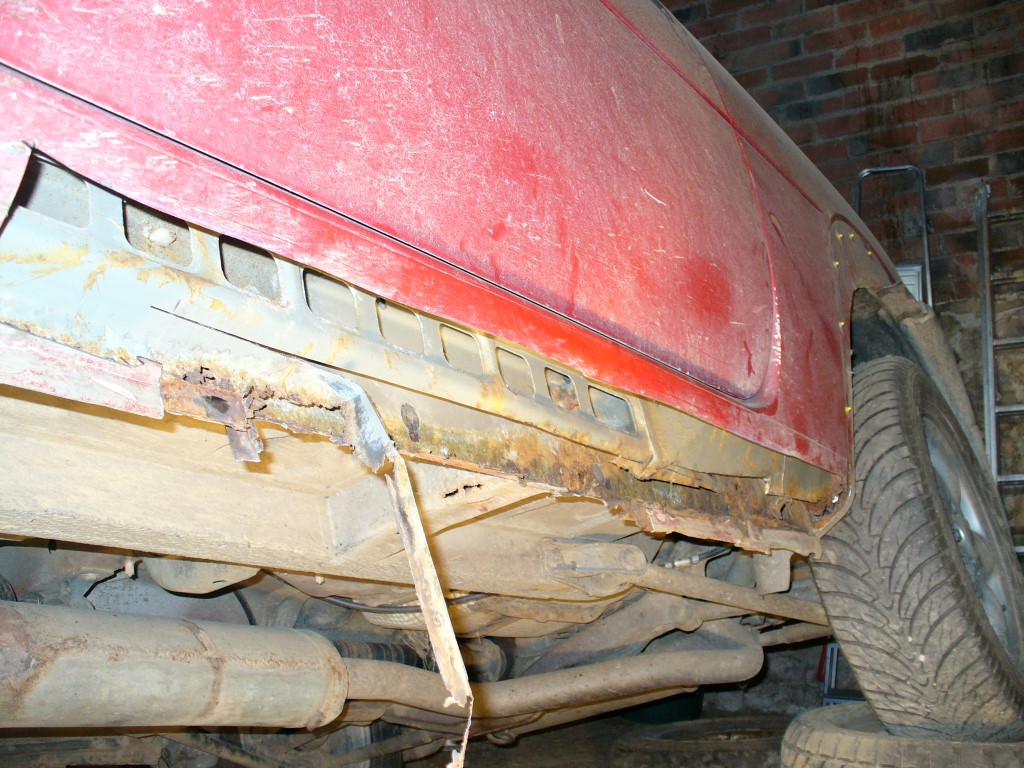
A bit further along...Two in the pink and one in....well, you get the idea.
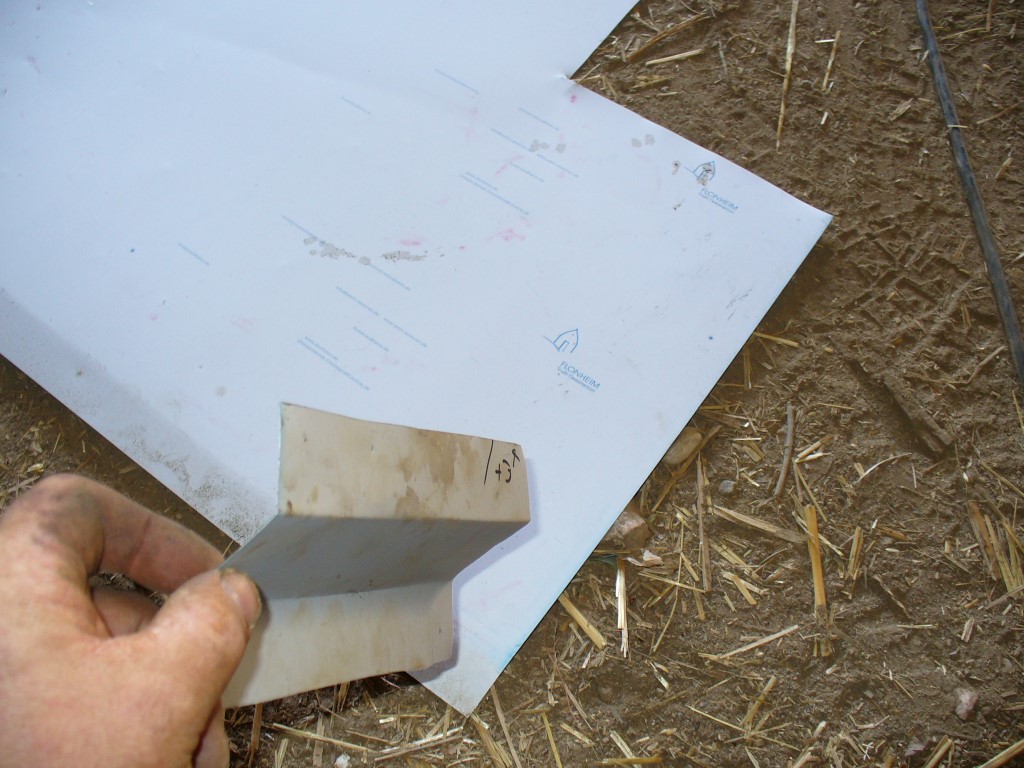
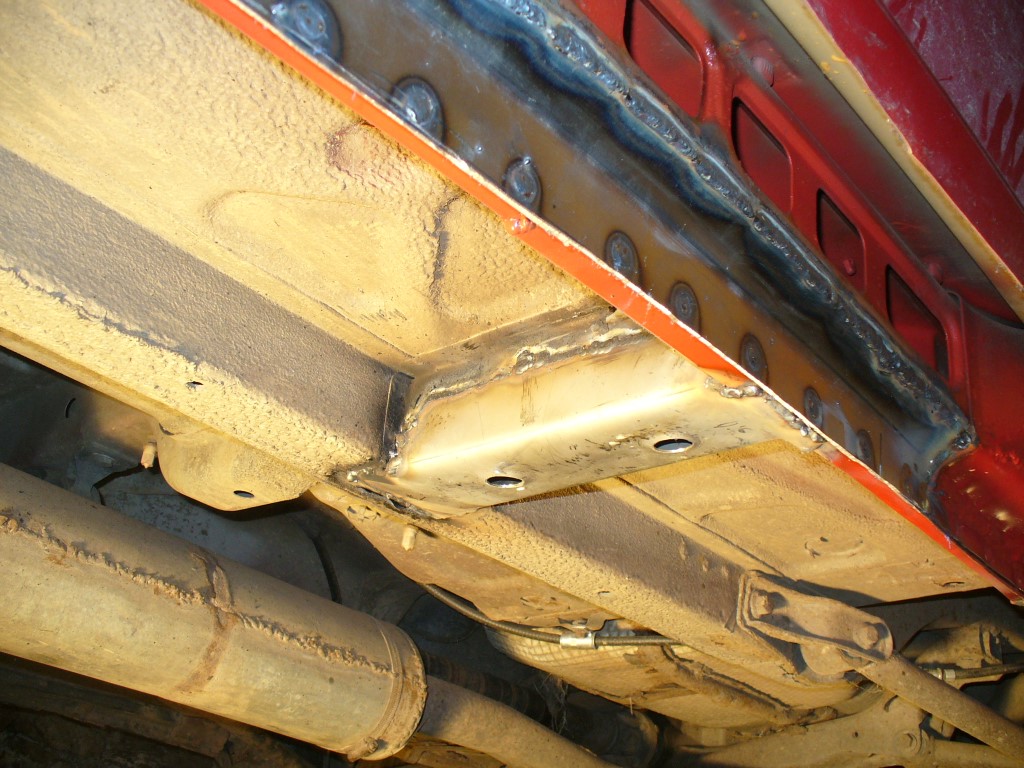
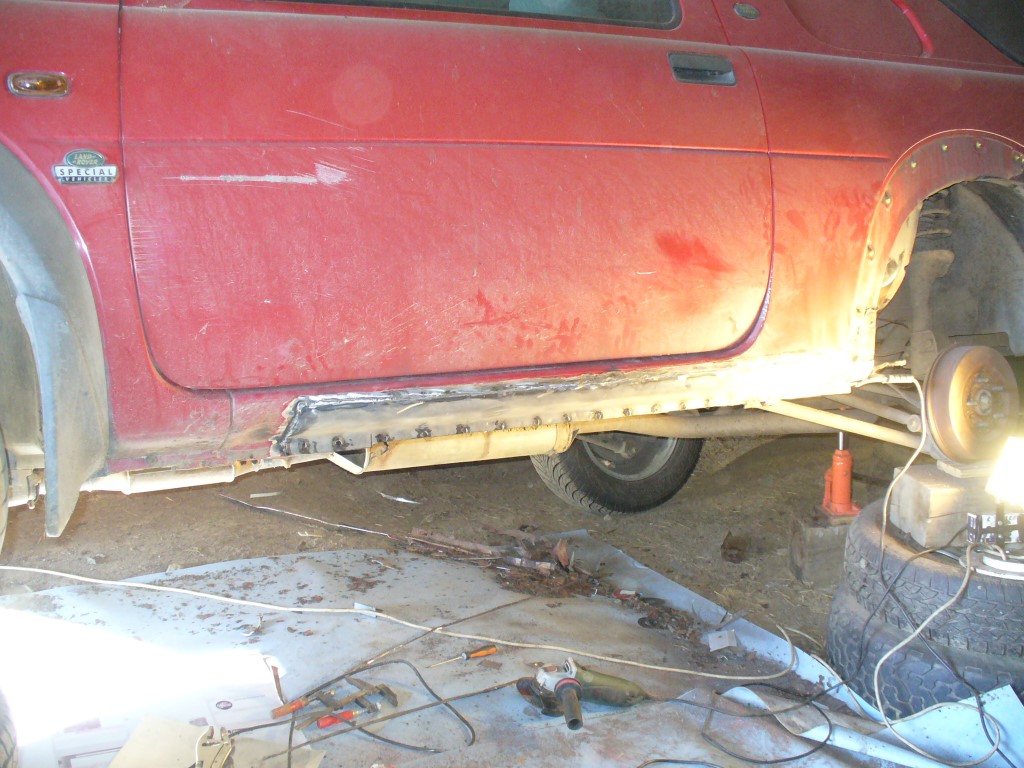
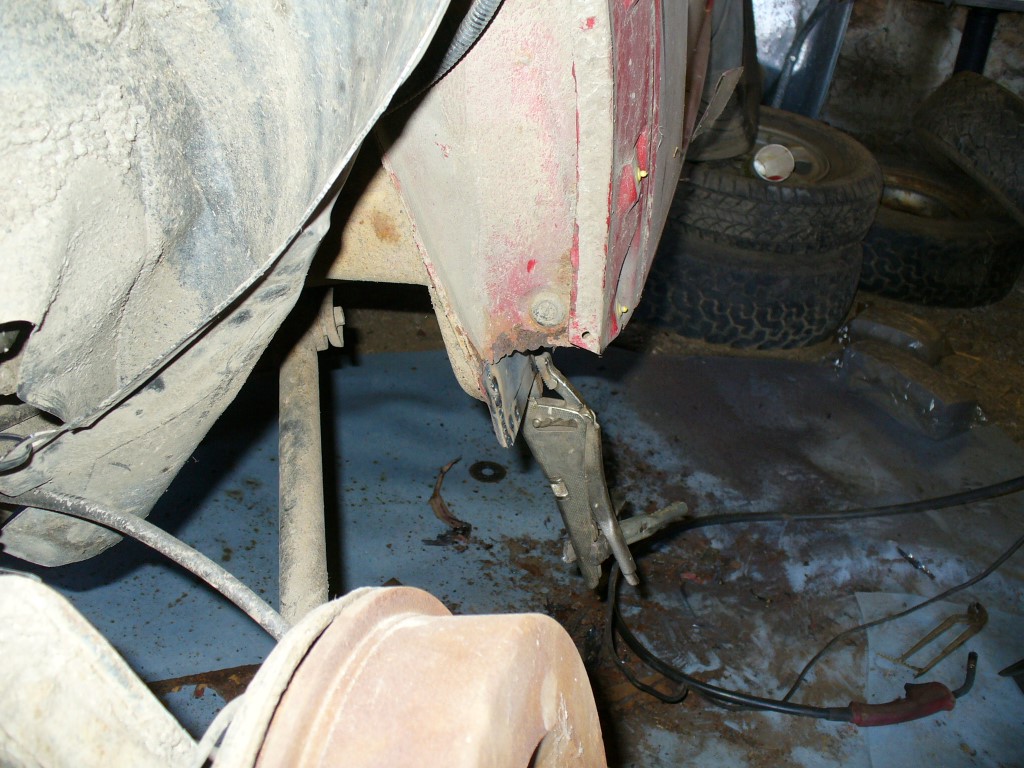
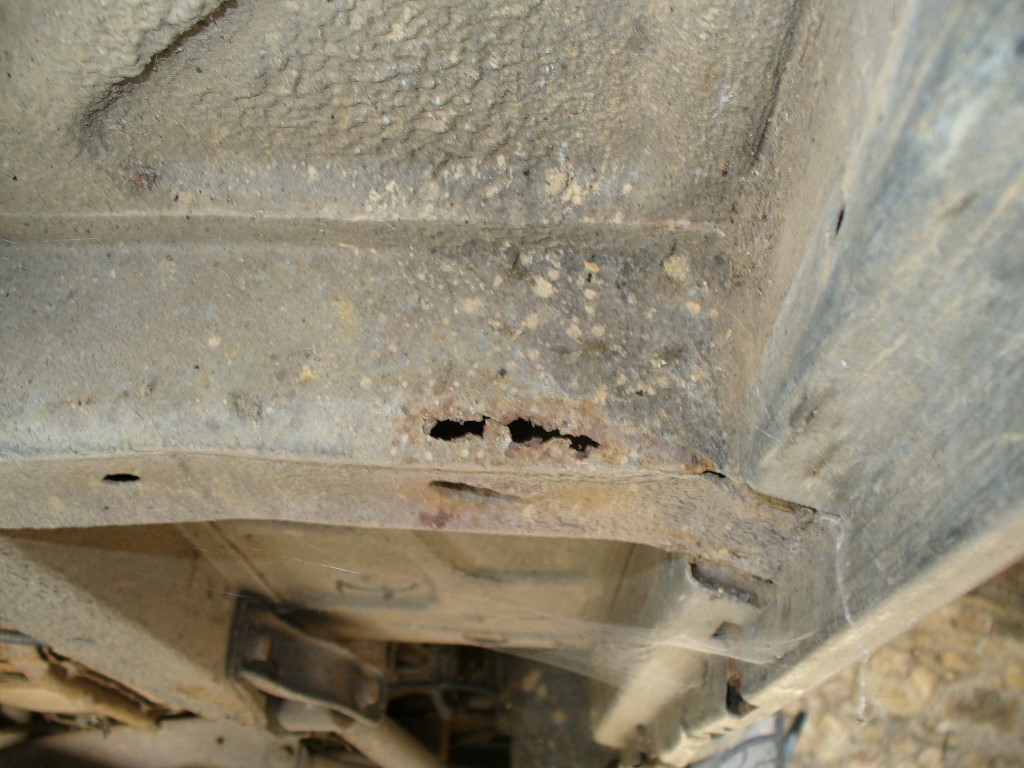
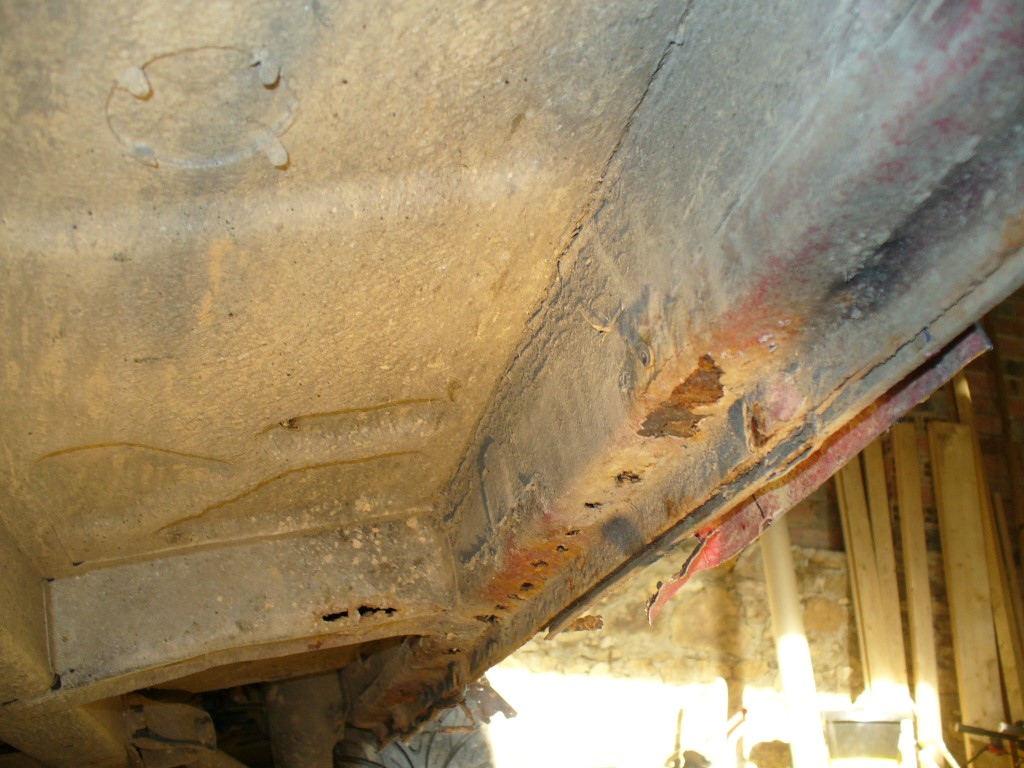
Underneath, it looked ok apart from this little outrigger which seems to have suffered from use as a jacking point.
In the pic above you can see the plastic sill trim in place, which turned out to be hiding some horrors - its a bad moisture and mud trap.
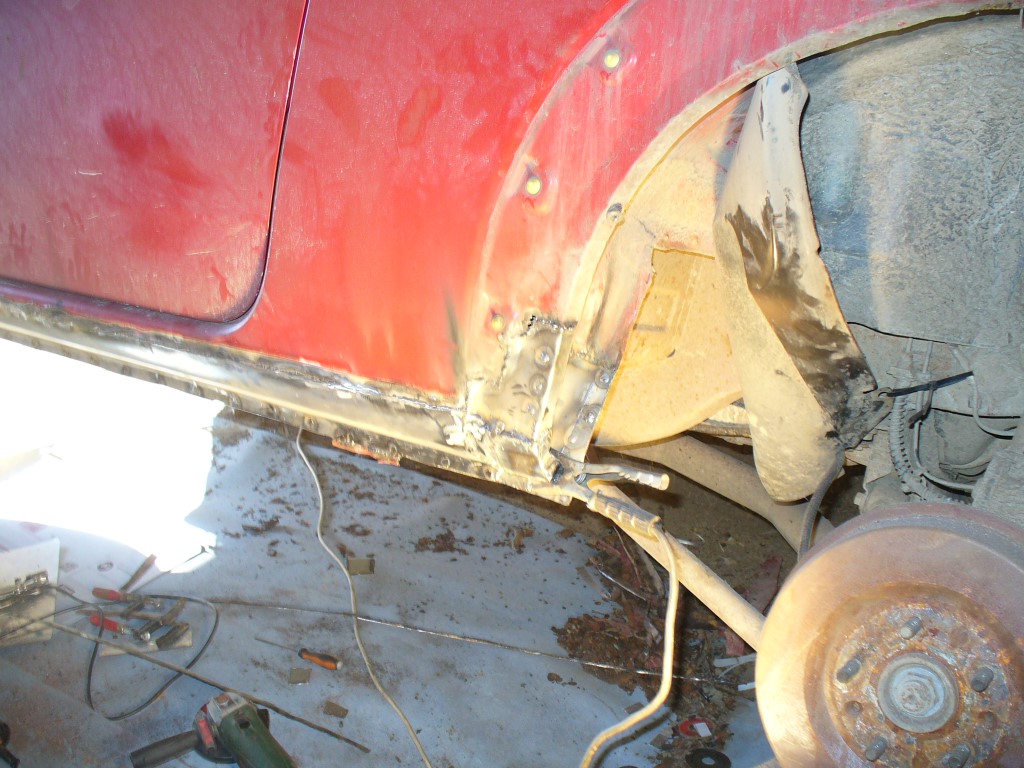
Some bashing with a chisel made some holes along 3/4 of the sills length.
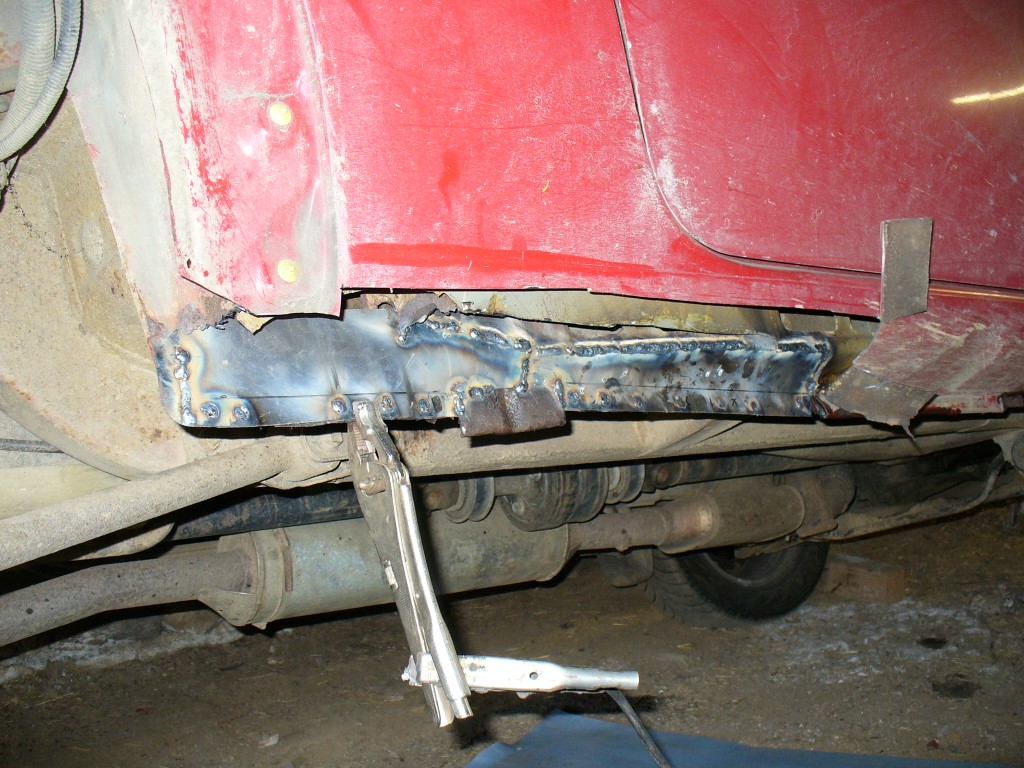
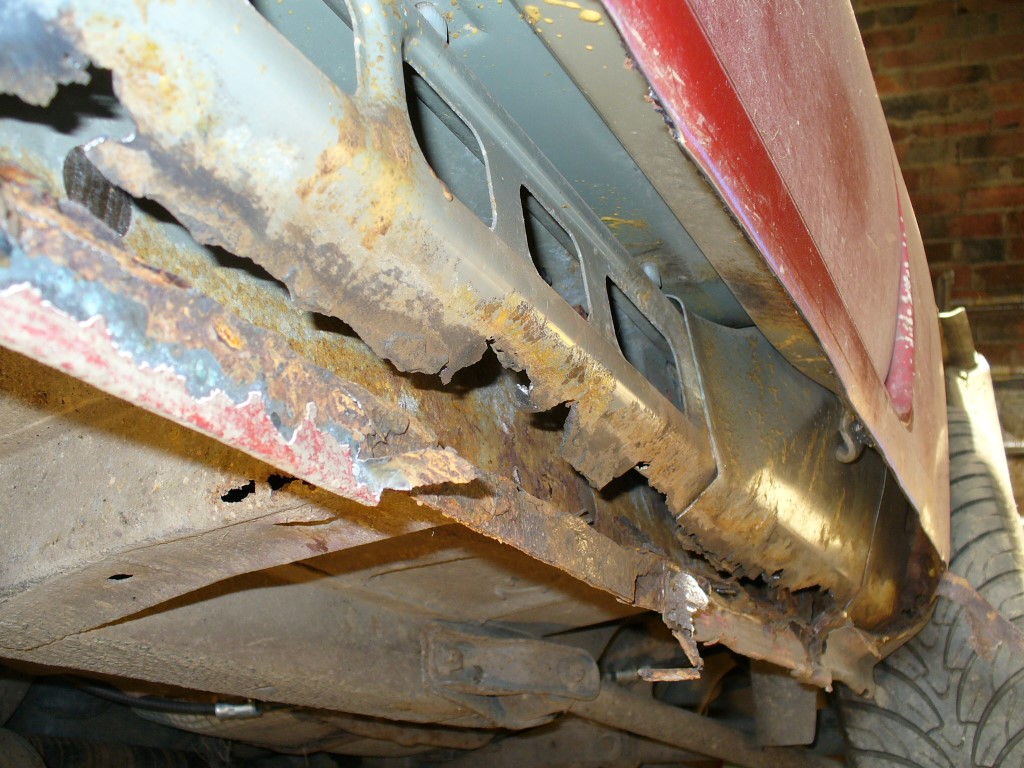
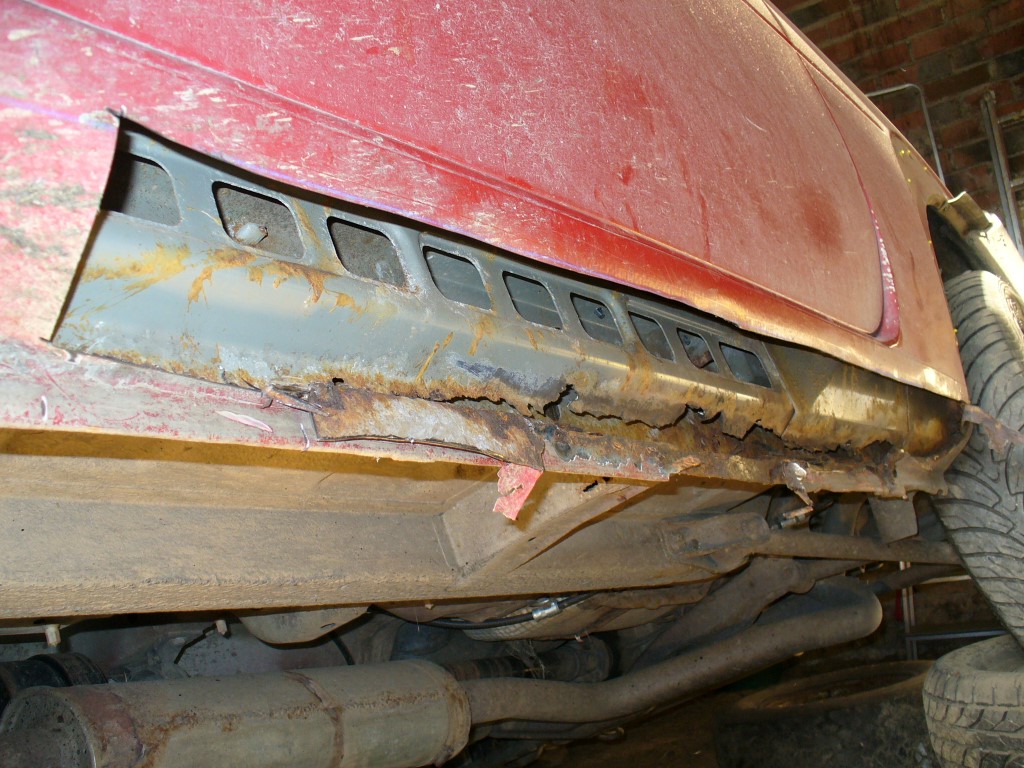
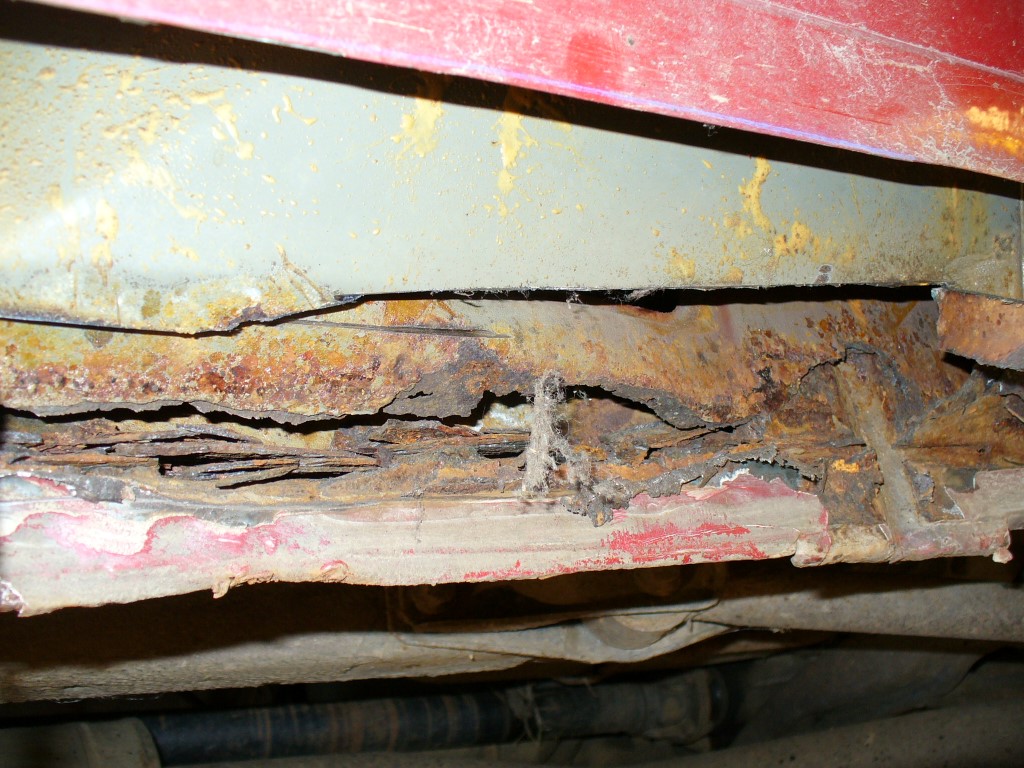
I cut the outer skin off to see the full extent...
With the trim off, the bottom surface of the sill was pretty rotten for about half its length. The vertical inner face is pretty solid though - it resisted some heavy bashing with the chisel.
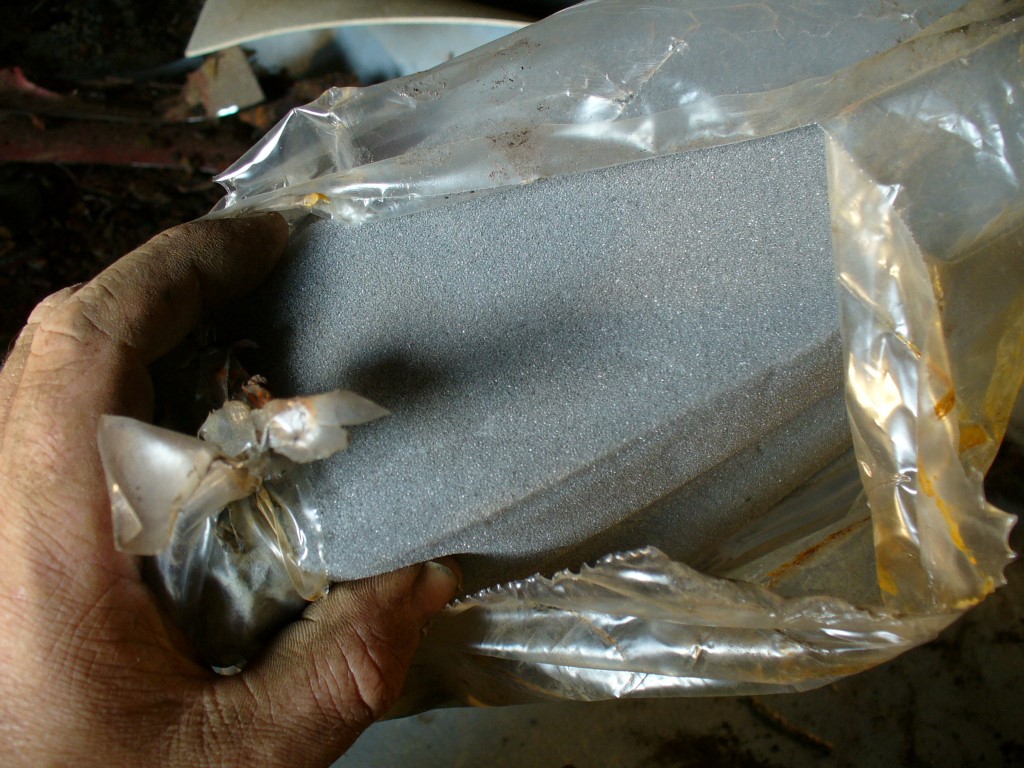
poking my hand up, I could feel a plastic bag full of something so I started pulling....
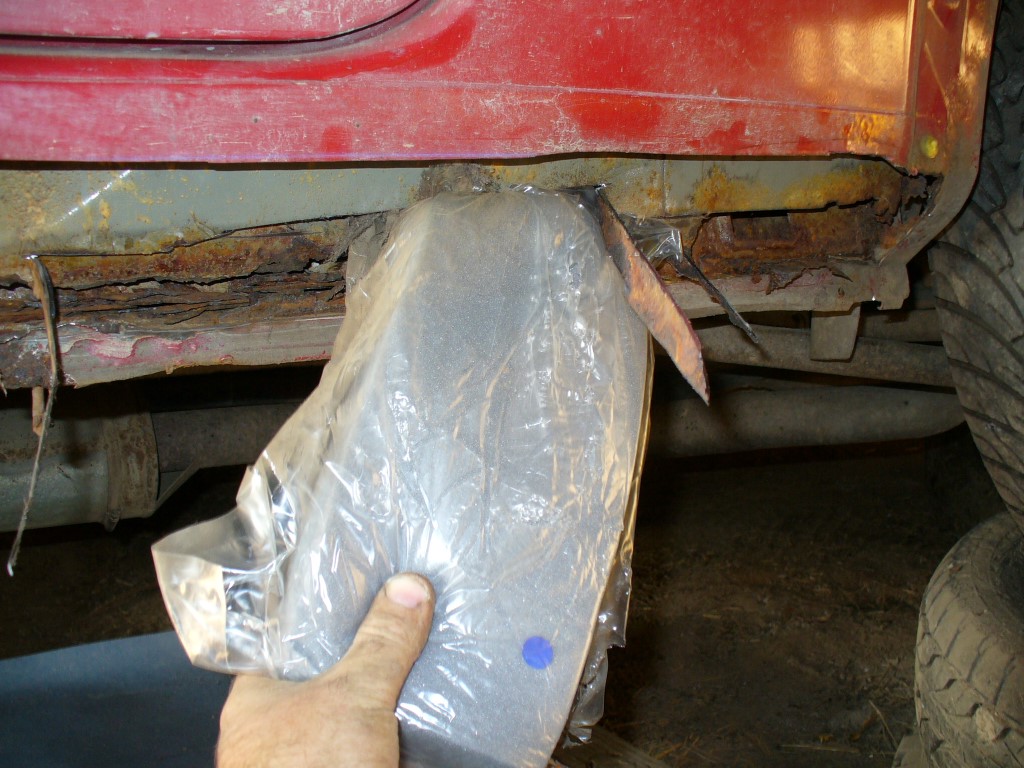
WTF? If I was going to be pulling out bags of stuff that had been hidden in the sills, I at least want it to be a few kilos of coke, not foam mousse. Talk about fire hazard...if I had started welding, this would have gone up in flames pronto.
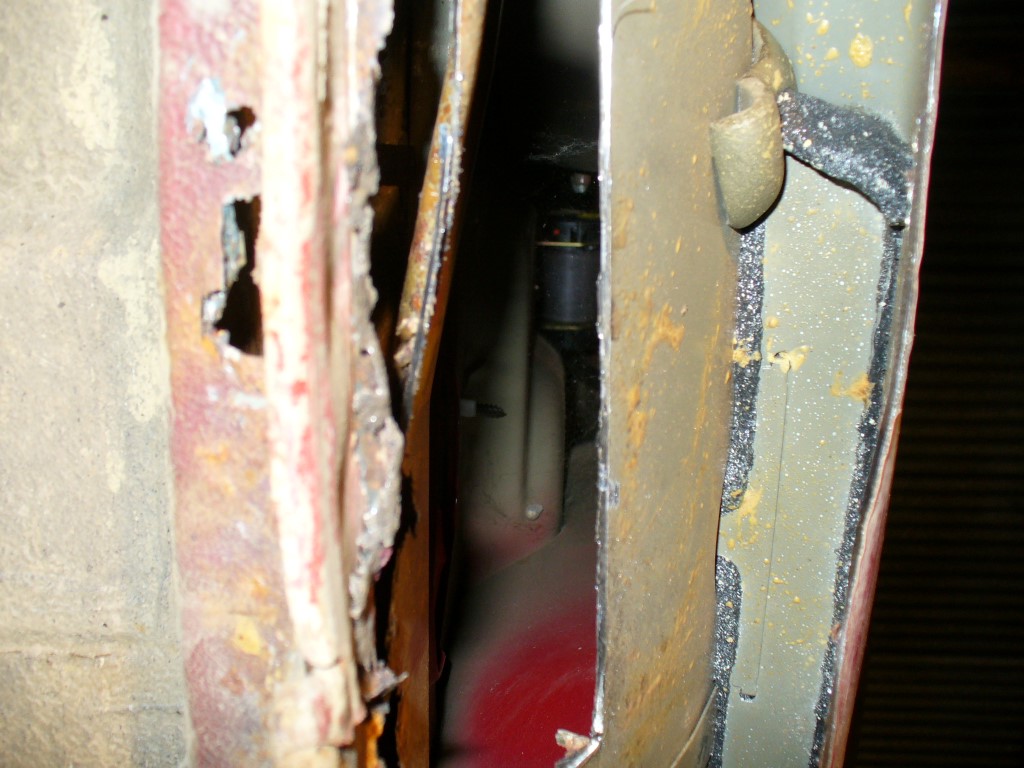
Turns out its Landrovers cheap way of blocking off the sill from the inside of the upper structure. Peeking up the hole shows the seatbelt mech and the back of the interior trim panels. There are two of these up there.
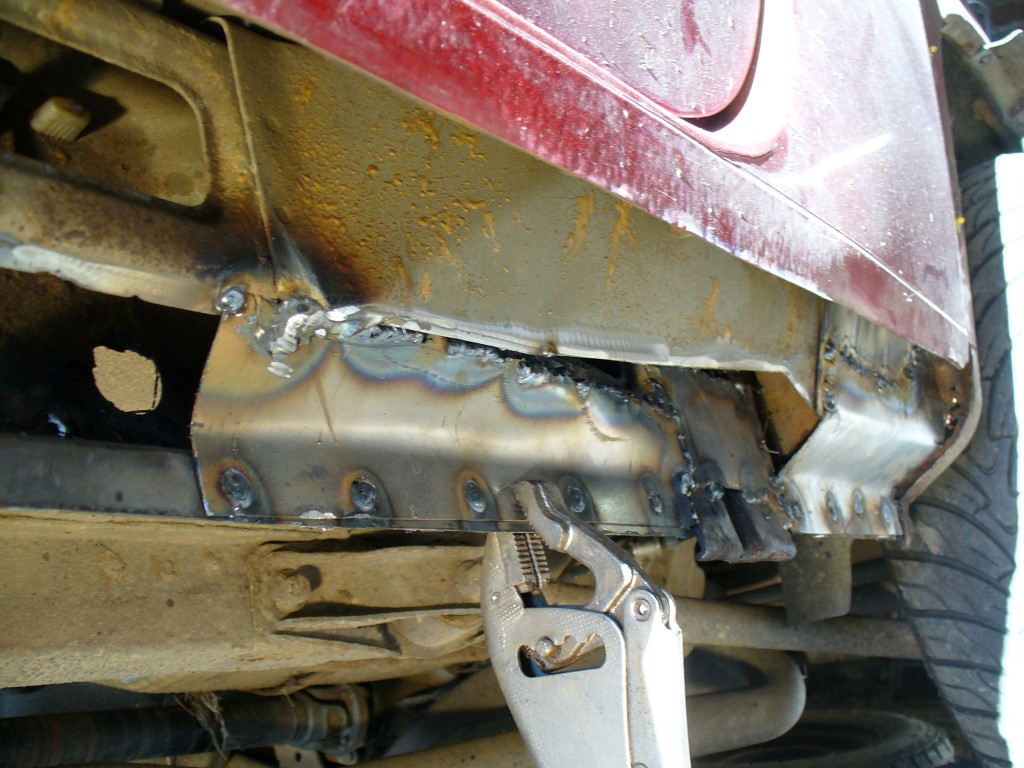
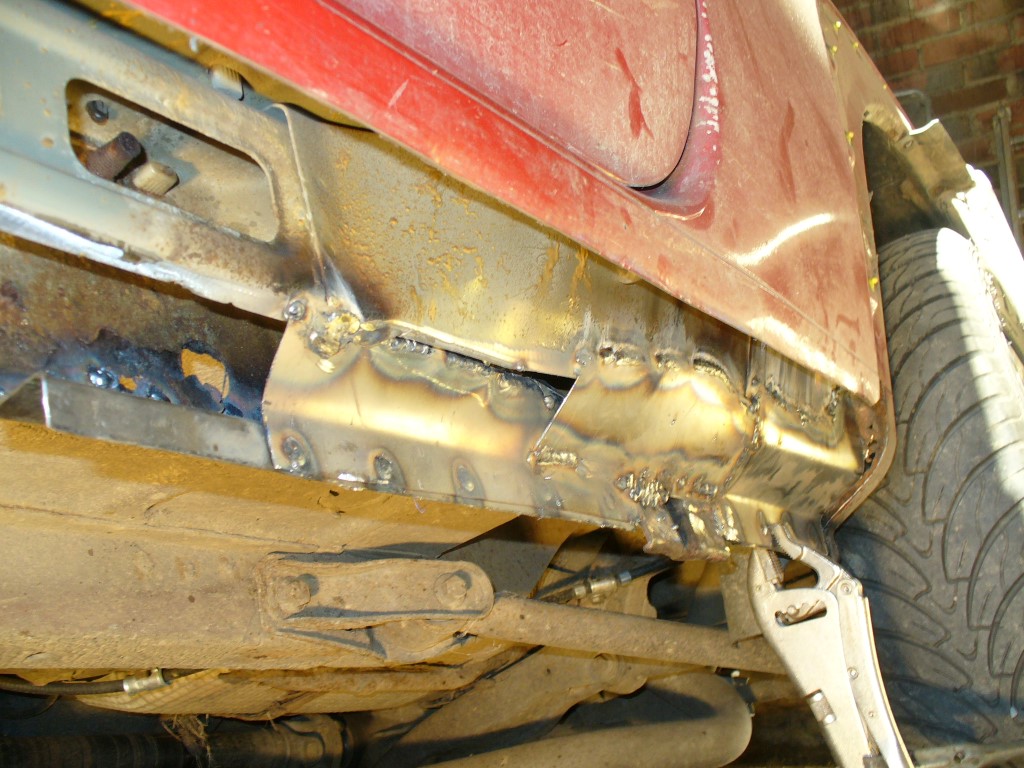
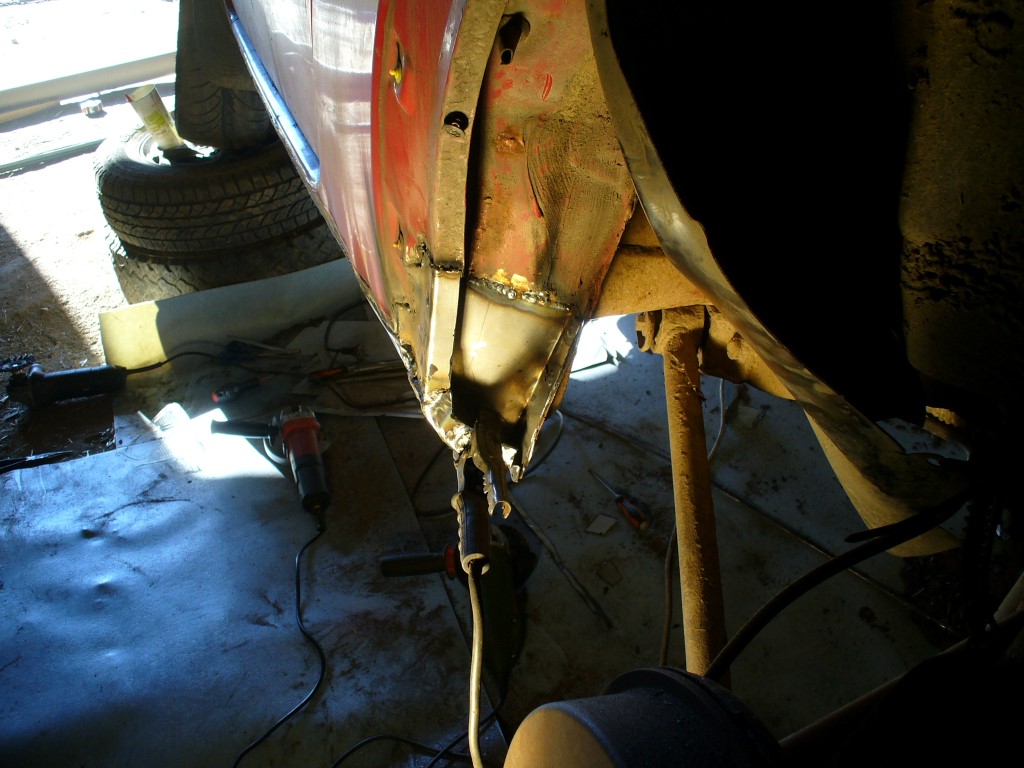
I started cutting into the strengthening rib towards the rear....damn, this has more layers than an Amway marketing scheme...
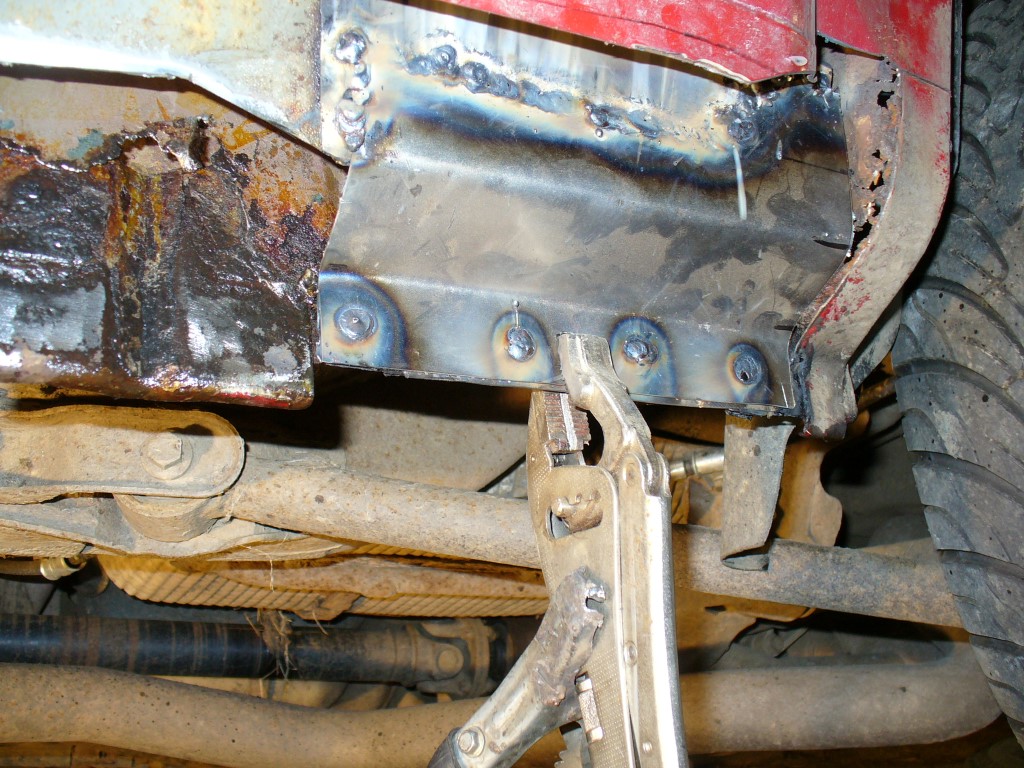
But with the loose stuff removed it seems quite simple really.
And thats where I got to this evening. I have to rush around pretending to work tomorrow morning, but the afternoon is free. I will head to town and pick up some 1.2mm steel as I have hardly any left and maybe a new grinder. My second one which I use for cleaning up metal has no guard on it, which gives me the willies when using it with the knotwheel.
Yeah, yeah, I know....its a girls car, not a proper offroader, hairdressers runnabout blah blah blah...you know what? I like it. It actually surprisngly capable off road, only hampered by lack of lo-ratio and on the road its pretty civilised and car-like to drive. This is a van version, so ideal for what I need for daily use and work.
I have had this car for years....5 or 6 years, I think - which is by far one of the longest periods of time I have owned any car, so that must count for something. Its not been without its problems though, having had several not very careful owners before me. I bought it at the bottom of the price range at a clearance car auction in Scotland and since then its provided sterling service with the occasional wallet-denting breakdown...highlights include 4 new injectors, a new turbo and a new VCU. Its also running a Synergy box and Pierburg MAF, Silicon boost hoses and a few other bits n pieces.
I laid it up several months ago due to the clutch being on its way out and the body suffering from rust. Freelanders seem to be one of the better Land Rover products for rot resistance. You only ever really see them either rust-free or the odd totally rotten one. Typically mine is the latter. This was never picked up earlier due to French MOT tests not caring about rust. The last few CT reports have just said "multiple corrosion points" as an advisory. I could have kept on using it but for my own piece of mind I preferred to weld it up. I could also have just lashed a plate over the top of the sills, but that would just prolong the inevitable by a year or two - I preferred to do it properly.
Once the welding is done, I will be changing the clutch - will probably fit a solid flywheel conversion - and then I think a rebuild of the suspension is in order. Springs, shocks, polybushes and it would be rude not to fit a lift kit while its in bits eh?
I dug it out of where its been sleeping for months. It took an Austin Powers style 23-point turn to reverse it into there and getting it out today was the same deal, which was tricky with a dud clutch.
Into the garage and up on some old rims. I hate welding upside down, so wanted to get it nice and high.
I often lurk around carpet shops and snap up roll-ends of Lino as my garage floor is just dirt. Dusty as hell in summer and muddy as hell in winter.
The back of the sill. Another problem with these is the sills are covered with a very thick, tough rubberised paint up to the first swage line which hides grot well. I peeled a chunk off and the metal came with it.
A bit further along...Two in the pink and one in....well, you get the idea.
Underneath, it looked ok apart from this little outrigger which seems to have suffered from use as a jacking point.
In the pic above you can see the plastic sill trim in place, which turned out to be hiding some horrors - its a bad moisture and mud trap.
Some bashing with a chisel made some holes along 3/4 of the sills length.
I cut the outer skin off to see the full extent...
With the trim off, the bottom surface of the sill was pretty rotten for about half its length. The vertical inner face is pretty solid though - it resisted some heavy bashing with the chisel.
poking my hand up, I could feel a plastic bag full of something so I started pulling....
WTF? If I was going to be pulling out bags of stuff that had been hidden in the sills, I at least want it to be a few kilos of coke, not foam mousse. Talk about fire hazard...if I had started welding, this would have gone up in flames pronto.
Turns out its Landrovers cheap way of blocking off the sill from the inside of the upper structure. Peeking up the hole shows the seatbelt mech and the back of the interior trim panels. There are two of these up there.
I started cutting into the strengthening rib towards the rear....damn, this has more layers than an Amway marketing scheme...
But with the loose stuff removed it seems quite simple really.
And thats where I got to this evening. I have to rush around pretending to work tomorrow morning, but the afternoon is free. I will head to town and pick up some 1.2mm steel as I have hardly any left and maybe a new grinder. My second one which I use for cleaning up metal has no guard on it, which gives me the willies when using it with the knotwheel.