00KK53 - My Soft Top 12v GS TUL 90. So a soft top 90 then......

This site contains affiliate links for which LandyZone may be compensated if you make a purchase.
the re-militarisation begins. Well refitting the NATO hitch and the bonnet mounted spare.

Did the hitch today. 5 min job, if that. Put dinitrol underbody wax between each piece as when i took it off they were all a bit corroded.

12440119395_5d4353a1e3.jpg
 
Bonnet mounted spare back in today. Couldn't be arsed to take a photo.

Stuck the battery on charge, going to attempt to get it out tomorrow for a razz around :)
 
Drive it today for the first time in 5 months.

10 seconds of glows and it fired straight up. Drove like a dream. Replacing the drive member has sorted the clunk :) only clunks now are from the diffs themselves and even then only if I dump the clutch, well happy about that!!

Ed
 
Cheers guys :) MOT man commented on the Chassis and general condition as being one of the best he has seen in a while :D

Today I fitted a CB radio as I am hoping to get some laning in this year now the vehicle is sorted.

This is what i did, didnt dash mount the CB as have nowhere really to put it on the dash so I recycled the gun mount bracket thingies and mounted it between the seats on the bulkhead, not the most convenient but its out the way, i can reach it and the one i chose has a nice big display for channel checking.

Wondered for ages what to do about the aerial as i have a canvas roof which gives you balls all ground plane so in the end i used the original military side candle stick mount.

i cut a circle of steel plate and bolted it on with countersunk machine screw and used a mag mount and small springer.

Intially SWR on channel one like this was 1.5 but on channel 20 was 3 and channel 40 was 5!!! :eek:

so i shortened the aerial by about 25mm total and it was better but still around 2-3 which is a bit much. I decided it must be not getting a good enough ground plane earth so i ran a solid copper core wire from the bolt on the aerial mount inside and grounded it on the front hoodstick hoop (rear ones didnt give such good results) and now have SWR of jsut above 0.5 on channel 1, 0.8 on channel 20 and 1 on channel 40 which is waaayyy better.

its all removable, its using a cigarette plug at the moment but i am going to wire it direct to the battery with a plug so i can remove it and not have wires all over the dash.

12679895624_9bf7428863.jpg


12679423575_06c1f2e9c2.jpg


12679557893_8d041e6bcf.jpg


Ed
 
Had an impromptu repair to do today.

My drivers window hasn't opened or closed for a whole, the felt it slides in seems to bunch up and jam it, well..... Today I tried opening it and wiggly and getting angry and half my window fell out.

So I had to strip the doortop, reseat the felt and put it all back together. Whilst doing so I discovered the army had put silicon sealant in the lower channel so the window wS perhaps 2mm to high hence the bunching of the felt. All removed and now my window opens, closes and locks!!!

Whilst I was at it changed the oil aswell, weirdly I can't get my sump plug out to change the washer as the egg sauce is in the way, but I did it last time so not sure what's moved. :confused:
 
had my cross-member welded today. Cost £60. I am definitely going to learn to weld, as I dont fancy forking out loads for some one else to do welding in the future!

Flush fitted, then covered with a couple of layers of hammerite. Had a really good look at the rest of the x-member before welding in case more needed doing, but the rest is solid.

xmember.jpg


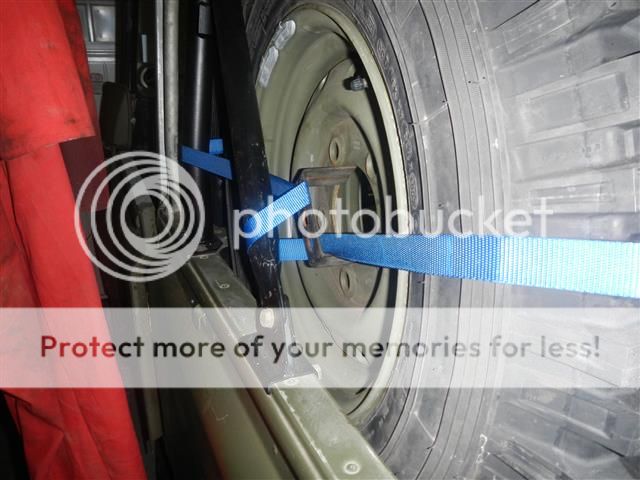
Also today re-fitted the roll bar now its painted and the rust on that sorted, also removed the bonnet mounted spare and worked out how to mount it in the tub. I shall make a mount (one day) but for now it is ratchet strapped in. The holes in the bonnet i have filled with bolts and rivets and will paint it over the summer.

DSCN2900.jpg


I also re-proofed the canvas tilt, and I also ground back a small area of surface rust below the windscreen and treated and painted that. Then I made a start on cleaing and painting some of the surface rust on the chassis, so far i have only done the rear outrigger. This is going to be a summer long chassis painting project lol

Ed

" Re-proofed the canvas tilt".

What does this mean?
 
Looking good

Where did you get the bungee cord from, I've just put a soft top on mine, I'm soon going to get cheesed off with 10 minutes of undoing ropes every time I want to get in the back

Good tip about the boat chandlers for the fabsil , that's another job I have to do
 
Just noticed your CB. I got the same one about a year ago and fitted it the same position as yours, except my bracket points towards the front of the vehicle (I used the holes left from the rifle mounts), so when my CB is in, the speaker is pointing forwards. I thought it would make it easier to hear, but I still can't hear it! I used Tamiya battery connectors for quick release. As mines hardtop, I fitted the aerial at the rear.

Why not utilise your existing FFR 24v power wiring for your CB etc? It's all laid on for you, I just connected the live from the generator to the start motor main +, then wired a fusebox to the 100amp fuse on the bulkhead and ran my accessories from there.

Mine is just a 12v GS so no 24v circuitry ever fitted.

I have tamiya connectors just haven't got round to fitting them, I am not sure about the mounting position as it gets knocked/ inhibits clambering in to the back. I will prob move it to underneath the rifle mounts so it is protected. I remove it when not using it anyway.

Can you stick up a photo of yours please so I can see what you did?

Ta

Ed
 
Any pics of how you did the bungee cord, I too hate having to untie all the knots.

I was thinking of getting one of my boat friends to make up some proper length ropes with some kinda clasps on the ends so that I just have to unsnap the ropes, no more knots.
 
Here you go Ed. Not the best pics, as it's wet and dark.

I've got dexi racking, so I can't clamber through into the back, but yeah I can see your point, it would be pretty dangerous. I can sort of hang over the top to reach for stuff.

I've got a 1.2 transfer box to swap in at some point, so I'll asses noise levels after that, but I think I'll be going down the sound proofing.

CB1.jpg


CB2.jpg
 
oh ok cool, yeah i will mount mine like that but a bit lower.

is the dexi racking annoying? I dont know whether to fit some or not....

Natas, will take pics at the weekend mate :)
 
I thought high as possible to get the speaker closer to my ear, but it's still impossible to hear!

I've found the racking useful. I was going to attach my first aid kit etc too it, but I keep forgetting. When your fully loaded, it stops bikes and stuff coming though, so it's good from that point of view. In an emergency, you could still get over it. I also thought it would serve as a dog guard, but I recently had a dog in that nearly got over the top! The top lip has a rubber coating so it does not cut into you. Pretty civilised by Landy standards!
 
yeah i thought of getting a dog guard purely to stop stuff in the back coming into the front when i dont want it!

Cheers will update when i have remounted the CB etc :)

Ed
 
Back
Top