- Posts
- 13,264
- Location
- Sud ouest France !
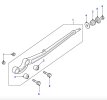
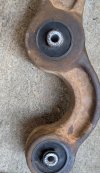
Here you go... AgainBlue print ref numbers.
ADJ138048 are the bushes,
ADJ138049 are the rear most bushes that fit to the chassis.

Here you go... AgainBlue print ref numbers.
ADJ138048 are the bushes,
ADJ138049 are the rear most bushes that fit to the chassis.
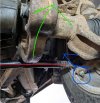
You will struggle on those ramps. Also probably dangerous to have the car on it's wheels with raduis arm(s) removed because there nothing to stop the axle moving back & forth.ok, so you'd rather do without the plastic ramps?
i guess thats one less thing to worry about, not having airI did my Defender radius arms on the floor, essentially the same I guess.
Chock all the wheels so nothing moves, went straight back on no problem
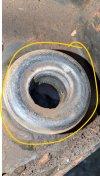
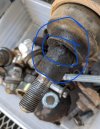
that's what we're talking about, right? ADJ138049Blue and Yellow is the exact same bush. There is just two of them that faces each other. But they usually come in packs of two. So you should have 4 to do both radius arms.
But yeah you are correct those bushes are worn.
Welcome To LandyZone, the Land Rover Forums!
Here at LandyZone we have plenty of very knowledgable members so if you have any questions about your Land Rover or just want to connect with other Landy owners, you're in the right place.
Registering is free and easy just click here, we hope to see you on the forums soon!