Disco 2 Aircon leak

This site contains affiliate links for which LandyZone may be compensated if you make a purchase.

benh999

Active Member
Posts
157
Location
Warwickshire
Folks I have an AC leak and it’s getting annoying.

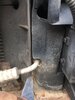
It’s been to an AC garage twice. First time there was a leak on the top of the compressor sorted with a new O ring however when they did another leak test it passed however once charged within a day or so the system had drained and the AC stopped engaging due to low pressure. I hear that it could be leaking through the slam panel so have attached a pic to see if I’m looking at right area? Any advice please as I know the system works ice cold when charged so want to get it fixed

Many thanks

ben
 

Attachments

  • C1A7CC4E-20BE-4F72-8D30-E5AE98963307.jpeg
    C1A7CC4E-20BE-4F72-8D30-E5AE98963307.jpeg
    333.8 KB · Views: 141
The only way to find a tricky leak is for the A/C company to put the stuff in that glows under ultra violet light, then closely examine the entire system, with said light. They should have done that. I daresay a tiny leak may pass their leak test but I would still keep taking it back to them otherwise you have paid money for nothing. ;)
But it is true that parts of the system are flipping awkward to get at and examine fully.
 
Cheers, the fact that there is 1 common leak point on these systems makes me want to swap out that 1 hose and as the system is currently empty it seems a perfect time to do it. Can any one advise on the part number?
 
I replaced this part on mine - when removing the old one, the pipe was so corroded that it just snapped in half. The part number to replace is JUE108230. If you're opening the system and exposing it to air, you'll also want to replace the receiver/drier (I used this one).

To do the repair, you'll need to remove the front grill (easier on 03/04 models but still relatively simple on early D2s). The pipe bolts to the receiver/drier under the grill, the joint on the drivers side (for US trucks) of the engine bay, and is secured by a few clips throughout the engine bay. You'll need to pull out a bunch of that foam in order to do the replacement, and you'll need to remove the airbox (be mindful of the plastic fitting on the radiator, as it's easy to snap off when you're pulling out the airbox). It's pretty intuitive to remove the old one, and I'd encourage you to just break it in half and rip it out - it already has a hole anyway.

When installing the new part, you must install it from front to back - unless you drill out the hole in the body where it goes from the engine compartment out in front of the grill, you won't be able to fit it through going back-to-front. This is frustrating because as a result, you need to feed like 80% of the length of the pipe through the hole and finagle it around so that it matches up with the front-left corner of the truck. The only way to do this is to (carefully) bend the new part so that you can swing it around and clear the miscellaneous parts in the engine bay. Otherwise, you simply don't have the maneuverability. I also found it helpful to unclip the power steering reservoir and hold it out of the way at times.

Be careful with removing the windshield washer filller tube - it clips into the fender and I think you need to pinch the plastic fastener from inside the fender (accessing from behind the turn signal) in order to remove it. I was impatient/didn't realize this, and ended up just breaking the fitting.

Let me know if you have any other questions and good luck!
You sir are a legend and a Gent :)
 
Back
Top