- Posts
- 16,475
As the title suggests, I was using Deasy's great guide to replacing the PCV Valve and Oil Seperator when things went a little Pete Tong....
So building on Deasy's thread, lets start at the beginning....
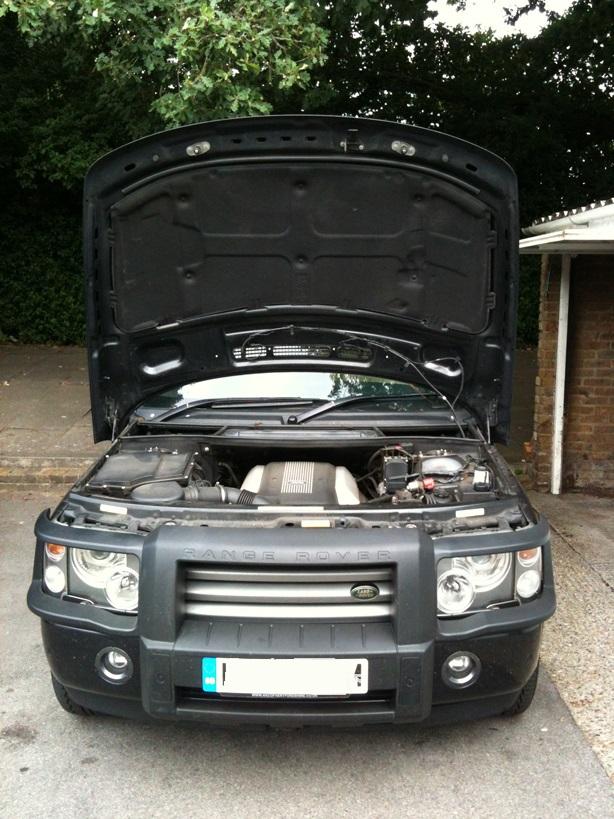
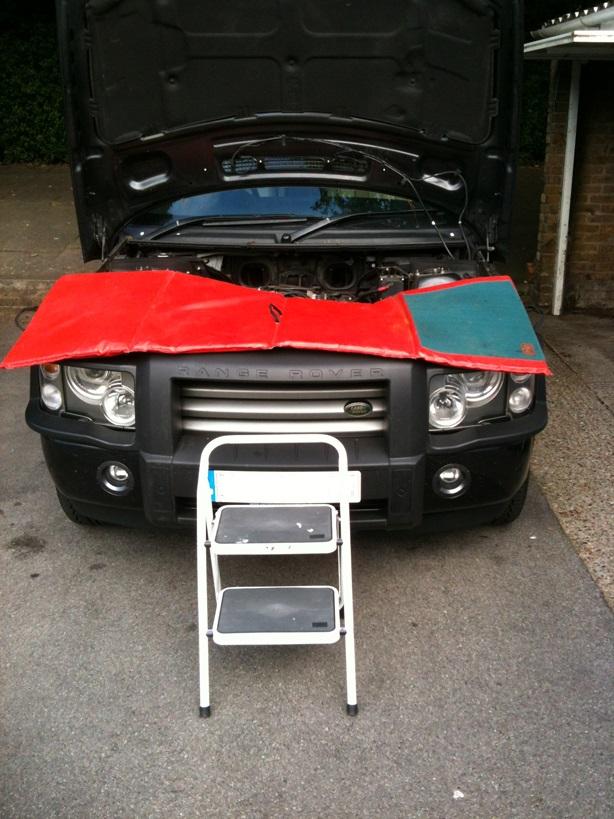
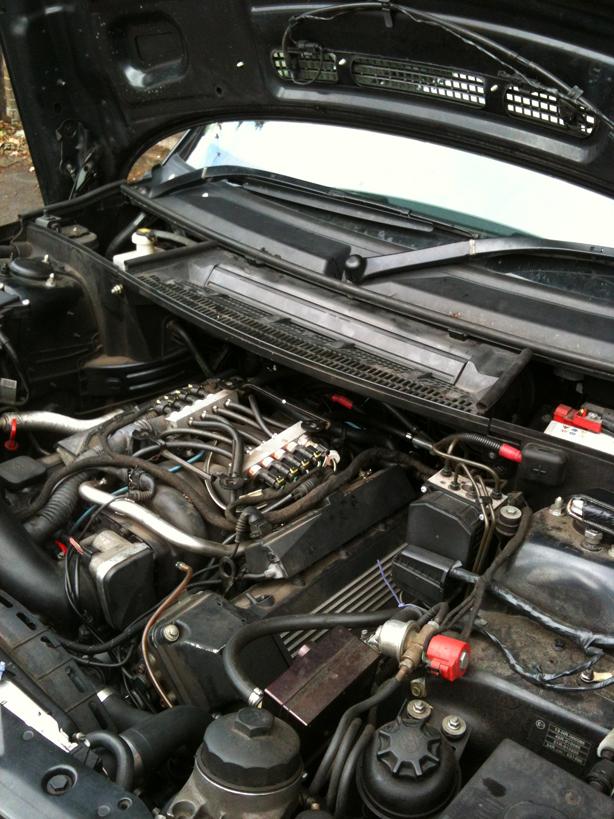
Lower the vehicle to Access Height to make working towards the back of the engine a lot easier and set the bonnet into 'service' mode...
Remove the Acoustic Engine over....
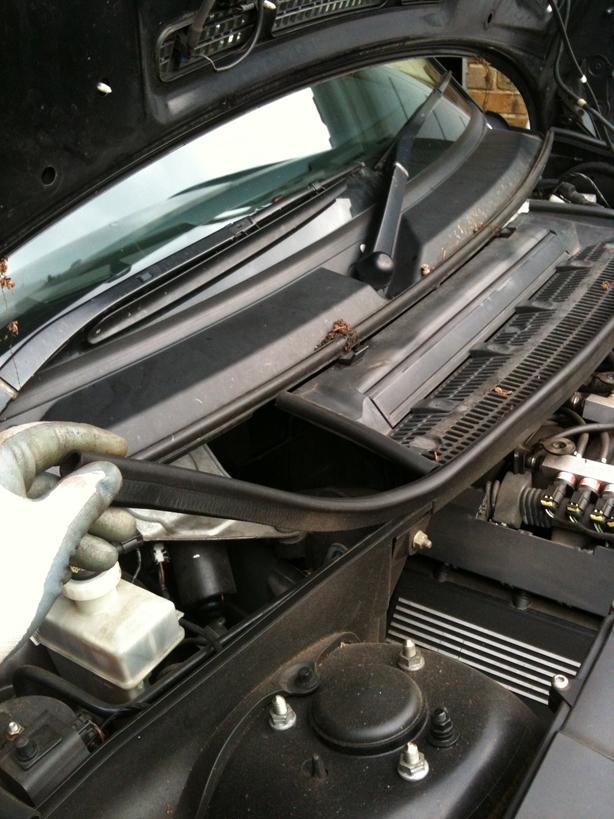
Remove the weather seal strip from along the front of the Pollen Filter housing and Battery and Brake areas....
Disconnect the battery negative lead (waiting for the Sat Nav system to go off first obviously)
Then disconnect the Battery Jump Post Positive Lead....

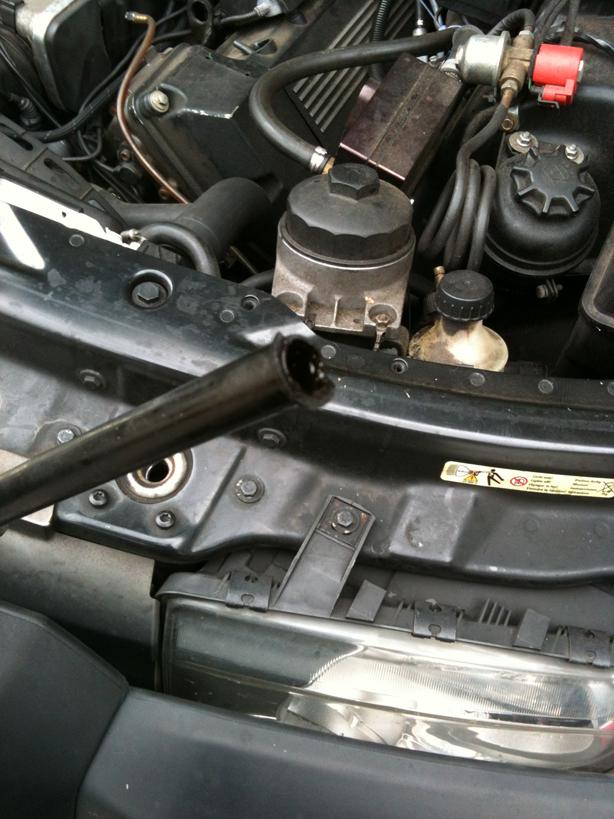
Undo the two 13mm nuts that holds the Pollen FIlter Housing in place then pull towards the front of the car.....
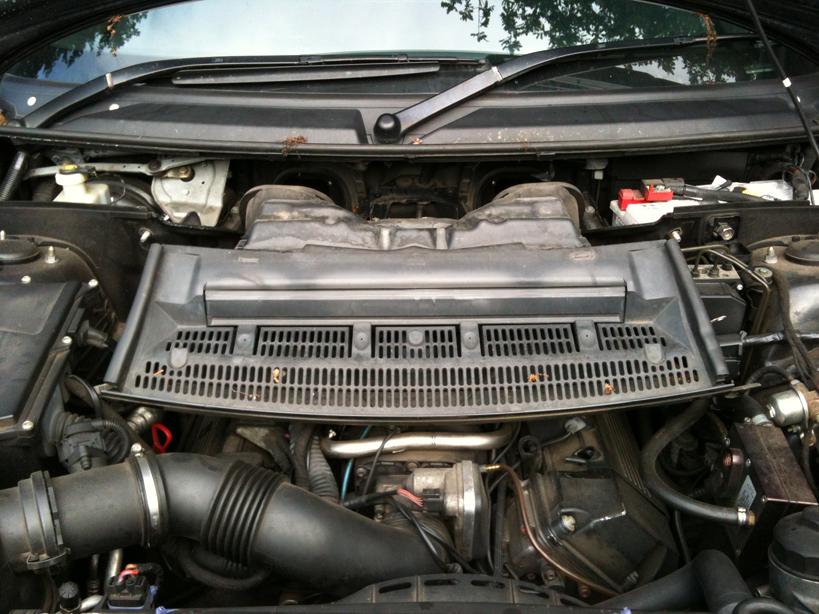
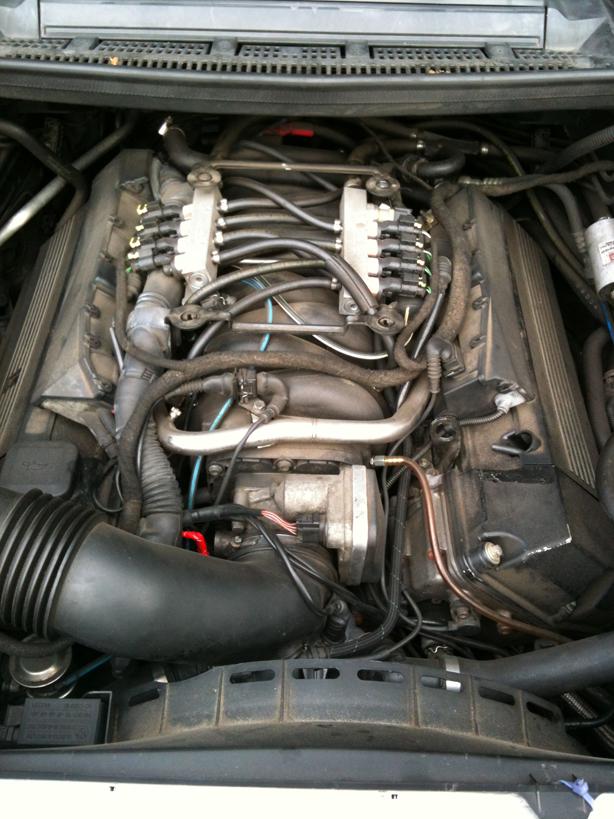
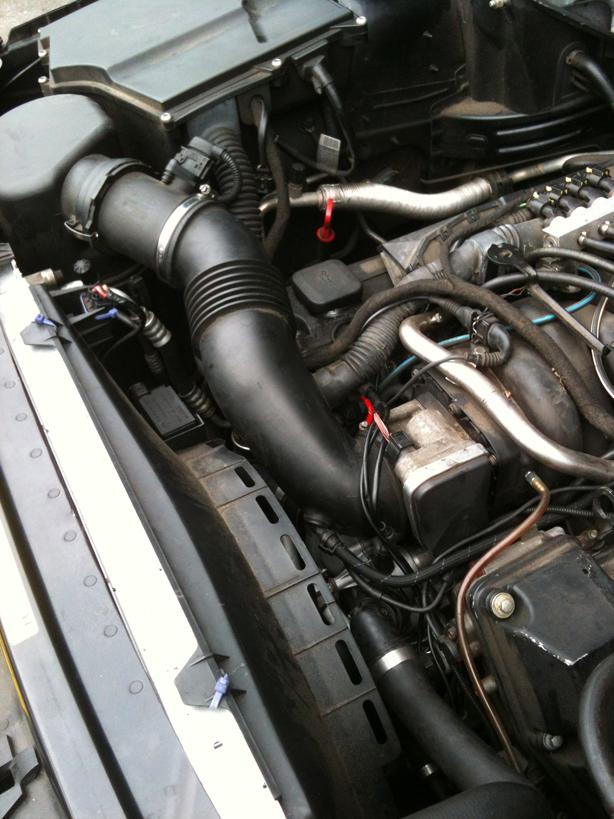
You can now get much better access to the rear of the engine...
Time to setup your working space, I use my old shooting mat (I have a new one ) to work on, so I draped it over the front slam panel, intake and E-Box. I then used a small set of steps to get up and into the engine bay.
It is quite surprising how comfortable it is up there and I mostly sat on the Slam Panel and E-Box, also kneeling on the front of the rocker covers is comfortable....I weigh in at over 20 stone and 6'3" tall and it took my size and weight with no issues...just be mindful of the components below, but I found it a comfortable place to work....
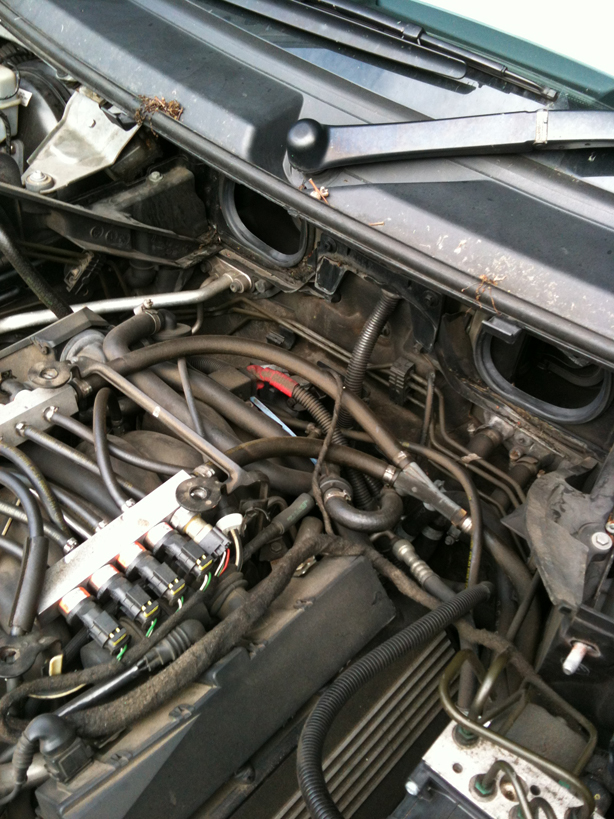
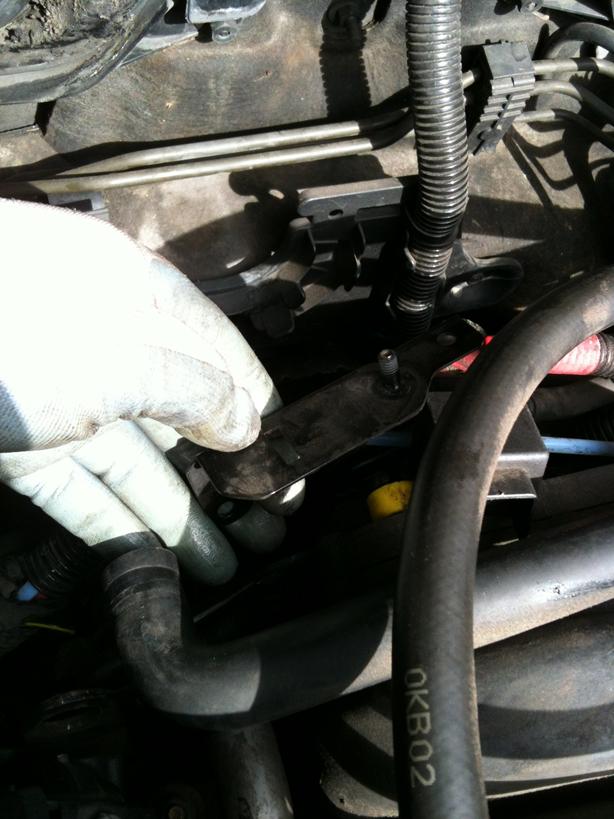
Undo the 10mm nut holding the Electrical Splice in place...note I snapped the bracket, it doesn't just lift up and off, but wiggles off!!
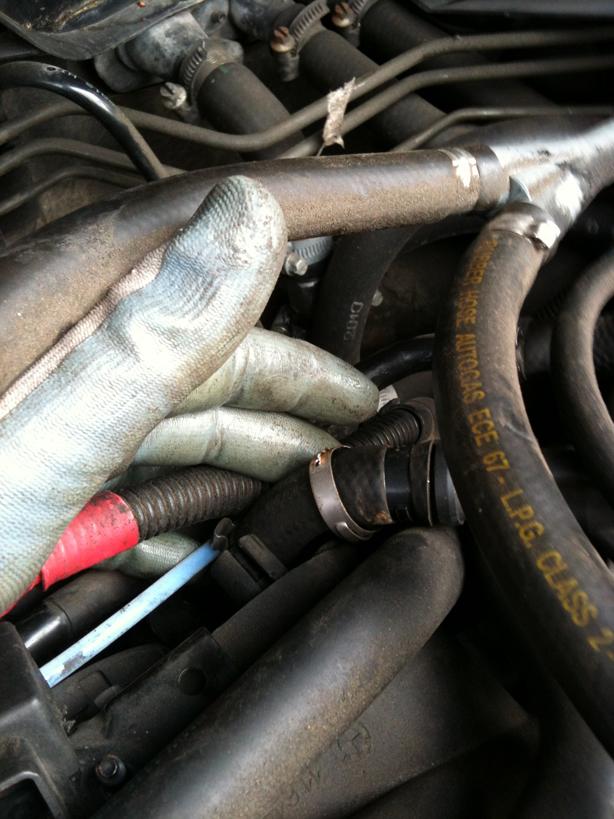
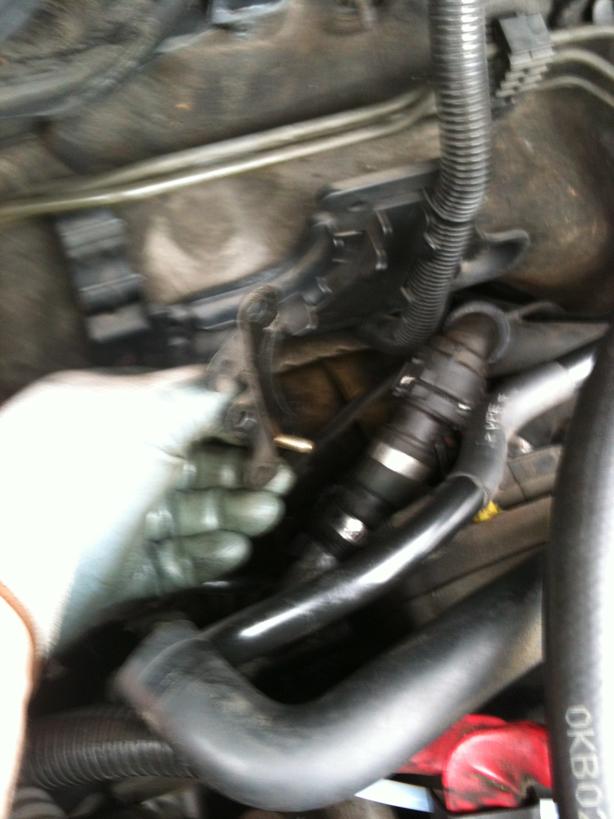
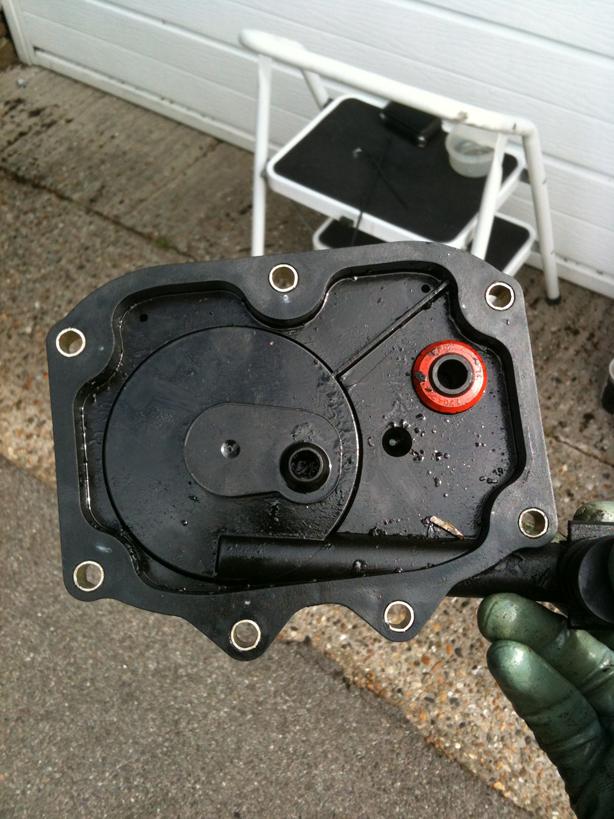
You can now get to and see the PCV Valve in place...
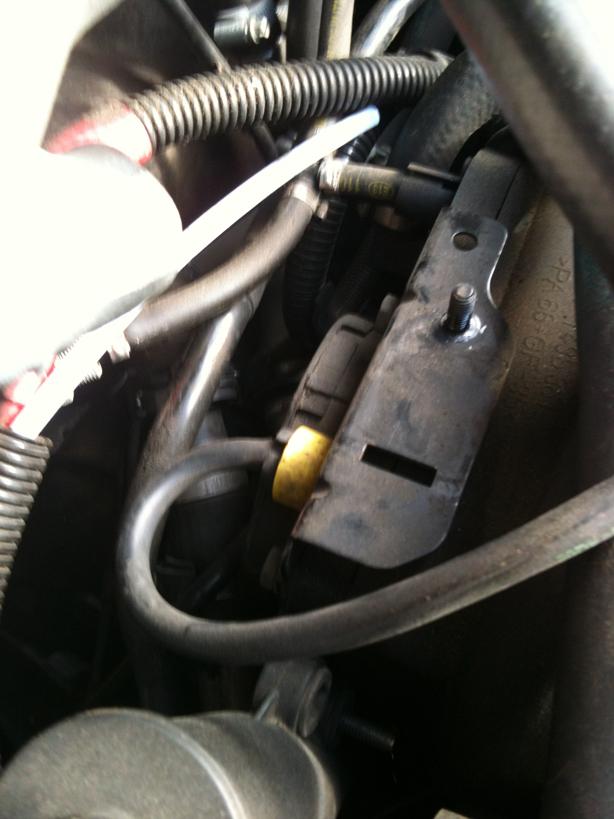
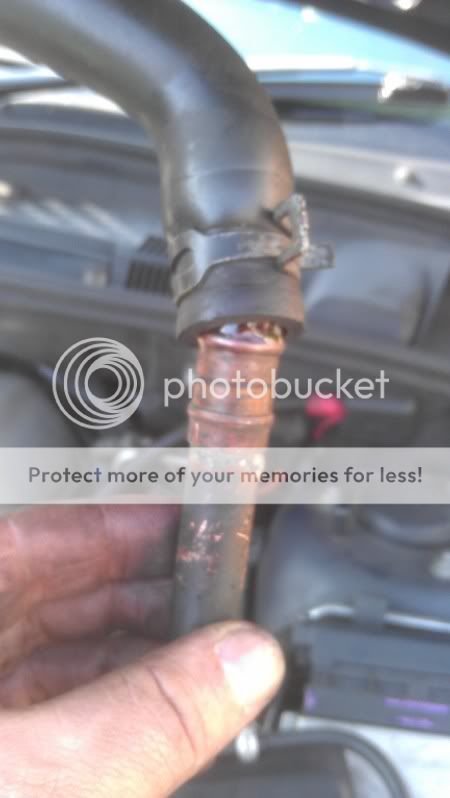
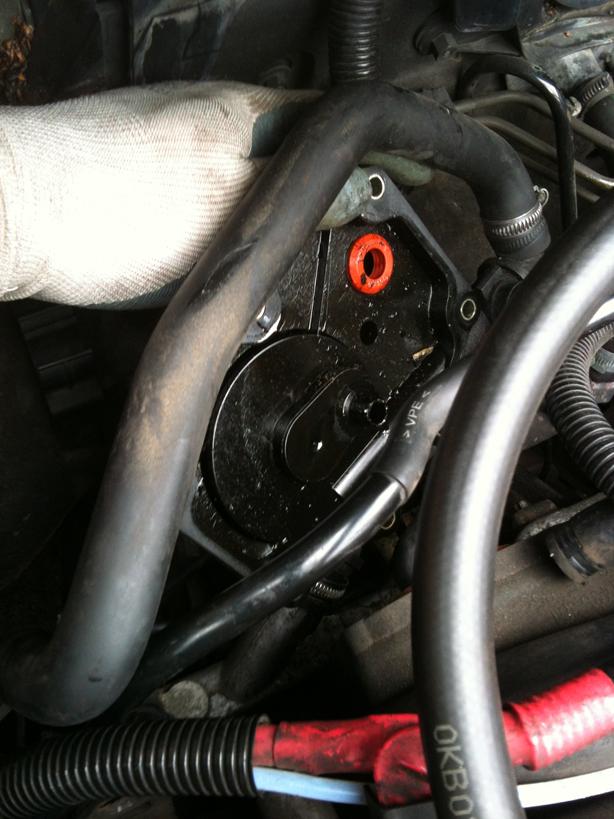
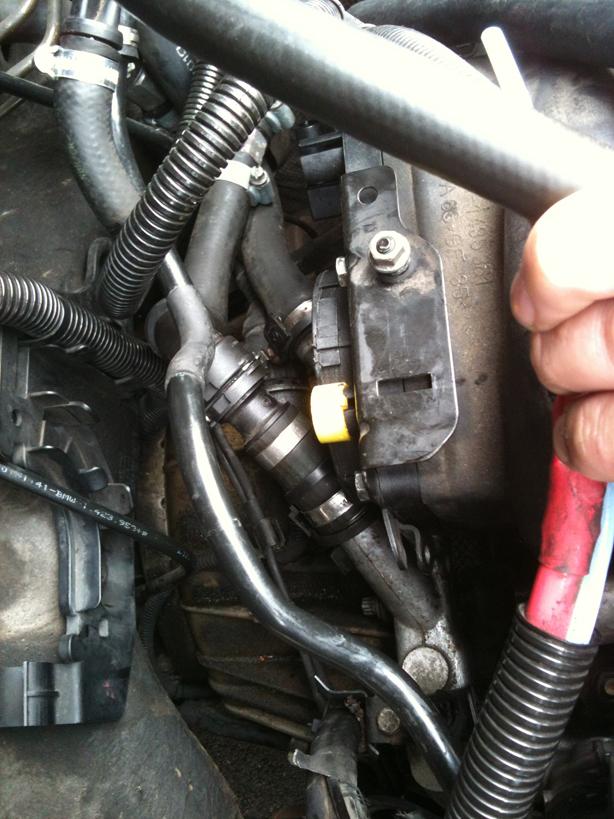
Undo the breather tubes to the Cyclonic Oil Seperator...
Undo the 10mm bolt holding the Oil Seperator in place, then I used a long flat screwdriver to hold the small pipe at the bottom of the seperator in place while I pulled the unit from the pipe...Note: this pipe at the bottom can be a real PITA to get back on at the other end, so be mindfull to carefully remove the seperator from it and not remove the pipe from the other end....
Now remove the various pipe clips from the pipes leading to the PCV valve unit...
On removing one of the Breather hose from the top of the rocker cover, I noticed it had split....I wonder if this is where my very minor Oil leak has been coming from??
The two top bolts holding the PCV valve in place are 10mm and also hold the bracket that holds the Electrical Splice in place...
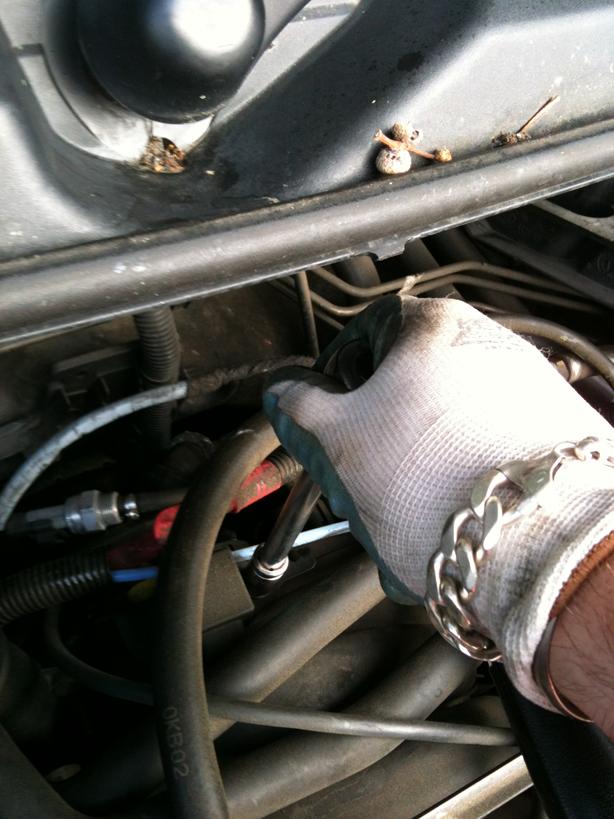
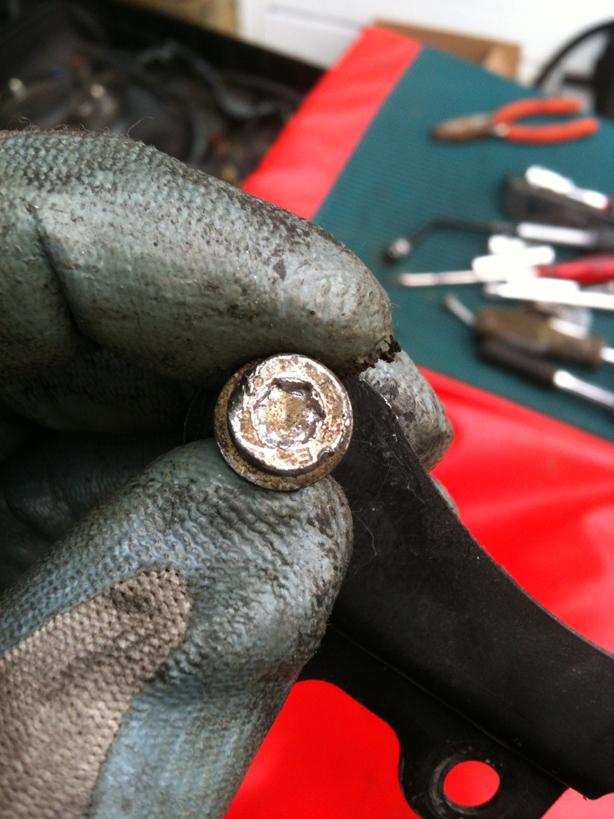
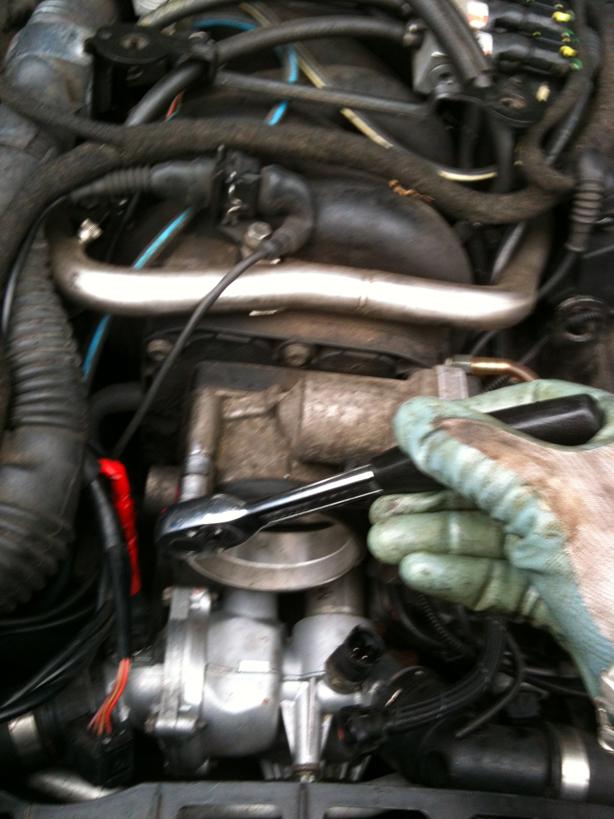
Using a T27 Torx bit, undo the PCV clamping bolts.....this is where the fun begins...!!
3 of the remaing 5 Torx bolts are simple to get to, 2 of them are a SOD...a real bugger...one the 3 easy to get to had been done up so fecking tight and had been really badly chewed up that I snapped a T27 bit, wrecked my spring drive and almost had me totaly give up on it....90 minutes to get one bolt out....in the end using a set of mole grips I managed to get it undone....
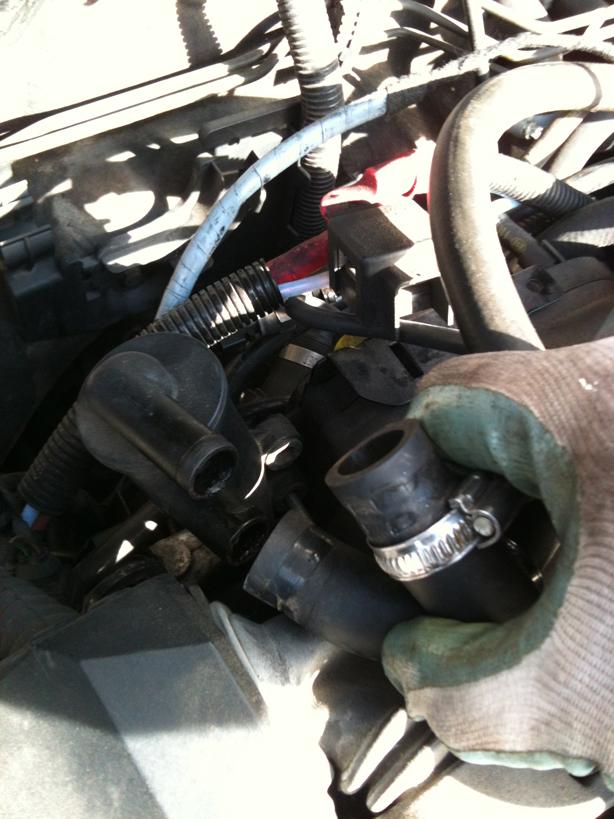
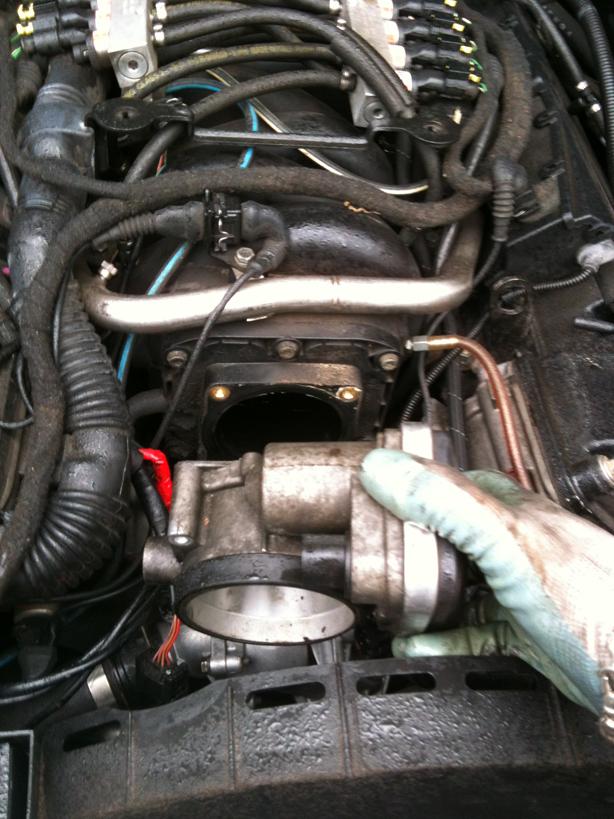
With them undone, now it is time to remove the PCV valve....the fun continues....
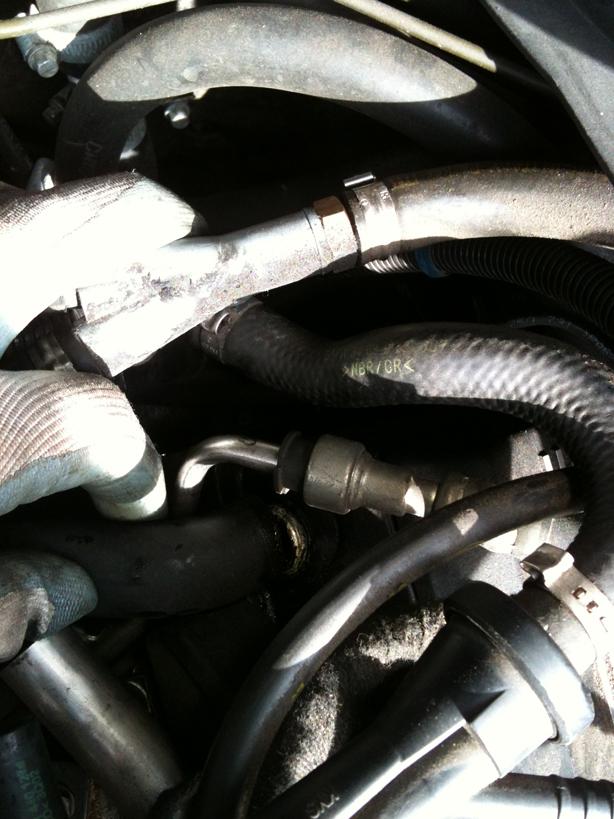
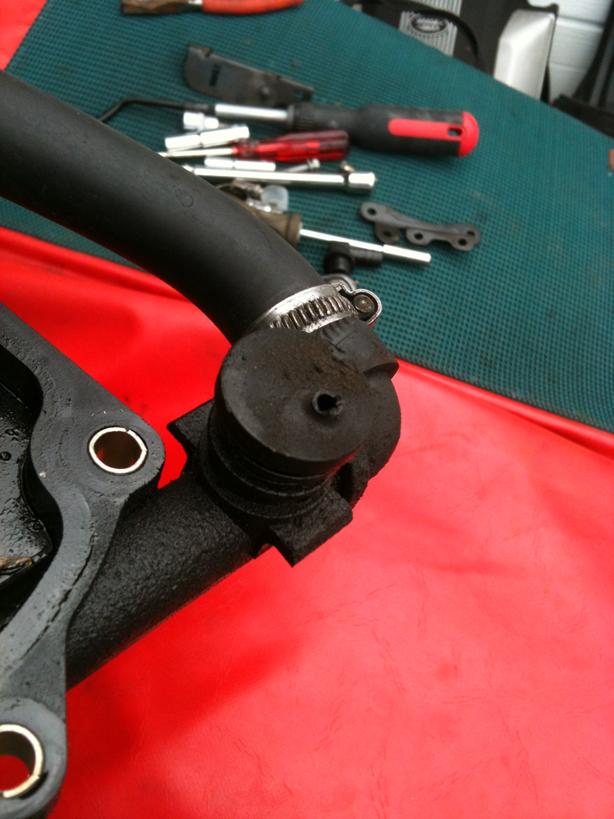
Mounted on the bottom of the valve is a small pipe - it is mentioned by Storey Wilson in his video tutorial, and various other posts I have read about the process to replace the PCV....so I was VERY aware to be careful of it, the same goes for the Vent pipe between the PCV and the Front of the intake manifold....
So being very cautious I pulled the PCV valve from the rear of the manifold, no sooner had I moved it back 3mm so I could get a screwdriver in the gap to hold the Vent Pipe in place, the small pipe snapped...oh ****e....
I would have assumed there was play in the small pipe to allow you to get it on and off, but there was none, not a single mm of play...how they put it on there in the first place I have no idea....
I reached around under the manifold feeling for the other end of the pipe and gave it a small tug. Nope not a single mm of play at all, so I then looked down the back and the other end of this small pipe goes down below the Oil Seperator, so I carefully pulled the pipe back out from under the manifold to see the damage. The plastic had become so brittle on the PCV valve that as soon as I tried to pull the remains of the spigot out of it, it crumbed, so I ended up cutting an inch off the pipe...it is now even shorter than it was.
I rerouted the pipe to allow for more play if I need to replace the PCV again the future and also because i had made it an inch shorter it was never going to fit back where it was originally.
Had to have a coffee after that...
OK, Time to fit the new PCV Valve....
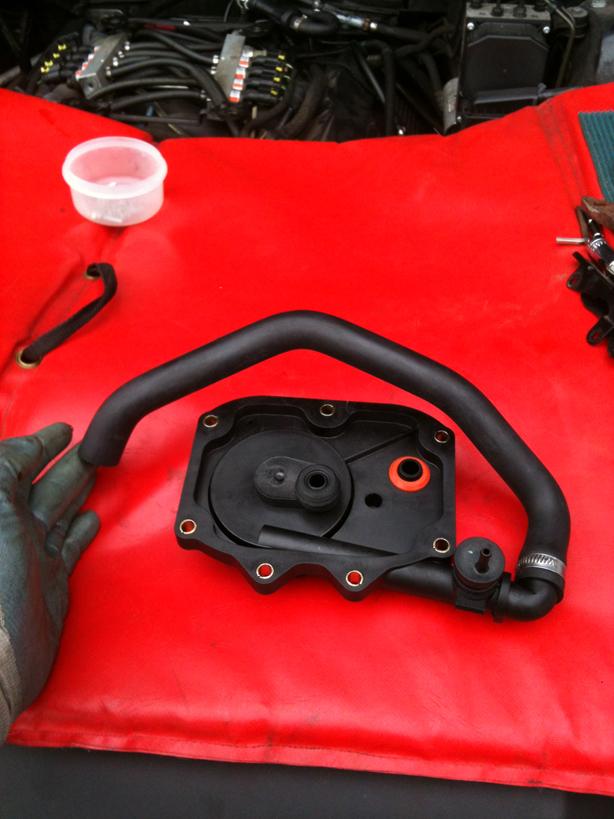
In order to make life a bit easier, on remvoing the old Valve I left one of the breathers attached as it was difficult to get to the Jubilee Clip in place, so I fitted the new Breather Pipe tothe PCV before fitment...
Got back on top of the engine to replace the valve, lined it up and pushed it into place....now thats when it all went Pete Tong...it seemed to not 'fit' well it kinda did but didn't, so I pushed it on a little futher and all I heard was the sound of something falling into a hollow metal dish....oh feck...
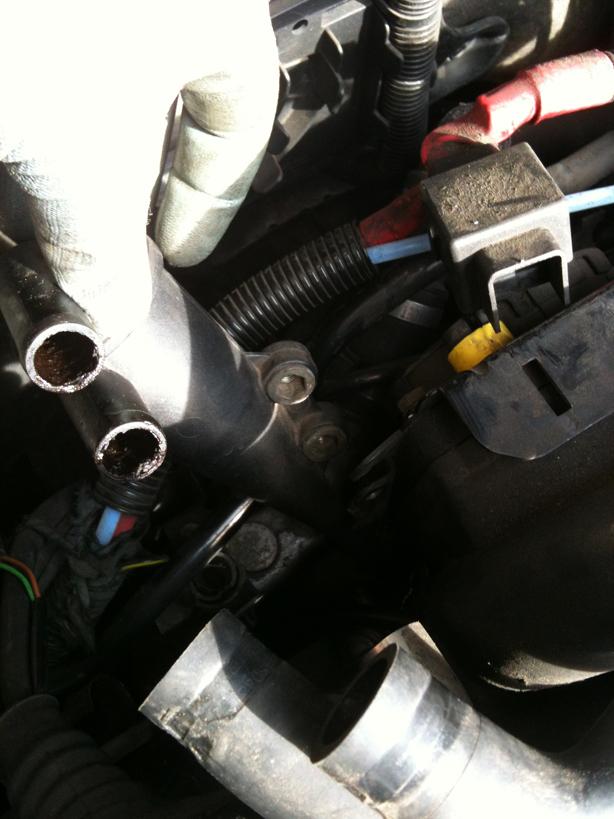
I removed the PCV and moved it to one side, and the vent pipe fell out the back of the manifold.
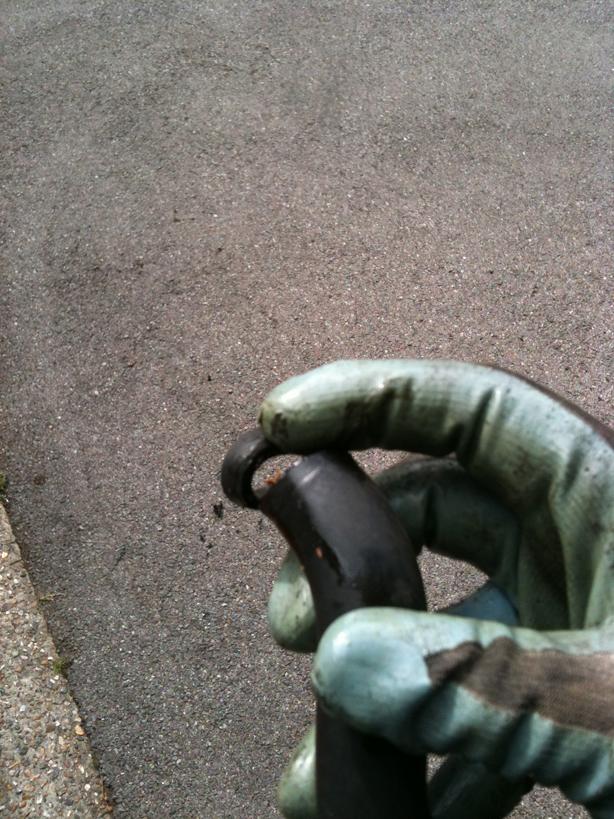
On retrieval, I had snapped the end off...OH FECK....
On closer look what I had done was when I remvoed the old PCV, the little rubber seal on the centre spigot of the diaphram was still attached to the Vent Pipe - I hadn't noticed, so when I pushed the new PCV into placeit was trying to fit the new rubber seal into the Vent Pipe which already had a rubber seal in it...and with me pushing I had snapped the pipe....

It was time for another coffee....
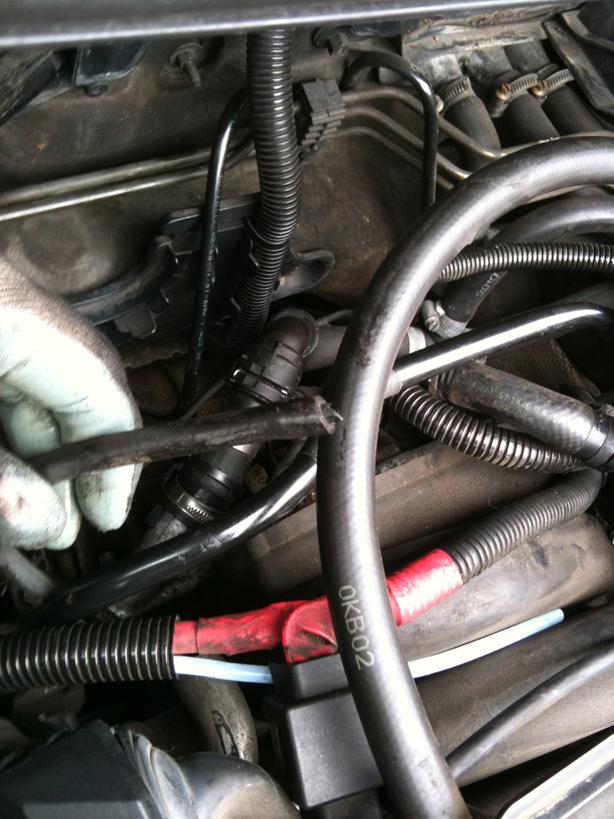
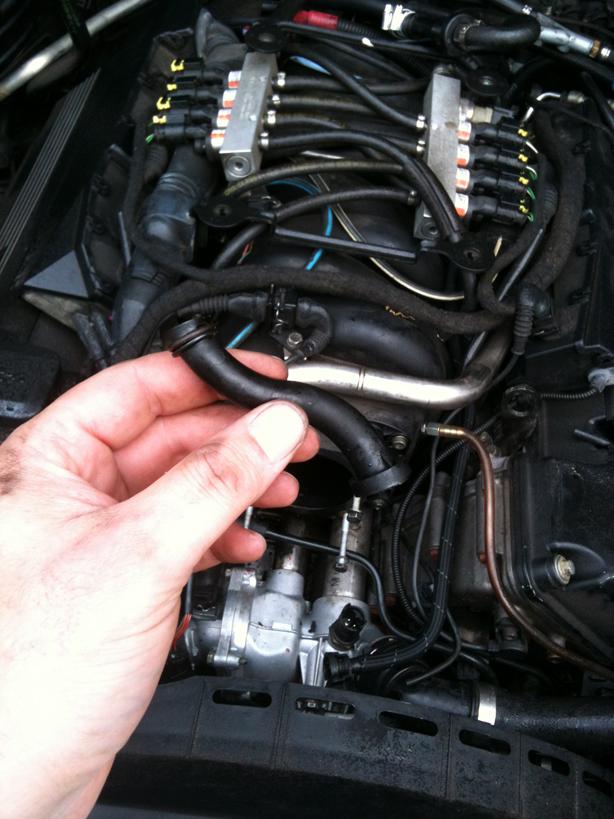
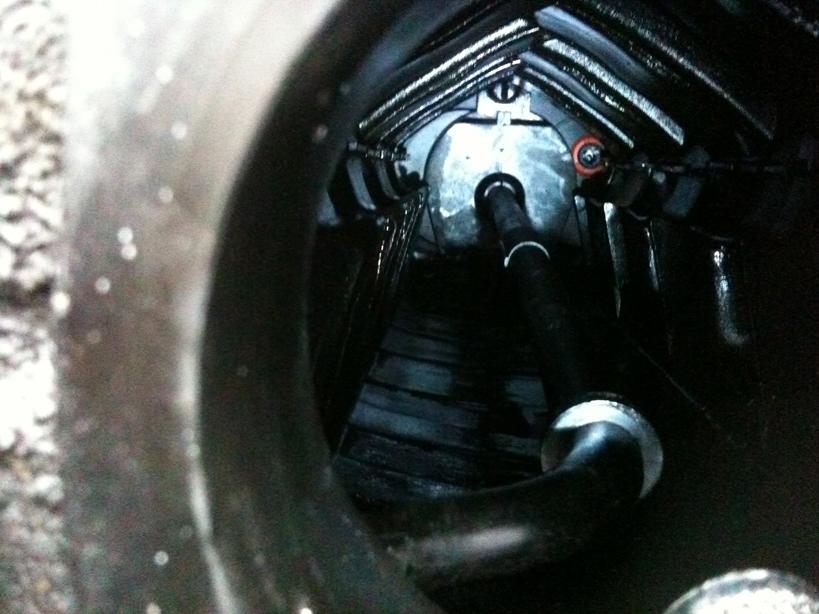
I had to find the other end that had snapped off inside the intake manifold...
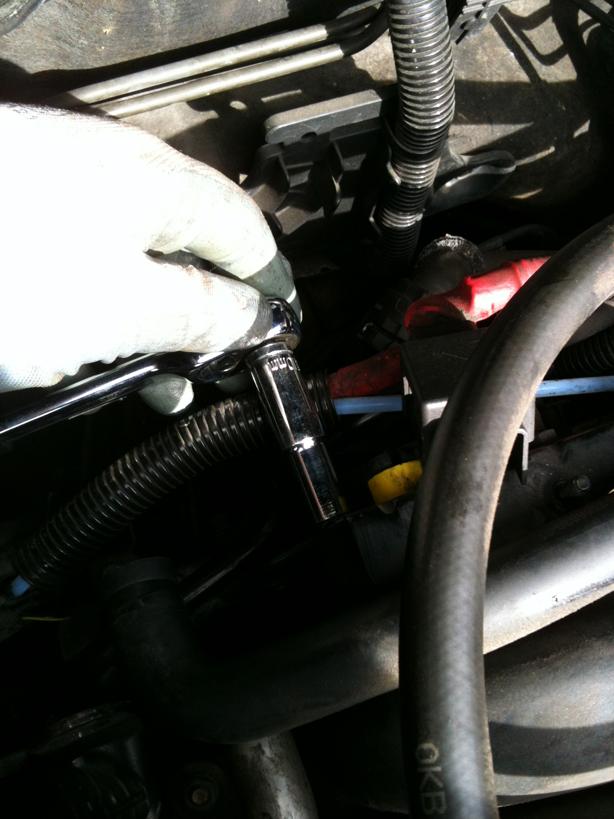
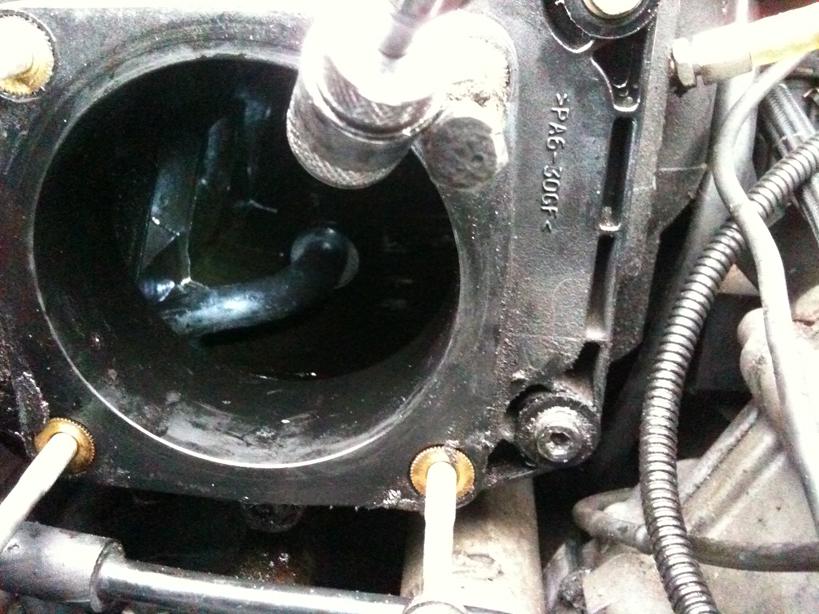
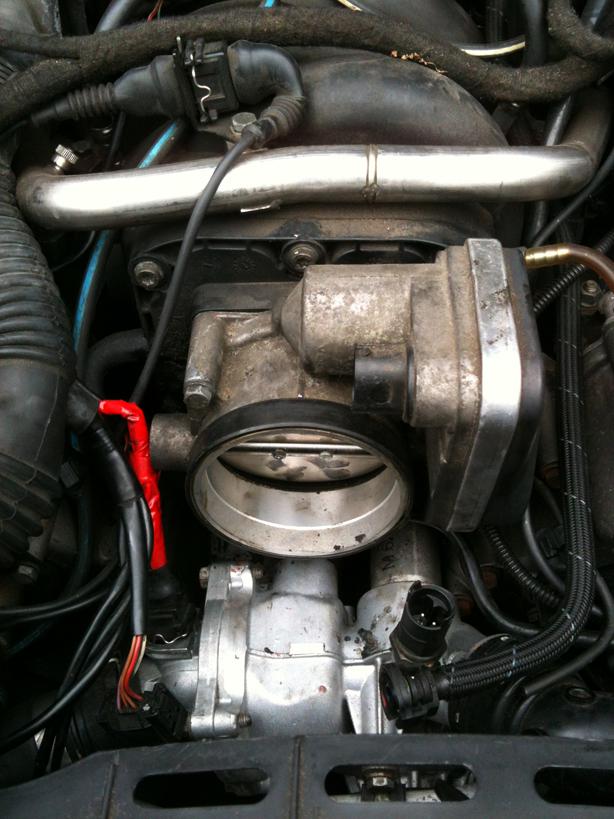
This meant taking the Fly-by-wire throttle butterfly off the front...
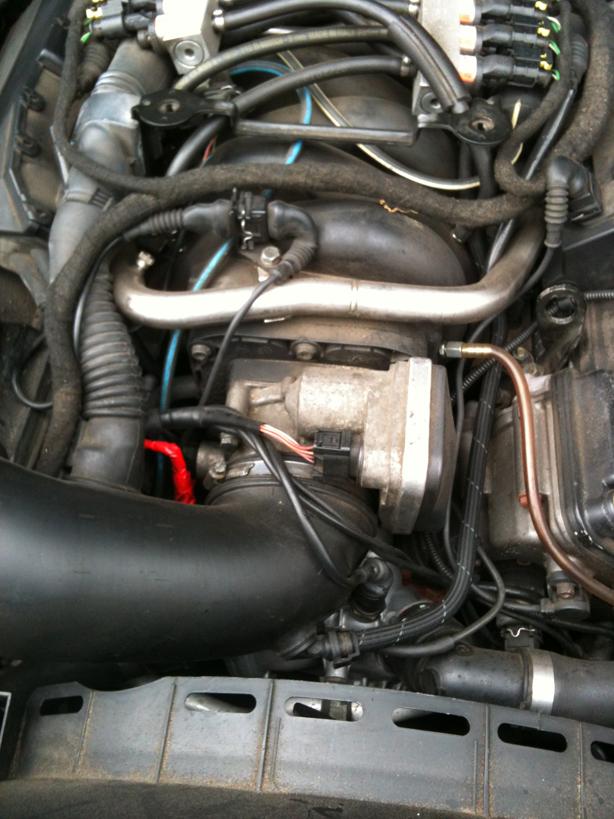
Remvoe the Intake Ducting...
Disconnect the Throttle wiring, the Water Temp Sender, SAI Connection and another which I have no idea what it does
Undo the 4 10mm bolts holding the butterfly valve body in place and remove....
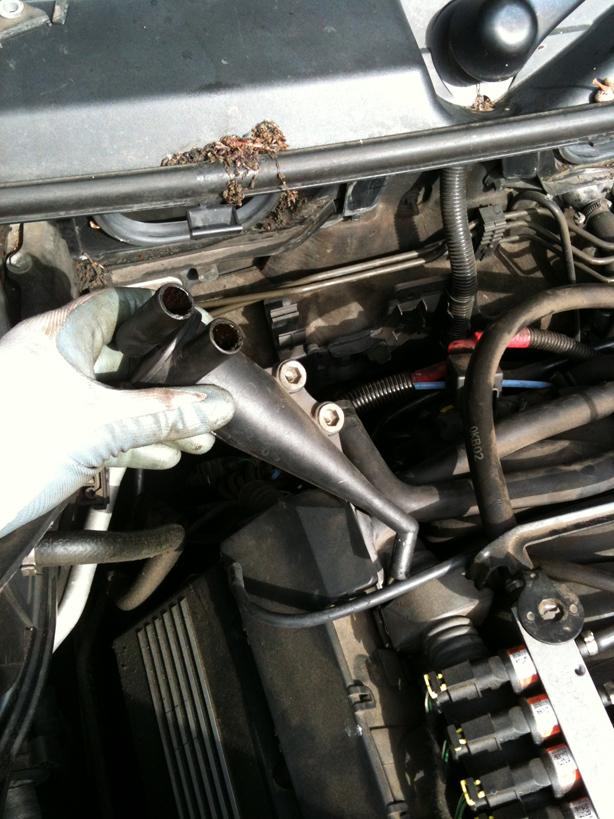
Fishing around inside the manifold (luckily it was at the front as I have large hands - otherside, the girlfriend would have to reach in and see what she could find) I found the end I had snapped off....
That was the end of day one (Saturday) as I would have to bond these two pieces back together as no one would be able to supply this off the shelf on a Sunday, and I couldn't wait for 3-4 days delivery from an internet supplier or wait for a LR/BMW dealer to order into stock for me.....
Saturday evening I used Unibond 2-part Epoxy resin deisnged for Plastic....reportedly a permenant repair, High Temperature resistant and super strong up to 30kg/cm2 after fully curing for 24hours....
Held together for the required 15 minutes, left it overnight to cure and now we crack on to Sunday morning....
Feeding the pipe in through the rear of the manifold, patience is needed to locate the front of the pipe into the hole in the front of the manifold and also line it up at the rear....

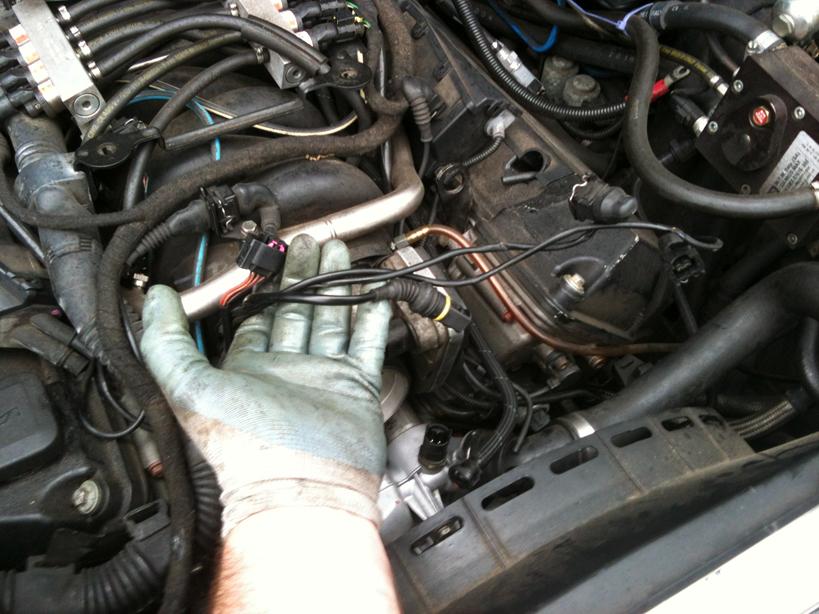
On replacing the new PCV I decided to use new M6x25 (10mm hex) bolts as they are easier to get to with a socket/spanner than the T27's
And ensured the pipe was located correctly before I replaced the Throttle Butterfly...
Replaced the breathers and Oil Seperator into place and all the pipe connections to the PCV Valve....

Replaced the Throttle Butterfly and reconected the wiring connections....
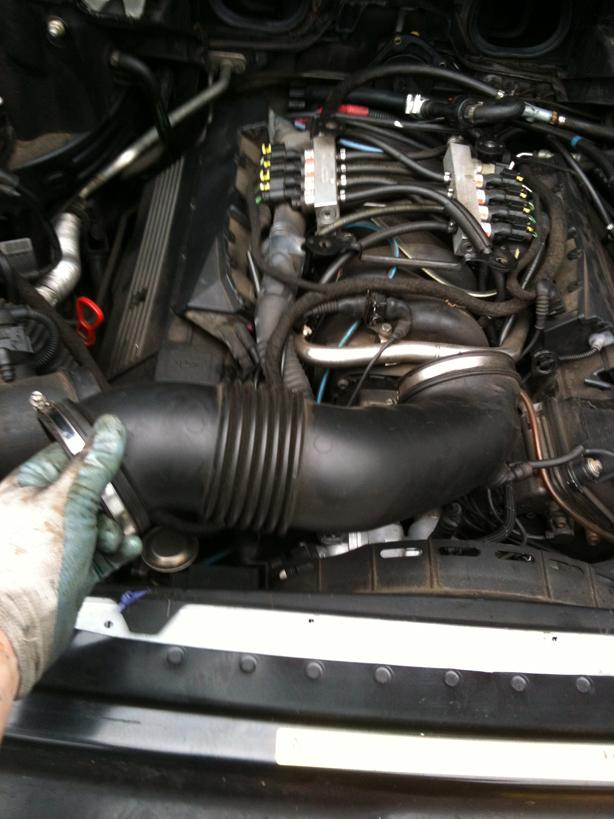
Replaced Intake Ducting...
Replace Pollen Filter Housing, Weather Seal and the Engine Acousitic Voer - remember to reattach the Battery Positive Jump Lead....
On starting the car....she spluttered into life, then died...restarted and she ran fine....need to take her out for a spin later, so we are off to see the inlaws this evening so should be a good test.
So what have I learned:
The PO or his/her mechanic was a numpty and rounded off one of the PCV Bolts....
The Little Pipe on the bottom of the PCV is a PITA
The Plastic the PCV is made from is brttle when it gets old
The Plastic Vent Pipe is easily broken
The slam panel and E-Box/Intake Filter is quite comfortable to sit on when using a mat
I usually don't like repairs/maintenance spreading over two days of the weekend (unless planned that way) as it leaves little wiggle room if things go a bit wrong, but hopefully the repair will hold.
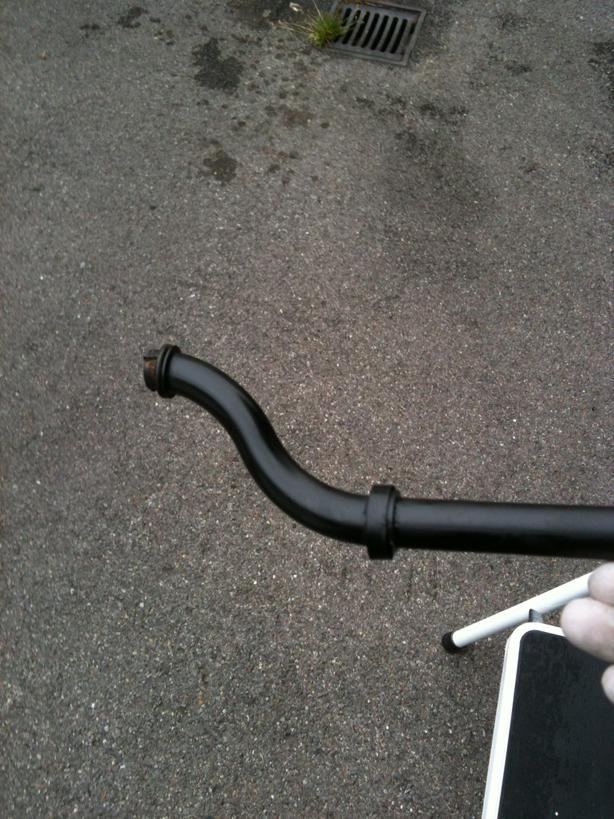
Just to note the Vent Pipe is ony £25-26 so not expensive, but is not a usually stocked item so if you can't repair, you'll have to wait for delivery....
Now where's my coffee!
So building on Deasy's thread, lets start at the beginning....
Lower the vehicle to Access Height to make working towards the back of the engine a lot easier and set the bonnet into 'service' mode...
Remove the Acoustic Engine over....
Remove the weather seal strip from along the front of the Pollen Filter housing and Battery and Brake areas....
Disconnect the battery negative lead (waiting for the Sat Nav system to go off first obviously)
Then disconnect the Battery Jump Post Positive Lead....
Undo the two 13mm nuts that holds the Pollen FIlter Housing in place then pull towards the front of the car.....
You can now get much better access to the rear of the engine...
Time to setup your working space, I use my old shooting mat (I have a new one
) to work on, so I draped it over the front slam panel, intake and E-Box. I then used a small set of steps to get up and into the engine bay.It is quite surprising how comfortable it is up there and I mostly sat on the Slam Panel and E-Box, also kneeling on the front of the rocker covers is comfortable....I weigh in at over 20 stone and 6'3" tall and it took my size and weight with no issues...just be mindful of the components below, but I found it a comfortable place to work....
Undo the 10mm nut holding the Electrical Splice in place...note I snapped the bracket, it doesn't just lift up and off, but wiggles off!!
You can now get to and see the PCV Valve in place...
Undo the breather tubes to the Cyclonic Oil Seperator...
Undo the 10mm bolt holding the Oil Seperator in place, then I used a long flat screwdriver to hold the small pipe at the bottom of the seperator in place while I pulled the unit from the pipe...Note: this pipe at the bottom can be a real PITA to get back on at the other end, so be mindfull to carefully remove the seperator from it and not remove the pipe from the other end....
Now remove the various pipe clips from the pipes leading to the PCV valve unit...
On removing one of the Breather hose from the top of the rocker cover, I noticed it had split....I wonder if this is where my very minor Oil leak has been coming from??
The two top bolts holding the PCV valve in place are 10mm and also hold the bracket that holds the Electrical Splice in place...
Using a T27 Torx bit, undo the PCV clamping bolts.....this is where the fun begins...!!
3 of the remaing 5 Torx bolts are simple to get to, 2 of them are a SOD...a real bugger...one the 3 easy to get to had been done up so fecking tight and had been really badly chewed up that I snapped a T27 bit, wrecked my spring drive and almost had me totaly give up on it....90 minutes to get one bolt out....in the end using a set of mole grips I managed to get it undone....
With them undone, now it is time to remove the PCV valve....the fun continues....
Mounted on the bottom of the valve is a small pipe - it is mentioned by Storey Wilson in his video tutorial, and various other posts I have read about the process to replace the PCV....so I was VERY aware to be careful of it, the same goes for the Vent pipe between the PCV and the Front of the intake manifold....
So being very cautious I pulled the PCV valve from the rear of the manifold, no sooner had I moved it back 3mm so I could get a screwdriver in the gap to hold the Vent Pipe in place, the small pipe snapped...oh ****e....
I would have assumed there was play in the small pipe to allow you to get it on and off, but there was none, not a single mm of play...how they put it on there in the first place I have no idea....
I reached around under the manifold feeling for the other end of the pipe and gave it a small tug. Nope not a single mm of play at all, so I then looked down the back and the other end of this small pipe goes down below the Oil Seperator, so I carefully pulled the pipe back out from under the manifold to see the damage. The plastic had become so brittle on the PCV valve that as soon as I tried to pull the remains of the spigot out of it, it crumbed, so I ended up cutting an inch off the pipe...it is now even shorter than it was.
I rerouted the pipe to allow for more play if I need to replace the PCV again the future and also because i had made it an inch shorter it was never going to fit back where it was originally.
Had to have a coffee after that...
OK, Time to fit the new PCV Valve....
In order to make life a bit easier, on remvoing the old Valve I left one of the breathers attached as it was difficult to get to the Jubilee Clip in place, so I fitted the new Breather Pipe tothe PCV before fitment...
Got back on top of the engine to replace the valve, lined it up and pushed it into place....now thats when it all went Pete Tong...it seemed to not 'fit' well it kinda did but didn't, so I pushed it on a little futher and all I heard was the sound of something falling into a hollow metal dish....oh feck...
I removed the PCV and moved it to one side, and the vent pipe fell out the back of the manifold.
On retrieval, I had snapped the end off...OH FECK....
On closer look what I had done was when I remvoed the old PCV, the little rubber seal on the centre spigot of the diaphram was still attached to the Vent Pipe - I hadn't noticed, so when I pushed the new PCV into placeit was trying to fit the new rubber seal into the Vent Pipe which already had a rubber seal in it...and with me pushing I had snapped the pipe....
It was time for another coffee....
I had to find the other end that had snapped off inside the intake manifold...
This meant taking the Fly-by-wire throttle butterfly off the front...
Remvoe the Intake Ducting...
Disconnect the Throttle wiring, the Water Temp Sender, SAI Connection and another which I have no idea what it does
Undo the 4 10mm bolts holding the butterfly valve body in place and remove....
Fishing around inside the manifold (luckily it was at the front as I have large hands - otherside, the girlfriend would have to reach in and see what she could find) I found the end I had snapped off....
That was the end of day one (Saturday) as I would have to bond these two pieces back together as no one would be able to supply this off the shelf on a Sunday, and I couldn't wait for 3-4 days delivery from an internet supplier or wait for a LR/BMW dealer to order into stock for me.....
Saturday evening I used Unibond 2-part Epoxy resin deisnged for Plastic....reportedly a permenant repair, High Temperature resistant and super strong up to 30kg/cm2 after fully curing for 24hours....
Held together for the required 15 minutes, left it overnight to cure and now we crack on to Sunday morning....
Feeding the pipe in through the rear of the manifold, patience is needed to locate the front of the pipe into the hole in the front of the manifold and also line it up at the rear....
On replacing the new PCV I decided to use new M6x25 (10mm hex) bolts as they are easier to get to with a socket/spanner than the T27's
And ensured the pipe was located correctly before I replaced the Throttle Butterfly...
Replaced the breathers and Oil Seperator into place and all the pipe connections to the PCV Valve....
Replaced the Throttle Butterfly and reconected the wiring connections....
Replaced Intake Ducting...
Replace Pollen Filter Housing, Weather Seal and the Engine Acousitic Voer - remember to reattach the Battery Positive Jump Lead....
On starting the car....she spluttered into life, then died...restarted and she ran fine....need to take her out for a spin later, so we are off to see the inlaws this evening so should be a good test.
So what have I learned:
The PO or his/her mechanic was a numpty and rounded off one of the PCV Bolts....
The Little Pipe on the bottom of the PCV is a PITA
The Plastic the PCV is made from is brttle when it gets old
The Plastic Vent Pipe is easily broken
The slam panel and E-Box/Intake Filter is quite comfortable to sit on when using a mat
I usually don't like repairs/maintenance spreading over two days of the weekend (unless planned that way) as it leaves little wiggle room if things go a bit wrong, but hopefully the repair will hold.
Just to note the Vent Pipe is ony £25-26 so not expensive, but is not a usually stocked item so if you can't repair, you'll have to wait for delivery....
Now where's my coffee!
Last edited: