You are using an out of date browser. It may not display this or other websites correctly.
You should upgrade or use an alternative browser.
You should upgrade or use an alternative browser.
My new Galv Chassis'
- Thread starter Dopey
- Start date
This site contains affiliate links for which LandyZone may be compensated if you make a purchase.


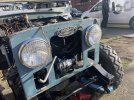
I'm currently restoring a series 2 Land Rover, and I'm putting power steering on it, I'd like to keep the original steering wheel which uses the old steering shaft, the shaft is hardened, and it will need turning down and splining to fit into another coupling which is aluminium which clamps onto the shaft.
I also need some sort of bearing machined to fit around the shaft and the sleeve to stop it flopping about.
Anyone know of a good engineering company that can do this and help me out please thanks I live near Heathrow
I also need some sort of bearing machined to fit around the shaft and the sleeve to stop it flopping about.
Anyone know of a good engineering company that can do this and help me out please thanks I live near Heathrow
From where to where?I think I need longer break lines? Anyone know where I can get them from? I should say hose!
Have you lifted it?
J
The front ones, I have parabolics on it now, so standard ones are too short and I dont want ss braided, you can't clamp themFrom where to where?
Have you lifted it?
J
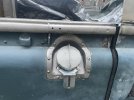
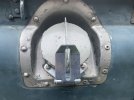
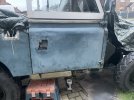
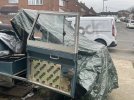
Sorted out the gaps on the doors, they look nice a square and the gaps are good, sorting out the filler caps and tubes now, some parts are broken and whoever tried to repair it by soldering it back on didn't do a good job it broke, taking it to work on Monday and will wield it on proper like


Well things are going forward slowly, but it's getting there, at last my biggest worry was the steering, but I have at last found someone to make the splines for the steering rod/column, so I'm going to have splines at one end for the P38 linkage and different splines at the other for a series 2 wire steering wheel, made of one rod and no welding its one piece, its hade of hardened steel as well, when I get it back I will post pics, I don't know If I have to put it in some kind of sleeve (most probably will) so I will sell by series 2 58 one, and it will pay for this. Also sorted out the petrol filler cap....
Attachments

I second that. Much better to conduit it outside the chassis.Completely agree with making a new loom from HD trailer wire, but don't feed it back through the chassis. Put in in some conduit and feed it along the top edge. Makes future access for repairs to either the loom or the vehicle far easier and is no less protected than being inside. Both the 110 and the series have this setup and no issue on many years of abuse!
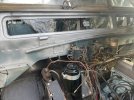
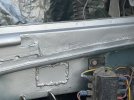
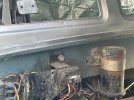
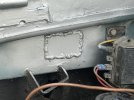
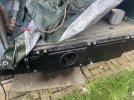
As part of a rebuild, I've just stripped all the old paint off my 20 year-old galv chassis for repainting. Under the oil and paint the chassis was almost perfect except for a small spot where mud was trapped just behind the fuel tank at the end of the outrigger. I have repainted with Corroless glass-reinforced paint and have been impressed so far with its toughness and ease of application. n Its pretty expensive though at about £50/litre
Attachments

Haha just noticed that the post I replied to was 9 months old so forget everything i said. Glad your rebuild is going wellI second that. Much better to conduit it outside the chassis.
As part of a rebuild, I've just stripped all the old paint off my 20 year-old galv chassis for repainting. Under the oil and paint the chassis was almost perfect except for a small spot where mud was trapped just behind the fuel tank at the end of the outrigger. I have repainted with Corroless glass-reinforced paint and have been impressed so far with its toughness and ease of application. n Its pretty expensive though at about £50/litre
interesting I have used corroless glass paint and was relatively unimpressed with its toughness and longevity. but not sure if i was just using it for the wrong application. I painted the inside of my sankey with it and it did not perform well and painted a couple of hitch pins with it that also did not perform well with those, either chipping off or rust coming back through fairly quickly. I have however painted some of the under bonnet parts with it (heater box, pedal assemblies, etc.) as part of my rebuild and they seem to be holding up but is protected and is only 9 months down the line. From my experience a good oxide primer and machine/tractor enamel is better better and harder wearing (what my wheels are painted with) but would be interested in your experience with it to see if it is just not living up my expectations or I did something wrong.I second that. Much better to conduit it outside the chassis.
As part of a rebuild, I've just stripped all the old paint off my 20 year-old galv chassis for repainting. Under the oil and paint the chassis was almost perfect except for a small spot where mud was trapped just behind the fuel tank at the end of the outrigger. I have repainted with Corroless glass-reinforced paint and have been impressed so far with its toughness and ease of application. n Its pretty expensive though at about £50/litre


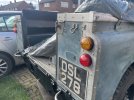
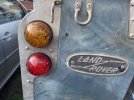
What have you used for indicators and relay? I am about to fit LED brake and side lights to mine but similar to my 110 I have not yet committed to LED indicators after all the horror stories of them not working correctly you read on here.LEDs in and stainless steel nuts and bolts for the tub and tub sound proofing
Similar threads
- Replies
- 5
- Views
- 958