driving lights - wiring in - facelifted freelander

This site contains affiliate links for which LandyZone may be compensated if you make a purchase.

TimUK

Member
Posts
26
Has anyone managed to wire in the driving lights on a facelifted freelander ?

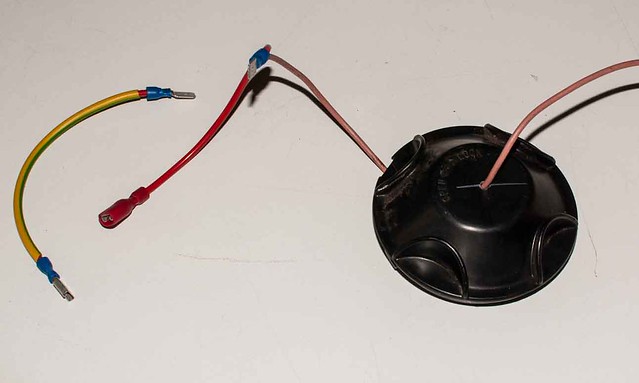
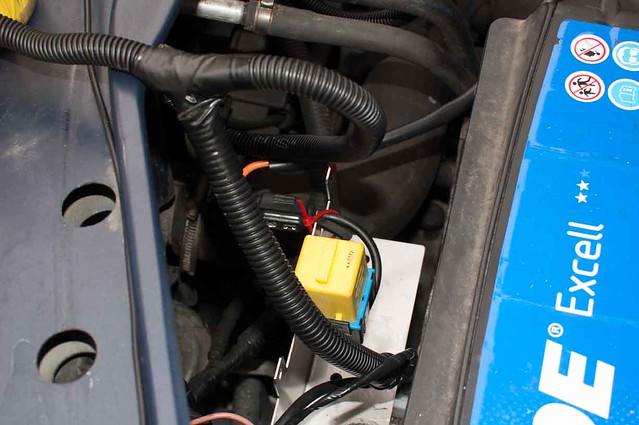
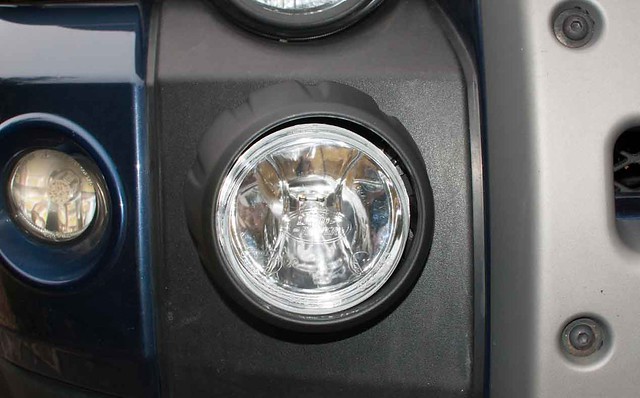
These are the VUB 500870 pod style ones. They are designed to come on only with the full beam.

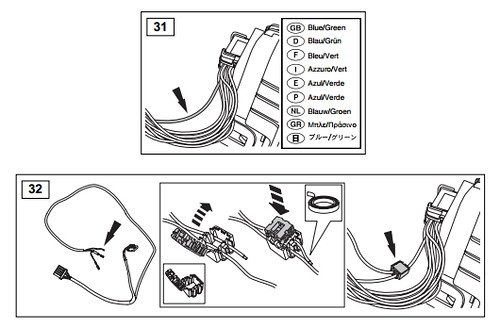
The instructions show two connectors that you need to find and then wire into them as below:

8054360568_30fd4f4231_b.jpg


8054358609_d349fe8c77.jpg


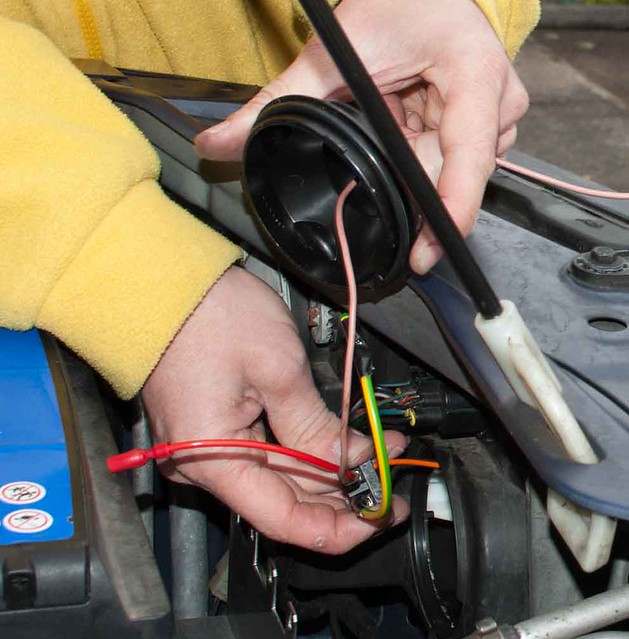
I have searched around the steering column and the back of the interior fusebox but can't find either of them !

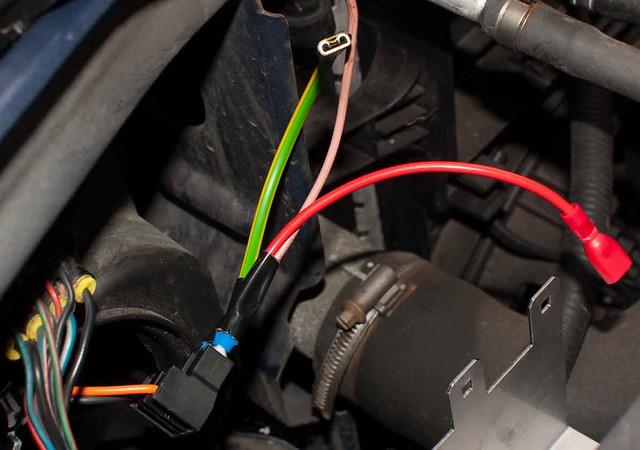
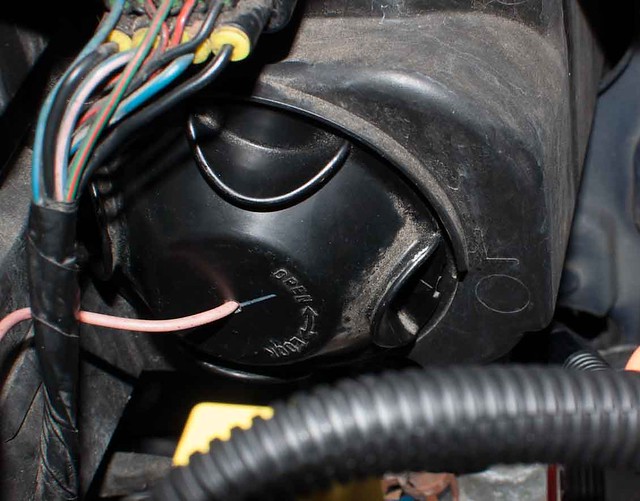
From looking at the switch that you also need to connect it appears that the multiple connector above just supplies power to illuminate the switch when you have lights on, and the second connector that you need to splice on I guess cuts into the full beam so this is the key one.


grateful of any suggestions !
 
Last edited:
Hi,
It was the genuine Aux Driving Lights kit i bought (pod type also)....i followed the instructions to a 'T' & like you couldnt for the life of me find the proper connector.....diagram was different from yours tho.

My lights are not meant tocome on at Full Beam but to be used as additional lights when the main beam was on, tho i did change the bulbs to a lower wattage.

As i said, i followed all the instructions....relay, wiring etc & taking off the steering wheel cowling...ended up splicing in to a live cable in the cowling.

Not much help tho i'm sorry....

Ian
 
well I searched again for the required connections near the steering wheel or fuse-box but no sign of them at all so found another solution - bit of a case of if the mountain will not come to muhammad...

needed to take a feed from the main beam but around the headlamps there wasn't much room and I didn't really like the idea of splicing into my cables with snap locks if something didn't work out right. I decided to make up a new mini cable to go between the main beam bulb and the bulb connector, and to the +ve cable added a new cable:

8058664356_14f619730c_z.jpg


8058665151_8e34065a41_z.jpg


8058665103_513a3dfe0d_z.jpg


8059788416_3230a87d1b_z.jpg


The new relay sits near the battery:

8058664222_665176cc3c_z.jpg


Ran this new cable back into the car coming out in the passenger foot-well, and ran it along to close to the interior fuse-box, fitted the switch above the fuse-box and joined my new cable to the blue lead supplied with the kit, sealed up the unused read cable.

8100345076_eb5f957ec4_z.jpg


8058664100_4a2484c20f_z.jpg


cutting out the bumper:


8058663942_c2c65822e9_z.jpg


new light fitted:

8058664879_0eb2fe371b_z.jpg


The only thing that doesn't work as planned is that the switch is not illuminated - I guess this is what the red cable was for, but the indicator led lights up when the new lights are on so no real loss.


Whilst I was doing this I also ran a new lead for a gps aerial and put this aerial at the front of the car - the landrover becker unit runs much better now - it never used to see so many satellites:


8058664781_18c5026571_z.jpg


Last edited:
well I searched again for the required connections near the steering wheel or fuse-box but no sign of them at all so found another solution - bit of a case of if the mountain will not come to muhammad...

needed to take a feed from the main beam but around the headlamps there wasn't much room and I didn't really like the idea of splicing into my cables with snap locks if something didn't work out right. I decided to make up a new mini cable to go between the main beam bulb and the bulb connector, and to the +ve cable added a new cable:

8058664356_a81cc4661a.jpg


8058665103_eb639d651b.jpg


8058665151_b365a48354.jpg


8059788416_6f2fc65e37.jpg


The new relay sits near the battery:

8058664222_be48808965.jpg


Ran this new cable back into the car coming out in the passenger foot-well, and ran it along to close to the interior fuse-box, fitted the switch above the fuse-box and joined my new cable to the blue lead supplied with the kit, sealed up the unused read cable.

8058664100_bf438971f1.jpg


8058664044_f4723220af.jpg


cutting out the bumper:


8058663942_e99ed28954.jpg


new light fitted:

8058664879_c4b4885314.jpg


The only thing that doesn't work as planned is that the switch is not illuminated - I guess this is what the red cable was for, but the indicator led lights up when the new lights are on so no real loss.


Whilst I was doing this I also ran a new lead for a gps aerial and put this aerial at the front of the car - the landrover becker unit runs much better now - it never used to see so many satellites:


8058664781_4ebfb4017f.jpg


Excellent pics and info.
Let us know how good the imrovement is in illumination. The dark nights are coming!
 
Back
Top